- How to install p7Zip GUI on Ubuntu 20.04 LTS
- p7Zip installation on Ubuntu 20.04 LTS Linux
- Step 1: Access Command Terminal
- Step 2: Update the system to the latest packages
- Step 3: Download and install p7ZIp
- Step 4: Run p7Zip GUI
- Step 5: Use 7Zip on Ubuntu to compress files
- Step 6: Add to Archive
- Quick process to compress
- Decompression
- p7Zip Command line to compress files
- Leave a Comment Cancel reply
- Arch Linux User Repository
- HCY-ASLEEP commented on 2022-12-24 16:21 (UTC)
- Nigholith commented on 2022-09-16 18:38 (UTC) (edited on 2022-09-16 19:03 (UTC) by Nigholith)
- tmn505 commented on 2022-08-30 16:01 (UTC)
- MShrimp4 commented on 2022-08-30 15:02 (UTC) (edited on 2022-08-30 15:03 (UTC) by MShrimp4)
- tmn505 commented on 2022-07-23 13:58 (UTC)
- pipes80 commented on 2022-07-23 09:30 (UTC)
- tmn505 commented on 2022-07-16 19:21 (UTC) (edited on 2022-07-16 19:24 (UTC) by tmn505)
- madjoe commented on 2022-07-16 17:29 (UTC)
- tmn505 commented on 2022-07-14 21:30 (UTC) (edited on 2022-07-14 21:32 (UTC) by tmn505)
- Установка и использование 7-Zip в Linux
- Установка 7-Zip в Linux
- Установка 7-Zip в Ubuntu, Debian
- Установка 7-Zip в Fedora, CentOS
- Установка 7-Zip в ArchLinux
- Раcпаковка 7zip-архивов
- Распаковать в текущую директорию
- Распаковать в определенную директорию
- Распаковать без сохранения структуры директорий
- Создание 7zip-архива
- Упаковать один файл
- Упаковать несколько файлов
- Упаковать директорию и ее содержимое
- Добавить файлы в существующий архив
- Просмотр файлов в архиве
- Протестировать целостность архива
- Заключение
How to install p7Zip GUI on Ubuntu 20.04 LTS
p7Zip is an open-source tool to highly compress files and folders on Linux and FreeBSD systems such as Ubuntu, Debian, RedHat, and more. It is the best alternative to Winrar software which is meant for Windows platforms.
Being an open-source doesn’t mean that it is not available for Win systems. p7Zip is a fork of 7Zip that is originally available for Windows. With the help of it, we not only compress but also can decompress the files available in other formats such as rar. This free compression tool offers many mainstream functions such as AES-256 encryption, hyper-threading, and fast speed. Apart from the Graphical version, the 7Zip is also available in the command-line suitable for Servers or Desktops running without a Desktop environment.
p7Zip installation on Ubuntu 20.04 LTS Linux
Here we will see the steps to install and use the 7Zip GUI on Ubuntu 20.04 LTS focal fossa to compress files and folders. The commands are also applicable for older Ubuntu versions such as 19.10/19.04;18.10/18.04 including Linux Mint.
Step 1: Access Command Terminal
Well, if you are already a Ubuntu user then, I don’t have any need to tell you how to access the command terminal. However, those who are new to Linux can open it by searching in Applications or using a simple keyboard shortcut that is: Ctrl+Alt+T.
Step 2: Update the system to the latest packages
Although this command is not necessary because we are going to use the SNAP command here for 7Zip installation. Yet, run it to make sure all the available packages on your system are up to date.
Step 3: Download and install p7ZIp
With SNAP: All the modern operating systems of Ubuntu come with a universal package manager called SNAP out of the box. Thus, we don’t need to install it. The benefit of using it is you can install the same snap package on other Linux systems such as CentOS, Fedora, Manjaro, and more without adding any repository. So, simply run the below command with sudo to install 7ZIP GUI,
sudo snap install p7zip-desktop
Wait for a few seconds depending on our internet connection speed, this free Linux file compression tool will be on your system.

With Repository: If you don’t want to use SNAP then it can be downloaded directly. This compression tool is available in the Universe repo of ubuntu. Therefore, add it, if it is not on your system.
sudo add-apt-repository universe sudo apt update
sudo apt install p7zip-full p7zip-rar
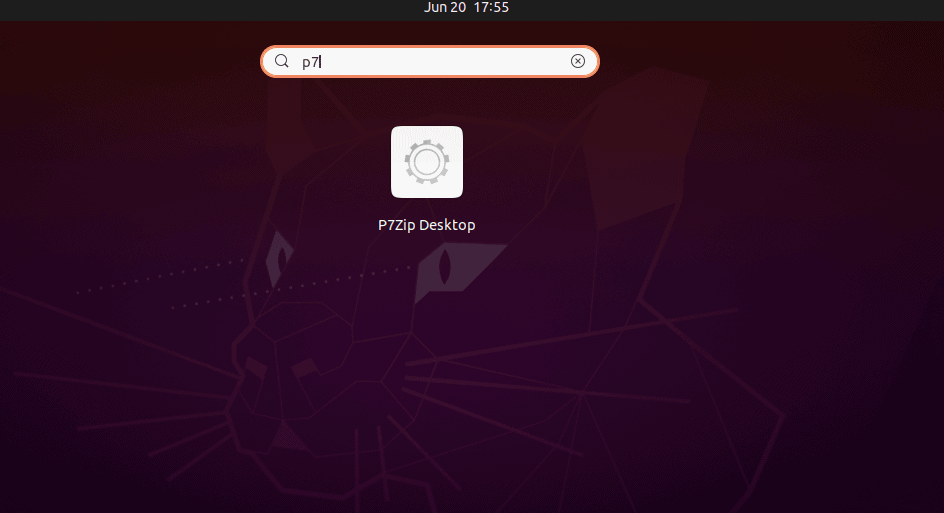
Step 4: Run p7Zip GUI
Once the installation is completed, go to Applications and search for this application. As its icon appears, click to open it.
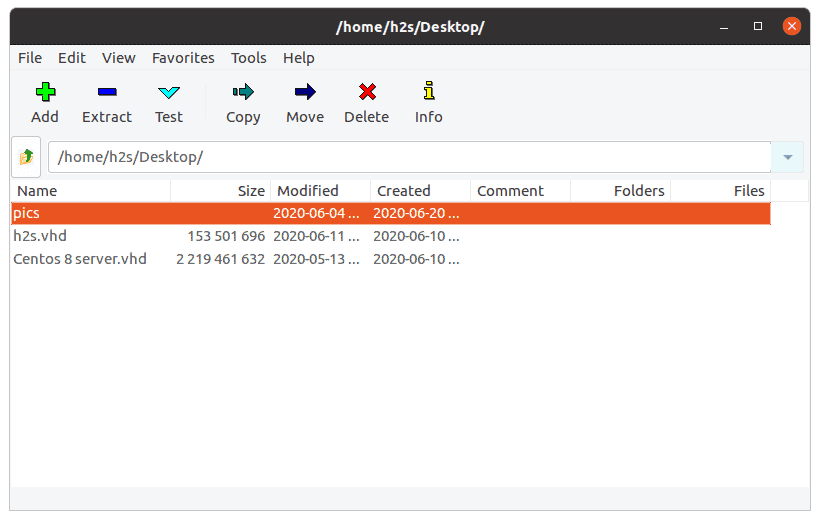
Step 5: Use 7Zip on Ubuntu to compress files
To use the p7Zip through the Graphical user interface is very easy, after opening it on Ubuntu. You will get a file explorer inside this tool. Navigate to the file or folder that you want to compress and then select & click on the “Add” button. For example, in the below screenshot we have a folder called “pics“, so we have selected to compress.
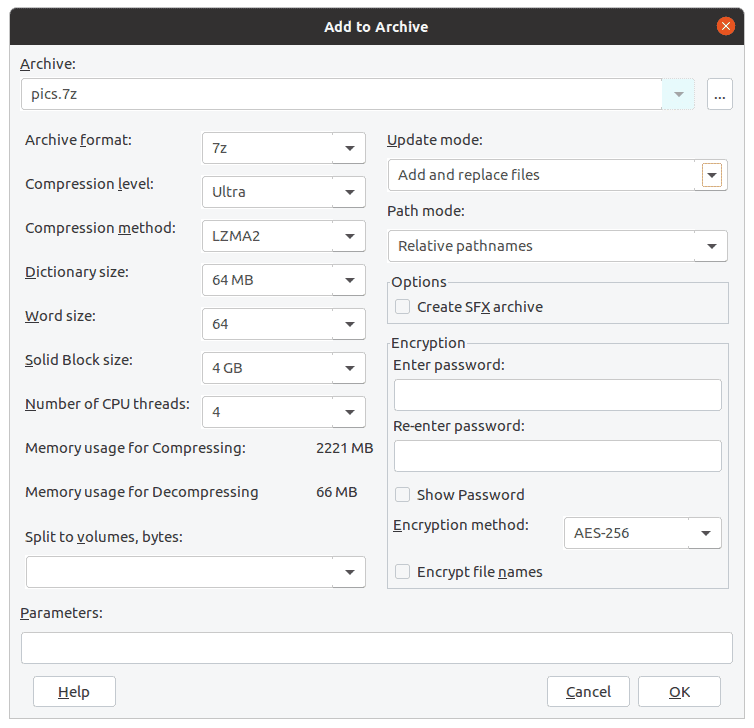
Step 6: Add to Archive
The moment you select and add a file to archive it, the settings of the 7Zip will get opened. From here we can opt for various settings to compress the files as per requirement.
Archive format: Select the various available formats such as 7z, bzip2, gzip, tar, swim, xz, and zip.
Compression level: Depending on how well compressed you want the archive, for that the level can be chosen. By default, it will be Normal.
Compression method: It offers LZMA2, LZMA, PPMd, and BZip2. These are encoding methods if you know what are you doing then change it otherwise leave it as default.
Several CPU threads: As the app supports hyperthreading, to process large files you can increase or decrease the assigned threads.
Encryption: As I told above, the p7Zip offers encryption, thus, under “Encryption” one can create a password for their compressed files. So, only they could open it.
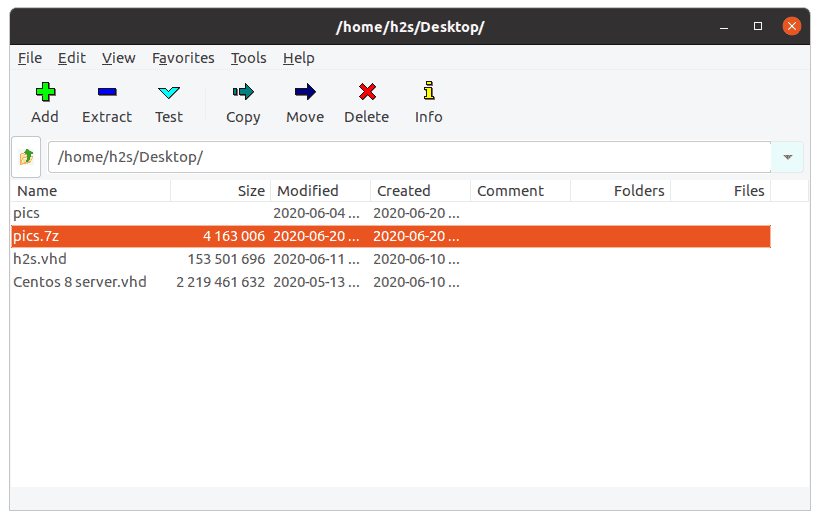
Finally, click on the OK button to start the compression process.
Once it is done, the compressed file will appear on the software files explorer as well as on the location, where the original uncompressed file is located.
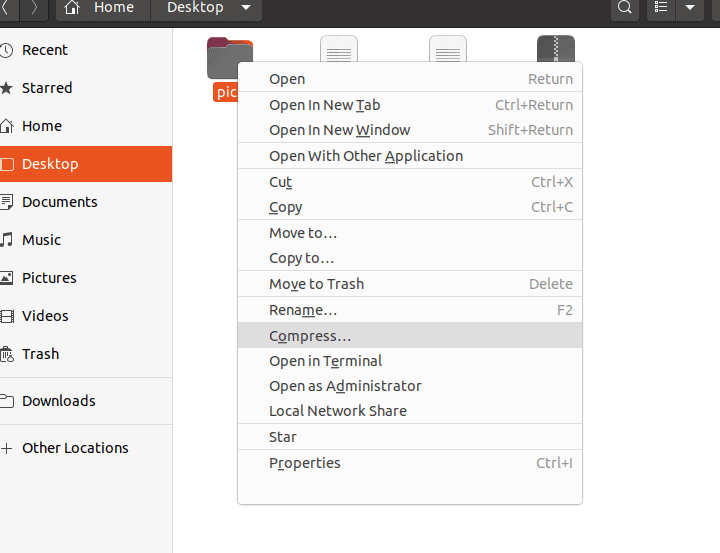
Quick process to compress
Apart from the p7ZIP GUI, it also integrates itself into the contextual menu of Ubuntu. It means you can directly archive files and folders without opening the software itself. For that, simply right-click on the file and select the “Compress..” option. This will open a small quick window from which you can select the type of Archive format you want to use. Then simply hit the “Create” button. That’s it.
Decompression
If already have an archive file then either right-click and select the decompress option or in the p7ZIP GUI file explorer select that file and click on the “Extract” option given in the menu.
p7Zip Command line to compress files
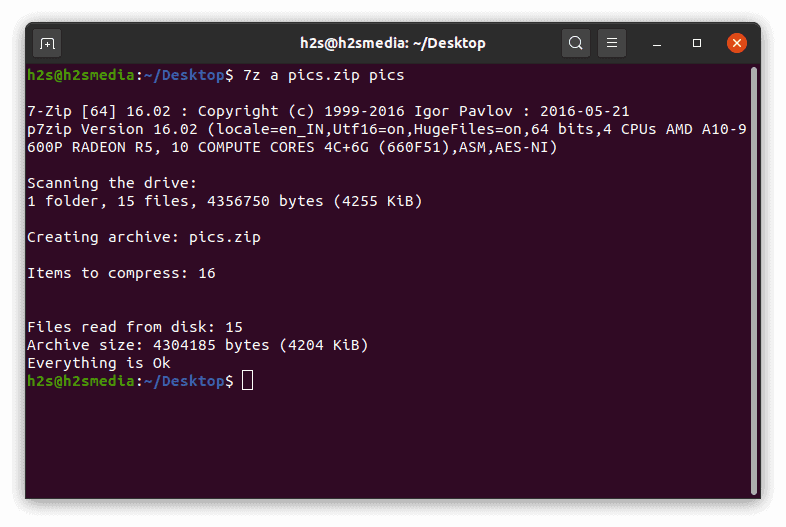
Another quick method is for those who are familiar with the command line and prefer to use that only. For that the structure of the command to create archive files in the terminal using 7Zip will be:
7z a folder-name.7z folder-name
Therefore, for example, if we say the folder name is “pics” then the command will be like this
To use any other archive format use that extension, for example, to get the archive in zipped format, the command will be like this way:
Here is the output:
I hope you would have now an idea to use p7ZIP on Ubuntu 20.04 or earlier systems to create archive files and folders easily via both GUI and CLI.
Leave a Comment Cancel reply
This site uses Akismet to reduce spam. Learn how your comment data is processed.
Arch Linux User Repository
It will be broken with 7-zip-full no matter where 7z.so is placed. It is just incompatible.
Unfortunately this app is a buggy mess anyway.
HCY-ASLEEP commented on 2022-12-24 16:21 (UTC)
Can not show Chinese characters inside the software, help!
Nigholith commented on 2022-09-16 18:38 (UTC) (edited on 2022-09-16 19:03 (UTC) by Nigholith)
Wouldn’t start with 7-zip-full, was missing /usr/lib/p7zip/7z.so. Replaced 7-zip-full with p7zip and now working; /usr/lib/p7zip/7z.so now present.
Also fails to open password protected archives when accessed directly with the following output: ===MyFrame::MyFrame===BEGIN=== DEBUG : new CExplorerListCtrl(id=1001) => 0x561e1f141030 ===MyFrame::MyFrame===WM_CREATE=== local_WM_CREATE INTERNAL ERROR : g_window and destWindow == NULL /usr/bin/7zFM: line 2: 4948 Aborted (core dumped) «/usr/lib/p7zip/7zFM» «$@»
Opening the gui and then navigating to the password protected archives works though.
tmn505 commented on 2022-08-30 16:01 (UTC)
MShrimp4 commented on 2022-08-30 15:02 (UTC) (edited on 2022-08-30 15:03 (UTC) by MShrimp4)
ArchLinux32 user here, somehow the default 7zFM.desktop does not work well, so i changed Exec a bit:
Somehow it makes 7zFM start at $PWD, or so I guess.
tmn505 commented on 2022-07-23 13:58 (UTC)
@pipes80 works for me but I’m using it only with p7zip from official repositories. This package might be incompatible with new 7-zip-full package, if that’s what You are using, then I’ll add it to conflicts array.
pipes80 commented on 2022-07-23 09:30 (UTC)
this no work for me, unlimited time extraction and 7z windows can’t open nothing
tmn505 commented on 2022-07-16 19:21 (UTC) (edited on 2022-07-16 19:24 (UTC) by tmn505)
It’s in official Extra repo: https://archlinux.org/packages/?q=wxwidgets-gtk3. Either mirror issue or PEBKAC. Anyway try pacman -Syy before pacman -Syu and don’t forget to read the news on main page about wxgtk2 .
madjoe commented on 2022-07-16 17:29 (UTC)
I can’t install this. Please help?
tmn505 commented on 2022-07-14 21:30 (UTC) (edited on 2022-07-14 21:32 (UTC) by tmn505)
Thx, it does work same with wxwidgets-gtk3. When I checked just before Your comment my mirror still had wxgtk2 package, so waited for the sync and that made the delay.
BTW to user @Fijxu, the flag out-of-date button is only for if there’s a new upstream release and not for other issues. And read the comments before You do it, a single poke at maintainer is enough.
Copyright © 2004-2023 aurweb Development Team.
AUR packages are user produced content. Any use of the provided files is at your own risk.
Установка и использование 7-Zip в Linux
Формат 7-Zip впервые появился в 1999 году. Данный формат отличает высокая степень сжатия данных. По сравнению с ZIP степень сжатия 7-Zip может быть на 30-50% лучше. 7-Zip в основном используется среди пользователей Windows.
7-Zip нельзя использовать для создания резервных копий в Linux, так как формат не сохраняет информацию о правах доступа к файлам и данные о владельце.
В данной заметке мы рассмотрим, как установить поддержку 7-Zip в некоторых дистрибутивах Linux, а также как работать с 7zip-архивами.
Установка 7-Zip в Linux
Установка 7-Zip в Ubuntu, Debian
Для установки поддержки 7-Zip в Ubuntu и Debian, а также производных от них дистрибутивах (LinuxMint и др.), доступно три пакета:
- p7zip — базовая версия, которая поддерживает только архивы в формате .7z Представляет собой порт утилиты 7za.exe для POSIX систем.
- p7zip-full — полная версия, которая поддерживает различные алгоритмы сжатия при создании 7zip-архивов, а также другие форматы архивов. Установка данного пакета также обеспечивает поддержку 7-Zip в менеджере архивов File Roller, который используется в Ubuntu.
- p7zip-rar — отдельный модуль для p7zip, позволяющий распаковывать RAR-архивы.
Для установки 7-Zip в Ubuntu (Debian) вы можете установить пакет p7zip-full, а также p7zip-rar для поддержки RAR. Для этого выполните в терминале команду:
sudo apt install p7zip-full p7zip-rarПримечание: В новых версиях Ubuntu (например, в Ubuntu 18.04 и новее) 7-Zip автоматический поддерживается в файловом менеджере Nautilus. Можно создавать и распаковывать 7zip архивы.
Установка 7-Zip в Fedora, CentOS
В дистрибутивах Fedora, CentOS доступны пакеты p7zip, p7zip-plugins.
Для установки используйте следующую команду:
sudo yum install p7zip p7zip-pluginsУстановка 7-Zip в ArchLinux
Для установки поддержки 7-Zip в ArchLinux установите пакет p7zip, который доступен в официальных репозиториях дистрибутива.
Раcпаковка 7zip-архивов
Когда поддержка 7-Zip установлена, то для распаковки .7z файлов вы можете использовать графические утилиты (например, File Roller, Ark), средства файлового менеджера вашего дистрибутива (если есть поддержка), а также командую строку.
Для работы с 7-Zip архивами через командную строку используется команда 7z
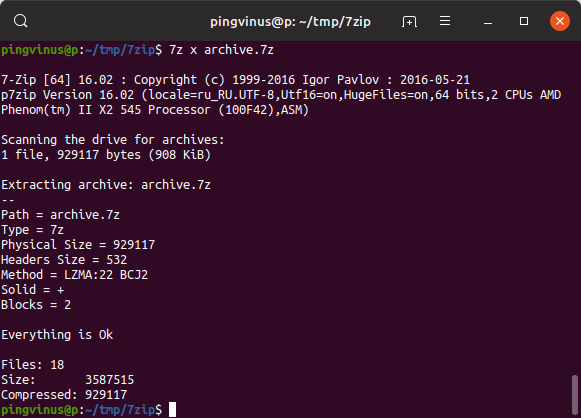
Распаковать в текущую директорию
Чтобы распаковать .7z архив в текущую директорию с сохранением структуры директорий, которые находятся внутри архива, выполните в терминале команду:
Файлы архива будут распакованы в текущую директорию. Если в архиве содержатся директории, то при распаковке их структура будет сохранена.
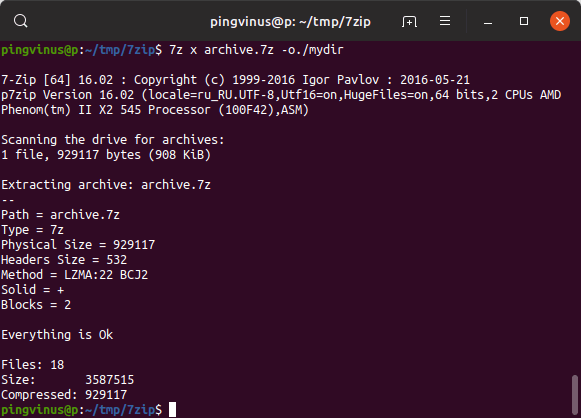
Распаковать в определенную директорию
Чтобы распаковать архив в определенную директорию используется опция -o , за которой без пробела указывается путь до директории.
Распаковать без сохранения структуры директорий
Можно распаковать .7z архив, не сохраняя структуру директорий. То есть, если внутри архива есть директории и файлы в них, то при распаковке все файлы будут распакованы в одну директорию. Для этого используется опция (команда) e .
Создание 7zip-архива
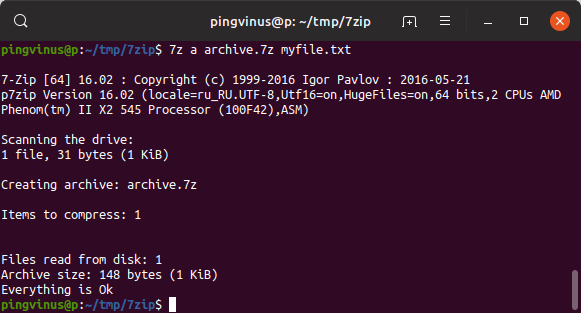
Упаковать один файл
Чтобы создать .7z архив используется следующая команда.
В результате выполнения данной команды будет создан архив archive.7z , который содержит файл myfile.txt
Упаковать несколько файлов
Чтобы упаковать несколько файлов, перечислите их имена через пробел.
7z a archive myfile1.txt myfile2.txt myfile3.txtУпаковать директорию и ее содержимое
Вместо файла, при создании архива, можно указать путь до директории, которую необходимо сжать.
7z a archive.7z /path/to/mydirДобавить файлы в существующий архив
Если архив уже создан, то можно добавлять в него новые файлы. Для этого используется такая же команда, как и для создания архива, только в качестве названия архива указывается существующий файл.
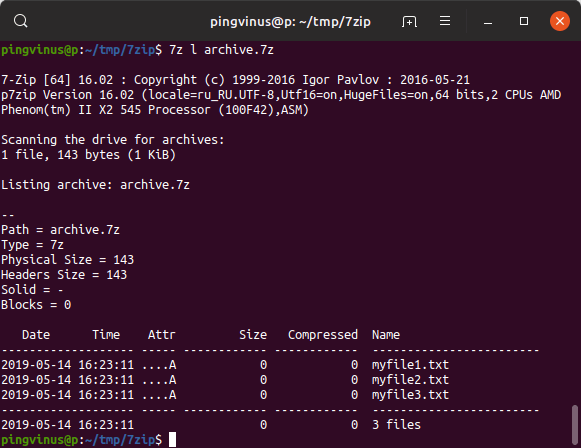
7z a archive.7z myfile123.txtПросмотр файлов в архиве
Для просмотра содержимого архива используется команда:
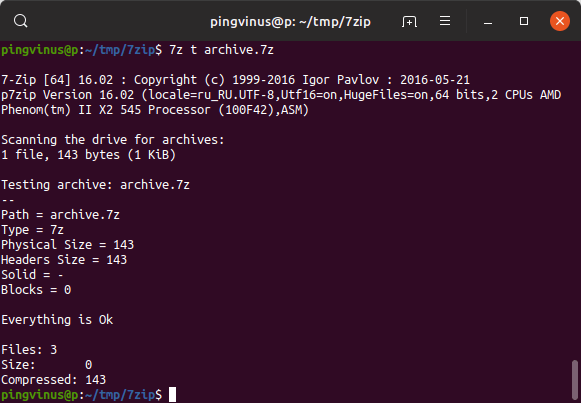
Протестировать целостность архива
Чтобы проверить целостность архива (проверить, что архив «не битый») используется команда:
Заключение
Мы рассмотрели как установить поддержку 7-Zip в популярных дистрибутивах Linux, а также рассмотрели базовые возможности работы с 7zip-архивами.
Утилита 7z имеет много возможностей. Чтобы получить дополнительную информацию можно использовать следующие команды: