How to connect and create a database in MySQL?
After you’ve installed MySQL, you need to set mysql root password. To do so:
- Enter the next command in a terminal: mysql -u root
- Now it should open the mysql console. And type the following line: SET PASSWORD FOR ‘root’@’localhost’ = PASSWORD(‘yourpassword’);
To exit from the mysql console enter exit .
Now you should create the database with the root user. To do so:
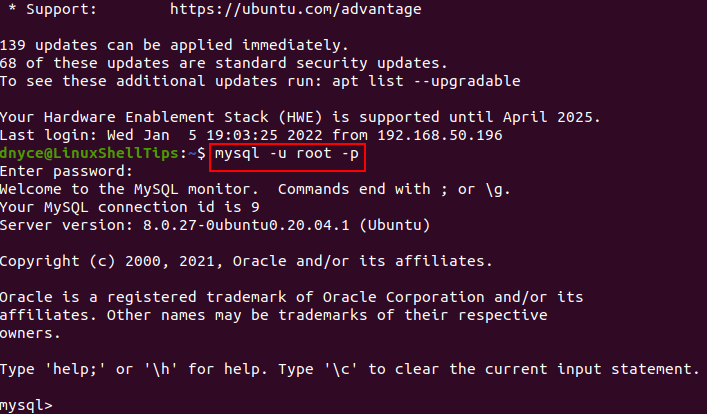
- Open mysql from terminal: mysql -u root -p
- Enter the password created before.
- Enter the following line: CREATE DATABASE yourdatabasename;
If you enter SHOW DATABASES; you should see it in the list. If so, you have a database ready to use!
mysql -u root gives me ERROR 1045 (28000): Access denied for user ‘root’@’localhost’ (using password: NO)
That error means that you already have a root user and it has a password. If you forgot the root password, read the MySQL documentation.
You need to connect to MySQL using the root user and associated password. If you need to set them, use the following command: sudo mysqladmin -u root -h localhost password ‘mypassword’
From there, you can configure additional accounts by following this document: How to Create a New User and Grant Permissions in MySQL
I copied the sudo mysqladmin -u root -h localhost password ‘mypassword’ and pasted it into my terminal and I get the message Access denied for user ‘root’@’localhost’ (using password: NO) .
@Bert This code will not work. The password ‘mypassword’ is wrong, it should be -password ‘mypassword’
I executed sudo mysqladmin -u root -h localhost -password ‘mypassword’ , but I get Access denied for user ‘root’@’localhost’ (using password: YES) .
This is strange because since 12.04 (guessing you’re running Kubuntu 12.04), MySQL has been default. Looks like you’re missing a few steps in between, so let’s look over this:
First, as you mentioned, let’s do an installation,
sudo apt-get install mysql-server After you installed it, let’s try a little test,
sudo netstat -tap | grep mysql When you run this, you should see this reply,
tcp 0 0 localhost:mysql *:* LISTEN 2556/mysqld If this is not running correctly, run this restart command,
sudo service mysql restart Now to configure the server.
Let’s go to /etc/mysql/my.cnf to configure the basic settings. This includes the Log File, Port Number, Etc. For example, to configure MySQL to listen for connections from network hosts, change the bind-address directive to the server’s IP address:
After this, restart the MySQL daemon,
sudo service mysql restart If you want to change the MySQL root password, run this:
sudo dpkg-reconfigure mysql-server-5.5 The daemon will be stopped and you’ll be prompted for a new password.
Once you’re done, you should be configured and a few google searches will teach you how to create a database
sudo dpkg-reconfigure mysql-server-5.5 (5.5 is the version number, adapt if you have a different version)
This will allow you to set your MySQL root password, that you can then use with mysqladmin and mysql commands.
After you’ve installed MySQL, you need to set mysql root password. To do so:
Enter the next command in a terminal: mysql -u root -p Enter Password: (Enter your password here). I know this is 3 years old but I just had this problem as well and wanted to post my answer in case anyone else does the same search I did.
mysqladmin: connect to server at ‘localhost’ failed
This indicates that your user doesn’t have permission to connect to the database itself, before it even gets to logging in; not the database user, your actual linux user. Run everything as super user: sudo mysql -u root -p
Only root (the linux user, or a user with sudo privileges) can log in to mysql as root (the database user). I wasn’t able to find anywhere documenting this but experimentation proved it was the case. You can create a new user with all the same rights as the root user and that will not be restricted.
sudo mysql -u root SET PASSWORD FOR 'root'@'localhost' = PASSWORD('yourpassword'); CREATE USER 'newuser'@'localhost' IDENTIFIED BY 'password'; GRANT ALL PRIVILEGES ON * . * TO 'newuser'@'localhost'; FLUSH PRIVILEGES; Now «newuser» (or whatever name you choose) can be logged-in-as without the need for sudo and you can use it for all your database administrative needs.
How to Allow Remote Access to MySQL Database Server
The software ecosystem is not new to the notion of distributed systems. You do not need to be physically present in order to interact with your remotely hosted software.
Therefore your MySQL does not need to reside on a local machine for you to fully benefit from its functional features. You can now have the MySQL running on a remote dedicated server and still be guaranteed the same database security and performance as the case with a MySQL running on a local/desktop machine.
This article guide will walk us through setting up and enabling remote access to a MySQL server in Linux. On the remote server/machine hosting your MySQL database software, we need to perform a few configuration steps for it to allow authenticated remote users access.
Create a New MySQL User
It is advisable to work with a remote user who is neither a root MySQL user nor tied to the remote server hosting the MySQL database software.
Access your remote MySQL server and database via SSH.
To create a new MySQL user, we will adhere to the command syntax:
CREATE USER 'username'@'%' IDENTIFIED BY 'your_user_password';
As you have noted, we are using the notation ‘username’@’%’ and not ‘username’@’localhost’ since we want this user to be dynamic enough to access the MySQL server from any other host machine with a different IP address.
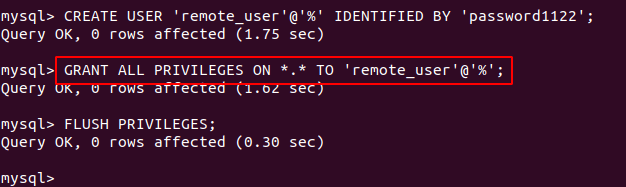
mysql> CREATE USER 'remote_user'@'%' IDENTIFIED BY 'password1122';
Let us grant this user some database privileges. For instance, this user can have the same database privileges as the root user only that the root user is bound to the host machine.
mysql> GRANT ALL PRIVILEGES ON *.* TO 'remote_user'@'%'; mysql> FLUSH PRIVILEGES; mysql> exit;
Enable Remote MySQL Access
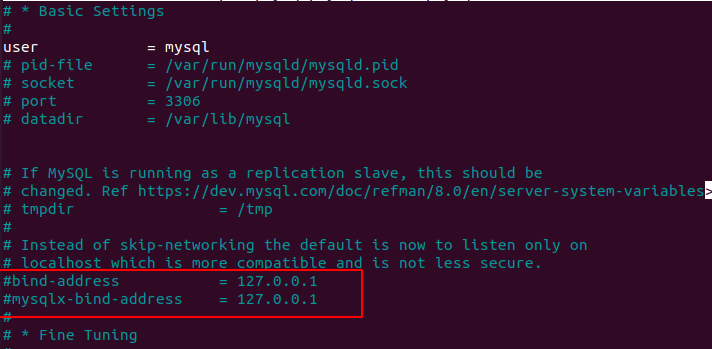
Now that we have the remote user created, it’s time to perform some additional configuration changes. By default, the MySQL bind-address is 127.0.0.1 which implies that only localhost users can interact with the MySQL database.
To give access to other users’ IP addresses to your database server, navigate and open the file MySQL configuration file.
$ sudo nano /etc/mysql/mysql.conf.d/mysqld.cnf OR $ sudo vi /etc/my.cnf
To allow remote access to your MySQL database server, the fields bind-address and mysqlx-bind-address need to be commented out. These configuration changes will prevent the server hosting MySQL database software from only relying on localhost (127.0.0.1) connections. Afterward, any IP address will be allowed to access it.
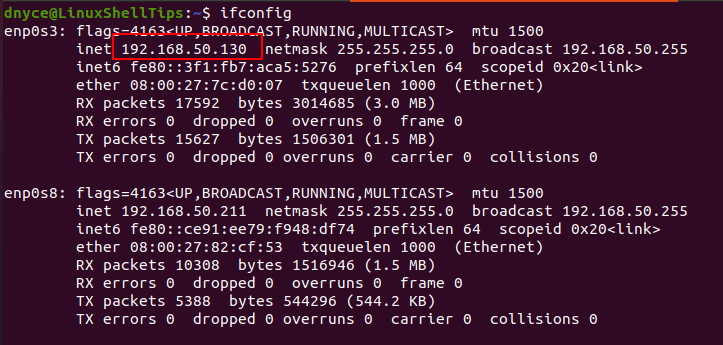
Restart Your MySQL server and then identify the IP address of the MySQL server.
$ sudo systemctl restart mysql $ ifconfig
Attempting Remote MySQL Database Access
To directly connect to the MySQL database server remotely, adhere to the following MySQL syntax:
$ mysql -u username -h mysql_server_ip_adress -p
In our case, the command will look like the following:
$ mysql -u remote_user -h 192.168.50.130 -p

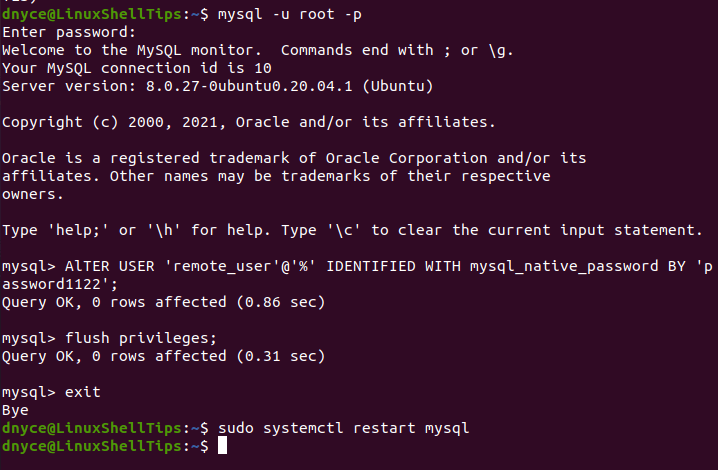
If you run into the above error as depicted by the screen capture, you will need to configure your MySQL user to use a native password. Sign-in back to your MySQL server via SSH and implement the command:
mysql> ALTER USER 'remote_user'@'%' IDENTIFIED WITH mysql_native_password BY 'password1122'; mysql> exit;
Afterward, exit the MySQL database shell and restart the MySQL daemon.
$ sudo systemctl restart mysql
Re-attempt remote access to your MySQL server.
$ mysql -u remote_user -h 192.168.50.130 -p

And just like that, you can directly and remotely gain access to a MySQL database server from a remote client computer configured to an IP address of your choice.
Enable Remote MySQL Access in Firewall
If you have a firewall enabled on your remote server, you might need to grant access to MySQL’s default port 3306 and grant access to remote_ip_address as shown.
UFW Firewall
$ sudo ufw allow from remote_ip_address to any port 3306
FirewallD
$ sudo firewall-cmd --new-zone=mysqlrule --permanent $ sudo firewall-cmd --reload $ sudo firewall-cmd --permanent --zone=mysqlrule --add-source=remote_ip_address $ sudo firewall-cmd --permanent --zone=mysqlrule --add-port=3306/tcp $ sudo firewall-cmd --reload
Iptables
$ sudo iptables -A INPUT -p tcp --dport 3306 -j ACCEPT $ sudo iptables -A INPUT -p tcp -s remote_ip_address --dport 3306 -j ACCEPT
That’s all! In this article, you have learned helpful insight into the common ideas of remote MySQL access in Linux.