- addgroup Command in Linux with Examples
- How to add groups
- Some options used in the above line code are explained here:
- Configuration
- Some of the valid configuration options are:
- Files
- Create New Groups in Linux With Groupadd Command
- Groupadd command examples
- 1. Create a new group
- 2. Create a group with specific group ID (gid)
- 3. Create a new system group
- How to create users and groups in Linux from the command line
- Creating users
- Creating groups and adding users
- User management made simple
- Subscribe to the Daily Tech Insider Newsletter
- Also See
addgroup Command in Linux with Examples
It is a command in Linux to create a new group using specified command lined and the system’s default values.
How to add groups
- Adding a user group: If we want to add a user group, we either call adduser with the –group option without using the –system option, or we call addgroup.
- Adding a system group: To add a system group, we call addgroup with the –system option. Here also, the group created will have no users.
- Adding an existing user to a group that already exists: If the adduser is run with two non-option arguments, then the user is added to a group if it already exists.
adduser [--system] [--home DIR] [--shell SHELL] [--no-create-home] [--uid ID] [--firstuid ID] [--lastuid ID] [--ingroup GROUP | --gid ID] [--disabled-password] [--disabled-login] [--gecos GECOS] [--add_extra_groups] [--encrypt-home] [--quiet] [--debug] [--force-badname] [--help|-h] [--version] [--conf FILE] user addgroup [--system] [--quiet] [--debug] [--force-badname] [--help|-h] [--version] [--conf FILE] [--gid ID] group adduser [options] usergroup Some options used in the above line code are explained here:
| —conf FILE | This option use FILE in place of /etc/adduser/conf. |
| —disabled-login | This option makes the user set a password for his account, or else he would not be able to use his account. |
| —disabled password | This option is similar to –disabled-login, but the user can log in to his account without using a password. |
| —force-badname | The user and group names are checked, by default. So, this option pressures adduser and addgroup to check roughly for the cogency of the name. |
| —gecos GECOS | This option will restrict the adduser to ask for finger information. |
| —gid ID | When this option is used, the given number is forced to bethe new group ID. If a user is created/added, due to this option he is added to that group. |
| —group | If we want to create the group with the same name as the system user, we combine this option with the —system. If this option is not combined with the —system, then the group with the given name is created. |
| —help | This option is used to show a help message and exit. |
| —home DIR | If we use DIR as the user’s home directory, then if the directory does not exist, it is created and the skeleton files are copied. |
| —quiet | This option only displays errors and warnings and hides informational messages. |
| —system | This option creates a system group or system user. |
| —add_extra_groups | This option adds a new user to extra groups. |
| —version | This option shows copyright information and version. |
Configuration
The file /etc/adduser.conf holds defaults for the programs. Every line contains a single value pair in the form “option = value”. A hash sign (#) is compulsory in a comment line.
Some of the valid configuration options are:
| DSHELL | This is the log-in shell that is used for all users. Reverts to /bin/bash. |
| DHOME | This is the directory where the new home directories have to be created. Reverts to /home. |
| GROUPHOMES | The home directory is created as “/home/[groupname]/user” if set to yes. Reverts to no. |
| SKEL | This is the directory from which the user configuration files have to be copied. Reverts to /etc/skel. |
| LETTERHOMES | The home directories have an extra directory added that is the first letter of the login name if this is set to yes. |
Files
| /etc/adduser.conf | It is a revert layout for adduser and addgroup. |
Working on addgroup command in Linux
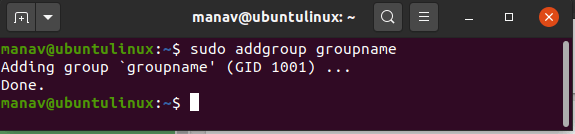
This command creates a new group for our Linux Machine.
sudo addgroup groupname --gid 12345
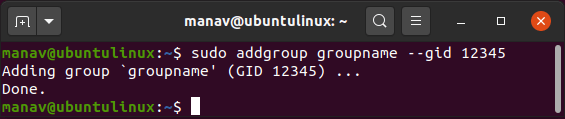
This command adds a new group with a specified Group ID (GID).
sudo addgroup groupname --shell /bin/sh
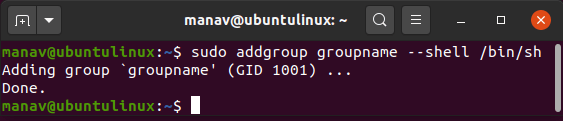
The /bin/sh shell is allocated to the newly created group with the help of this command.
sudo addgroup groupname --debug
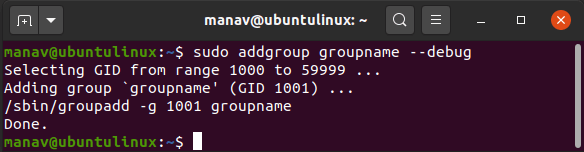
All the commands will be executed in the verbose mode i.e., all the details of the operations being performed will be printed, when this command is used.
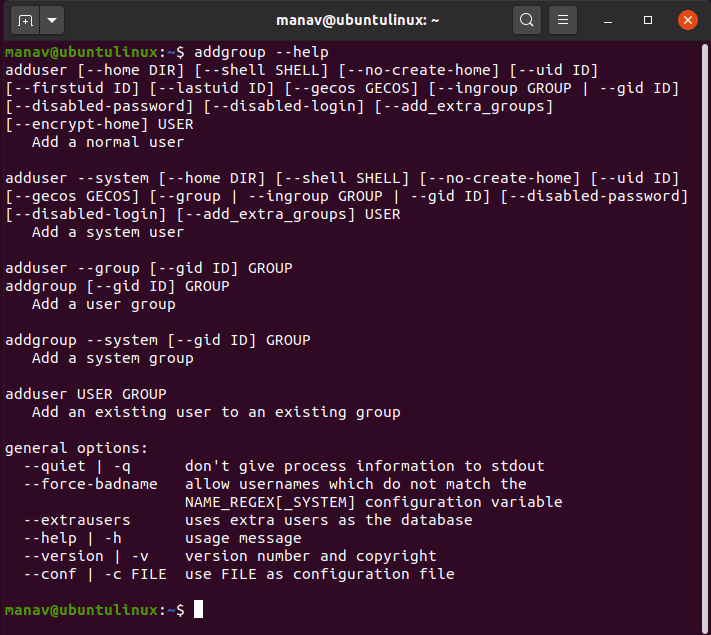
The help section of the addgroup command can be displayed using this command.
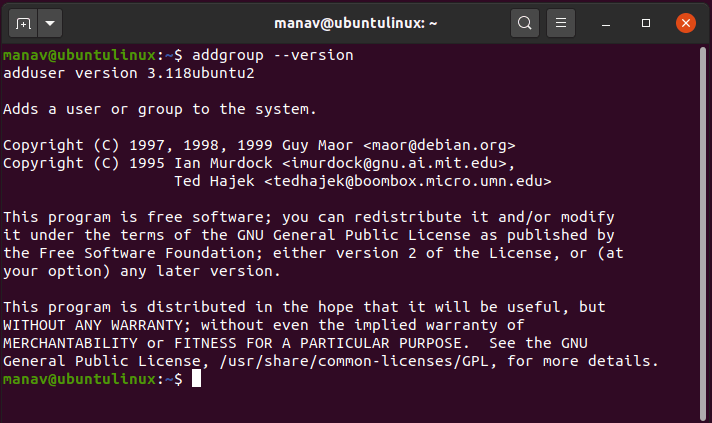
To show version details of the addgroup command, the version command is used.
Create New Groups in Linux With Groupadd Command
The groupadd command in Linux creates new groups. Learn how to use groupadd command to add new groups in Linux.
While the useradd command creates new users, the groupadd command in Linux creates new groups. It updates the /etc/group file accordingly.
There are not many options with groupadd and its syntax is pretty basic:
groupadd [options] group_nameLet’s see how to use groupadd command for creating groups in Linux.
Groupadd command examples

Please keep in mind that adding group is administrative task and hence you need to be root or have sudo rights. Read more about creating sudo user here.
1. Create a new group
To create a new group in Linux, you can use it in the following manner:
sudo groupadd new_group_nameYou can verify that the new group has been created by checking the /etc/group file:
[email protected]:~$ sudo groupadd testing [email protected]:~$ grep testing /etc/group testing:x:1008:What do you do with a group? You should have some users in it, right? You can add users to group using the usermod command. If you want to add multiple users to a group at the same time, you can use the gpasswd command like this:
sudo gpasswd -M user1,user2,user3 new_group_name2. Create a group with specific group ID (gid)
By default, the new group gets created with a group id higher than the GID_MIN value defined in /etc/login.defs. On most Linux system, this value is 1000.
In other words, you get one of the first available GID after 1000.
But you are not restricted to that. You can create a group with a specific GID in this manner:
sudo groupadd new_group_namep -g GID[email protected]:~$ sudo groupadd test_group -g 678 [email protected]:~$ grep test_group /etc/group test_group:x:678:3. Create a new system group
When you create a new group, it’s a normal group with GID higher than 1000. You can also create a system group that automatically takes a group id between SYS_GID_MIN and SYS_GID_MAX as defined in /etc/login.defs.
sudo groupadd -r new_group_nameYou can see in the example that the group id is less than 1000 and thus indicating that it is not a normal group but a system group (used for system programs).
[email protected]:~$ sudo groupadd -r tesla [sudo] password for abhishek: [email protected]:~$ grep tesla /etc/group tesla:x:998:I hope you find this quick little tutorial helpful in using groupadd command. You may also checkout how to delete groups with groupdel command.
Any questions or suggestions are always welcomed.
How to create users and groups in Linux from the command line

Here’s a quick guide to adding users and groups, and then how to add users to groups, all from the command line on the Linux platform.
We may be compensated by vendors who appear on this page through methods such as affiliate links or sponsored partnerships. This may influence how and where their products appear on our site, but vendors cannot pay to influence the content of our reviews. For more info, visit our Terms of Use page.

If you administer a Linux server, you very likely will have to create users and groups. Without knowing how to create users, you will find yourself limited in a few crucial ways. First off, new users cannot be added to a system. Second, you might find yourself having to create a user in order to install a piece of software. As for groups: Beyond having to create groups for successful installation of certain software, this is a great way to control user permissions for directories.
Chances are you will also have to do this from the command line. Because of the necessity of this task I want to walk you through the process of:
Let’s dive in, so you can up your Linux admin game.
Creating users
For this, we will be making use of the useradd command. This command is pretty flexible and allows you to create users that can login or even users that cannot login (in the case of creating a user for a software installation).
The basic syntax of the command is:
Say, you want to create the user olivia such that she has a home directory and can log in. If you were to issue the command:
The user would be added, without a home directory and be locked out of logging in. Instead of issuing the command without arguments, let’s go with this:
The above command would create the user and also create the user’s home directory to match the username. So if you looked in the /home directory, you would now see olivia.
But what about that lockout issue? There are two ways you can do this. If you’ve already created the user, you could issue the command:
You will be prompted to enter and verify the new password. At this point, the user account will be unlocked and they can login.
If you want to do this all in a single step, that command would look like this:
sudo useradd -m olivia -p PASSWORD
Where PASSWORD is the password you want to use for the user olivia.
Once the user logs in, they can change their password by using the passwd command, entering their current password, and then entering/verifying their new password.
If you need to create a user that has no home directory and is locked out from logging in, you can do this with the the following commands:
sudo useradd -M USERNAME
âsudo usermod -L USERNAME
Where USERNAME is the name of the user to add.
The first command creates the user without a home directory and the second command locks the user out of logging in.
Creating groups and adding users
Now it’s time to create a group. Let’s create the group editorial. To do this, you would issue the command:
Now we want to add our new user, olivia, to the group editorial. For this we will take advantage of the usermod command. This command is quite simple to use.
sudo usermod -a -G editorial olivia
The -a option tells usermod we are appending and the -G option tells usermod we are appending to the group name that follows the option.
How do you know which users are already a member of a group? You can do this the old-fashioned way like so:
The above command will list pertinent information about the group (Figure A).

Another method for finding out who is in a group is with the command members. This command isn’t installed on most distributions, but can be installed from the standard repositories. If you’re using a Ubuntu distribution, the command for installation would be:
sudo apt-get install members
Once installed, the command for listing out who is in our editorial group would be:
That’s much more efficient than using grep and will only display the member names for the group (Figure B).

User management made simple
If you were concerned that managing users on Linux would be a challenge, you should now be able to set those concerns aside. Truth be told, user management on Linux is quite simple — you just need to know which commands to work with. For more information about these tools, issue the commands man useradd, man groupadd, man usermod, and man members.

Subscribe to the Daily Tech Insider Newsletter
Stay up to date on the latest in technology with Daily Tech Insider. We bring you news on industry-leading companies, products, and people, as well as highlighted articles, downloads, and top resources. You’ll receive primers on hot tech topics that will help you stay ahead of the game.
Also See
- How to start, stop, and restart services in Linux (TechRepublic)
- How to monitor your Linux servers with nmon (TechRepublic)
- How to install Stacer for quick Linux system optimization (TechRepublic)
- How to use wget to download files to your GUI-less Linux server (TechRepublic)
- What’s the fastest Linux web browser? (ZDNet)