- How to Setup Network Interface on Ubuntu, Debian & LinuxMint
- 1. Setup System Hostname
- 2. List Attached Network Interfaces
- 3. Setup Static IP on Interface
- 4. Setup Second IP on Network Interface
- 5. Restart Network Service
- 3 ways to configure a network interface in Linux
- Great Linux resources
- At installation time
- Linux Networking: Add a Network Interface Card (NIC)
How to Setup Network Interface on Ubuntu, Debian & LinuxMint
Most operating systems provide commands or options to setup network interface using the command line. On Linux systems, we can directly edit network configuration files and make changes as per our requirements. This tutorial will help you to How to Setup Network Interface on Ubuntu, Debian, and LinuxMint systems.
1. Setup System Hostname
You can use ‘hostname‘ command to check current set hostname or to set new hostname of system.
- Type hostname on command prompt and press enter to check current hostname of system.
hostname station1.example.com
To set hostname permanently, you need to edit /etc/hostname file and add new hostname. This will remain even after system reboot.
sudo echo "station1.example.com" > /etc/hostname
Now edit /etc/hosts and bind new hostname with local ip address.
127.0.0.1 localhoststation1.example.com
2. List Attached Network Interfaces
To view or list attached network interfaces on system use following command. This will also show the state of the network interface.
1:lo: mtu 65536 qdisc noqueue state UNKNOWN group default link/loopback 00:00:00:00:00:00 brd 00:00:00:00:00:00 inet 127.0.0.1/8 scope host lo valid_lft forever preferred_lft forever inet6 ::1/128 scope host valid_lft forever preferred_lft forever 2:eth0: mtu 1500 qdisc pfifo_fast state UP group default qlen 1000 link/ether 00:27:0e:1d:62:ab brd ff:ff:ff:ff:ff:ff 3:eth1: mtu 1500 qdisc pfifo_fast state UP group default qlen 1000 link/ether 00:e0:4d:77:8a:0e brd ff:ff:ff:ff:ff:ff
3. Setup Static IP on Interface
Now edit your network interface configuration file /etc/network/interfaces and configure it. For the example, we are configuring eth0 interface to get ip address from DHCP server and eth1 will have a static ip address.
$ sudo vi /etc/network/interfaces
auto lo iface lo inet loopback auto eth0 iface eth0 inet dhcp auto eth1 iface eth1 inet static address 192.168.1.100 netmask 255.255.255.0 gateway 192.168.1.1 dns-nameservers 8.8.8.8
4. Setup Second IP on Network Interface
Now if you want to add second IP address (Virtual IP) on the same interface (eth1). You can define an alias in network configuration file and configure another IP address.
sudo vi /etc/network/interfaces
## other configuration goes here auto eth1:0 iface eth1:0 inet static address 192.168.1.101 netmask 255.255.255.0 gateway 192.168.1.1 dns-nameservers 8.8.8.8
You can see here we have defined an interface as eth1:0, which is an alias of the interface.
5. Restart Network Service
After making all above changes just restart network service using following command.
eth1:0sudo /etc/init.d/networking restart
3 ways to configure a network interface in Linux
Few things are more important to your machine than a good network connection. Here are three ways to configure the interfaces needed to make this happen.
Editor’s note: This article was written while James Brigman was a member of the Red Hat Accelerator program.
Great Linux resources
Almost any useful work that one would want to do with a Linux system requires a network interface. Want to browse the web, watch YouTube, stream video, audio or files? It’s all done over the network interface. RPM-based Linux distributions using Gnome have several fundamental ways to configure the network interface. I’m describing three ways in this article. All of the configuration methods require the entry of sets of numbers that allow the network interface to operate.
You will need three fundamental pieces of numerical information in order to minimally configure a network interface to work over IPv4 and more if you want to define things like IPv6, hostnames, or DNS servers. This article covers the bare minimum for IPv4. Those three fundamental numerical pieces are:
IP Address: The unique number defining the access point to your network interface. It has the form: xxx.xxx.xxx.xxx, where “xxx” are three, or fewer, numbers between 0 and 255. It’s possible for this number to be purely made up, but normally it takes a form that works with the other three numbers. If you are using a home router with DHCP, which is the typical default configuration, the router will “assign” the IP address to your network interface. You won’t have to enter the number at all.
Gateway: The unique number assigned to the network interface at the «other end of the wire» that your computer must communicate through. Again, it has the general xxx.xxx.xxx.xxx format and takes a form that also works with the other two numbers. If you are using a home router, your home router generates this number because it is the gateway through which you communicate with the wider world.
Netmask: The non-unique number that defines the network itself. This number can be automatically generated but is sometimes requested by the method you use to configure the interface. It, too, has the format xxx.xxx.xxx.xxx.
Note that I’m not going into the how of these numbers; I’m just telling you they are needed to configure the network interface. I’ll skip that so you can get on into the point of the article: Three ways to configure network interfaces. In each case, the numbers I use will be real numbers applicable to the system I used to write this article. I used CentOS 8 to generate the images, but everything you see here is the same in Fedora and Red Hat Enterprise Linux.
At installation time
The Anaconda installer prompts for network configuration and you can’t complete the installation without providing these numbers to the installer. Here’s the initial screen, using “Network & Host Name” in the rightmost column, third selection down:
Linux Networking: Add a Network Interface Card (NIC)
A tutorial on the systems configuration of a Linus system required for an additional Ethernet Network Interface Card. This is typically done for redundancy (in case one fails), high availability and failover or for routing and network subdivision, isolation or gateway (see Linux networking gateway tutorial)
Related YoLinux Tutorials:
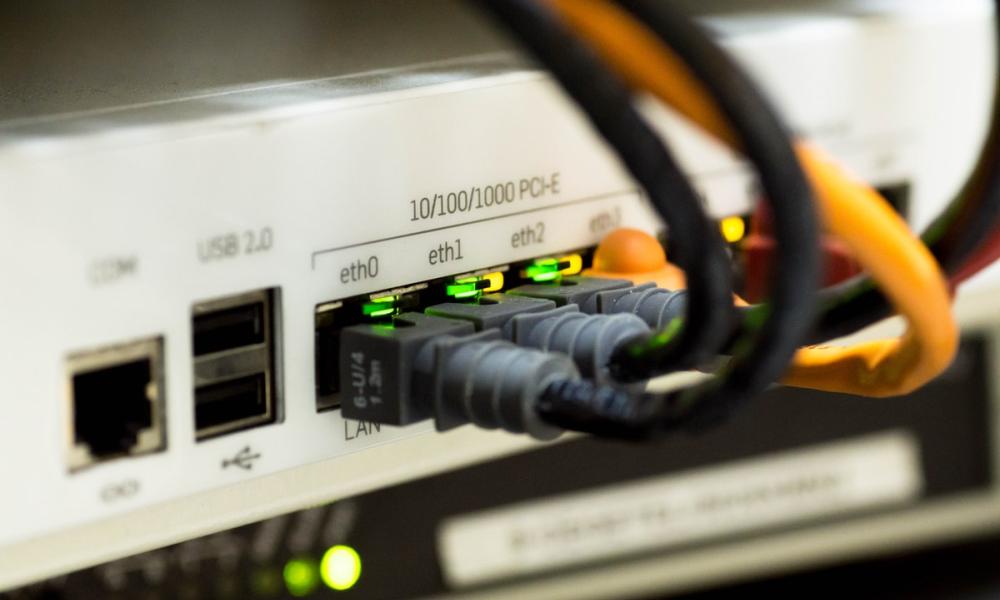
Typically an Ethernet network interface is built-in to most modern motherboards. Some computer systems, especially server systems, are equipped with two network interfaces built-in to the motherboard. Additional interfaces can be installed in extra PCI expansion slots.
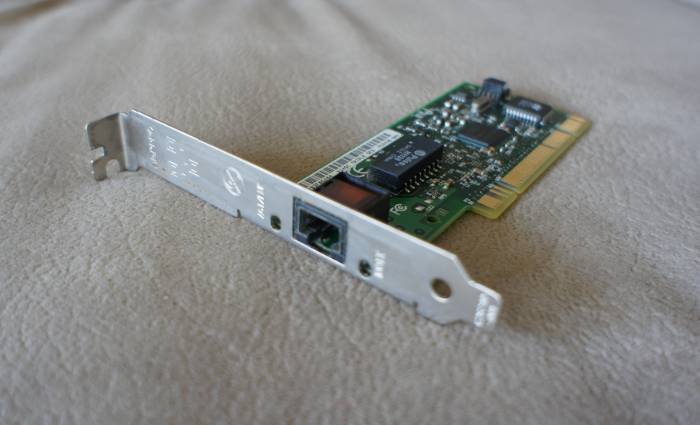
Typical Ethernet NIC PCI card
Try the command lspci -vv to see if the hardware is detected properly, and which kernel module (if any) is being assigned:
01:00.0 Ethernet controller: Broadcom Corporation NetXtreme BCM5764M Gigabit Ethernet PCIe (rev 10) Subsystem: Hewlett-Packard Company Device 1309 Control: I/O- Mem+ BusMaster+ SpecCycle- MemWINV- VGASnoop- ParErr- Stepping- SERR- FastB2B- DisINTx+ Status: Cap+ 66MHz- UDF- FastB2B- ParErr- DEVSEL=fast >TAbort- SERR- Kernel driver in use: tg3 Kernel modules: tg3 . . 37:09.0 Ethernet controller: Broadcom Corporation NetXtreme BCM5782 Gigabit Ethernet (rev 03) Subsystem: Hewlett-Packard Company Device 000c Physical Slot: 5 Control: I/O- Mem+ BusMaster+ SpecCycle- MemWINV- VGASnoop- ParErr- Stepping- SERR+ FastB2B- DisINTx- Status: Cap+ 66MHz+ UDF- FastB2B+ ParErr- DEVSEL=medium >TAbort- SERR- Kernel driver in use: tg3 Kernel modules: tg3
or more specifically lspci -vv | grep Ethernet
01:00.0 Ethernet controller: Broadcom Corporation NetXtreme BCM5764M Gigabit Ethernet PCIe (rev 10) 37:09.0 Ethernet controller: Broadcom Corporation NetXtreme BCM5782 Gigabit Ethernet (rev 03)
The network configuration tools and network configuration files are different for Ubuntu/Debian vs Red Hat/Fedora based systems.
- sudo /etc/init.d/networking start
- sudo /etc/init.d/networking stop
- sudo /etc/init.d/networking restart
Ubuntu GUI network configuration tool: /usr/bin/gnome-nettool (apt-get install gnome-nettool)
One can also configure Ubuntu systems by adding entries to the configuration file:
/etc/network/interfaces
. . auto eth1 iface eth1 inet dhcp
. . auto eth1 iface eth1 inet static address 192.168.1.2 netmask 255.255.255.0 network 192.168.1.0 broadcast 192.168.1.255
DNS configuration will be required in /etc/resolv.conf. For this and other networking configurations see the YoLinux Networking tutorial.
The most simple method of configuring Red Hat based distributions is by using the console based GUI tool:
system-config-network
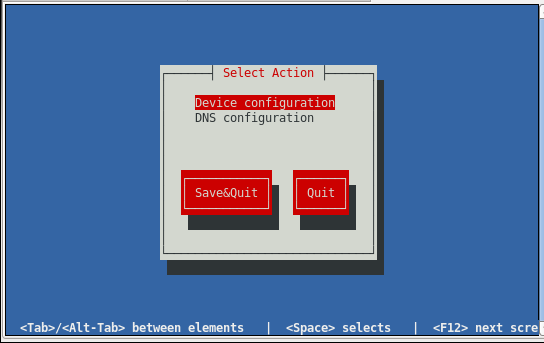
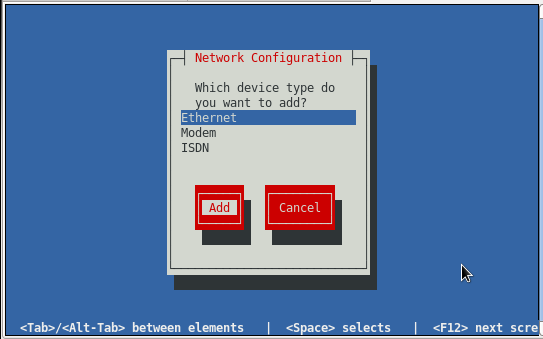
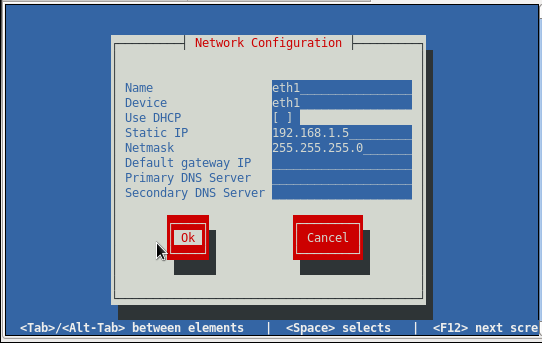
Both static and dynamic configurations can be set. If configuring for DHCP, go to that line and pres the space bar. An asterisk «*» will appear to show that this option has been selected.
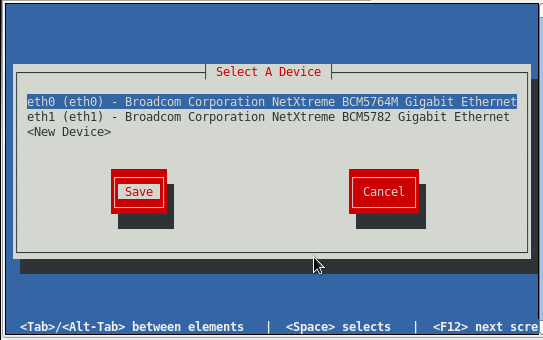
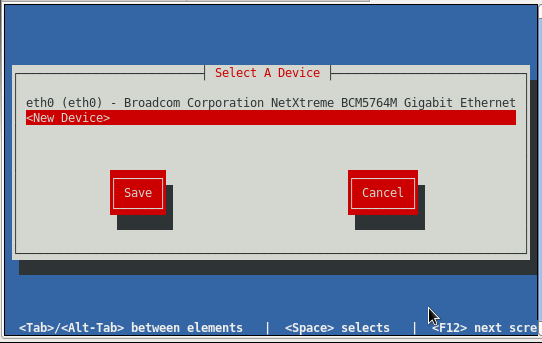
After device configuration, the new device will show up in the list.
1: lo: mtu 65536 qdisc noqueue state UNKNOWN group default qlen 1 link/loopback 00:00:00:00:00:00 brd 00:00:00:00:00:00 inet 127.0.0.1/8 scope host lo valid_lft forever preferred_lft forever inet6 ::1/128 scope host valid_lft forever preferred_lft forever 2: eth0: mtu 1500 qdisc pfifo_fast state UP group default qlen 1000 link/ether fa:ac:14:24:5e:8d brd ff:ff:ff:ff:ff:ff inet 192.168.12.2/24 brd 192.168.12.255 scope global dynamic eth0 valid_lft 77603sec preferred_lft 77603sec inet6 fe80::477:3e3e:d5fd:823a/64 scope link valid_lft forever preferred_lft forever 3: eth1: mtu 1500 qdisc pfifo_fast state DOWN group default qlen 1000 link/ether fa:ac:14:24:5e:8f brd ff:ff:ff:ff:ff:ff 4: wlan0: mtu 1500 qdisc noop state DOWN group default qlen 1000 link/ether 28:b2:bd:36:a7:3b brd ff:ff:ff:ff:ff:ff
eth0 Link encap:Ethernet HWaddr 64:31:50:24:41:A1 inet addr:242.27.32.60 Bcast:242.27.32.255 Mask:255.255.255.0 inet6 addr: fb80::6631:50ff:fb44:46a1/64 Scope:Link UP BROADCAST RUNNING MULTICAST MTU:1500 Metric:1 RX packets:845 errors:0 dropped:0 overruns:0 frame:0 TX packets:191 errors:0 dropped:0 overruns:0 carrier:0 collisions:0 txqueuelen:1000 RX bytes:158077 (154.3 KiB) TX bytes:15619 (15.2 KiB) Interrupt:17 eth1 Link encap:Ethernet HWaddr 00:10:17:24:BF:77 inet addr:192.168.1.5 Bcast:192.168.1.255 Mask:255.255.255.0 UP BROADCAST MULTICAST MTU:1500 Metric:1 RX packets:0 errors:0 dropped:0 overruns:0 frame:0 TX packets:0 errors:0 dropped:0 overruns:0 carrier:0 collisions:0 txqueuelen:1000 RX bytes:0 (0.0 b) TX bytes:0 (0.0 b) Interrupt:21 lo Link encap:Local Loopback inet addr:127.0.0.1 Mask:255.0.0.0 inet6 addr: ::1/128 Scope:Host UP LOOPBACK RUNNING MTU:16436 Metric:1 RX packets:330704 errors:0 dropped:0 overruns:0 frame:0 TX packets:330704 errors:0 dropped:0 overruns:0 carrier:0 collisions:0 txqueuelen:0 RX bytes:917208006 (874.7 MiB) TX bytes:917208006 (874.7 MiB)
The addition and configuration of the new Ethernet device will generate the new file:
/etc/sysconfig/network-scripts/ifcfg-eth1
DEVICE=eth1 BOOTPROTO=static NETMASK=255.255.255.0 TYPE=Ethernet HWADDR=00:10:17:24:bf:77 IPADDR=192.168.1.5
The command ifup eth1 and ifdown eth1 are used to bring the new Ethernet interface card into service or offline.
DNS configuration will be required in /etc/resolv.conf. For this and other networking configurations see the YoLinux Networking tutorial.
- Linux Networking and Configuration — subnetting, routing, configuration, DNS, multiple IP’s per NIC, etc
- Linux gateway routing — using forwarding and iptables
- Integrating with the Microsoft Network