- Предоставление общего доступа к принтеру
- Принтер установлен на Windows (samba)
- Принтер установлен на Ubuntu
- Установка сетевого принтера на Ubuntu
- Установка сетевого принтера на Windows
- Installing network printers under Linux
- Joining the network:
- Installing a printer on Debian/Ubuntu Linux based distributions (graphical way):
- Installing a printer on Debian/Ubuntu Linux based distributions (cups):
- About the author
- David Adams
- Printer Setup (Ubuntu)
- Checking Printer Status in CUPS
- Adding Users to the lpadmin Group
- Sharing a Printer to the Local Network
- HP and Epson Printers
- Brother Printers
- Troubleshooting
- Remove and Re-add the Printer in Settings
- Assign a Static IP Address to the Printer
- Useful Commands
Предоставление общего доступа к принтеру
Если к компьютеру подключен принтер, к нему можно предоставить общий доступ для любого пользователя сети. Тип принтера не имеет значения, если он установлен и подключен к компьютеру с помощью кабеля универсальной шины USB или кабеля другого типа. Любой выбранный пользователь сети сможет использовать принтер, если ему удастся найти в сети компьютер, к которому подключен принтер.
Принтер установлен на Windows (samba)
~ Подключаем принтер к компьютеру и устанавливаем на него драйвера в ОС Windows; ~ Проверяем корректно ли функционирует принтер, если все порядке переходим к следующему шагу; ~ Делаем общий доступ к данному принтеру. //Панель управления->Принтеры и факсы// щелкаем правой клавишей мыши по установленному принтеру, и выбираем в появившемся меню пункт "Общий доступ". В появившемся окне напротив пункта "Общий доступ к данному принтеру" ставим флажок и нажимаем кнопку "ОК". ~ В Ubuntu: //Система->Администрирование->Печать// в открывшемся окне нажимаем кнопку "Добавить": //Сетевой принтер->Windows Printer via Samba//. Кнопка "Browse" открывает окно с выбором сети, компьютера и принтера.
Принтер установлен на Ubuntu
Если у Вас принтер фирмы Hewlett Packard, желательно обновить пакет Hewlett-Packard’s Linux Imaging and Printing software.
Чтобы избежать проблем с печатью графики, необходимо сменить драйвер, устанавливаемый по умолчанию на pcl3
~ Устанавливаем принтер в Ubuntu: //Система->Администрирование->Печать// нажмите кнопку "Добавить", система определит подключенный к компьютеру принтер и устанавит его. Если этого не произошло, обратитесь к документации по установке Вашего принтера. ~ Делаем общий доступ к данному принтеру. В окне "Печать" меню //Сервер->Settings//. Ставим галочки в пунктах: * Show printers shared by other systems; * Publish shared printers connected to this system. ~ Нажимаем на установленный принтер и проверяем галочки Shared.
Установка сетевого принтера на Ubuntu
Стоит сразу отметить, что в большинстве случаев десктопная ubuntu сама найдет сетевой принтер, если на сервере выставлена опция публикации принтера в сети. Если принтер по каким-то причинам не нашелся, действуем по инструкции:
В окне «Печать» нажимаем кнопку «Добавить», затем переходим Сетевой принтер→Проткол сетевой печати (ipp) и в поле «Host» пишем:
http://192.168.0.1:631/printers/Laserjet-2300
Laserjet-2300 — имя подключенного принтера (точно такое же наименование, как и на компьютере c ip адресом 192.168.0.1).
(в нашем примере адрес сервера 192.168.0.1) и на появившейся странице найдите ссылку «принтеры», а на открывшеся странице выберите нужный принтер. Полученный адрес в браузере и будет искомым.
Установка сетевого принтера на Windows
В открывшемся окне «Принтеры и факсы»: Установка принтера→Далее→Сетевой принтер или принтер подключенный к другому компьютеру→Подключиться к принтеру в Интернете, в домашней сети или в интрасети и вводим в поле такой же адрес, как и в примере для ubuntu.
Installing network printers under Linux
![]()
In a previous tutorial we published on LinuxHint how to join a Windows network with your Debian/Ubuntu based linux device. This tutorial will explain how to add printers from the network on Debian/Ubuntu based Linux Distributions only since we’ll use the system settings and cups (apt). This article can be considered as the continuation of the mentioned above since we’ll use Samba, below i’ll briefly repeat the steps to join a Windows network, for explanation on each step please check the previous article.
Joining the network:
Step 1. Check for the IP range and Gateway from a Windows device by running “ipconfig” (the DOS command equivalent to ifconfig)
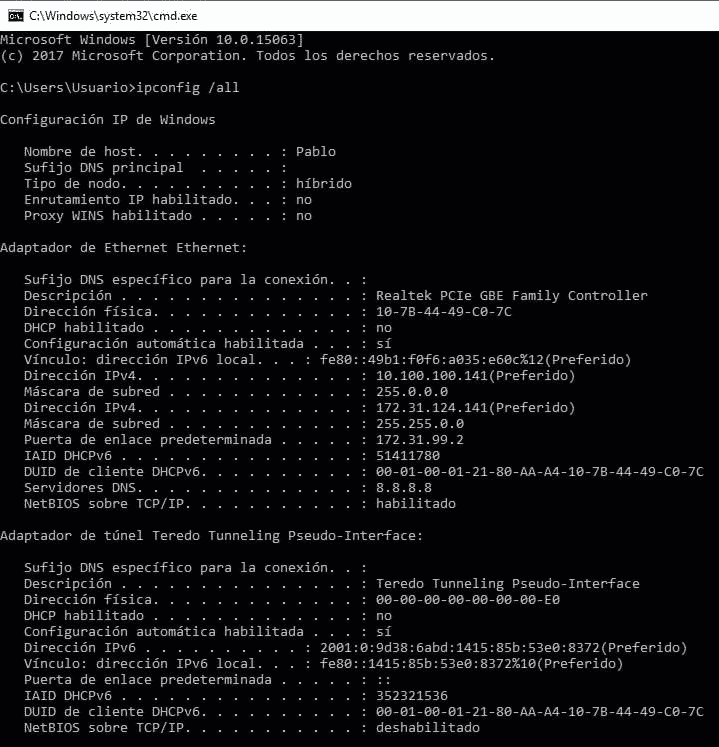
I apologize but the network belongs to a Latin American company and all workstation are in Spanish. Where “Direcciòn” means “address” and “Puerta de enlace determinada” means “gateway”.
Step 2.
Then we assign an ip address and the gateway (ping IP addresses to find a free one). Run:

Replace enp2s0 for your network device and write the proper IP addresses instead.
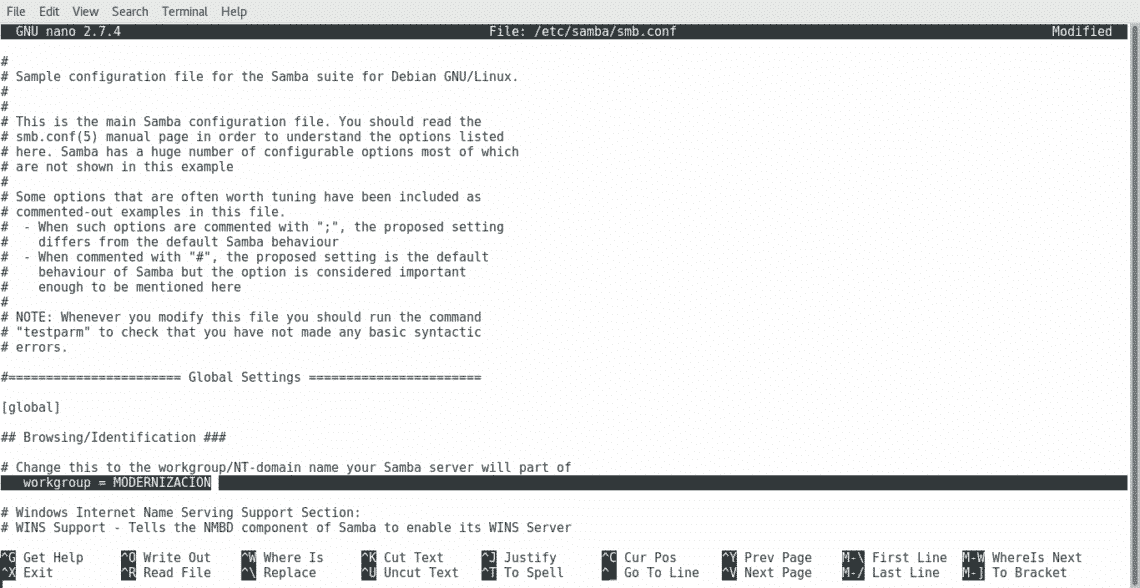
Edit the file nano /etc/samba/smb.conf adding the correct Workgroup. Run:
Installing a printer on Debian/Ubuntu Linux based distributions (graphical way):
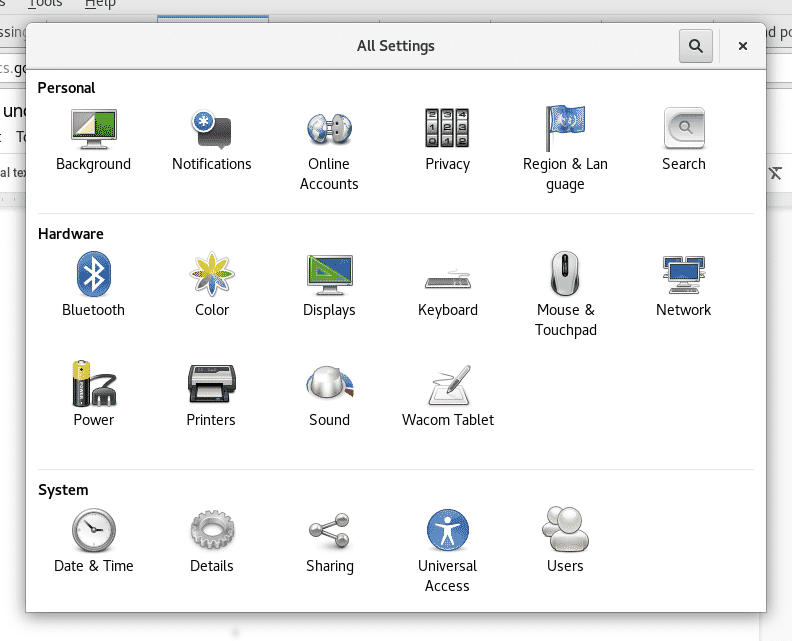
On Debian/Ubuntu Linux based distribution click on Settings>Printers
On the emerging window click on Add Printer (probably you’ll need to click the Unlock button and complete your root credentials before).
Note: On some Debian/Ubuntu versions the icon may be called “Network Printers”
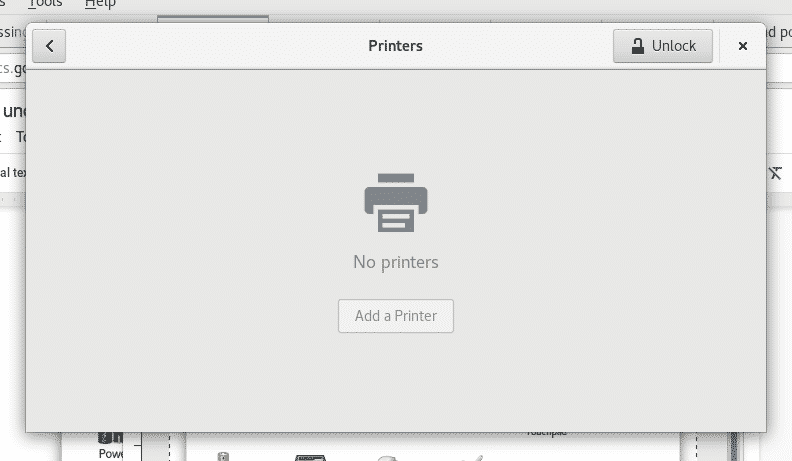
Your device will scan for available printers and will list them
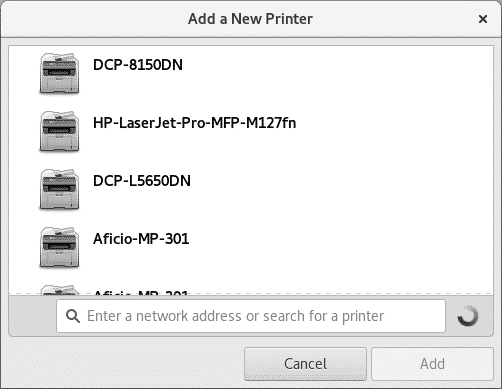
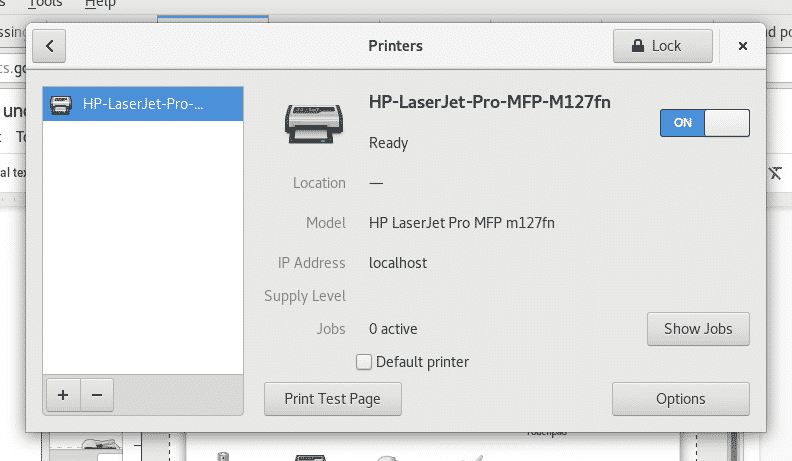
Select your printing device and click on “Add”, your printer will be listed and ready to print
Installing a printer on Debian/Ubuntu Linux based distributions (cups):
Run as root or using sudo
And press Y when asked.

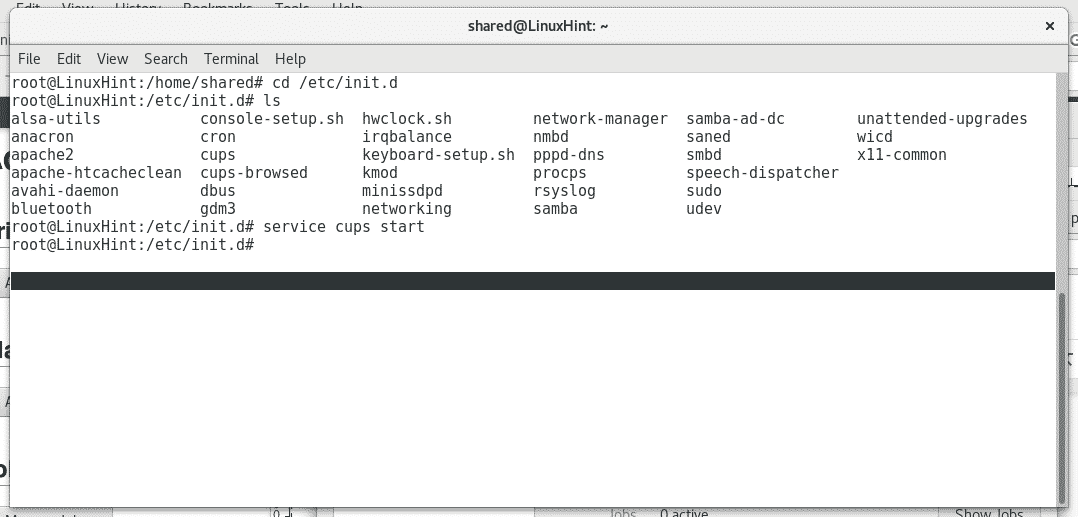
Start the cups service by running “service cups start” or “/etc/init.d/cups start”
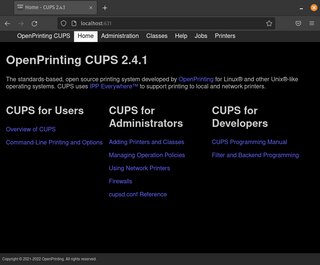
Cups has an intuitive and user friendly web interface to manage printers, open in your browser http://localhost:631/admin
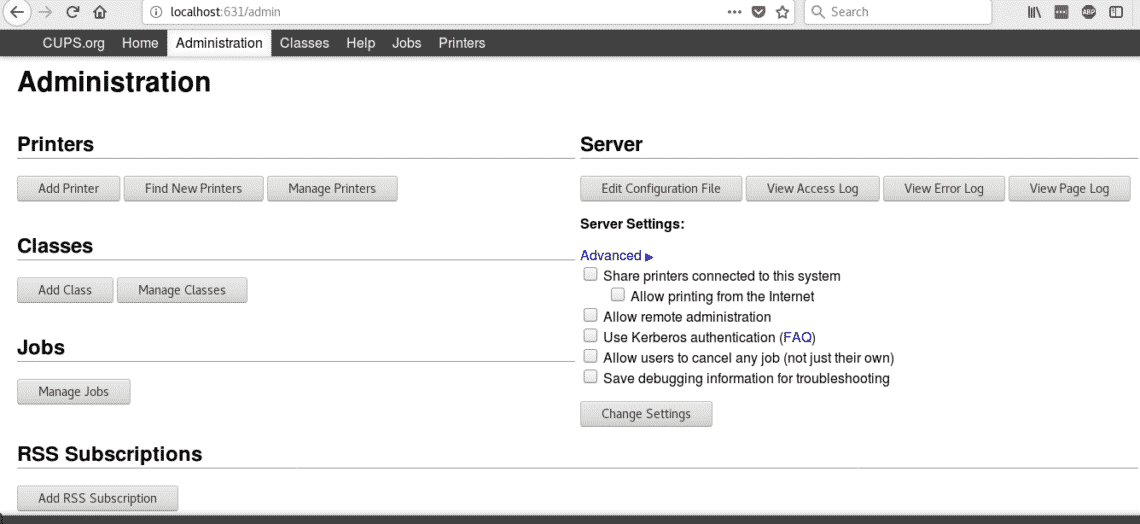
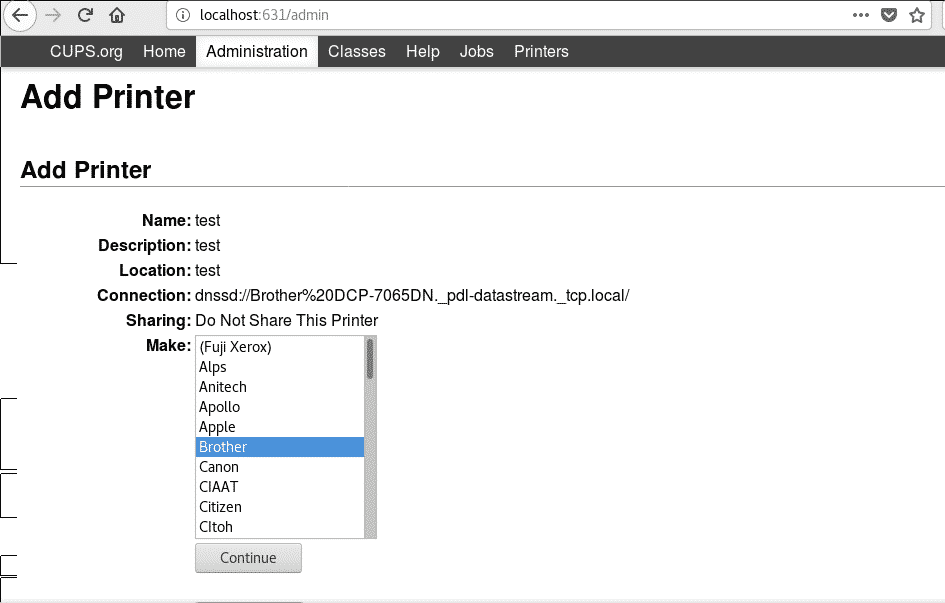
Click on “Add Printer” , it will ask for your root credentials, fill it and cups will list the available printers

Select your devices and press “Continue”, as you see cups allows to install both local and network printers. Next fill the requested information (descriptive information) and press Continue.

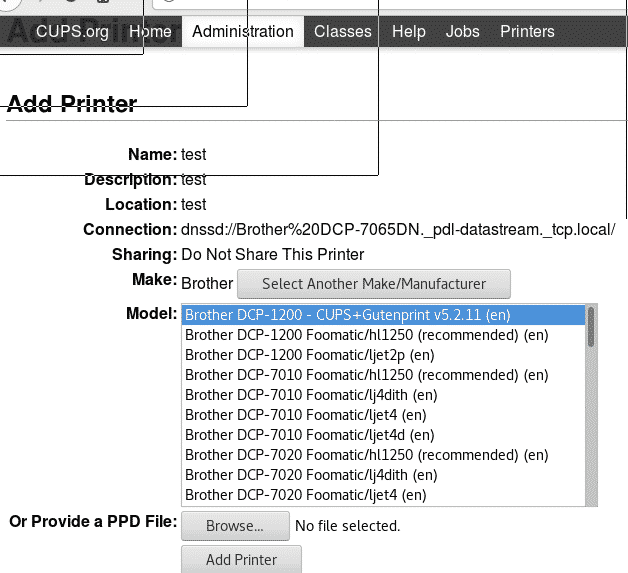
Next, select your printer type and press “Continue”
Select your printer model and press on Add Printer.
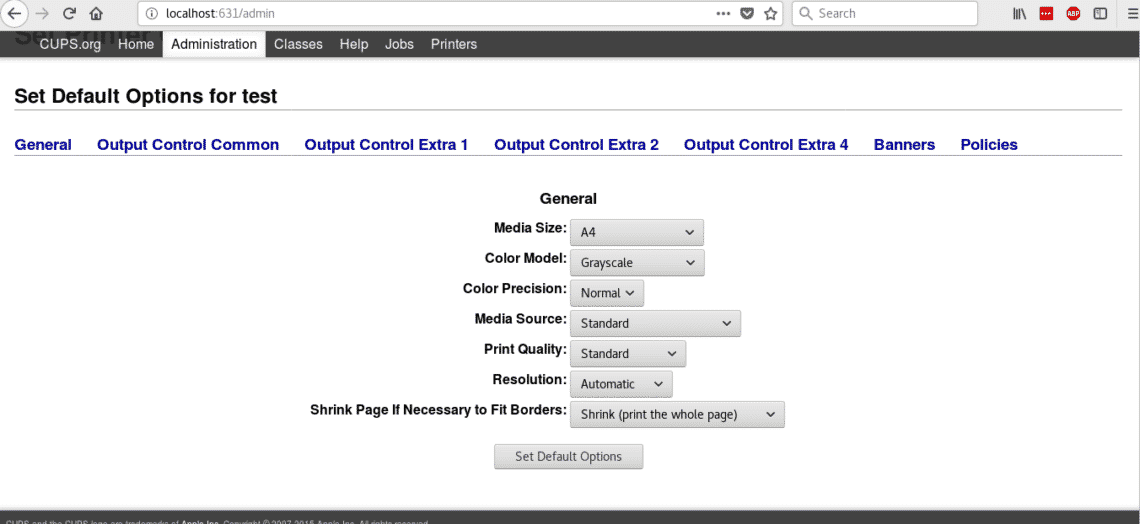
Now your printer is added, and you can determine the default settings for printing.
Now if you open your Open office and click on File>Print you’ll see the printers you just installed.
I hope this tutorial helped you to deal with printers under Linux, keep following LinuxHInt for more tips and resources on Linux.
About the author
David Adams
David Adams is a System Admin and writer that is focused on open source technologies, security software, and computer systems.
Printer Setup (Ubuntu)

- Click the Ubuntu icon at the top left of your screen and type the word Printers then choose the Printers application in the search box.
- In the Printers Application, click the Add button. Wait a few seconds for printers to appear in the Device List.
Checking Printer Status in CUPS
CUPS can be managed directly using a web browser by navigating to the following local URL:
The status window will show current print jobs, detected printers, and other information about the printing system.
Adding Users to the lpadmin Group
CUPS allows you to manage printers using Terminal commands. A user must be a part of the lpadmin group to use these commands. You can confirm you are a part of this group with the following command:
You can add yourself to this group using the below command:
sudo usermod -aG lpadmin $USER If you prefer to manage printers in Terminal, See the CUPS documentation for full documentation.
Sharing a Printer to the Local Network
Share a printer with the local network by clicking the Administration tab.
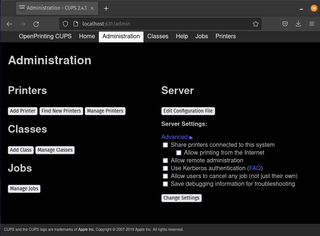
Check the box for Share printers connected to this system .
Locally shared printers are visible in the Printers tab in the Settings application. Users with the appropriate group assignments can now select the printer and enter their username and password to gain access to the network printer. If a user is unable to see the printer, see the above section to confirm the user is in the lpadmin group, and to add the user to the group.
HP and Epson Printers
In the Software & Updates settings, go to the Other Software tab, and check the first item, Canonical Partners . After closing the Software & Updates program, add the driver with this command for HP:
If you would like to use a guided GUI application from HP, you will need to install a python dependency:
sudo apt install python3-pyqt5 hp-setup Epson printer drivers are in the printer-driver-escpr package, which are also installed by default. You may need to install the lsb package for some printer versions:
sudo apt install lsb printer-driver-escpr Additional configuration will require that the user is a part of the lpadmin group. See the above section for instructions to confirm or add a user to this group.
When adding the printer, select type of connection as DNS-SD, and then Forward, and then ESC/P-R.
Brother Printers
Brother provides a driver installation tool for Linux users. Install the appropriate driver for your Brother printer by downloading this tool and running the installer with your printer model appended to the command.
- Click this link to search for the appropriate printer.
- Once you’ve located your printer, select Linux (deb) for your «OS Version», then click OK .
- Select the Driver Install Tool at the top of the list.
- Click Agree to the EULA and Download .
- Choose the Save File option if prompted.
- Press Super + T to launch the Terminal application.
- Change directory to where you downloaded the driver (usually the Downloads directory). Unzip the file using this command:
cd Downloads gunzip linux-brprinter-installer-*.gz ℹ️ Your installer version may differ from this guide. Type the first portion of the installer name as shown below, and then hit TAB to complete the installer name. Substitute PRINTERNAME with your exact printer model name.
During this installer process, answer yes to all questions except when you are prompted for the Device URI . See step 9 if you require a device URI for your printer setup.
sudo bash linux-brprinter-installer PRINTERNAME 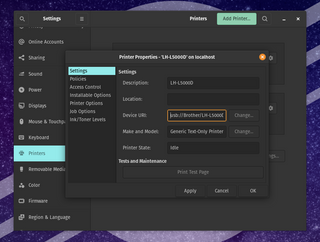
Troubleshooting
Remove and Re-add the Printer in Settings
If the printer stops working, open the Printers Application again and right-click on the printer and select Delete to remove the printer and its settings. Repeat the steps above to add the printer and try printing the test page again. This process usually resolves many printing issues.
Assign a Static IP Address to the Printer
Connectivity issues can occur when the printer is assigned an address using DHCP. Assigning a permanent, static IP address will resolve these issues. Reference your printer manufacturer’s documentation for this process. Be aware that simply using the printer’s assigned DHCP address as a static IP may cause a future address conflict. Additional router configuration may be required to reserve specific addresses within or outside of a DHCP address pool. If your printer is being deployed on a corporate network, contact your network administrator for this process.
Useful Commands
Reinstall the CUPS print server to resolve general printing issues:
sudo apt install --reinstall cups cups-client Reinstall the system control panel in case printer settings are not available.
sudo apt install --reinstall system-config-printer