- Как создать группу Linux
- Как создать группу Linux
- Создание группы Linux вручную
- Как удалить группу в Linux
- Выводы
- Linux User Groups Explained: How to Add a New Group, a New Group Member, and Change Groups
- Creating groups
- Creating users
- Adding a user to a group
- Removing a user from a secondary group
- Conclusion
- How to Add Groups in Linux: The groupadd Command
- Sudo Privileges
- groupadd command
- Creating Users : Useradd command
- Adding users to a group
- New user:
- Existing user:
Как создать группу Linux
Группы — очень удобный инструмент распределения прав в Linux. Благодаря группам можно разрешить нескольким пользователям доступ к одному файлу или папке, а другим запретить, не прибегая к более сложным технологиям, таким, как ACL-списки. Системные сервисы тоже запускаются от имени определённых пользователей, и поэтому группы позволяют очень тонко настроить права доступа к нужным файлам для сервисов, не давая им полного доступа к системе.
В этой небольшой статье мы рассмотрим, как создать группу Linux разными способами, а также поговорим о дополнительных настройках группы.
Как создать группу Linux
Для создания групп в Linux используется команда groupadd, давайте рассмотрим её синтаксис и опции:
$ groupadd опции имя_группы
А теперь разберём опции утилиты:
- -f — если группа уже существует, то утилита возвращает положительный результат операции;
- -g — установить значение идентификатора группы GID вручную;
- -K — изменить параметры по умолчанию автоматической генерации GID;
- -o — разрешить добавление группы с неуникальным GID;
- -p — задаёт пароль для группы;
- -r — указывает, что группа системная;
- -R — позволяет изменить корневой каталог.
Перейдём к практике. Всё очень просто. Создадим группу group1:
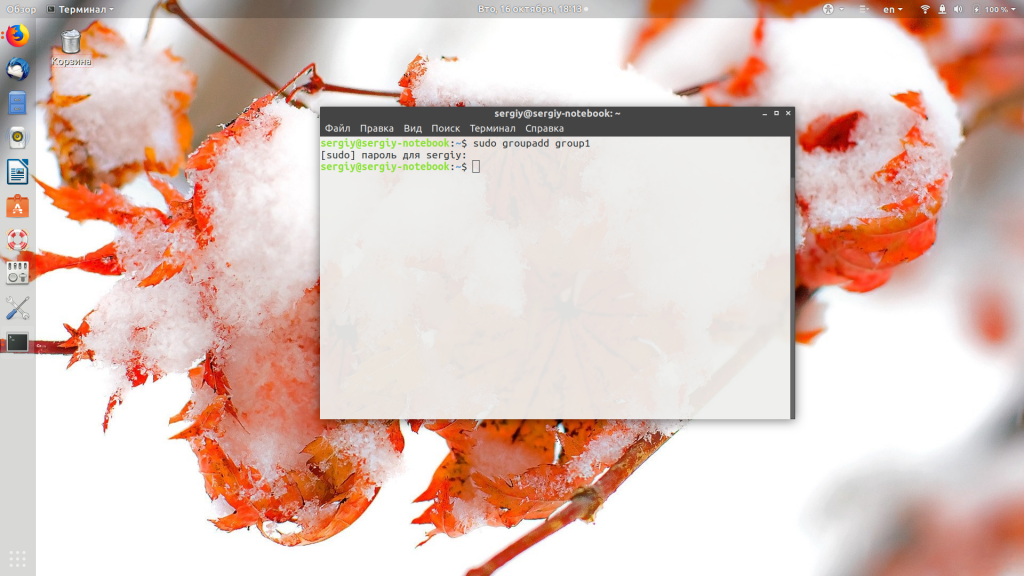
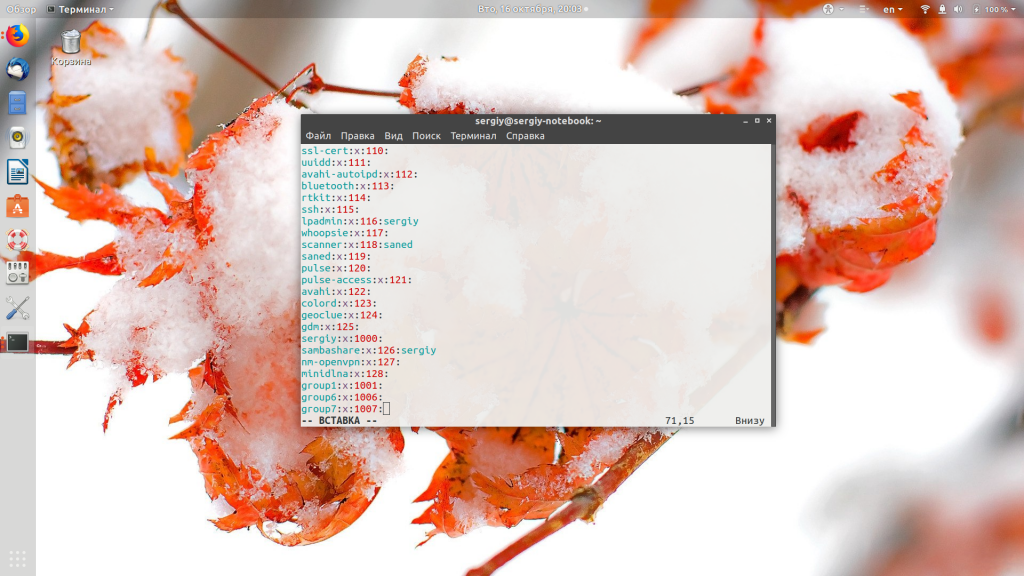
Теперь вы можете убедится, что группа была добавлена в файл /etc/group:
cat /etc/group | grep group1

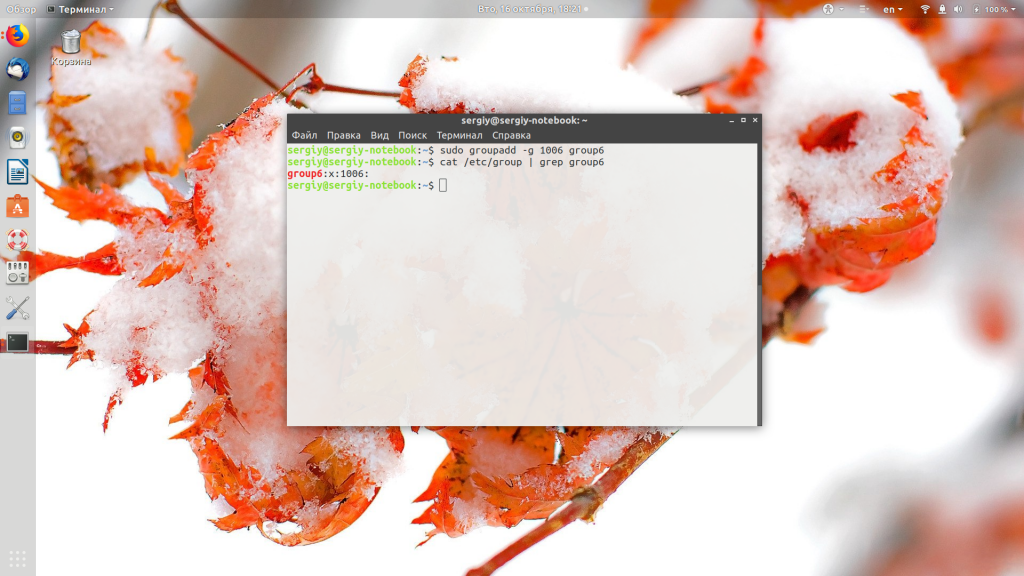
Система создала группу с GID 1001. Вы можете вручную указать GID вашей группы с помощью опции -g;
sudo groupadd -g 1006 group6
Также есть возможность задать пароль для группы. Он служит для того, чтобы пользователи, не состоящие в группе, смогли получить к ней доступ с помощью команды newgrp. Эта команда делает пользователя участником указанной группы до конца сеанса. Из соображений безопасности этот метод использовать не рекомендуется, поскольку один пароль будут знать несколько пользователей. Чтобы создать группу с паролем, сначала создаём пароль командой:
perl -e ‘print crypt(«12345», «xyz»),»\n»‘
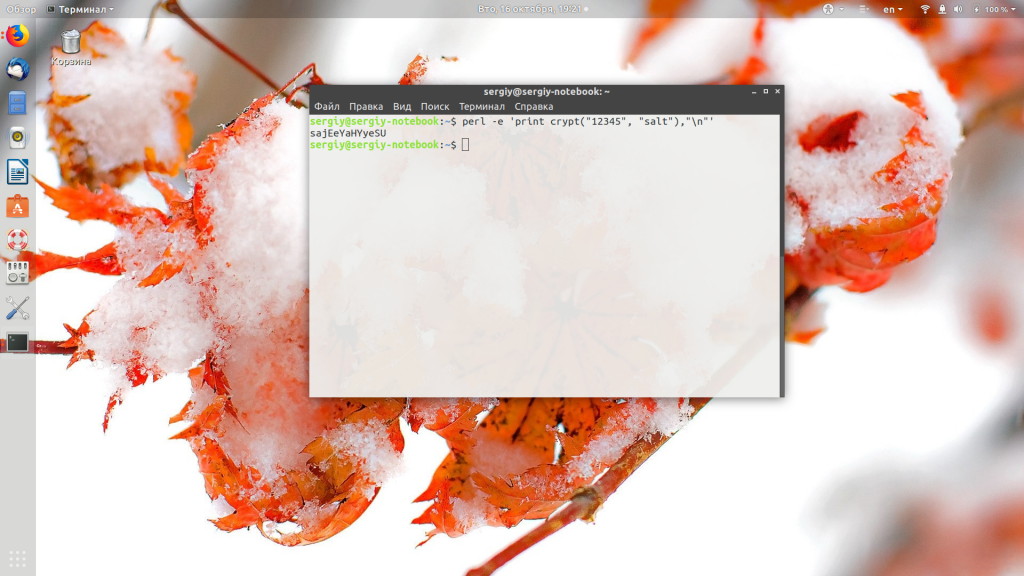
Здесь xyz — это случайная комбинация символов для увеличения надёжности пароля, а 12345 — ваш пароль. Мы должны передать утилите именно зашифрованный пароль, если передать его в открытом виде, то ничего работать не будет. Теперь создаём группу с только что полученным паролем:
sudo groupadd -p sajEeYaHYyeSU group7

Затем можно попытаться получить временный доступ к ресурсам группы с помощью newgrp:
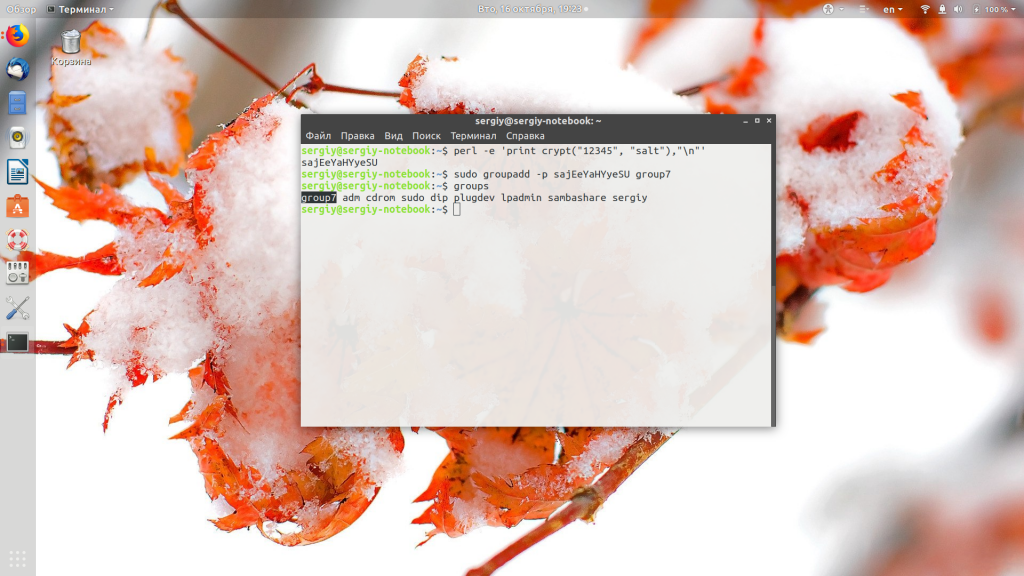
Нам надо ввести пароль, который мы раньше шифровали, и теперь до конца сеанса наш пользователь находится в группе. Если вы хотите добавить пользователя в группу навсегда, то надо использовать команду usermod:
sudo usermod -aG group7 имя_пользователя
Создание группы Linux вручную
Если вы не хотите создавать группу с помощью команды, это можно сделать, просто редактируя конфигурационные файлы. Все группы, которые существуют в системе, находятся в файле /etc/group. Если мы хотим добавить новую, достаточно добавить строчку с таким синтаксисом:
имя_группы : х : gid : список_пользователей
Разберём более подробно, какой параметр за что отвечает:
- имя_группы — имя, которое будет использоваться для операций с группой;
- x — заглушка пароля группы, пароль указывается в файле /etc/gshadow, если в этом есть необходимость;
- gid — идентификатор группы;
- список_пользователей — пользователи, разделённые запятыми, которые входят в группу.
Таким образом, чтобы создать группу group7, достаточно добавить строку:
Всё. Теперь нашу группу можно использовать, например, добавим в неё пользователя:
usermod -aG group7 имя_пользователя
Вы уже знаете, как создать группу пользователей linux двумя способами, теперь разберёмся, как её удалить.
Как удалить группу в Linux
Если вы создали группу неправильно или считаете, что она не нужна, то её можно удалить. Для этого используйте:
Только ни в коем случае не удаляйте системные группы, они нужны и используются системой, а их удаление может сломать работу некоторых программ.
Выводы
В этой небольшой статье мы рассмотрели создание группы в Linux, а также то, как удалить созданную группу. Как видите, это довольно просто. Ели у вас остались вопросы, спрашивайте в комментариях!
Обнаружили ошибку в тексте? Сообщите мне об этом. Выделите текст с ошибкой и нажмите Ctrl+Enter.
Linux User Groups Explained: How to Add a New Group, a New Group Member, and Change Groups

Linux allows multiple users to have access to the system at one time. Setting permissions protects users from each other. Users can be assigned to groups that are created for users who share privilege, security, and access. Files and devices may be granted access based on a specific user or a group of users.
Groups are often used to give members certain permissions to modify a file or directory.
The two main types of groups are primary groups and secondary groups. A user’s primary group is the default group the account is associated with. Directories and files the user creates will have this Group ID. A secondary group is any group(s) a user is a member of other than the primary group.
Creating groups
Let’s create two groups called «writers» and «editors». Use the groupadd command like this ( You may have to use sudo at the beginning so you have the appropriate permission to create a group):
groupadd writers groupadd editorsCreating users
You may already have users to add to your group. If not, here is the basic syntax to create a user with the useradd command:
Here is the command to create a user named «quincy». The -m will create the user’s home directory to match the username. The -p p4ssw0rd creates a password for the user of «p4ssw0rd».
useradd -m quincy -p password
The user will be able to change their password with the passwd command. They will have to enter their current password and then their new password.
Adding a user to a group
You can use the usermod command to add a user to a group. Here is how to add the user «quincy» to the group «writers». The -a parameter means «append» and the -G parameter adds a group as a secondary group.
usermod -a -G writers quincy
When a user is created with the adduser command, the user is automatically assigned to a primary group with the same name as the username. So currently the user «quincy» has a primary group of «quincy» and a secondary group of «writers».
You can also add a user to many groups at once by separating the group names with commas. -G group1,group2,group3 .
The following command changes the primary group of the user quincy to «editors»:
Removing a user from a secondary group
To remove a user from a secondary group you need to overwrite the current groups of a user with a new set of groups that does not contain the group that is being removed.
First, use the id command to check what secondary groups a user belongs to:
Let’s say that this returns editors writers indicating that quincy is part of the «editors» and «writers» group. If you want to remove the «writers» group, use this command:
That command sets the secondary group of quincy to «editors». Since the -a flag was not used, the previous set of groups was overwritten.
Conclusion
You should now be ready to start managing users and groups. The next step is to determine which privileges each group will have.
How to Add Groups in Linux: The groupadd Command
Learn how to manage your linux system with the groupadd command to add groups and useradd to add users.

This blog post will discuss how to use the groupadd command in Linux. This command adds a new group to the system. Understanding how to use this command to manage your Linux system effectively is important. By the end of the post, you will know how to create groups and add users to the groups you make.
Sudo Privileges
The first step is to open the terminal. You can do this by pressing Ctrl+Alt+T on your keyboard.
You cannot add a group without sudo privileges. Therefore, you must use the Sudo command to gain access or log in as a root user. To do this, type:
Enter your password when prompted.
Once you have access, you can manage your system.
groupadd command
We add groups using the groupadd command, followed by the name of the group you want to add.
The syntax for the command is:
groupadd [options] groupname If we wanted to add a group called «geekbits», we would type:
OR: use sudo if not a root user.
To confirm that the group was added successfully, run this command:
redis:x:119: ssl-cert:x:120:postgres postgres:x:121: superman:x:1001: `geekbits:x:1002:` As you can see the group «geekbits» was added successfully.
Creating Users : Useradd command
To create a user, we use the useradd command followed by the user’s name.
Let’s confirm the user add was successful.
j4y:x:1000:1000. /home/j4y:/bin/bash redis:x:112:119::/var/lib/redis:/usr/sbin/nologin postgres:x:113:121:PostgreSQL administrator. /var/lib/postgresql:/bin/bash superman:x:1001:1001::/home/superman:/bin/sh `grandmaster:x:1002:1003::/home/grandmaster:/bin/bash` Now that the user «grandmaster» was added successfully, Let’s see how to add users to groups.
Adding users to a group
New user:
To add a new user to a group, we use the useradd command with -G flag followed by the group’s name and then the user’s name.
useradd -G [group name] [username] sudo useradd -G geekbits jeff ssl-cert:x:120:postgres postgres:x:121: superman:x:1001: geekbits:x:1002:`jeff` As you can see, the geekbits group has a new user «jeff.»
Existing user:
We add existing users to a group using the usermod command.
usermod -G [group name] [username] sudo usermod -G geekbits grandmaster We use the -G option to specify the group to which we want to add the user.
ssl-cert:x:120:postgres postgres:x:121: superman:x:1001: `geekbits:x:1002:jeff,grandmaster` And that’s it! You have successfully added a new group to your Linux system (geekbits) and added users (jeff, grandmaster) to the group.
Remember, you can only add groups if you have sudo privileges or be logged in as root. If you need help managing your groups, feel free to contact us for assistance. We’re always happy to help!
If you enjoy our content, please consider buying us a coffee to support our work:
I’m a tech enthusiast interested in everything computer-related, from hardware to operating systems to programming. I aim to share my expertise with the rest of the world.