- Как создать пользователя Linux
- Создание пользователя в Linux
- Команда useradd
- Создание нового пользователя linux в GUI
- Выводы
- Linux: How to Add Users and Create Users with useradd
- Create a user
- Add a password
- Other common options
- Home directories
- Shell
- Putting it all together
- Read the Fine Manual
- Easily Create User With Password with one line command in Linux
- Add a user to Linux the usual way.
- Linux add user with password one line
Как создать пользователя Linux
Основу управления правами доступа в Linux и уровнем привилегий в Linux составляют именно пользователи. Изначально, еще при проектировании системы существовал пользователь root, которому позволено выполнять любые действия и другие пользователи, права которых настраиваются с помощью вступления их в группы Linux и установки прав на каталоги.
Многопользовательская архитектура, одна из первых особенностей Linux, которая существует еще с зарождения системы. В системе могут работать одновременно множество пользователей благодаря удаленному входу, а также пользователи используются для запуска определенных сервисов. В этой статье мы рассмотрим как создать пользователя linux, рассмотрим способ через терминал и в графическом интерфейсе.
Создание пользователя в Linux
Вся информация о пользователях находится в файле /etc/passwd. Мы могли бы создать пользователя linux просто добавив его туда, но так делать не следует, поскольку для этой задачи существуют специальные утилиты. Одна из таких утилит, это useradd. Рассмотрим ее подробнее.
Команда useradd
Это довольно простая команда, которая есть во всех дистрибутивах Linux. Она позволяет зарегистрировать нового пользователя или изменить информацию об уже имеющемся. Во время создания можно даже создать домашний каталог пользователя и скопировать в него системные файлы. Рассмотрим синтаксис команды:
$ useradd опции имя_пользователя
Все довольно просто, дальше нам нужно рассмотреть основные опции команды, с помощью которых вы будете настраивать нового пользователя:
- -b — базовый каталог для размещения домашнего каталога пользователя, по умолчанию /home;
- -c — комментарий к учетной записи;
- -d — домашний каталог, в котором будут размещаться файлы пользователя;
- -e — дата, когда учетная запись пользователя будет заблокирована, в формате ГГГГ-ММ-ДД;
- -f — заблокировать учетную запись сразу после создания;
- -g — основная группа пользователя;
- -G — список дополнительных групп;
- -k — каталог с шаблонами конфигурационных файлов;
- -l — не сохранять информацию о входах пользователя в lastlog и faillog;
- -m — создавать домашний каталог пользователя, если он не существует;
- -M — не создавать домашнюю папку;
- -N — не создавать группу с именем пользователя;
- -o — разрешить создание пользователя linux с неуникальным идентификатором UID;
- -p — задать пароль пользователя;
- -r — создать системного пользователя, не имеет оболочки входа, без домашней директории и с идентификатором до SYS_UID_MAX;
- -s — командная оболочка для пользователя;
- -u — идентификатор для пользователя;
- -D — отобразить параметры, которые используются по умолчанию для создания пользователя. Если вместе с этой опцией задать еще какой-либо параметр, то его значение по умолчанию будет переопределено.
Теперь, когда вы знаете основные необходимые нам параметры утилиты мы можем перейти к разбору того, как выполняется создание нового пользователя linux. Сначала давайте посмотрим какие параметры будут применены для пользователя по умолчанию:
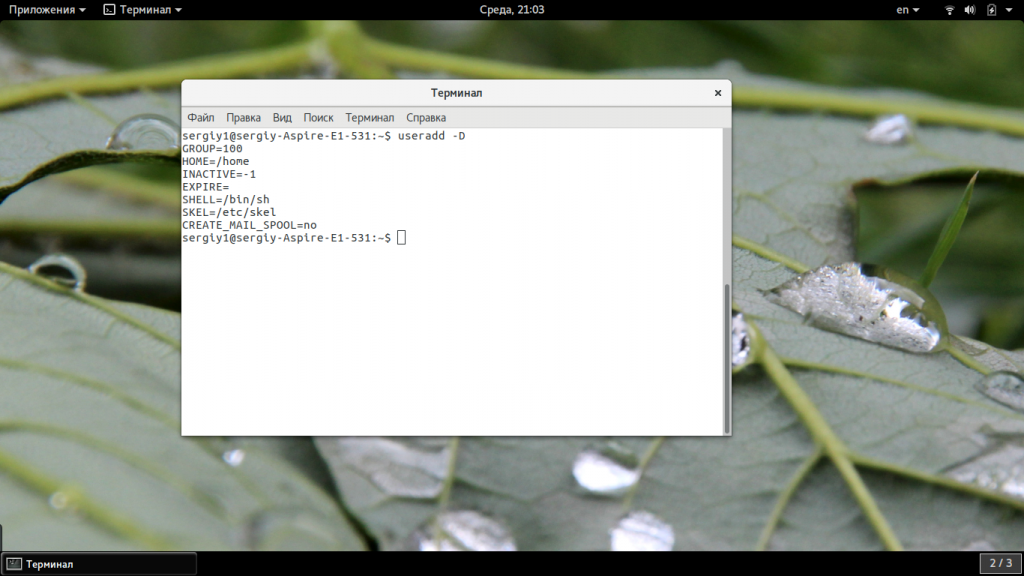
Как видите, по умолчанию домашний каталог пользователя будет создан в /home и будет использоваться оболочка /bin/sh. Теперь создадим минимального пользователя с минимальными настройками:
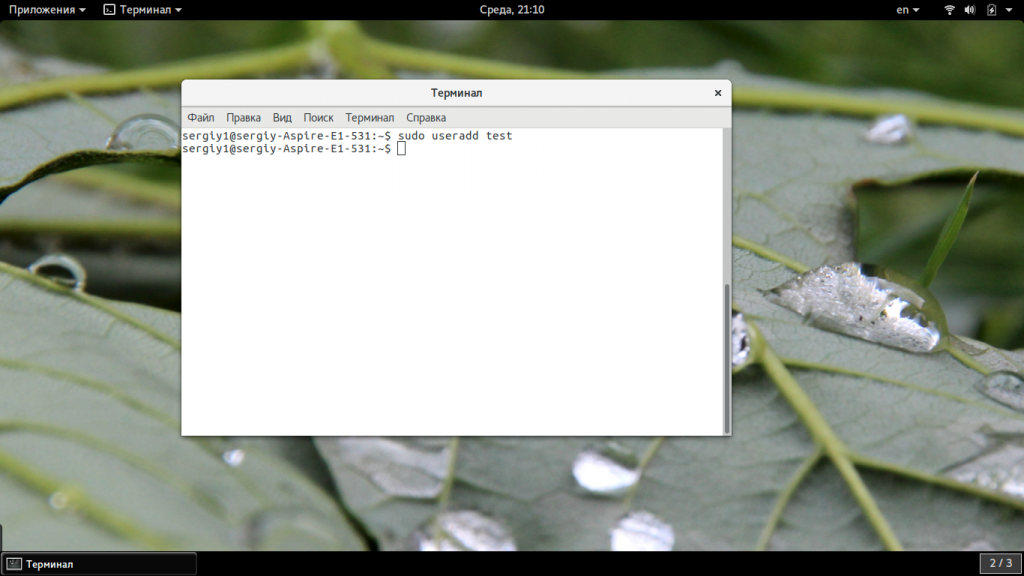
Был создан самый простой пользователь, без оболочки и пароля, а также без групп. Теперь немного усложним задачу и создадим пользователя с паролем и оболочкой /bin/bash:
sudo useradd -p password -s /bin/bash test1
Для того чтобы получать доступ к системным ресурсам пользователю нужно быть участником групп, у которых есть доступ к этим ресурсам. Дополнительные группы пользователя задаются с помощью параметра -G. Например, разрешим пользователю читать логи, использовать cdrom и пользоваться sudo:
sudo useradd -G adm,cdrom,wheel -p password -s /bin/bash test2
Также, можно установить дату, когда аккаунт пользователя будет отключен автоматически, это может быть полезно для пользователей, которые будут работать временно:
sudo useradd -G adm,cdrom,wheel -p password -s /bin/bash -e 01:01:2018 test2
Некоторых пользователей интересует создание пользователя с правами root linux, это очень просто делается с помощью useradd, если комбинировать правильные опции. Нам всего лишь нужно разрешить создавать пользователя с неуникальным uid, установить идентификатор в 0 и идентификатор основной группы тоже в 0. Команда будет выглядеть вот так:
sudo useradd -o -u 0 -g 0 -s /bin/bash newroot

Пожалуй, это все основные примеры как добавить пользователя linux. Дальше нам осталось взглянуть только на работу в графическом интерфейсе.
Создание нового пользователя linux в GUI
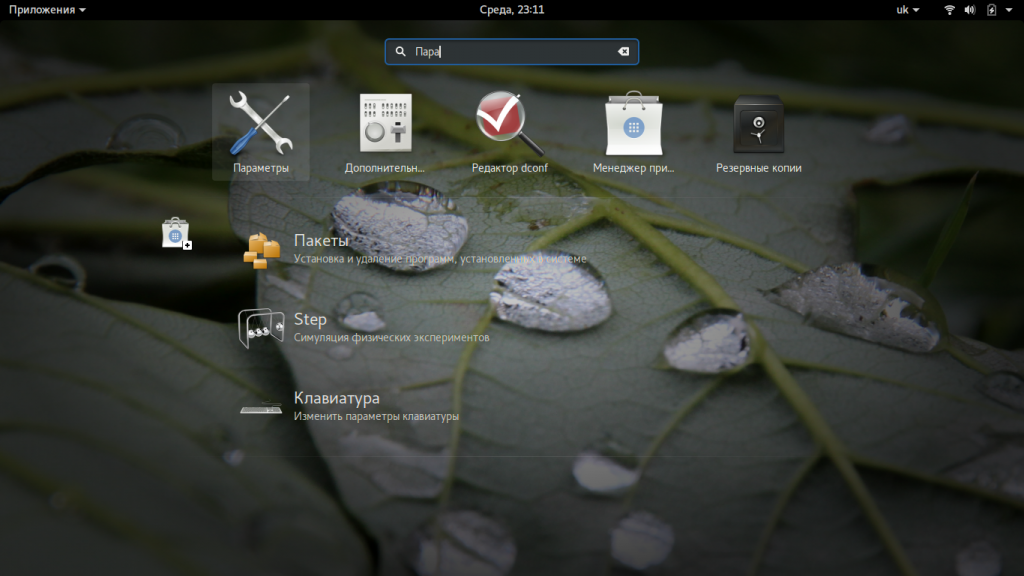
В графическом интерфейсе системы создать нового пользователя linux еще проще. Рассмотрим окружение Gnome, хотя и в KDE тоже есть аналогичная функция. Войдите в главное меню и откройте параметры системы:
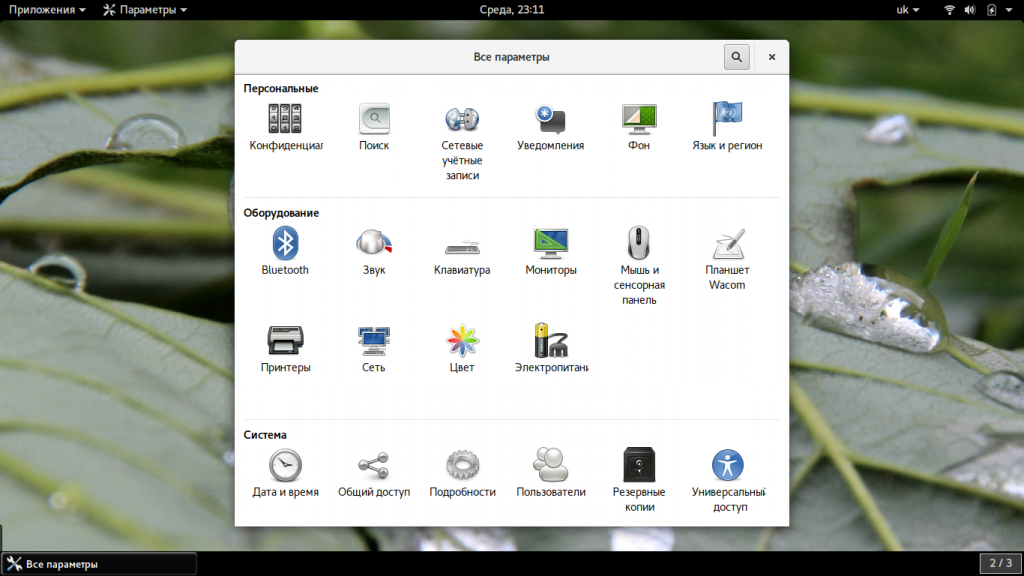
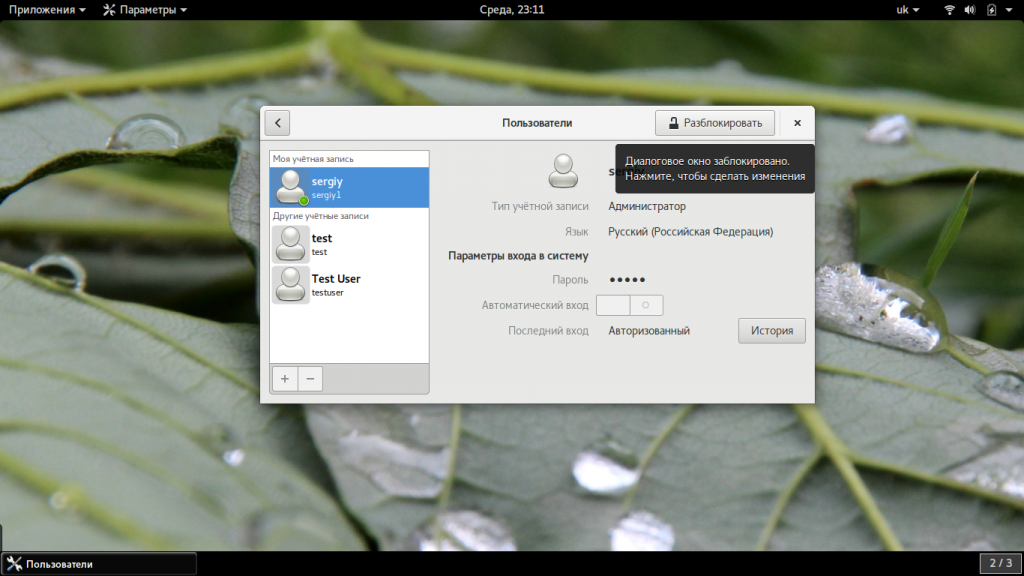
Затем откройте «Пользователи»:
Поскольку утилита запущена от имени обычного пользователя вы ничего не можете сделать. Поэтому нажмите кнопку «Разблокировать»:
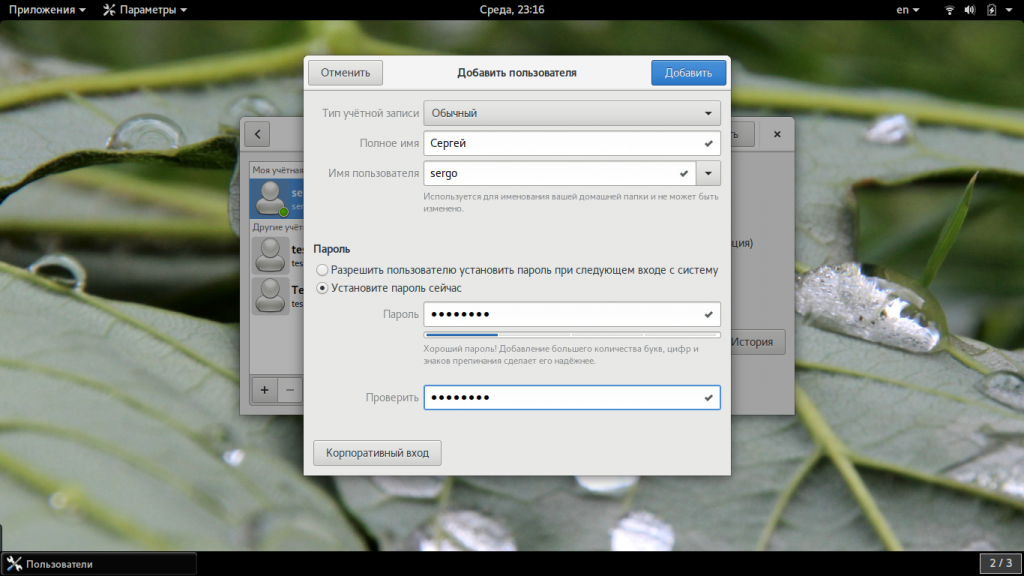
Только после этого используйте кнопку со знаком плюс для создания нового пользователя Linux:

В открывшемся окне нужно заполнить все поля. Но тут намного больше ограничений, чем в методе через терминал. Вы не можете задать слишком простой пароль, а также нельзя настроить группы. Можно только указать будет ли пользователь включен в группу wheel с помощью выбора типа пользователя — администратор или обычный:
После этого создание пользователя linux завершено, новый пользователь появится в списке.
Выводы
В этой статье мы рассмотрели как создать пользователя linux с помощью терминала или в графическом интерфейсе системы. Оба способа имеют свои преимущества. Например, способ в терминале намного гибче, но в то же время графический способ дает больше контроля над процессом. Если у вас остались вопросы, спрашивайте в комментариях!
Обнаружили ошибку в тексте? Сообщите мне об этом. Выделите текст с ошибкой и нажмите Ctrl+Enter.
Linux: How to Add Users and Create Users with useradd

Jackson Bates

If more than one person is using your Linux machine at home, or you are managing a server that provides access to multiple users, the useradd command is essential for creating users.
Also, many of the services you use as a developer may require their own user accounts to function. So even as a solo dev on your own machine, you may find yourself reaching for these commands when you install MySQL or something similar.
You can get a full overview of the various options available to you by viewing the man page for the utility: man useradd
But if that is overwhelming, here’s a breakdown of some of the common options you might use when creating a user.
Create a user
The simple format for this command is useradd [options] USERNAME .
For example useradd test (as the root user — prefix with sudo if you are not logged in as root).
This will create a user called test, but it’s a limited operation and will not create other useful things like their home directory or password!
Add a password
You then add a password for the test user by using the passwd command: passwd test . This will prompt you to enter a password for the user.
There is an option for adding an encrypted password via the -p option on useradd , but this is not recommended for security purposes.
Note that the -p option doesn’t allow you to input a plaintext password, it expects you to encrypt it first. This is intentionally difficult, because you should not do it! Just use the passwd command.
Other common options
Home directories
In order to create a user with the default home directory use the following option:
This user now has a /home/test directory.
To change the home directory, you can pass an extra option to modify this, for example:
useradd -m -d /alternate test
Shell
By default, your created users will likely have the default login shell bin/bash or bin/sh, which will be defined in /etc/default/useradd .
You can override this default with the -s option:
Putting it all together
To construct the whole command, you put the options in one after another — the order does not matter — and end with the username you wish to create.
So creating a user with a home directory and a customized shell would look like this:
useradd -m -s /usr/bin/zsh user
And then you would add a password for the user: passwd user
Read the Fine Manual
Now that you’ve seen the basics of what this tool can do, hopefully the man page is a little more navigable.
man useradd will show you how to add things like expiry dates on the account, assign groups, and so on.
Jackson Bates
Senior Software Engineer and consultant freelancer in Melbourne, Australia. Formerly a teacher.
If this article was helpful, tweet it .
Learn to code for free. freeCodeCamp’s open source curriculum has helped more than 40,000 people get jobs as developers. Get started
freeCodeCamp is a donor-supported tax-exempt 501(c)(3) charity organization (United States Federal Tax Identification Number: 82-0779546)
Our mission: to help people learn to code for free. We accomplish this by creating thousands of videos, articles, and interactive coding lessons — all freely available to the public. We also have thousands of freeCodeCamp study groups around the world.
Donations to freeCodeCamp go toward our education initiatives, and help pay for servers, services, and staff.
Easily Create User With Password with one line command in Linux
Linux requires knowledge about terminal and commands and unlike Windows 10 you can do everything with a bunch of keystrokes. Adding users in Linux is rather simple but command based. In this article, we will see how to create user with password on Linux and one line commands to add a user with password’.
When we talk about Linux, the first thing to consider is Ubuntu, which is a fairly popular operating system. Apart from this, many operating systems are based on Ubuntu since there are segments of people who don’t like the way Ubuntu works and looks. Some operating systems are such that are made for very specific users such as Elementary OS.
Whatever new user account you create, a new folder creates under /Home/username.
Add a user to Linux the usual way.
For this, you will have to open the terminal. You can open the terminal by going to the Task Bar — you will find the terminal app in applications list. There are some shortcuts that you can use to open the terminal window.
When the terminal window opens, you have to type the comment given below following by a username.
useradd [username] replace username with something more human.
The new user account has to be secured, so it’ll be locked which require you to set a new password.
passwd [password] This command will set given password for the user you created.
Example, I would like to have a new user account with the name “Devendra” and “qf007” password.
# useradd Devendra
# passwd qf007
- -c comment: Add a comment for user.
- -e yyyy-mm-dd: Date for the account to be disabled
- -f days: Set expiration date 0 to disable account with password expiration. -1 for not disable the account.
- -M: Do not create the home directory
Load more options you can choose by typing the command.
Linux add user with password one line
Linux users are demanding, many would ask for one line command to add username with password and fortunately, there is a way to do this.
In Linux, useradd is used to configure everything including username and password. For security reasons, the password should in encrypted, and you can use openssl for making md5 passwords, this helps to specify the password if it’s in plain text.
useradd -u ABCDE -g users -d /home/username -s /bin/bash -p $(echo mypasswd | openssl passwd -1 -stdin) username-u userid
-d groupname
-d user home directory
-s default shell
-p password
Openssl passwd will generate hash of mypasswd to be used as secure password.
To exclude this from history, unite a space before the command to prevent is from history. If you have to do the corresponding on lots of machines, generate the password once and type in the command.
useradd -u 12345 -g users -d /home/username -s /bin/bash -p '$1$NNfXfoym$Eos.OG6sFMGE8U6ImwBqT1' usernameadduser --uid 3434 --password my_password my_loginPretty much everything was given in this article to create a user with password in Linux, even with a single line code-that’s something. If you like Linux, hop on and subscribe to our channel. Do you have more Linux tips, why not comment down them, below.
Since you are here…
I’ve got a small favor to ask. This is an independent site, and producing content takes a lot of hard work and time. Although many people are reading Quickfever, many use adblocker.. And unlike many other sites, there is no paywall blocking. So you can see why your help is needed. If everyone who finds this website useful and helps to support it, the future would be much more secure. Thank you.
If you use adblocker, please disable it for this site.
$0 raised so far by 0 people.