- Установка Alpine Linux
- Установка Alpine Linux
- Шаг 1. Загрузка образа
- Шаг 2. Запись образа
- Шаг 3. Настройка BIOS
- Шаг 4. Начало установки
- Шаг 5. Раскладка клавиатуры
- Шаг 6. Имя компьютера
- Шаг 7. Настройка сети
- Шаг 8. Пароль пользователя
- Шаг 9. Настройка прокси
- Шаг 10. Выбор зеркала репозиториев
- Шаг 11. Настройка SSH
- Шаг 12. Выбор места установки
- Шаг 13. Завершение установки
- Шаг 14. Вход в систему
- Шаг 15. Установка редактора nano
- Шаг 16. Редактирование файла с репозиториями и обновление
- Шаг 17. Установка графического интерфейса
- Шаг 18. Устанавливаем окружение xfce4
- Шаг 19. Устанавливаем файловый менеджер
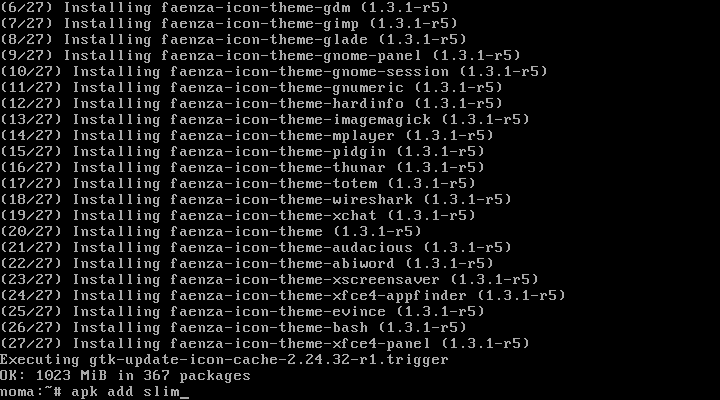
- Шаг 20. Набор тем и иконок
- Шаг 21. Устанавливаем менеджер входа
- Шаг 22. Запуск сервиса D—Bus
- Шаг 23. Завершение установки.
- Alpine Linux first steps
- Why not Alpine Linux?
- Highly recommended reading
- Installation
- Diskless mode
- Default Login for Alpine on Raspberry Pi
- Setup procedure
- Storing Configs
- Persisting changes
- Interesting things to know
- Resources
- Search
- Recent Posts
- Recent Comments
- Categories
Установка Alpine Linux
Итак, что же мы знаем об Alpine Linux и зачем его устанавливать? Во-первых, он базируется на musl и BusyBox, во-вторых, это единственный независимый дистрибутив Linux предоставляющий безопасность в общих целях. Его разработка была предопределена концепцией обеспечения безопасности, а для защиты от вредоносного кода было решено использовать PaX и SSP.
Стоит отметить его необычно неприхотливые требования к ресурсам системы. Пакеты используются apk, но некоторые придется установить самостоятельно. Руководство, конечно же, присутствует на сайте дистрибутива, которому необходимо не более 8 МБ, а минимальная установка на диск требует не более 130 МБ свободного места. Для управления пакетами в Alpine используется apk. И некоторых пакетов, которые Вам будут нужны, по умолчанию не будет в Alpine.
Установка Alpine Linux
Шаг 1. Загрузка образа
Переходим по этой ссылке https://www.alpinelinux.org/downloads/ и качаем образ:
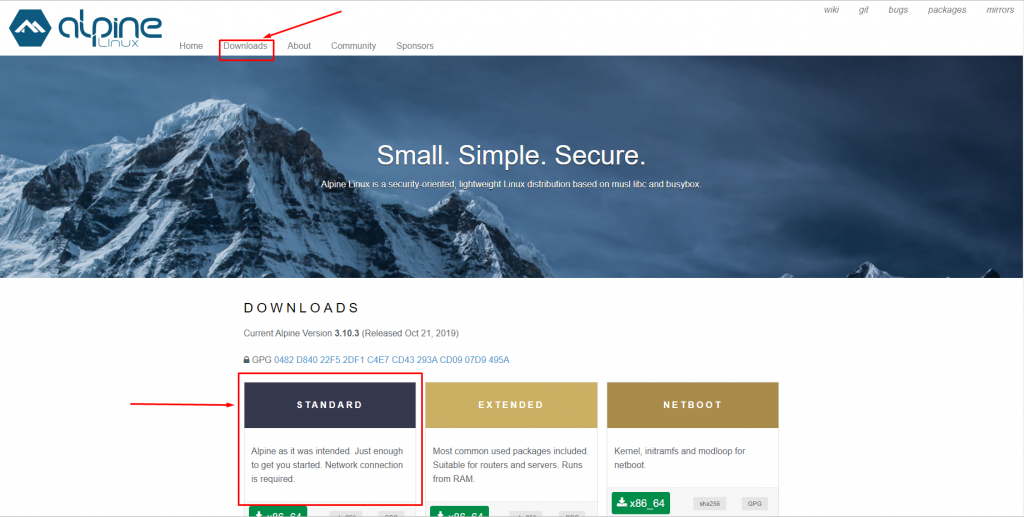
Нам нужен STANDARD.
Шаг 2. Запись образа
Все как обычно, — если у вас Linux, то качаем Unebootin; если у вас Windows, то качаем Rufus. Ссылки предоставил.
Шаг 3. Настройка BIOS
Перезагружаем компьютер и заходим в BIOS. Нам надо зайти во вкладку Boot и указать в пункте 1 st Boot Device вашу флешку. Затем сохраните настройки и перезагрузите компьютер.
Шаг 4. Начало установки
Заранее говорю, что все делается через командную строку.

Пишем для входа в командную оболочку:
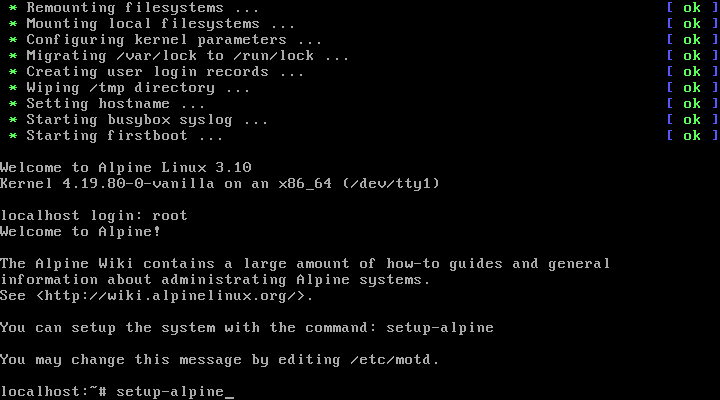
Таким образом мы запускаем процесс установки
Шаг 5. Раскладка клавиатуры
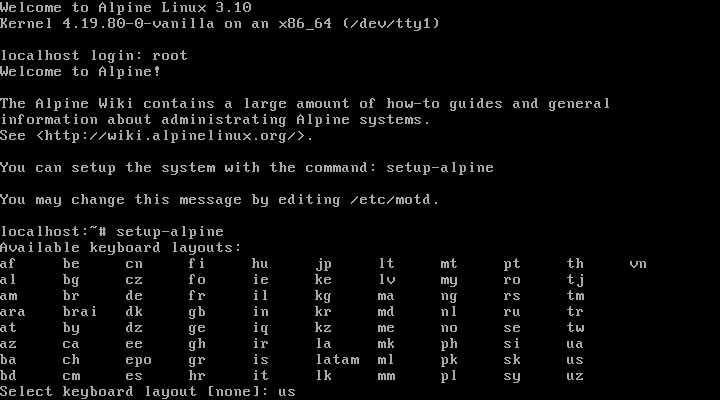
Выбираем раскладку из списка. В моем случае это:
Шаг 6. Имя компьютера
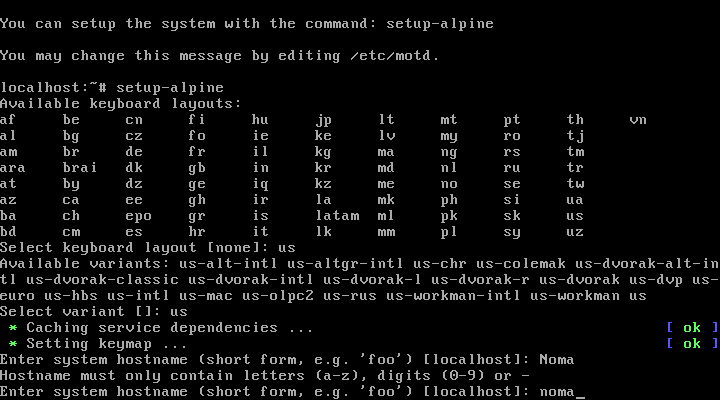
При указании имени компьютера обратите внимание на то, что следует использовать числа и символы нижнего регистра. Например, имя Noma я не смог указать, зато имя noma вполне проходит по параметрам.
Шаг 7. Настройка сети
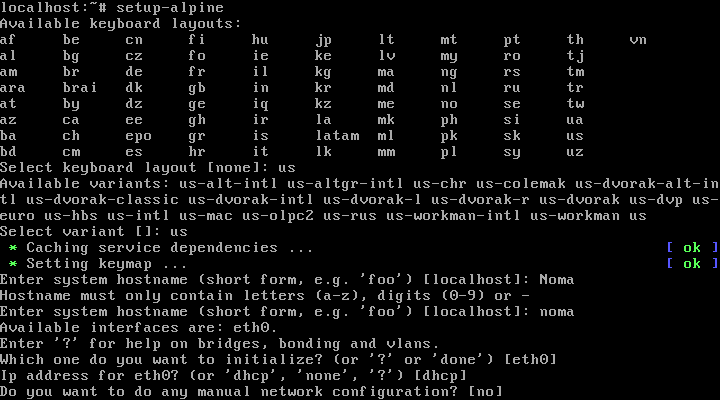
Сразу же после указания имени хоста нам предложат настройки, связанные с интернетом. Если у вас проводной интернет по DHCP, их просто пропускаем нажатием Enter. Все это можно настроить уже потом непосредственно в установленной системе.
Шаг 8. Пароль пользователя
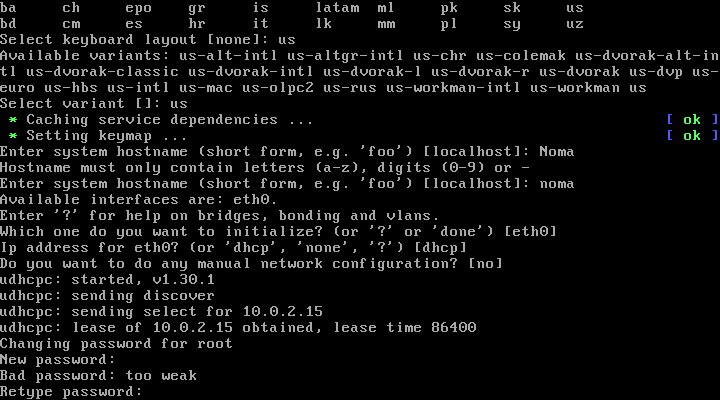
Указываем пароль для суперпользователя. Если он 6-значный, например, то вы получите предупреждение о том, что пароль слишком слабый, но это не мешает установке.
Шаг 9. Настройка прокси
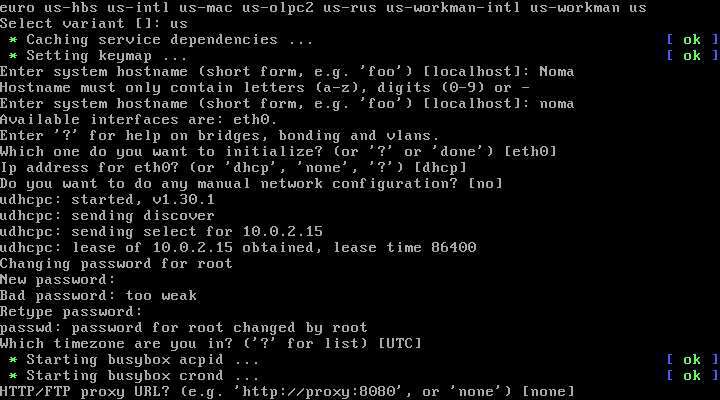
Далее вы можете установить прокси или просто пропустить. В моем случае я просто нажал Enter и пропустил этот пункт, так как все это тоже можно будет потом настроить, при необходимости.
Шаг 10. Выбор зеркала репозиториев
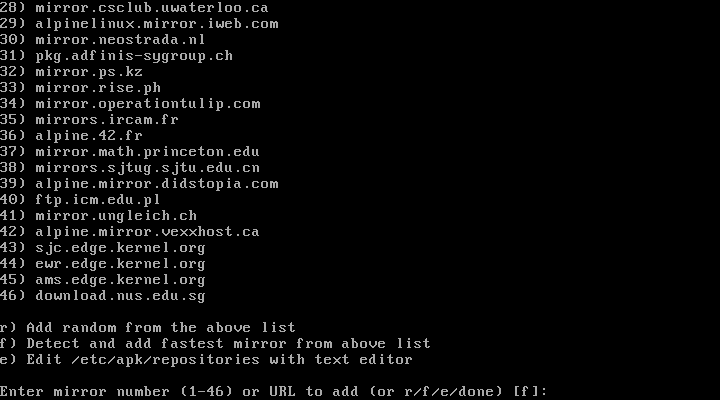
Вам дадут список зеркал, если вы этого не сделаете, то система будет проверять каждое и самостоятельно выберет наиболее подходящее.
Примечание для жителей Украины. Если вы не укажите зеркало, то рискуете попасть на Yandex, а с ним установка не получится, так как компания под санкциями. В вашем случае просто выберете любое другое.
Шаг 11. Настройка SSH
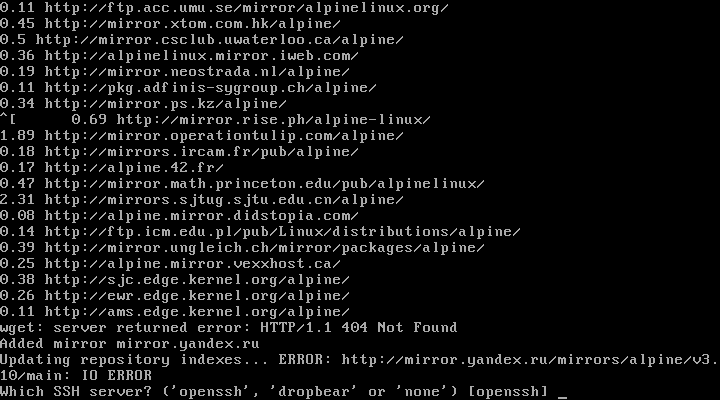
Если вы хотите, то можете установить и ssh сервер. И снова, на данном этапе это не является необходимым, и вы всегда сможете его поднять позже.
Шаг 12. Выбор места установки
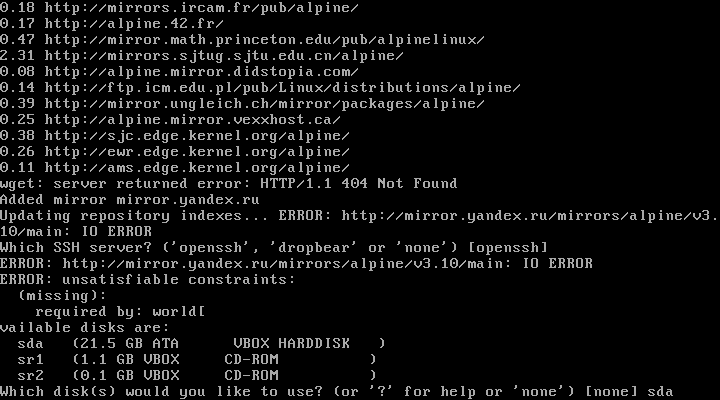
Система предложит выбрать любой из доступных дисков для установки ОС. Я указываю следующее:
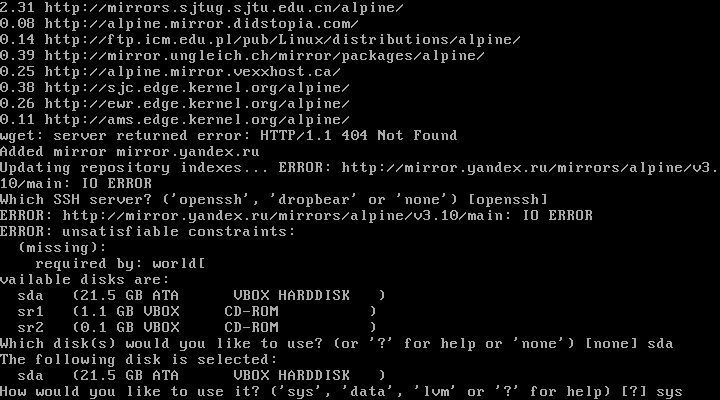
Далее вам надо выбрать для чего будет использоваться этот диск. Так как это системный диск, то я выбираю:
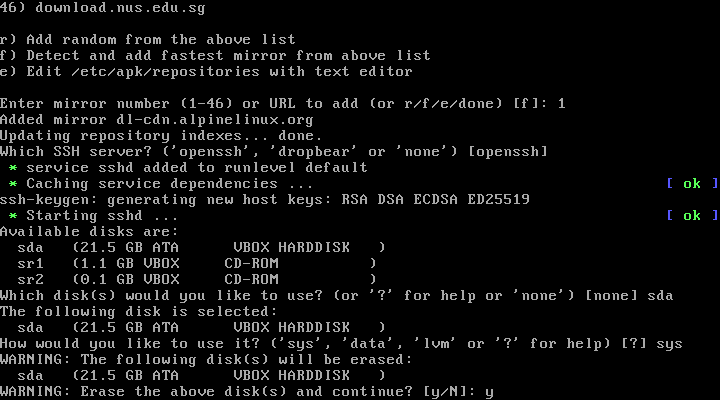
Получаем предупреждение о том, что все данные с выбранного диска будут удалены. Впрочем, ничего удивительного. Пишем:
Шаг 13. Завершение установки
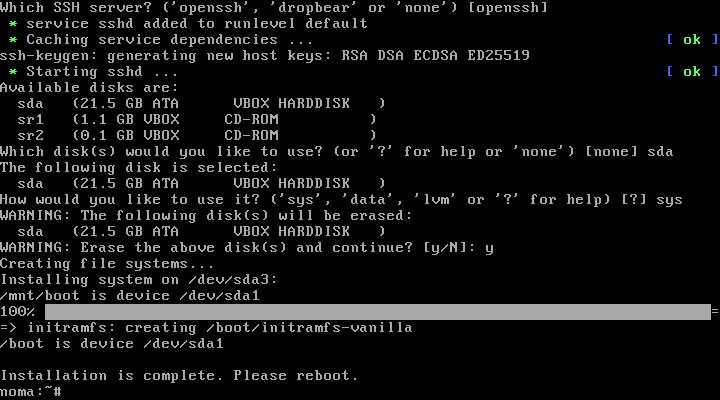
Когда установка Alpine Linux завершится, система попросит о перезагрузке. Для этого извлекаем носитель на котором система и перезагружаемся командой:
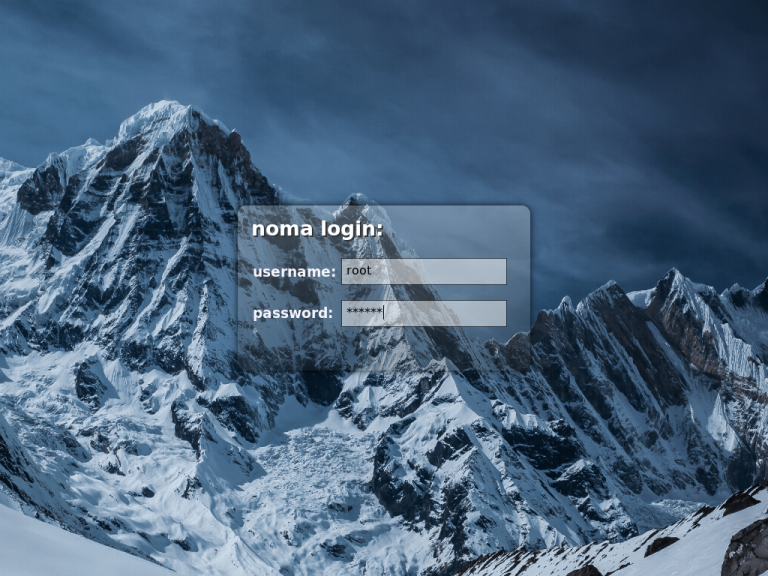
Шаг 14. Вход в систему
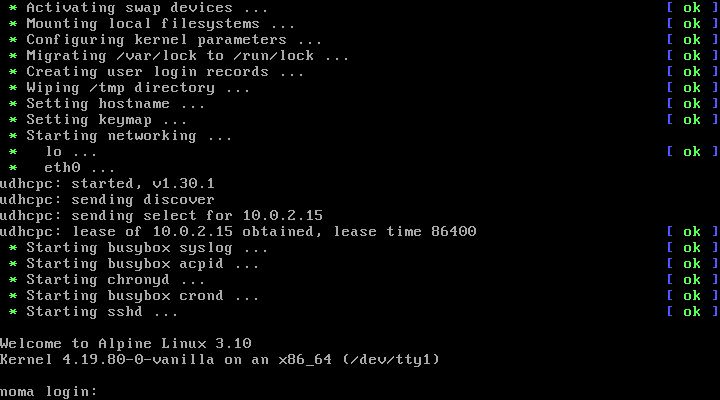
Далее пишем пароль, который ранее задавали.
Шаг 15. Установка редактора nano
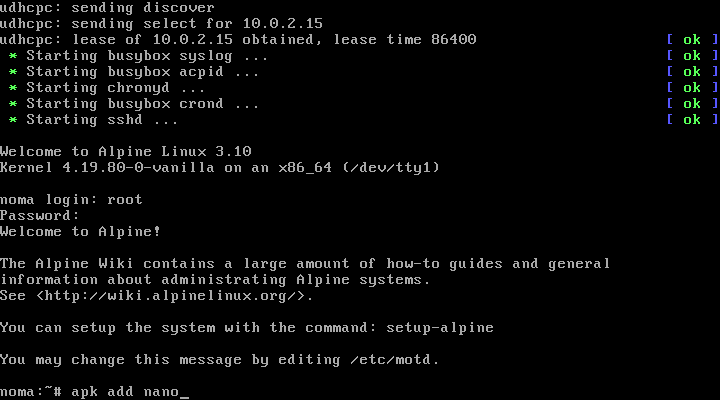
Так как у нас нет редактора, то мы установим. Это будет редактор Nano. Сделаем это с помощью команды:
Шаг 16. Редактирование файла с репозиториями и обновление
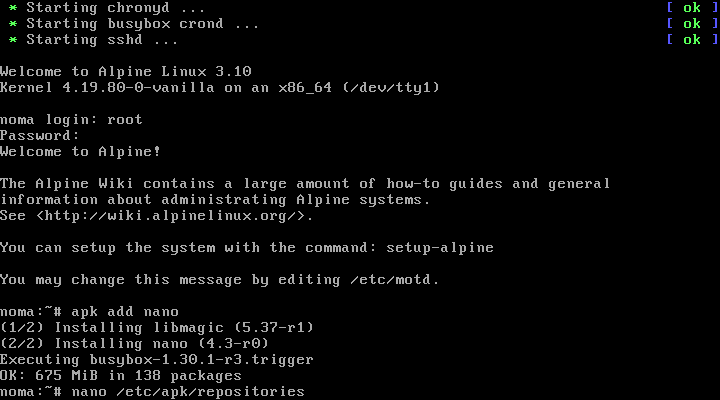
Теперь нам надо отредактировать файл репозиториев. Это позволит нам обновить систему и продолжить установку. Пишем:
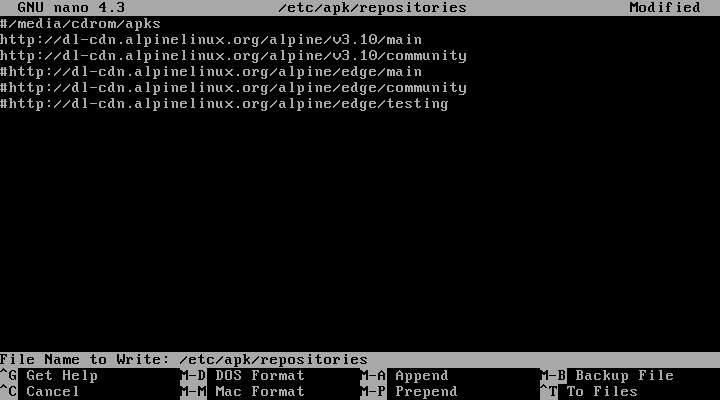
Чтобы получить доступ к репозиторию сообщества надо раскомментиовать третью строку:
Для этого удалите # перед ней. После жмем ctrl+o -> Enter -> ctrl+x. После всего пишем команду:
Шаг 17. Установка графического интерфейса
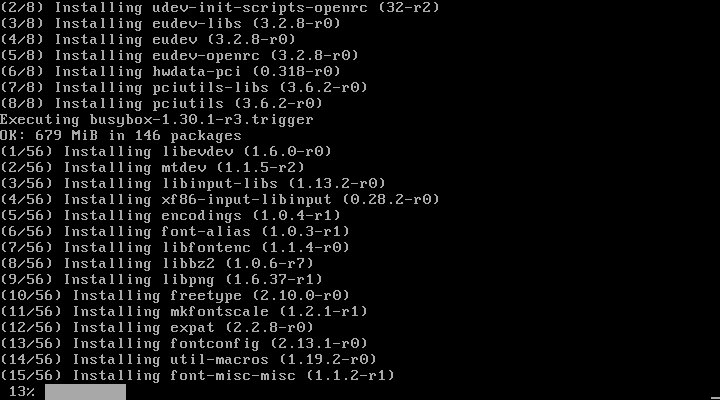
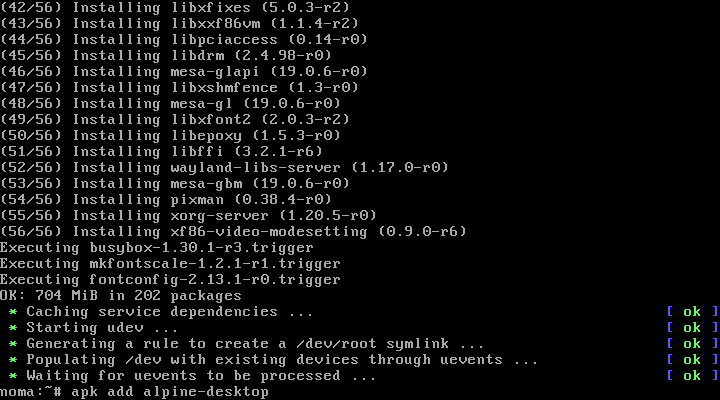
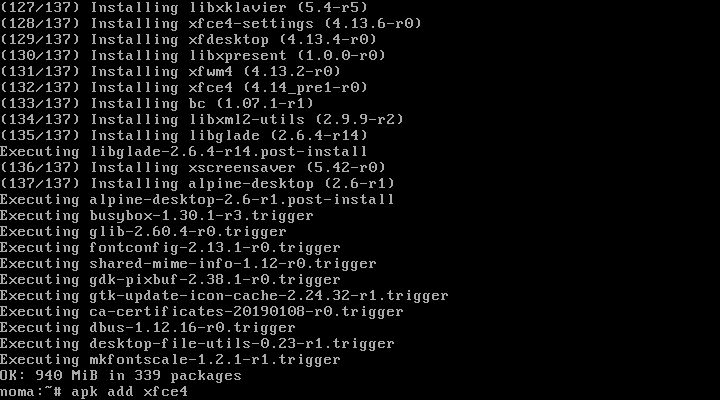
Шаг 18. Устанавливаем окружение xfce4
Шаг 19. Устанавливаем файловый менеджер
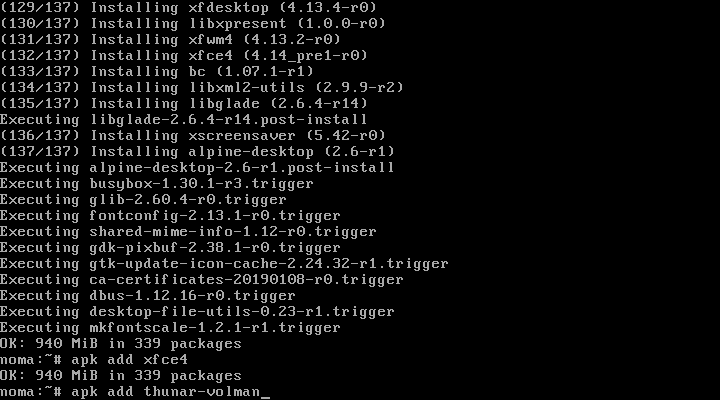
Достаточно тривиально, но проверено.
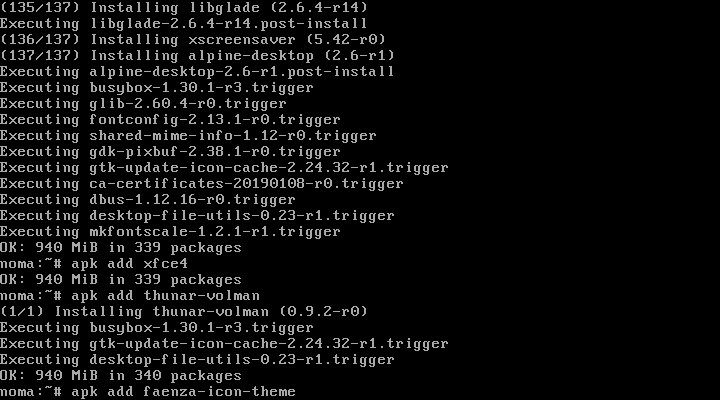
Шаг 20. Набор тем и иконок
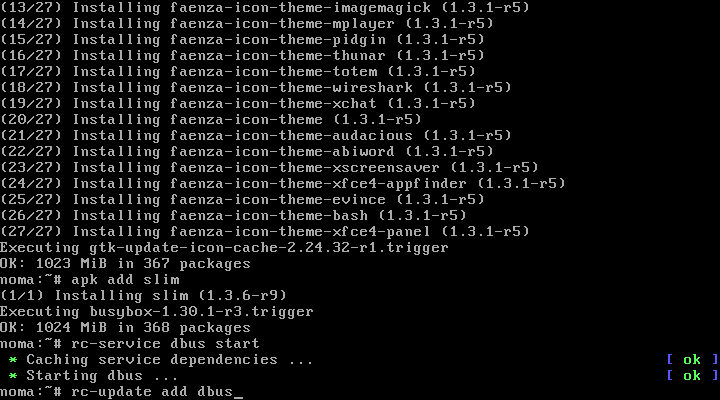
Шаг 21. Устанавливаем менеджер входа
Так как система является легковесной, то будем работать в направлении её преимуществ. Это ответ на вопрос: А почему Slim?.
Шаг 22. Запуск сервиса D—Bus

Чтобы приложения могли между собой взаимодействовать, нам надо запустить сервис межпроцессорного взаимодействия (IPC). Выполняем команду:
Работает, отлично. Теперь добавим его в автозагрузку?
Шаг 23. Завершение установки.
Это позволит нам перезагрузить устройство и войти в систему с графическим интерфейсом.
В поле username пишем root и указываем раннее заданный пароль. Ну а дальше рабочий стол.
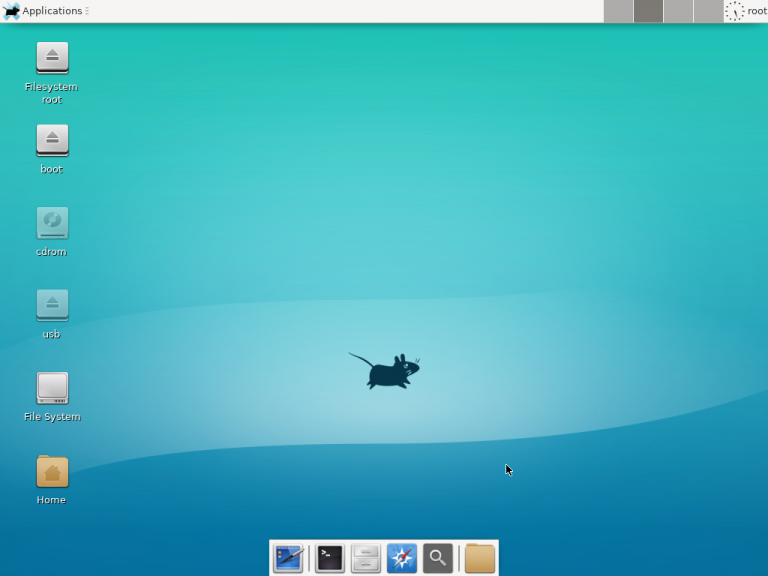
Теперь вы знаете как установить Alpine Linux, а также как минимально настроить систему, так, чтобы с ней можно было работать.
Обнаружили ошибку в тексте? Сообщите мне об этом. Выделите текст с ошибкой и нажмите Ctrl+Enter.
Alpine Linux first steps

Alpine Linux is often used for Docker containers. And it is also supported on the Raspberry Pi platform.
Why not Alpine Linux?
- it’s not recommended to start with Alpine for beginners – they should definitely use NOOBS or Raspbian
- Alpine assumes some level of Linux knowledge, and adds it’s own tools to manage the installation
- “big distributions” use glibc however – software compatiblity might be an issue.
Highly recommended reading
- https://wiki.alpinelinux.org/wiki/Alpine_Linux:Overview – explaining the different modes (sys, diskless, data), and general Alpine philosophy – read this first!
- https://wiki.alpinelinux.org/wiki/Raspberry_Pi – installation of Alpine on Raspberry Pi
- https://wiki.alpinelinux.org/wiki/Alpine_Linux_package_management – the apk utility
- https://wiki.alpinelinux.org/wiki/Alpine_local_backup – the lbu utility
- https://wiki.alpinelinux.org/wiki/Tutorials_and_Howtos – list of tutorials and Howto’s for Alpine
Installation
We recommend to use the armhf build, not the aarch64 one. As of writing this the most recent Alpine release is 3.8.1.
I have tested Alpine on the Pi 3 B+, and the Zero W, and am confident that it will run on Pi 1, 2 and 3.
- To ensure data integrity verify the SHA256 hash. On Windows this can be done using VisualHash
- extract the tar.gz file. On windows, this can be done using 7-zip
- extract the tar file as well (into it’s own directory)
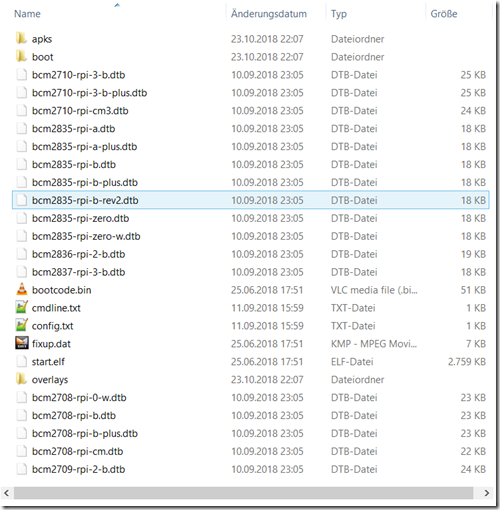
Extracting the tar file will give you the contents which need to be copied to the FAT32 partition of the SD card.
No other partitions are needed to start Alpine.
Remember, the Raspberry Pi needs a FAT partition as the first partition to boot properly.
Bonus tip: if you need formatting, the SD Card Association’s SD Formatter will do the trick on Windows.

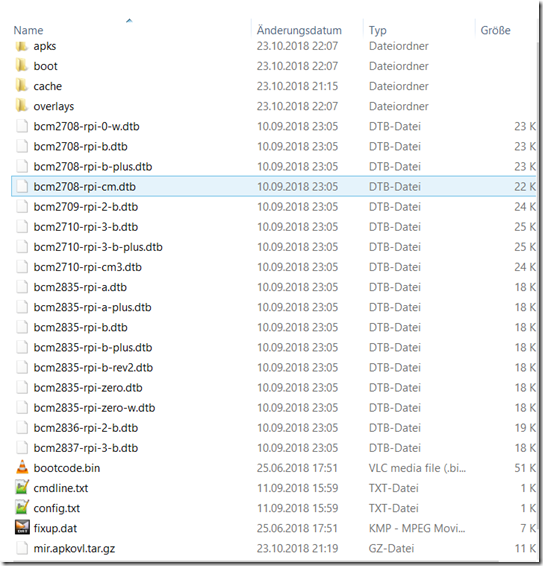
The screenshot shows a freshly installed Alpine Linux.
Diskless mode
The default installation mode for the Raspberry Pi is diskless mode.
In diskless mode, the SD card is only used initially to load the system (and your apkovl changes, see below) into a RAM filesystem.
You have to preserve modifications in between sessions using Alpine’s lbu (local backup) utility.
Default Login for Alpine on Raspberry Pi
Boot up the Raspberry Pi with the Alpine SD card inserted.
The password is not necessary, after entering root and pressing enter, you will be logged in.
Setup procedure
hint: on the German keyboard layout the dash “-“ is on the “?” key.
- Alpine will suggest to set up a keyboard layout as the first step
- and then ask for the keyboard variant
I used “de” and “de-nodeadkeys”
- Alpine will ask for the system’s hostname
- Then you can set up networking
- you can set up networking for wired and wireless devices
Additional settings
- After this Alpine will ask you to set a new root password
- time zone
- e.g. Europe
- e.g. Berlin as sub-timezone
- Europe/Berlin will work as well.
- due to clock skew you might run into issues setting up a package mirror (no mirror can be added)
- to fix this problem run setup-alpine a second time once you have gone through it completely the first time
- you will get some warnings, as some services will already have been started.
Dropbear will save some RAM, but it has less features. We recommend OpenSSH.
Alpine will now generate SSH host keys for you.
Storing Configs
An important step in the setup procedure is to set where configuration changes are going to be saved.
mmcblk0p1 is the pre-selected default
This is the first partition (FAT32 partition) of the Raspberry Pi’s SD card.
After that, Alpine will suggest a local cache directory for apk packages, also on the SD card: /media/mmcblk01p/cache
Important note: Alpine will not save any changes in the diskless mode, even the setup which you just completed. You need to use the lbk utility to persist these changes!
Updating the system
Quite similar to Debian derivatives, really.
Installing packages
Adds the htop package. (Allowing you to monitor resource usage in a more graphic way).
Remember, Alpine will not persist the package installation if you do not use the lbk utility!
Persisting changes
The lbk utility (local backup) is used to persist changes in diskless mode. Run it after you are satisfied with your setup:
This will create a file called .apkovl.tar.gz in your FAT32 partition. In this file lbu will save the changes respective to the base configuration.
-d: will remove old apk overlay files.
-n: don’t commit, show what would have been committed.
This is also a great place to be patching these configurations dynamically while creating SD cards en masse, and thus injecting them into the system (e.g. modified settings / IP addresses / …).

in my case I called the system “mir”, that is why the apkovl is called mir.apkovl.tar.gz

Note that only the single folder “etc” is contained in the apkovl.
That is because lbu, by default, will only persist changes in the /etc directory! (except /etc/init.d)
Adding other directories to lbu’s list of persisted directories:
To add a directory or file besides /etc to monitor for changes and commit (when you run lbu commit), use lbu include:
and then commit the file system.
You will only need to include the directory once, and commit. Future commits will preserve the included directory as well.
Showing the current changes:
will show the files changed since the last commit.
use the –a flag to show all files compared to the fresh installation.
Note that on the reboot, Alpine will extract the contents of the apkovl, which will take a bit of additional time (and RAM).
Interesting things to know
- To bring the size down, Alpine uses busybox. Busybox is a single executable which is symlinked to different utilities (like tar, and so on.) This is a frequently used technique in embedded systems, e.g. the Fritz!Box.
- Alpine mounts the FAT32 partition read-only as /media/mmcblk0p1. It will be briefly remounted writable for persisting changes.
- Alpine will create a cache directory in the FAT32 partition for caching the apk’s downloaded from the online mirrors.
- By default only vi is installed as text-editor. vi is included in the busybox executable (/usr/bin/vi is a symlink to /bin/busybox).
- lbu can keep multiple backups, and you can revert to an older backup. This only affects which apkovl is considered active.
- Alpine does not have udev, it has mdev.
- As Alpine uses a RAM based file system, you can simply remove the SD card after Alpine has booted, and boot the next Pi with it. Very cool!
- note simply plugging it back in will not allow you to commit – you’ll get an I/O error.
Resources
- https://en.wikipedia.org/wiki/Alpine_Linux
- Alpine Wiki
- https://wiki.alpinelinux.org/wiki/Raspberry_Pi – Raspberry Pi installation tutorial
- https://wiki.alpinelinux.org/wiki/Raspberry_Pi_3_-_Setting_Up_Bluetooth
- https://wiki.alpinelinux.org/wiki/Alpine_Linux_package_management
- https://wiki.alpinelinux.org/wiki/Configure_Networking
- https://wiki.alpinelinux.org/wiki/Installing_Oracle_Java
- https://wiki.alpinelinux.org/wiki/Tutorials_and_Howtos
- https://wiki.alpinelinux.org/wiki/Comparison_with_other_distros – compares how to execute different admin tasks on different distros, and how it’s done on Alpine
Search
Recent Posts
Recent Comments
Categories
- Alpine Linux
- Anonym im Internet
- Anonymebox News
- Coral EdgeTPU
- Crystal Language
- Development
- Docker
- Electronics Legislation
- GPT3 / ChatGPT / OpenAI / Whisper / DALL-E
- Interviews
- JavaScript
- MongoDB
- MQTT
- pi3g Hardware Designs
- PiCockpit
- PiDoctor
- Python
- Raspberry Pi Blog
- Raspberry Pi Embedded Development
- Raspberry Pi Embedded Hardware
- Raspberry Pi News
- Ruby
- Stupid business mistakes
- Tips & tricks
- VerneMQ
- Vue.js
- Vuetify