- Install MATE Desktop
- Misc
- True type fonts
- Disabling standby and screensaver
- How to Install XFCE Desktop on Alpine Linux
- Installing XFCE Desktop on Alpine Linux
- How to Install XFCE Desktop on Alpine Linux
- Installing XFCE Desktop on Alpine Linux
- Xfce
- Starting Xfce
- With a display manager (graphical login)
- From the command line
- Localized keyboard layout
- Allowing shut down and reboot
- Auto-mounting USB drives
- Network browsing
- Enabling privilege escalation GUI
- Troubleshooting
- Missing Icons
- Startup
- Login
- Session
- See also
Install MATE Desktop
# apk add mate-desktop-environment dbus dbus-x11 lxdm adwaita-icon-theme faenza-icon-theme # gvfs_pkgs=$(apk search gvfs -q | grep -v ‘\-dev’ | grep -v ‘\-lang’ | grep -v ‘\-doc’) # apk add $gvfs_pkgs
If you are running your Alpine from RAM, save the changes:
Try, starting dbus and lxdm. This will start the display manager and should allow you to login.
If it worked, enable the services to start on reboot
Misc
True type fonts
Add all available True Type Fonts:
$ ttfs=$(apk search -q ttf- | grep -v ‘\-doc’) # apk add $ttfs
Disabling standby and screensaver
Check the current configuration using xset:
$ sudo apk add xset $ xset q
Contents of xset q
Keyboard Control: auto repeat: on key click percent: 0 LED mask: 00000000 XKB indicators: 00: Caps Lock: off 01: Num Lock: off 02: Scroll Lock: off 03: Compose: off 04: Kana: off 05: Sleep: off 06: Suspend: off 07: Mute: off 08: Misc: off 09: Mail: off 10: Charging: off 11: Shift Lock: off 12: Group 2: off 13: Mouse Keys: off auto repeat delay: 500 repeat rate: 20 auto repeating keys: 00ffffffdffffbbf fadfffefffedffff 9fffffffffffffff fff7ffffffffffff bell percent: 0 bell pitch: 400 bell duration: 100 Pointer Control: acceleration: 2/1 threshold: 4 Screen Saver: prefer blanking: yes allow exposures: yes timeout: 600 cycle: 0 Colors: default colormap: 0x22 BlackPixel: 0x0 WhitePixel: 0xffffff Font Path: /usr/share/fonts/misc,/usr/share/fonts/100dpi:unscaled,/usr/share/fonts/75dpi:unscaled,/usr/share/fonts/misc,/usr/share/fonts/100dpi:unscaled,/usr/share/fonts/75dpi:unscaled,built-ins DPMS (Energy Star): Standby: 600 Suspend: 0 Off: 900 DPMS is Enabled Monitor is On
To disable those timers issue the command:
$ xset q | grep Standby Standby: 0 Suspend: 0 Off: 0
How to Install XFCE Desktop on Alpine Linux
The XFCE Desktop environment is a fast, resource-friendly, and lightweight Desktop environment for Linux systems. It is the Desktop environment of choice for old systems or PCs with low computational power such as low RAM and CPU specs.
If you are running a sluggish Linux system with a GUI such as GNOME or KDE, switching to the XFCE environment is highly recommended to improve performance.
In this guide, we will demonstrate how to install the XFCE Desktop environment on Alpine Linux.
Installing XFCE Desktop on Alpine Linux
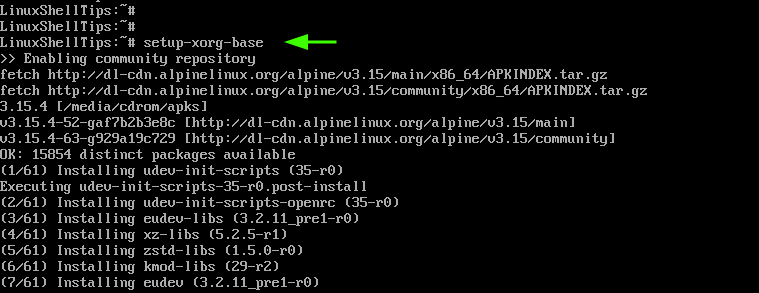
First off, access the Alpine Linux terminal and update the local package index using the following apk command:
The next step is to install the Xorg server, which is a free and open-source X-11 Windows server for Linux systems. It provides an interface through which users can interact with the graphical elements of the system.
To install the Xorg server on Alpine, run the command:
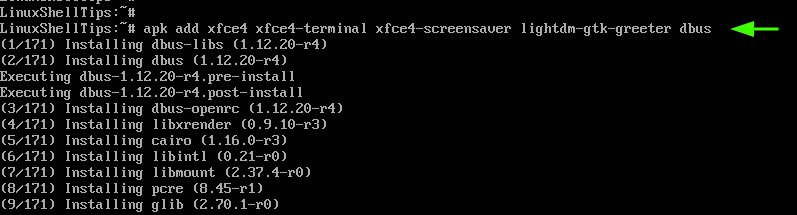
With the Xorg server already in place, proceed and install the XFCE environment, lightdm display manager, and dbus (Desktop bus) package as follows.
$ apk add xfce4 xfce4-terminal xfce4-screensaver lightdm-gtk-greeter dbus
The installation size is approximately 400MB and this might take a while.
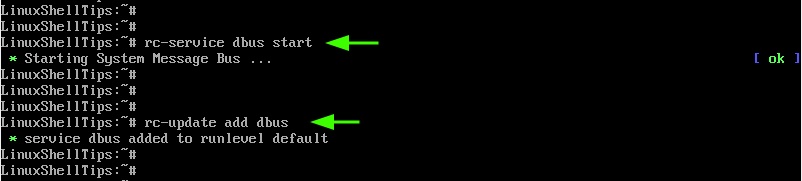
With all the components of the XFCE desktop environment and dbus installed, start the dbus service.
Just as crucial, consider enabling the dbus service to automatically start on boot.
The final step is to enable and start the Lightdm display manager, which is a fast and lightweight X display manager provided by the lightdm-gtk-greeter package.
To enable the display manager, run the command.
Next, start the display manager by running the command:
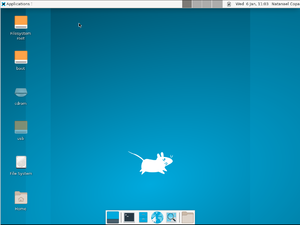
Right after running the command, a login screen will appear. Provide your credentials and log in.
Once logged in, the XFCE desktop environment will come into view. From there you can enjoy using the graphical interface to navigate your system and explore various tools and applications that come with XFCE.

And there you have it. We have successfully installed the XFCE desktop environment on Alpine Linux.
How to Install XFCE Desktop on Alpine Linux
The XFCE Desktop environment is a fast, resource-friendly, and lightweight Desktop environment for Linux systems. It is the Desktop environment of choice for old systems or PCs with low computational power such as low RAM and CPU specs.
If you are running a sluggish Linux system with a GUI such as GNOME or KDE, switching to the XFCE environment is highly recommended to improve performance.
In this guide, we will demonstrate how to install the XFCE Desktop environment on Alpine Linux.
Installing XFCE Desktop on Alpine Linux
First off, access the Alpine Linux terminal and update the local package index using the following apk command:
The next step is to install the Xorg server, which is a free and open-source X-11 Windows server for Linux systems. It provides an interface through which users can interact with the graphical elements of the system.
To install the Xorg server on Alpine, run the command:
With the Xorg server already in place, proceed and install the XFCE environment, lightdm display manager, and dbus (Desktop bus) package as follows.
$ apk add xfce4 xfce4-terminal xfce4-screensaver lightdm-gtk-greeter dbus
The installation size is approximately 400MB and this might take a while.
With all the components of the XFCE desktop environment and dbus installed, start the dbus service.
Just as crucial, consider enabling the dbus service to automatically start on boot.
The final step is to enable and start the Lightdm display manager, which is a fast and lightweight X display manager provided by the lightdm-gtk-greeter package.
To enable the display manager, run the command.
Next, start the display manager by running the command:
Right after running the command, a login screen will appear. Provide your credentials and log in.
Once logged in, the XFCE desktop environment will come into view. From there you can enjoy using the graphical interface to navigate your system and explore various tools and applications that come with XFCE.
And there you have it. We have successfully installed the XFCE desktop environment on Alpine Linux.
Xfce
lightdm-gtk-greeter may be omitted if Xfce should only be started from or after a command line login, i.e. the machine should not boot to a graphical login screen (display manager). However, it is then necessary to add some theme files instead, to get a proper (themed) appearance. By default, there is no theme and Adwaita icon in Settings -> Appearance, but Adwaita is missing some icons for XFCE. Install adw-gtk3 for basic themes and adwaita-xfce-icon-theme for basic icons.
Starting dbus (desktop bus) service:
Enabling dbus to start on boot:
If dbus is not running it leads to issues like missing icons and keyboard shortcuts.
Starting Xfce
With a display manager (graphical login)
If the package lightdm-gtk-greeter has been installed per the instructions above, the lightdm display manager may be started to log in graphically with your new user.
After correct operation is verified, lightdm can be enabled to start up during boot:
From the command line
If you want to start it via another script or mechanism like xinit , use startxfce4 . e.g. call it via «exec startxfce4» at the end of the ~/.xinitrc configuration file.
Localized keyboard layout
Settings->Keyboard->Layout->»Keyboard layout» seems to get activated only after once temporarily switching on the «Use system defaults» button, logging out and in again, and then turning it off.
Allowing shut down and reboot
To enable users to shut down the machine or reboot, the packages # apk add elogind polkit-elogind
A reboot is required to let it take effect.
lbu commit # if running in diskless mode, to save state reboot
Auto-mounting USB drives
To enable automatic mounting of USB drives, install these packages:
Depending on what devices you intend to mount, some additional packages may be needed:
ntfs-3g Stable, full-featured, read-write NTFS (driver) gvfs-cdda CDDA support for gvfs gvfs-afp AFP support for gvfs gvfs-goa GNOME Online Accounts support for gvfs gvfs-mtp MTP support for gvfs gvfs-smb Windows fileshare support for gvfs gvfs-lang Languages for package gvfs gvfs-afc Apple mobile devices support for gvfs gvfs-nfs NFS support for gvfs gvfs-dev Backends for the gio framework in GLib (development files) gvfs-archive Archiving support for gvfs gvfs-dav WebDAV support for gvfs gvfs-fuse FUSE support for gvfs gvfs-gphoto2 gphoto2 support for gvfs gvfs-avahi DNS-SD support for gvfs
To list descriptions of all gvfs- packages:
Make sure that mounting is enabled in
Thunar>Edit>Preferences>Advanced>Volume Management>Configure>Storage>Removable Storage
Network browsing
For browsing of network shares within XFCE that works seamlessly with file associations, you can install the gvfs packages for the network protocols you use.
For example, to browse in a SMB/cifs windows network:
(Check: If the above may already be sufficient for gvfs to initiate the fuse kernel module. Else, try to identify if there are necessary steps in:)
The OpenRC script for fuse is in a separate package.
Then the fuse service can be started manually.
(The XFCE sessions already in progress need to be restarted for this to take effect, i.e. log out and log in again.)
If it works, the fuse service can be added to start up automatically at boot time:
Enabling privilege escalation GUI
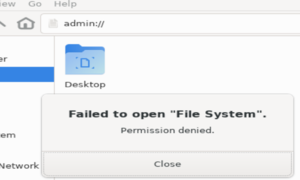
In other popular Linux distributions, such as Ubuntu Server, this comes by default when you install minimal XFCE, but if you install XFCE on Alpine using the instruction on this page, it is not included, and the GUI application that needs root access fails with a message like «permission denied». You can test this with the default Thunar file manager by installing gvfs , which is needed for things like Trash or browsing SMB network share, and then typing admin:// in the address bar.
To enable the privilege escalation GUI for a doas/sudo user, you need to install elogind , polkit-elogind , xfce-polkit , and lightdm . Note that elogind and lightdm must be running before logging into the XFCE desktop, otherwise you will see an empty error dialogue box at login.

To make elogind/lightdm running, either make them start automatically at system start:
doas rc-update add elogind #change elogind for lightdm and run the same command
or start them manually for this time only:
doas rc-service elogind start #change elogind for lightdm and run the same command
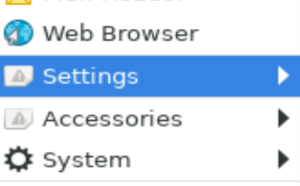
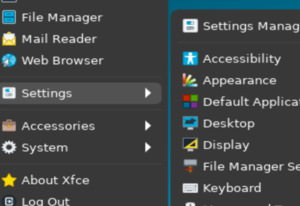
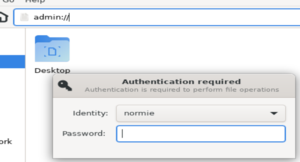
Now, make sure in Settings -> Session and Startup -> Application Autostart, «XFCE PolKit» exists and checked. If it is not found, navigate to /etc/xdg/autostart and check if xfce-polkit.desktop exists and its size is not 0. If everything above has been done, when you type admin:// in the address bar, you will see the password dialogue.
Troubleshooting
Missing Icons
Startup
If the Xorg server segfaults in kvm/qemu then add nomodeset as a boot option.
If the mouse / keyboard is not responding, you can try disabling hotplug.
Section "ServerFlags" Option "AutoAddDevices" "False" EndSection
Login
If you are unable to login, check /var/log/lightdm/lightdm.log, there may be output there from X to indicate failed modules, etc.
If you are unable to login, or you see an error «Failed to execute login command», you should check ~/.xinitrc (if you’re using .xinitrc) with your preferred text editor (vi, nano, etc) and ensure that it is set to load xfce. To do this, the ‘exec’ line (usually the last line in the file) should read «exec startxfce4». If ~/.xinitrc does not exist, create it and add the exec line. this command will do it:
$ echo «exec startxfce4» >> ~/.xinitrc
Session
If the panel and windows disappear or start flickering after logging in to xfce the first time, log out, and then log in again. That happens because xfce is writing a default config file with the compositor enabled, but does not enable it during your first login. Clear out the ~/.config/xfce directory, and login as «first time» again, as the default vblank setting for the compositor is likely incorrect. Open the windows manager tweaks and dconf editor (or use dconf-query) before you log out. Tick the compositor to off in the window manager tweaks ui. If you have a recent enough xfce (4.14) there is a ui in window manager tweaks to set syncing mode, and you can try different values, such as vblank, xpresent, and glx, while turning the compositor on and off, until you find one that works. Or, from dconf editor, you can set xfwm4 /general/vblank_mode, which you will find is set to «auto» by default, and then turn the compositor on again. This can also be accomplished from the command line using using:
xfconf-query -c xfwm4 -p /general/vblank_mode -s mode
where mode is vblank, glx or xpresent.
You have to use xfconf-query from within the xfce terminal session, or at least with the xfce settings daemon started.