- Provision NGINX on Docker and Increase Server Capabilities
- Prerequisites
- Provisioning an NGINX on Docker Container
- Mapping Website Files to a Container
- Running a PHP-FPM Application with a Docker NGINX Container
- Conclusion
- Создать контейнер с Nginx Docker
- -v: Подключение Volume
- Второй пример
- Основы
- Nginx в Docker Compose
Provision NGINX on Docker and Increase Server Capabilities
Ransomware recovery test drive: This technical workshop is designed to take you behind the scenes and shows you how to adopt strategies to automate recovery, ensuring you’re ready to become a recovery hero. REQUEST YOUR LAB
Containerizing web server workloads, such as NGINX, has become common across the modern IT industry. NGINX makes a perfect container workflow and marrying NGINX to Docker is a perfectly logical task.
In this tutorial, you will learn how to provision a new NGINX on Docker container running on any operating system such as Windows, macOS, or Linux!
Prerequisites
To follow along with this tutorial, be sure you have the following:
- Docker Desktop – This tutorial uses version 3.5.1.
- Windows 10 – The tutorial uses Windows to run Docker on but the same general steps can also be applied to Linux or macOS.
- The Docker engine if you’re on Linux.
Provisioning an NGINX on Docker Container
Let’s get started by first creating a Linux Docker image with NGINX already installed. This tutorial will use a minimal Linux distribution called Alpine Linux running the latest NGINX version available, which is 1.21.1 in this tutorial.
1. First, open a terminal session where you will run all of the necessary Docker commands.
2. Run the docker pull command to retrieve, or pull , the latest nginx image from the NGINX Docker Hub repository using the mainlin-alpine branch. The Docker Hub is an open-source repository of Docker Images available to Docker users.
docker pull nginx:mainline-alpine
Retrieving the latest image is great for development and testing, but it is often a best production practice to specify a specific version such as docker pull nginx:1.21.0-alpine .
3. Next, run the docker run command to run a container from the nginx:mainline-alpine image.
- -i – This parameter requests an interactive console, which returns internal container output to the terminal.
- -t – Here you ask for a Pseudo-TTY console to the running container which allows the use of the key command ctrl-c to exit the interactive container.
- —name – The name of this container run, must be unique for each new container (unless prior containers of the same name are removed).
- -p – What internal to external port to use, which in this case the internal port of 80 should be mapped to the external port of 80 .
- “image name” – What Docker image to provision the container from, in this case, the previously pulled nginx:mainline-alpine image.
docker run -i -t --name nginx-mainline -p 80:80 nginx:mainline-alpine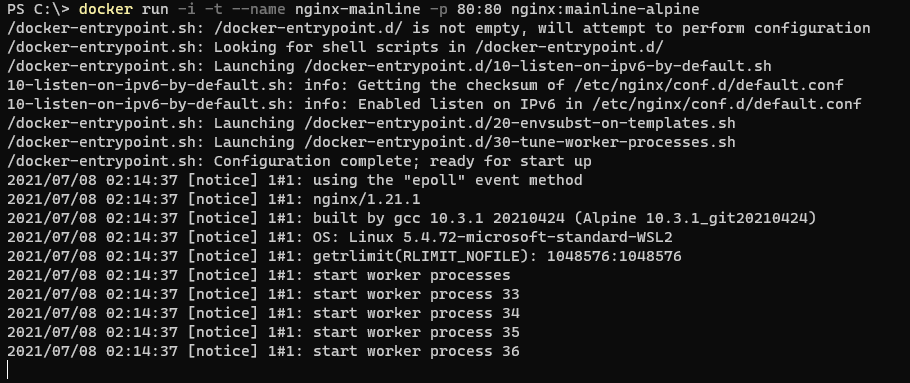
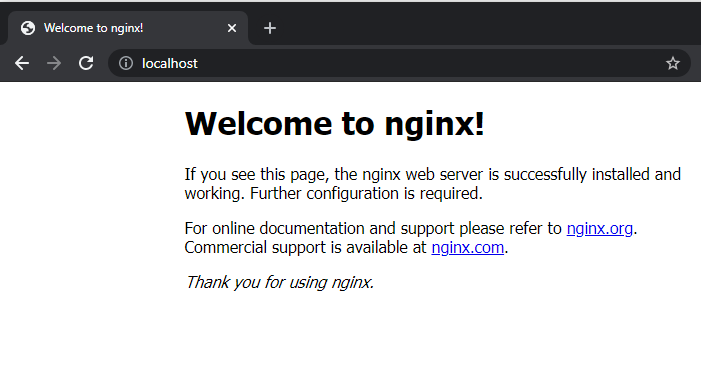
4. In a web browser, navigate to the running Docker container by going to http://localhost. If successful, you will see the default NGINX welcome page. Since in the previous step, you started the container mapping the external port 80 to the container’s port 80 ( -p 80:80 ), NGINX should be available.
5. Finally, open your command line console again and hit the key combination of ctrl-c to exit the running container. You still have some work to do!
Mapping Website Files to a Container
At this point, you can easily bring up an NGINX Docker container with the sample webpage. You now need to upload your custom website to NGINX. Since containers are immutable and will purge any changes to them when recreated, you must provide a website source outside of the Docker image.
The NGINX web server running on Linux stores website files in the /usr/share/nginx/html directory. Rather than upload files directly to this directory, you should map a storage location to that location so that the container will pull those files from the storage location at bootup.
On your local host operating system:
1. First, create a directory to map to the NGINX Docker container. In this example, C:\Articles\NGINX is used to map to /usr/share/nginx/html.
2. In the newly-created directory, create a file, index.html, that contains the following. This file will be the file that NGINX serves up when navigating to the website.
ATA Test!
Welcome to your custom NGINX index file.
3. Next, on the command line, invoke docker run with nearly all the same parameters as step three in the previous section. But this time, include the volume parameter, -v as shown below.
In the example below, the -v parameter is mapping the local C:\Articles\NGINX directory to the image’s /usr/share/nginx/html directory. Creating this mapping will allow you to modify the contents of the /usr/share/nginx/html container directory by modifying the contents of the C:\Articles\NGINX directory.
This demonstrates a Windows file location, but this command works the same on Linux. For example, -v /usr/share/myfiles:/usr/share/nginx/html .
docker run -i -t -v c:\Articles\NGINX:/usr/share/nginx/html --name nginx-mainline -p 80:80 nginx:mainline-alpine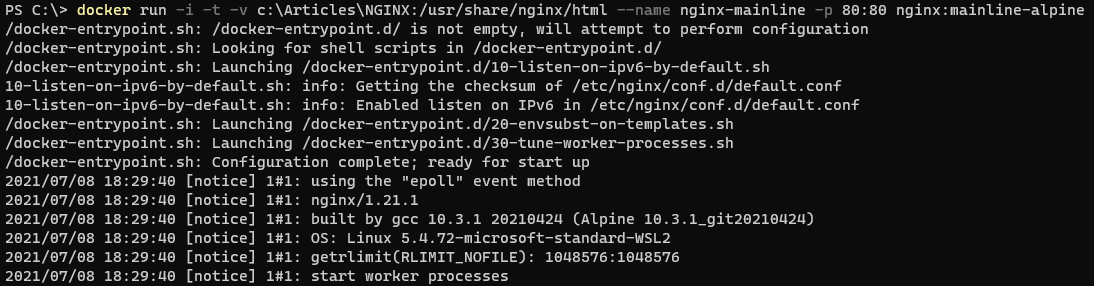
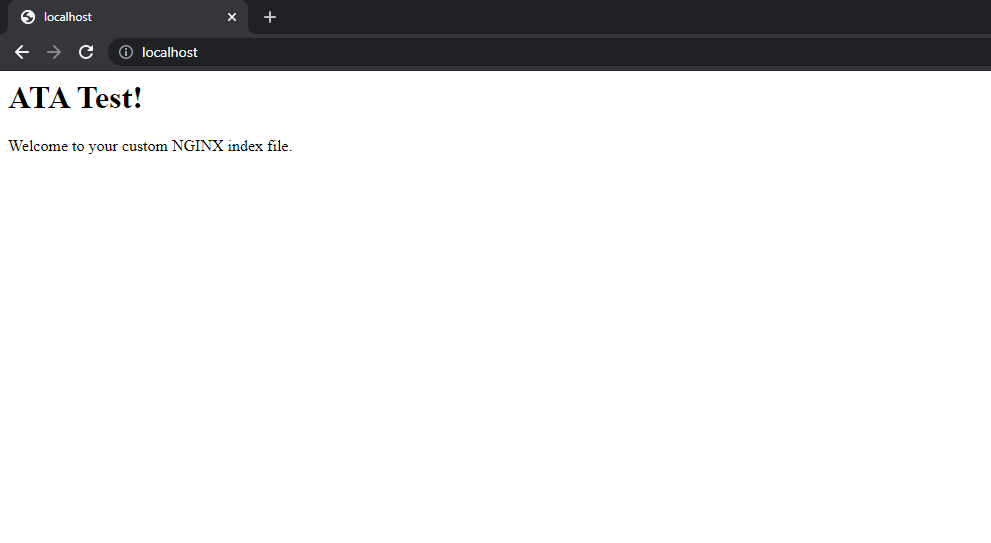
4. Finally, open a web browser and navigate to http://localhost. You will see the following displayed based on the newly created index.html file since it is now pulling files from the local C:\Articles\NGINX directory.
Running a PHP-FPM Application with a Docker NGINX Container
By now, you can bring up an NGINX Docker container and easily modify a website’s contents. If you need a super-basic setup, this might work. But, if you plan on running a web application on NGINX, you must do a little more work.
As an example, let’s enable the NGINX image just created to run the popular web scripting language PHP using PHP FastCGI Process Manager (FPM).
For this section, several new concepts must be introduced. To easily define a set of containers and their linkages, it is best to use a Docker Compose file. Docker Compose defines the series of services and related applications in a YAML (Yet Another Markup Language) file.
In addition, since you need to copy a custom configuration file for the default site, into the NGINX container, a custom version of the nginx:mainline-alpine image is needed. To extend an existing image, a dockerfile is used and built with the build step in the Docker Compose file.
1. Create a directory to contain your configuration files. In this example, the directory C:\Articles\NGINXPHP is used.
2. First, create the file, dockerfile, with the following contents.
# The image to pull the base configuration from FROM nginx:mainline-alpine # The directory where any additional files will be referenced WORKDIR C:\Articles\NGINXPHP # Copy the custom default.conf from the WORKDIR (.) and overwrite the existing internal configuration in the NGINX container COPY ./default.conf /etc/nginx/conf.d/default.conf3. Next, create the file docker-compose.yml file, containing the following.
# The specification version of docker-compose version: "3.9" # The collection of applications composing this service services: # The NGINX custom container web: # Instead of referencing image: nginx:mainline-alpine here, use build to # reference the current directory (.), which will look for a dockerfile # by default build: . # The external directory location to map to an internal location volumes: - C:\Articles\NGINXPHP:/usr/share/nginx/html # The external port mapping to internal port mapping ports: - "80:80" php: image: php:fpm-alpine # It is important that both containers can reference the same files volumes: - C:\Articles\NGINXPHP:/usr/share/nginx/html4. Finally, create the NGINX configuration file, default.conf, with the following.
You may wonder where “PHP” for the hostname came from. By default, a network shared by all applications contained in the service is created using the name of the parent directory. Each container is assigned a hostname equal to the application name. In this example, the network is nginxphp and the hostnames are web and php .
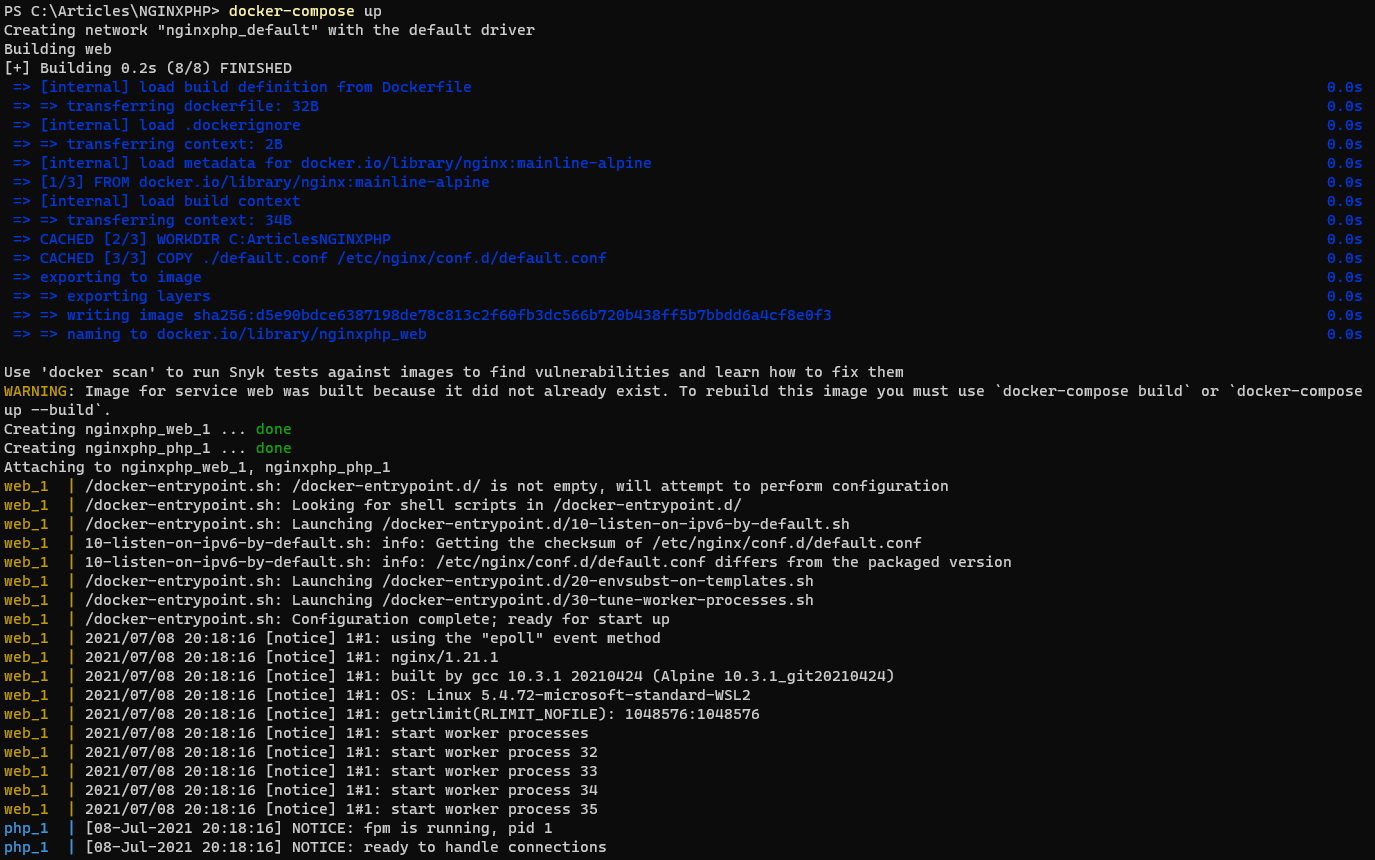
5. In a terminal session, navigate to your custom Docker configuration file directory, which in this example is C:\Articles\NGINXPHP. Run the command, docker-compose up to generate and start your custom service.
6. Now that the set of containers are up and running, you need a PHP file to test the configuration out. Create the file, index.php, in your NGINX Docker shared directory which is C:\Articles\NGINXPHP in this tutorial.
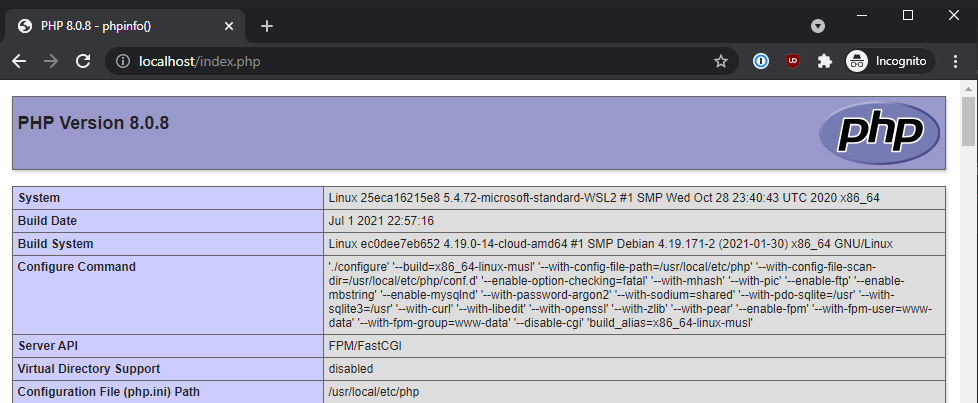
7. Open a web browser and navigate to http://localhost/index.php to verify that the PHP file is properly shown.
Conclusion
Docker NGINX containers are incredibly useful for testing and development. With proper care and attention, Docker containers can help to greatly increase a production web server’s capability as well!
Now that you have successfully provisioned an NGINX container and a linked PHP-FPM container, try adding a database container into the mix for a full web application environment.
Hate ads? Want to support the writer? Get many of our tutorials packaged as an ATA Guidebook.
Создать контейнер с Nginx Docker

Welcome to nginx! Welcome to nginx! If you see this page, the nginx web server is successfully installed and working. Further configuration is required. For online documentation and support please refer to nginx.org . Commercial support is available at nginx.com . Thank you for using nginx.
-v: Подключение Volume
Можно сразу закинуть свою html страницу вместо стандартной с помощью volume
mkdir nginx
cd nginx
touch index.html
vi index.html
Создадим простейшую страницу, например про велосипеды
Убедимся, что контейнер удалён и запустим снова но уже с опцией -v которая укажет какую директорию на хосте нужно подставить в директорию из образа .
docker rm andrei-nginx
docker run —name andrei-nginx -p 8080:80 -v $(pwd) : /usr/share/nginx/html nginx:alpine
Второй пример
mkdir docker_lab
cd docker_lab
Основы
Скачаем образ (image) с Nginx
sudo docker pull nginx Using default tag: latest latest: Pulling from library/nginx 7d63c13d9b9b: Pull complete 15641ef02d80: Pull complete 392f7fc24052: Pull complete 8765c7b04ad8: Pull complete 8ddfvc52b5c7: Pull complete 353f1014328a: Pull complete Digest: sha256:dfef797cyddfc01645503cef9036379f03ae920cac82d344d58b637ee861fda1 Status: Downloaded newer image for nginx:latest docker.io/library/nginx:latest
Убедимся, что образ появился в списке
REPOSITORY TAG IMAGE ID CREATED SIZE nginx latest 04661cdce581 13 hours ago 141MB nginx_nginx latest 915d22c6f9c6 21 hours ago 219MB nginxinc/nginx-unprivileged 1.21.0 d30c9c6fe1a0 5 months ago 133MB
Создадим папку nginx и перейдём в неё
Создадим файл с найстройками ssh sshd_config и начнём его редактировать
touch sshd_config
nano sshd_config
Сделайте небольшой конфиг, например такой:
Port 22 Protocol 2 HostKey /etc/ssh/ssh_host_rsa_key HostKey /etc/ssh/ssh_host_dsa_key HostKey /etc/ssh/ssh_host_ecda_key HostKey /etc/ssh/ssh_host_ed25519_key LoginGraceTime 120 PermitRootLogin yes StrictModes yes RSAAuthentication yes PubkeyAuthentication yes UsePAM yes
Создайте файл с настройками Docker — Dockerfile и отредактируйте его
touch Dockerfile
nano Dockerfile
FROM centos RUN yum -y update RUN yum install -y openssh-server RUN ssh-keygen -A ADD ./sshd_config /etc/ssh/sshd_config RUN echo root:Secret123 | chpasswd CMD /usr/sbin/sshd -D
docker build -t andrei-ubuntu/centos_ssh .
-t это сокращение от —tag задаёт название и тэг в формате ‘name:tag’
тэг можно не указывать — это опционально
. означает — в текущей директории
docker run -it -d —name node1 -p 2201:22 andrei-ubuntu/centos_ssh
Убедитесь, что его статус Up
Если вы не знаете на каком вы IP выполните
ssh root@192.168.0.100 -p 2201
Nginx в Docker Compose
Рассмотрим пример создания простейшего контейнера со статическим сайтом на основе Nginx.
nginx_mkdocs/ |— docker-compose.yml |— dockerfiles | |— Dockerfile.nginx | `— nginx.conf |— git-experiments | `— mkdocs | `— documentation | |— docs | |— mkdocs.yml | `— site `— venv
Содержимое сайта находится в директории site
# docker-compose.yml version: ‘1.0’ services: nginx: restart: always privileged: true user: root build: context: ./dockerfiles dockerfile: Dockerfile.nginx args: buildversion: 1 ports: — «8001:80» container_name: nginx_mkdocs networks: net2: ipv4_address: 10.6.0.2 volumes: — ./git-experiments/mkdocs/documentation/site:/usr/share/nginx/html — /var/run/docker.sock:/var/run/docker.sock networks: net2: driver: bridge ipam: config: — subnet: 10.6.0.0/16 gateway: 10.6.0.1
# Dockerfile.nginx FROM nginx:1.24 COPY ./nginx.conf /etc/nginx/nginx.conf