- Alpine Install: from a disc to a any computer single only boot
- Terminology
- Requirements
- Preparing the source medium to install
- Burning the source medium to install
- Booting the Alpine ISO disc
- Finishing the installation
- Install to disk
- If using Alpine Linux 2.2.3 or later
- Continue Setting up your Computer
- If using Alpine Linux 2.2.2 or earlier
Alpine Install: from a disc to a any computer single only boot

This material is proposed for deletion .
there are other wiki pages with similar or same information, the proposal and idea of newbie pages was specific cases but now there are too mixed pages with same information DUE LACK OF COORDINATION, so the best is to delete this content (Discuss)
Make sure no other pages link here and check the page’s history before deleting.
Overall description: Alpine Installation from a official disc/iso burned into DVD/CD to a new computer with or without UEFI and will be single only boot, it’s means that any thing in the computer and their disc will be erased to put Alpine Linux as main system
This document will guide you to install Alpine into a new empty or just fresh PC or Laptop hardware computer, use if you have a BIOS or UEFI based hardware and only wants Alpine Linux into it.
Terminology
- UEFI: it’s a new system included in every new hardware machine laptop or desktops, that will manage the early boot process as a little operating system, see more in the Alpine and UEFI page.
- New machine: will be your real machine fresh and ready to install your new Alpine operating system, with a installed CD/DVD Rom optical drive where to put the burned downloaded disc media installation.
- Optical drive: will be your hardware drive input to put the burned downloaded iso media with the operating system Alpine to install as source media; this drive are commonly named DVD/CD Rom unit.
- Source media: will be the just burned/ disc from the downloaded iso file of Alpine operating system. Will be put into the optical drive or named DVD/CD Rom to property boot the source disc as media installation.
- Target media: will be the storage medium device into the new computer target where the Alpine files for operating system will be installed, its one partition from the HardDisk of the new computer.
Requirements
- A blank disc (CD blank or DVD blank or BR blank) to just burn/record the source media file downloaded
- In the new machine we need optical drive as input source media
- In the new machine we need at least 512Mb of RAM, but required 2Gb of RAM for desktop/graphical applications
- In the new machine we need target media with at least 2G of hard disk, but required 10G for desktops
- Will need to previously downloaded and burned the Source media ISO file from https://alpinelinux.org/downloads/
Preparing the source medium to install
Download the source medium to install and put into your home documents in a modern computer. There are more hardware medium sources to download, like the arm and i386, but ISO CD/DVD images are only to PC/Laptops that are i386 and amd64, so by downloading the x86 (32bit) flavor will be same for both cases, but UEFI need 64bit, so change to the x86_64 (amd64) if your computer is the most modern and lasted hardware.
The source medium to install for UEFI or modern hardware are just 64-bit only, the download URL will be as following format: http://dl-cdn.alpinelinux.org/alpine/v/releases//alpine-standard-.0-.iso where ARCH and VERSION could be:
- will be
- x86: the most used i386 32-bit x86 based machines, if your computer are too older use this only.
- x86_64: The popular AMD64 compatible 64-bit x86 based machines, i386 are not recommended for newer/lasted hardware.
- s390x: For the Super powered IBM mainframes, especially IBM Z and IBM LinuxONE servers.
- ppc64le: For the PowerPC devices with pure little-endian mode, mostly for POWER8 and POWER9
- latest-stable for a more up to date without taking care of numbered
- 3.10 the most recommended for machines between 2016 to 2018
So using 3.10 version the available links to download will be:
- x86_64: http://dl-cdn.alpinelinux.org/alpine/v3.10/releases/x86_64/alpine-standard-3.10.0-x86_64.iso
- s390x: http://dl-cdn.alpinelinux.org/alpine/v3.10/releases/ppc64le/alpine-standard-3.10.1-ppc64le.iso
- ppc64le: http://dl-cdn.alpinelinux.org/alpine/v3.10/releases/ppc64le/alpine-standard-3.10.1-ppc64le.iso
Graphical download: Just point the web browser to that url and the download of the iso file will start. A file with .iso extension type, with name like «alpine-standard-3.10.0-x86_64.iso» (if amd64) or like alpine-standard-3.10.1-s390x.iso (if s390x); will be downloaded commonly into the Download directory of your home documents filesystem.
Command line method: in unix-like terminal execute: wget -c -t8 —no-check-certificate http://dl-cdn.alpinelinux.org/alpine/v3.10/releases/x86_64/alpine-standard-3.10.0-x86_64.iso , and where you run the command, in that place/dir will be downloaded the file.
Burning the source medium to install
After downloading the source media file from Alpine download page put the blank disc into the input optical drive named DVD/CD Rom and open your CD/DVD recording program, choose to «burn from iso file» and wait the process will end.
In detail if you downloaded with Graphical download (using a web browser), the source media file will be into the Download directory. If you downloaded with Command line method your source file probably will be in your root document home (or just $HOME of your Linux install or MAC install filesystem).
In Linux, assuming the blank disc is in the optical drive, the command to record/burn the downloaded source media file is :
$ umount /dev/sr0;cdrecord -v -sao dev=/dev/sr0 alpine-standard-3.10.0-x86_64.iso
If your blank media is a DVD or BD disc the command will be then :
$ umount /dev/sr0;growisofs -dvd-compat -Z /dev/sr0=alpine-standard-3.10.0-x86_64.iso
Note: growisofs has a small bug with blank BD-R media. It issues an error message after the burning is complete. Programs like k3b then believe the whole burn run failed.
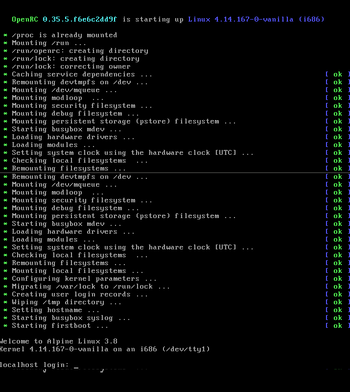
Booting the Alpine ISO disc
When the machine start, you must be sure to choose the optical drive (commonly named CD/DVD Rom drive), so the disc/iso will boot and after a while a command line shell will show you:
Tip: If your system is not configured to boot from a CD/DVD drive, it must be configured in the BIOS, ask/search to your vendor or technical support, Toshiba computers need to hit F1 to choose boot medium, DELL must hit F11 to choose medium for example, and so and so

TODO: restore the template about normal script steps for common pages (was inclusion here)
Finishing the installation
After all of the scripts in the setup end, a «reboot» will be offered, just type «reboot» and press enter, remove the boot media and newly installed system will be booted.
You cannot see a graphical window system? take it easy and get calmed down.. in Alpine all are made by the right way.. so if user need a desktop.. user can install a desktop
Install to disk
This material is proposed for merging .
If using Alpine Linux 2.2.3 or later
Warning: This will erase everything on your machine’s harddisk. Don’t blame me if someone sues you for this, your cat dies etc. You are warned.
The following is meant to be an absolute newbie guide
- Burn the Alpine ISO image to a CD
- Put the CD into the new computer and turn on the power. Make sure the computer is capable to boot from a CD. Your manual for the computer or the BIOS can help.
- Wait for the text login: to appear, type root and press enter.
- Run the setup-alpine script
- Choose your keyboard layout. If you don’t know your keyboard layout choose us. Here us was chosen.
- Then I chose the us variant.
- Most people will use DHCP, so press enter again, or you can enter in your static IP address
- You will be asked if you want to do any manual network configuration, press enter for no
- Now choose how you would like to use it, for this guide, choose sys, this will install the entire OS onto your hard drive
- You are given a final chance to back out, type in Y to continue
Take out the CD, and your computer should boot into Alpine using your hard drive.
Continue Setting up your Computer
- Alpine Linux package management(How to add/remove packages on your Alpine)
- OpenRC(Configure a service to automatically boot at next reboot)
- Setting up a SSH server(Using ssh is a good way to administer your box remotely)
- Tutorials and Howtos(Various tutorials, including how to setup a XFCE desktop)
If using Alpine Linux 2.2.2 or earlier
A number of steps are nowadays included in the setup-disk and setup-lbu scripts, which are invoked by setup-alpine. But in these older systems, these steps have to be performed manually.
Run setup-alpine to configure the keyboard, hostname and networking.
Now for the manual steps. Install needed programs for the setup:
apk add e2fsprogs syslinux mkinitfs
Create partitions with fdisk .
Let’s say you have 2 partitions: /dev/sda1 as «Linux» (type 83) and /dev/sda2 as «linux swap» (type 82). The partition containing /boot —here, /dev/sda1 —must be marked bootable (command «a» within fdisk ).
Next, create your filesystem(s) and swap:
mkfs.ext4 /dev/sda1 mkswap /dev/sda2
Clone the current running config created by setup-alpine (hostname, networking root password):
lbu package — | tar -C /mnt -zxf —
Install base packages on the mounted disk:
apk add —root=/mnt —initdb $(cat /etc/apk/world)
Append the / and swap to /etc/fstab :
echo -e «/dev/sda1 / ext4 defaults 1 1» >> /mnt/etc/fstab echo -e «/dev/sda2 none swap sw 0 0» >> /mnt/etc/fstab
Configure the boot loader, extlinux . We use the provided syslinux.cfg as base.
cp /media/cdrom/syslinux.cfg /mnt/boot/extlinux.conf vi /mnt/boot/extlinux.conf
It should contain something like:
timeout 20 prompt 1 default grsec label grsec kernel /boot/grsec append initrd=/boot/grsec.gz root=/dev/sda1 modules=ext4 quiet
Install the bootloader on your /boot partition:
Install the early-stage bootloader in the disk’s MBR (note that it’s /dev/sda not /dev/sda1 !)
dd if=/usr/share/syslinux/mbr.bin of=/dev/sda
cat /usr/share/syslinux/mbr.bin > /dev/sda
Unmount, remove cdrom, and reboot. (If you can’t eject, just remove it manually as the machine reboots)
umount /mnt umount /.modloop eject reboot
In recent versions of Alpine, the second line can be accomplished by rc-service modloop stop . (See this FAQ entry).
After reboot, you should be able to log in as root with the password you created in setup-alpine .
- Choose your keyboard layout. If you don’t know your keyboard layout choose us. Here us was chosen.