- How to Turn On WiFi Automatically Android 9 Pie
- How to Turn On WiFi Automatically Android Pie 9.0
- Stop WiFi From Turning on Automatically Android
- Turn on WiFi Scanning in Android 9 Pie
- Automatically Turns Off Hotspot on Android 9 Pie
- About Bestusefultips
- Automatically connect to wifi network in android?
- 1 Answer 1
- Fix: Android Doesn’t Automatically Connect to WiFi
- List of alternatives to fix the Android doesn’t automatically connect to Wi-Fi issue:
- #1 Restart your Android device
- #2 Delete the saved networks
- #3 Reconnect the device to the wifi network
- To establish connections with a new wi-fi network.
- To establish connections with a hidden network.
- #4 Turn on the auto-connect option in your device
- #5 Restart your router and modem
- #6 Ensure proper cable connection in the modem and router
- Check cable connection in the modem.
- Check cable connection in the router.
- #7 Ensure that the light in the modem and router is on
- #8 Contact your service provider
- #9 Do away with unnecessary apps
- #10 Check if your device is in range
- Wrap up
How to Turn On WiFi Automatically Android 9 Pie
You can turn on WiFi automatically Android 9 pie device under Wi-Fi preferences. To connect Android 9 to WiFi automatically, make sure to turn on location in your device. If available nearby saved networks, it will automatically connect to your Android devices. Wi-Fi won’t turn on automatically on Pixel or Android when the location is off or airplane turned on or Wi-Fi scanning off. Also, make WiFi calling on your Android Pie 9.0 devices using network and internet settings.
How to Turn On WiFi Automatically Android Pie 9.0
To wifi turns on automatically Android Pie 9.0, confirm location must turn on.
Swipe down notification shade twice > tap Location
Now follow the below-given step by step process to enable Wi-Fi automatically in Android Pie 9.0 device.
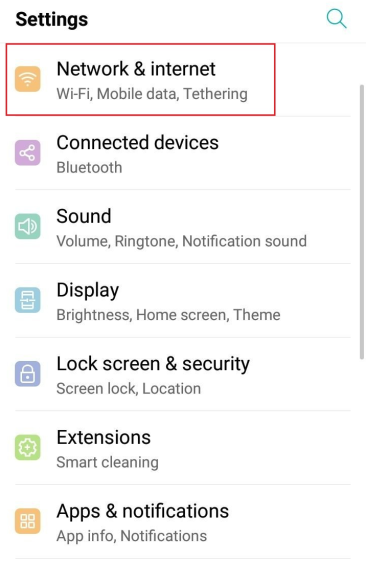
Step 1: Swipe down the notification panel twice and tap the Settings icon.
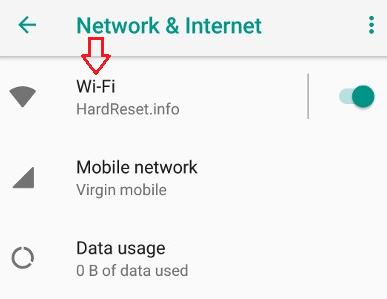
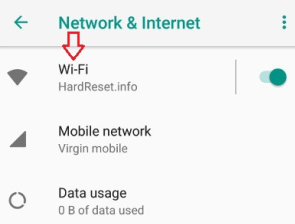
Step 2: Tap Network & internet.
Here you can see Wi-Fi, mobile network, Data usage, hotspot & tethering, Airplane mode, and advanced settings.
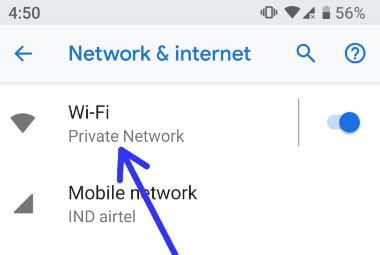
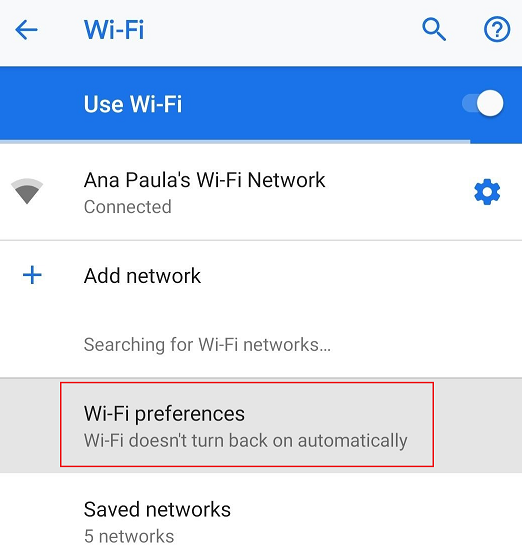
Step 3: Tap WiFi.
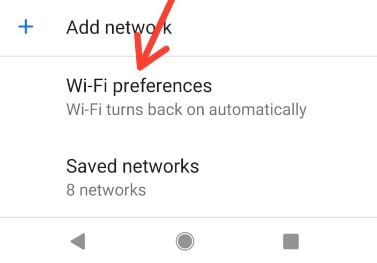
Step 4: Tap Wi-Fi preferences.
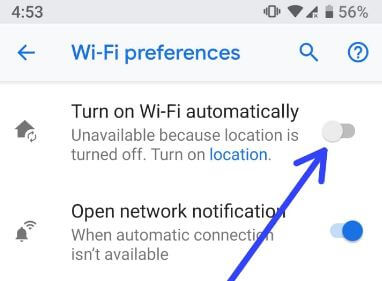
By default turned off “turn on Wi-Fi automatically” option.
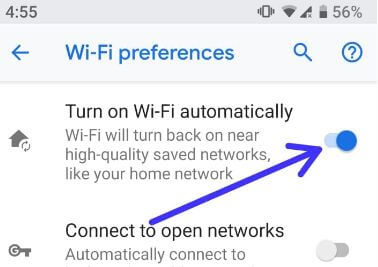
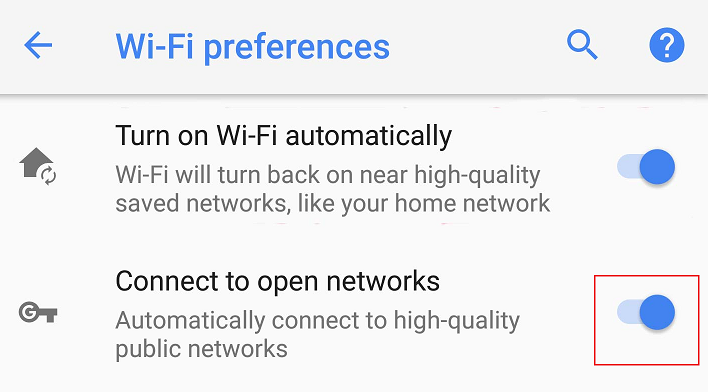
Step 5: Toggle on “Turn on Wi-Fi automatically”
Now you can see new settings added to Wi-Fi preferences called “connect to open networks”. By default disabled this option. It will automatically connect to the high quality public network on Android Pie 9.0 device when turned on.
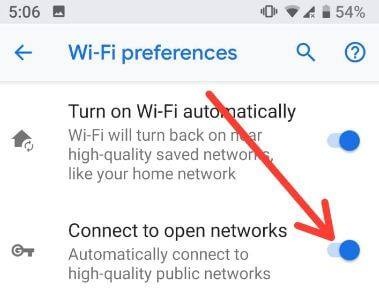
Step 6: Turn on toggle Connect to open networks to automatically connect to the high quality public network.
Wi-Fi assistant by Google connectivity services auto-connects to high-quality public WiFi hotspots and helps secure your connection. To protect you on public Wi-Fi, your data is transmitted through a secure VPN (Virtual Private Network) managed by Google.
If turn on Wi-Fi automatically not working in Android device, then enable Wi-Fi scanning in Android Pie 9.0 & after that again turn on Wi-Fi automatically.
Stop WiFi From Turning on Automatically Android
Settings > Network & internet > WiFi > WiFi preferences > Toggle off “Turn on Wi-Fi automatically”
Turn on WiFi Scanning in Android 9 Pie

Settings > Security & location > Location > Advanced > Scanning > Toggle on “Wi-Fi scanning”
Now your Pixel device automatically connects near the Wi-Fi network if available.
You’ll enable/disable “turn off hotspot automatically” in your devices.
Automatically Turns Off Hotspot on Android 9 Pie
Settings > Network & internet > Hotspot & tethering > Wi-Fi hotspot > Advanced > Turn off hotspot automatically
By default enable this option. You can disable it any time in your android 9.0 device.
And that’s all. Do you still have a question about turn on WiFi automatically Android 9 Pie? If you have any kind of trouble, tell us in below comment box. Stay and connect with us for the latest updates.
About Bestusefultips
I’m Arpit Patel, a techno lover from India. Bestusefultips is a technology website focused on the latest Android news, tricks & tips related to Android devices, tutorials and videos.
Automatically connect to wifi network in android?
I am develping an app in which whenever wifi turned on then in background app should be to connect to a network if the network it connected to previously ?Can i use broad cast reciver for this purpose?
I think you need to used BroadcastReceiver as well as other components such as WifiManager and NetworkManager
can i detect if wifi network availble using brodcast reciver & then connect to the network which previosly remember.
I want to listen to broadcast first & then i get the previous saved wifi ssid & password from database then i try to match with searched result.if reslut match with previous then i connect to that network
1 Answer 1
For receiving the Broadcast for connectivity change, you can listen like this:
Register your receiver in the AndroidManifest.xml
Then in the BroadcastReceiver class
public class NetworkCheckReceiver extends BroadcastReceiver < @Override public void onReceive(Context context, Intent intent) < if (intent.getAction().equals(ConnectivityManager.CONNECTIVITY_ACTION)) < Log.d("NetworkCheckReceiver", "NetworkCheckReceiver invoked. "); boolean noConnectivity = intent.getBooleanExtra( ConnectivityManager.EXTRA_NO_CONNECTIVITY, false); if (!noConnectivity) < Log.d("NetworkCheckReceiver", "connected"); WifiConfiguration wifiConfig = new WifiConfiguration(); wifiConfig.SSID = String.format("\"%s\"", networkSSID); wifiConfig.preSharedKey = String.format("\"%s\"", networkKey); WifiManager wifiManager = (WifiManager) mContext.getSystemService(Context.WIFI_SERVICE); int netId = wifiManager.addNetwork(wifiConfig); wifiManager.disconnect(); wifiManager.enableNetwork(netId, true); wifiManager.reconnect(); >else < Log.d("NetworkCheckReceiver", "disconnected"); >> > > And of course, don’t forget to add the required permissions
Fix: Android Doesn’t Automatically Connect to WiFi

Many Android users today are struggling with their devices that are not auto-connecting to establish a connection. It’s a world where every individual constantly switches to a new location to enjoy more robust access to the home wifi and a stable Internet connection on the phone.
In such a case, Android devices seem to annoy customers when they can’t get phone notifications on time, and the phone can’t connect automatically.
It is naturally quite displeasing when the phones lose the ability to scan and accept the wifi networks available. The Android operating system demands that the customer chooses the network to get a connected Android device.
We have tried to browse the latest news about the problem in almost every Android phone and list the step-by-step guides to fix the same issue and error. We hope you find the content helpful.
List of alternatives to fix the Android doesn’t automatically connect to Wi-Fi issue:
#1 Restart your Android device
The first most common solution is to restart your device.
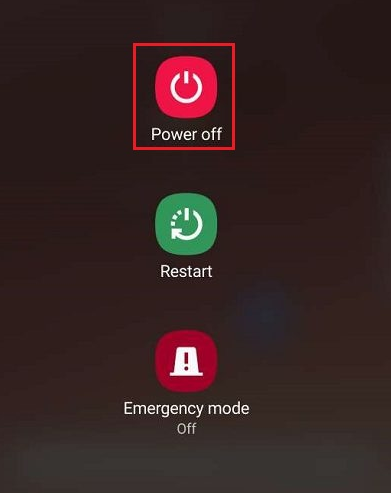
Step 1: Press the Power button and hold on for a few seconds.
Step 2: A list of options will appear on the screen—tap Restart.
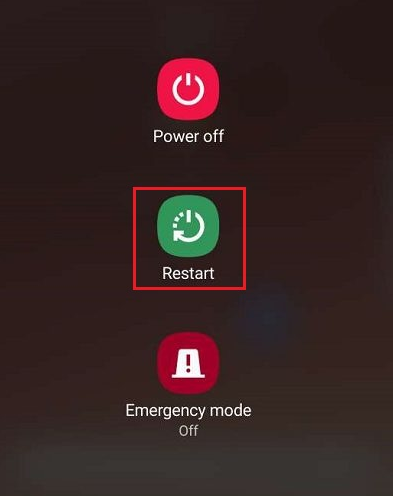
If the gadget doesn’t show a Restart option on the screen, you can tap the Power off option. Then press and hold the power button again to power on.
#2 Delete the saved networks
Often, forgetting a saved network and deleting the protected wi-fi network information can also help check the issue.
Step 1: Go to the Settings menu on your Android device.
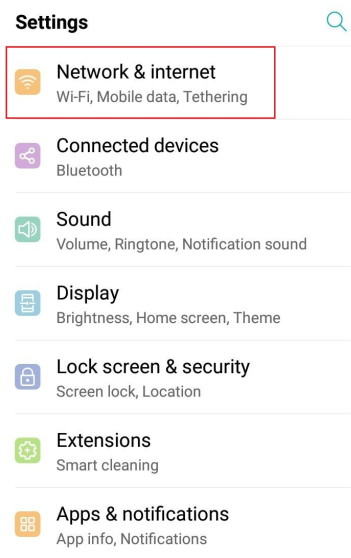
Step 2: Tap Network & Internet from the menu.
Step 3: Select Wi fi.
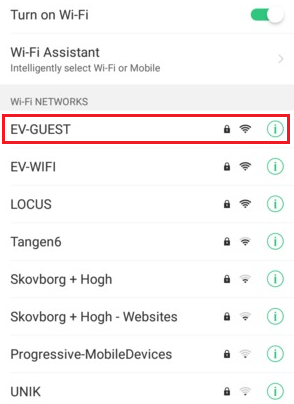
Step 4: In the Wi fi settings menu, you will see a list of wi-fi networks. Tap and hold on to your wi-fi network name.
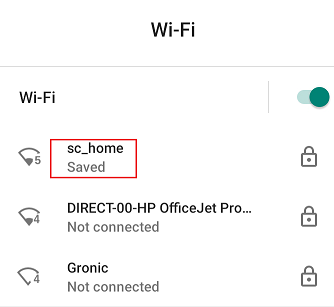
Step 5: Tap Forget network.

#3 Reconnect the device to the wifi network
After you delete the previously saved wi-fi networks, you can connect back to the wi-fi network you prefer. So there is a bright chance it can solve your wi-fi issue.
Step 1: Go to the Settings.
Step 2: Tap Network & Internet on screen.

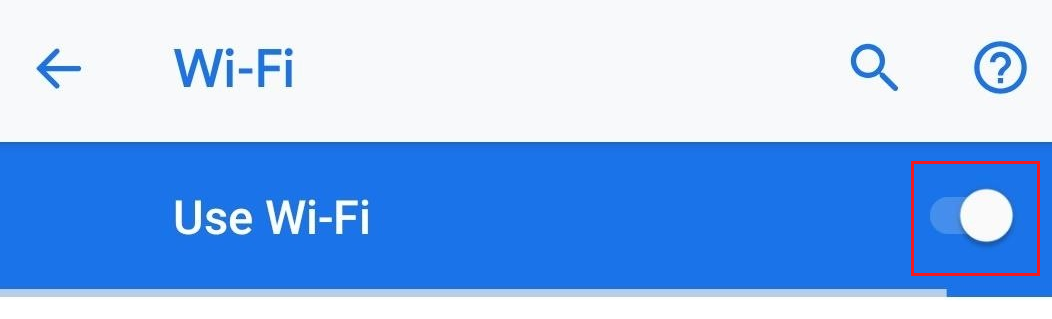
Step 3: Select Wi fi and turn it on.
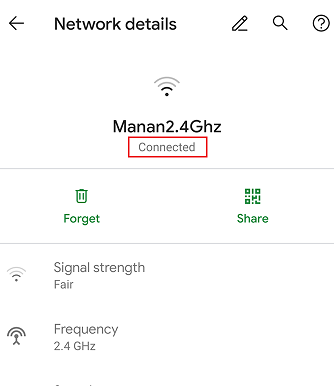
Step 4: If there is no specified authentication system, then the open network will connect automatically. You will see Connected written along with the wi-fi network name. There is an automatic wi fi connection even when you have already connected it previously.
You may want to connect to a new wi-fi network if you don’t wish to use the open networks you have connected to before. Then, you may connect to a new one from the list of public networks. Alternatively, if it is a hidden network, you must know the exact credentials for connecting it.
To establish connections with a new wi-fi network.
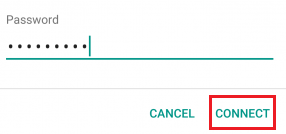
Step 1: In the wi-fi settings, you will see a list of all the available wifi networks. Choose the one with which you want to establish a new Internet connection.
Step 2: Enter the password to sign in to the wi-fi network.
Step 3: Tap Connect.
To establish connections with a hidden network.
Specific wi-fi networks are hidden and not open. Therefore, you won’t find them in the list of the available ones. If you want to connect with such a wi-fi network, follow the steps below.
Step 1: Tap Add Network.

Step 2: Enter the exact Network Name or the SSID, the Security type,and the Password manually.
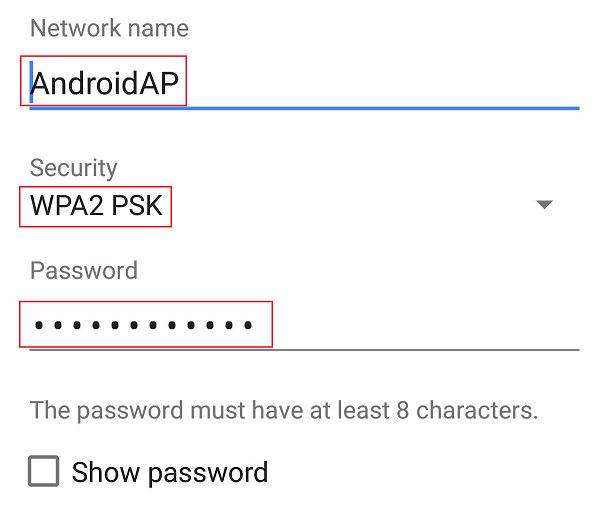
Step 3: Select Save.

#4 Turn on the auto-connect option in your device
One widespread solution that answers your wi-fi problem is the auto-connect option out of all the features in your phone. But, first, you must ensure that you have turned on the option on your phone.
Step 1: Go to the Settings.
Step 2: Tap Network & Internet.
Step 3: Click on Wi fi on the screen.
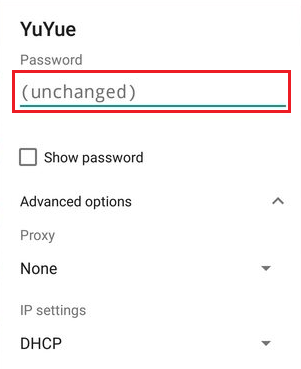
Step 4: Select Wi fi preferences.
Step 5: There is a toggle for Connect to open networks. Switching it on will automatically turn on the option to auto-connect to high-quality open wi-fi networks to establish connections.
#5 Restart your router and modem
If you have access to the modem and the network’s router you want to make a wi-fi connection with, follow the settings below to get support.
Step 1: Look for the power cable in the modem and disconnect it.
In some modems, the lights don’t go off even when you disconnect the power cable. Then, you will have to take out the battery from the device as well. But remember to put it back in place before you plug the power cable back in the modem.
Step 2: Similarly, find the power button on the router and press it to switch the power off. Also, if your router has a power cable like the modem, don’t forget to disconnect it.
Internet service providers these days give customers the services of Wireless Gateways. It means that both the Internet equipment come in a single gadget. If you have such a device, then skip the last step.
Step 3: Wait for a while, about 30 seconds.
Step 4: Finally, plug the power cables back into both the router and the modem. The power light will turn on in the devices.
Hence, the modem and the router will take up some time before they start working.
#6 Ensure proper cable connection in the modem and router
Sometimes, wi-fi issues may arise due to broken links in your modem and router. Follow the settings below to ensure it can connect your phone to the nearest network.
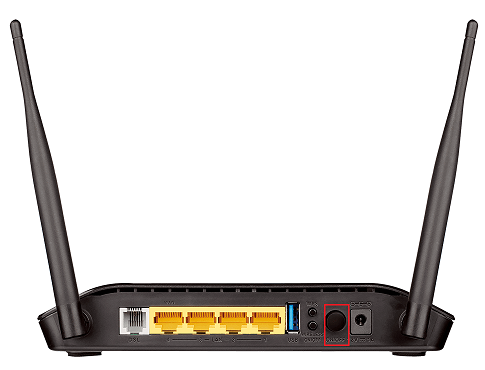
Check cable connection in the modem.
Step 1: Make sure that the power cable has a proper connection at both ends. It must have a good link with the modem itself, as well as the power source. Check if the power light is on in the device.
Step 2: Next, check the cable that links the device directly with the Internet service provider. You may have a cable line, a Fibre line, or a phone line.
Check cable connection in the router.
Step 1: Likewise, ensure that the power cable has a proper connection to the two outlets. It must have a good link between the router and the power outlet. Check if the power light is on.
Step 2: Check whether the Ethernet cable connection is perfect.
#7 Ensure that the light in the modem and router is on
Other elementary settings are to check whether the light in the modem and router is on. When there is stable wi-fi connectivity, the light will indicate it.
#8 Contact your service provider
If nothing works, ask your Internet and mobile data services provider to support you and solve the issue.
#9 Do away with unnecessary apps
Apps like battery savers and hibernators might turn off the wifi automatically when you are not consuming mobile data. Your wifi won’t work because the app had turned it off when you were not using mobile data. Do away with such an app from your phone.
#10 Check if your device is in range
To get a considerably good connection, you must make sure that your gadget lies well within the data range of the wifi router.
Wrap up
Android users are increasingly struggling and complaining about the issue nowadays. It has proved to be a significant turndown for customers using Android smartphones. We have recommended various solutions to the same, and one of them is sure to help you. Try every alternative one by one as it is, and you are sure to get a one-time solution for the issue.
Hedayat S
Hedayat is the new Editor-in-Chief of Rottenwifi and has been writing about computer networking since 2012. Hedayat’s strong background in computer science helped him cement his position in the ever-expanding tech blogging world. As a network engineer, systems administrator, and systems analyst during his decade-long career in Information Technology, he has a passion for the internet & technology in his DNA.
Blog.rottenwifi.com is a participant in the Amazon Services LLC Associates Program which means we may get paid commissions on editorially chosen products purchased through our links to retailer sites. All names, logos, brands, and images are trademarks or copyrighted materials of their respective owners. Amazon and the Amazon logo are trademarks of Amazon.com, Inc., or its affiliates.