How to Install Android OS to Run Favourite Games and Applications in Linux
Android (x86) is a project which aims to port the Android system to Intel x86 processors to let users install it easily on any computer, the way they do this is by taking an android source code, patching it to work on Intel x86 processors and some laptops and tablets.
In this article, you will learn how to install the latest version of Android OS on your VirtualBox platform on Linux. If you want, you can also install Android directly on your Linux, Windows or Mac system.
Step 1: Install VirtualBox in Linux
1. VirtualBox is available to install easily via official repositories in most Linux distributions, to install it on Debian-based Linux distributions run the following commands.
First, add the following line to your /etc/apt/sources.list file and according to your distribution release, make sure to replace » with your distribution release.
deb [arch=amd64] https://download.virtualbox.org/virtualbox/debian contrib
Then import public key and install VirtualBox as shown.
$ wget -q https://www.virtualbox.org/download/oracle_vbox_2016.asc -O- | sudo apt-key add - $ wget -q https://www.virtualbox.org/download/oracle_vbox.asc -O- | sudo apt-key add - $ sudo apt-get update $ sudo apt-get install virtualbox-6.1
For other Linux distributions like RHEL, CentOS, and Fedora, use the following article to install Virtualbox.
Step 2: Download and Install Android in Virtualbox
2. This is an easy step, go to the Android-x86 project and grab the latest Android version of Android-x86 64-bit ISO file for your architecture.
3. To install Android on VirtualBox, you need first to boot from the .iso image that you downloaded, to do so, open VirtualBox, Click on new to create a new virtual machine, and choose the settings as follows.
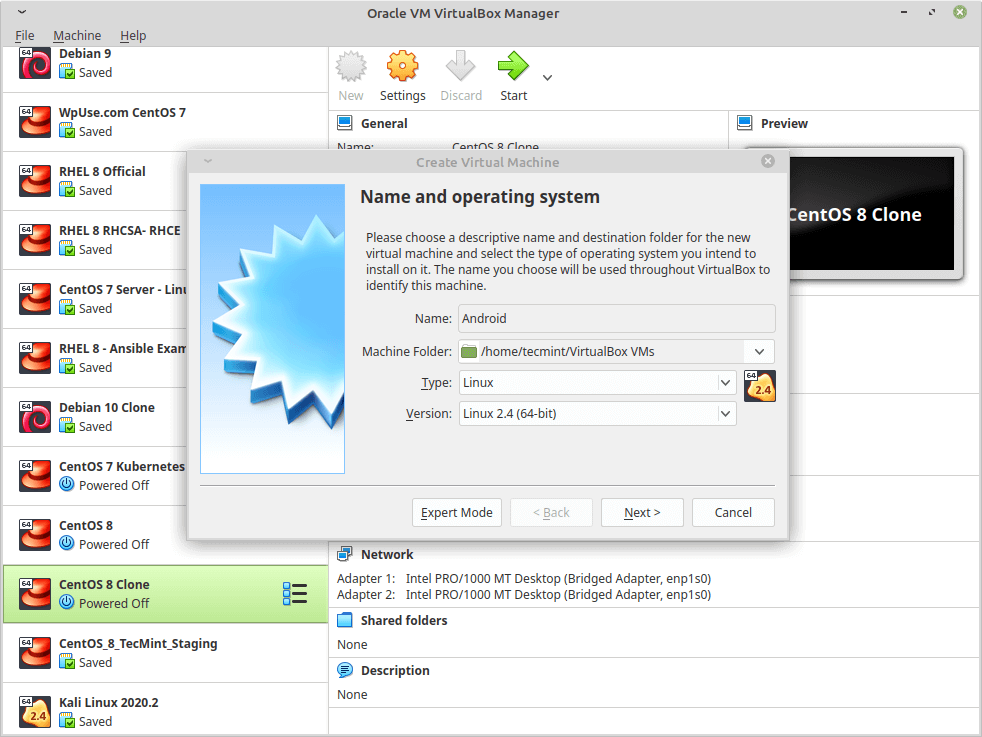
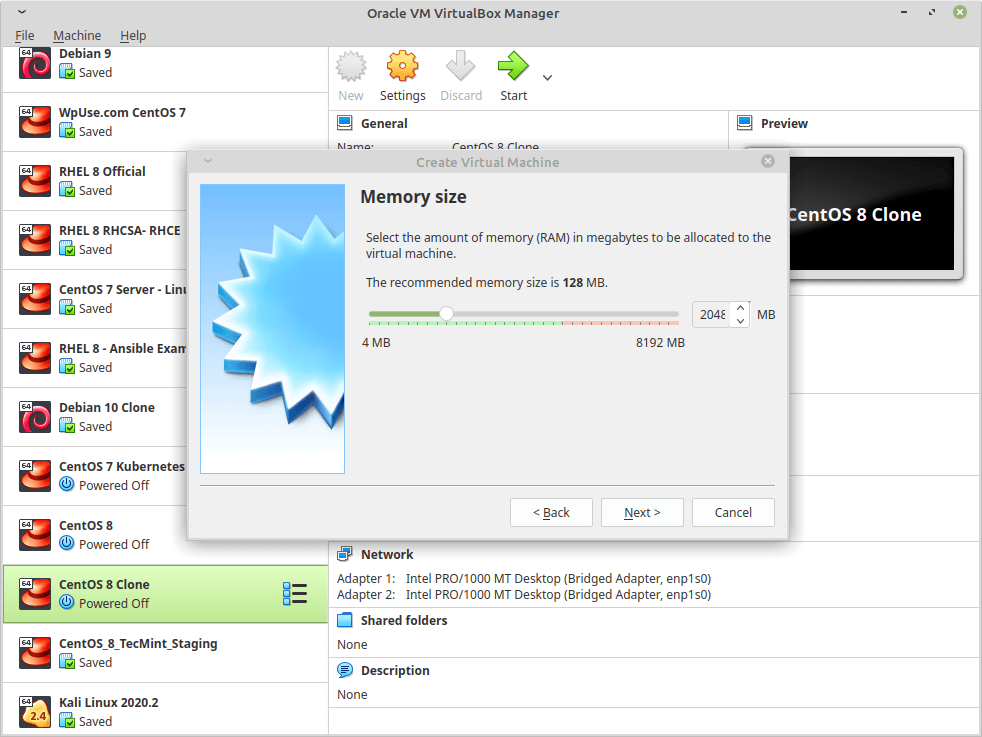
4. Then it will ask you to choose a Memory size for the machine, Android needs 1GB of RAM to work perfectly, but I will choose 2GB since I only have 4GB of RAM on my computer.
5. Now select “Create a virtual hard drive now” to create a new one.

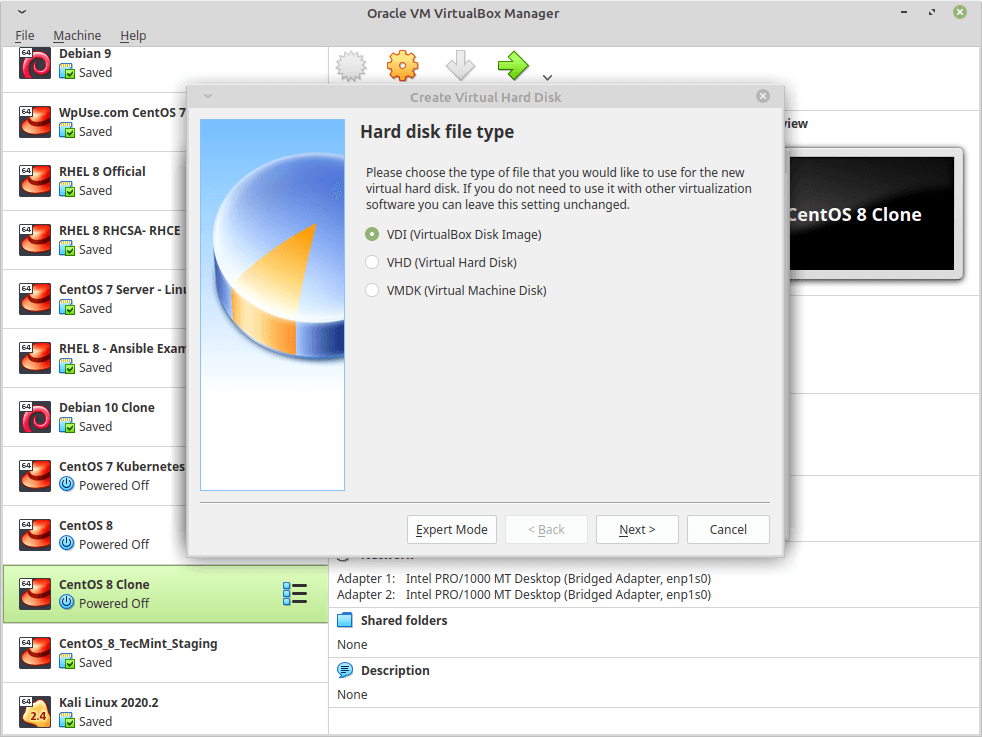
6. It will now ask you for the type of the new virtual hard drive, select VDI.
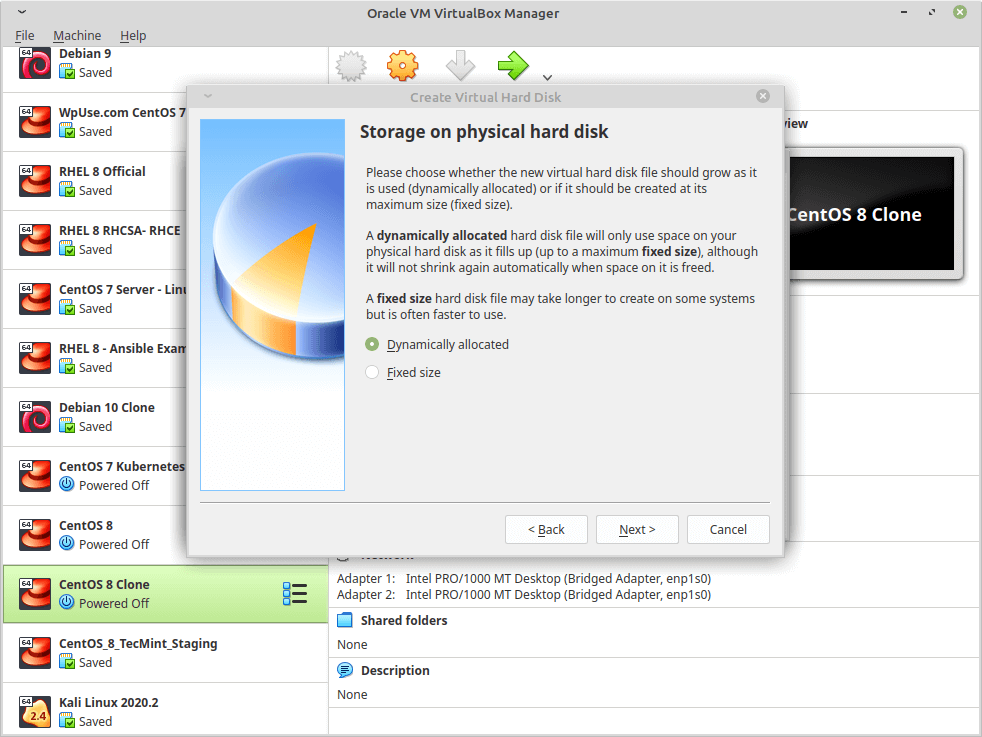
7. Now choose the size of the virtual hard drive, you may choose any size you want, no less than 10GB so the system can be installed correctly beside any future apps that you want to install.
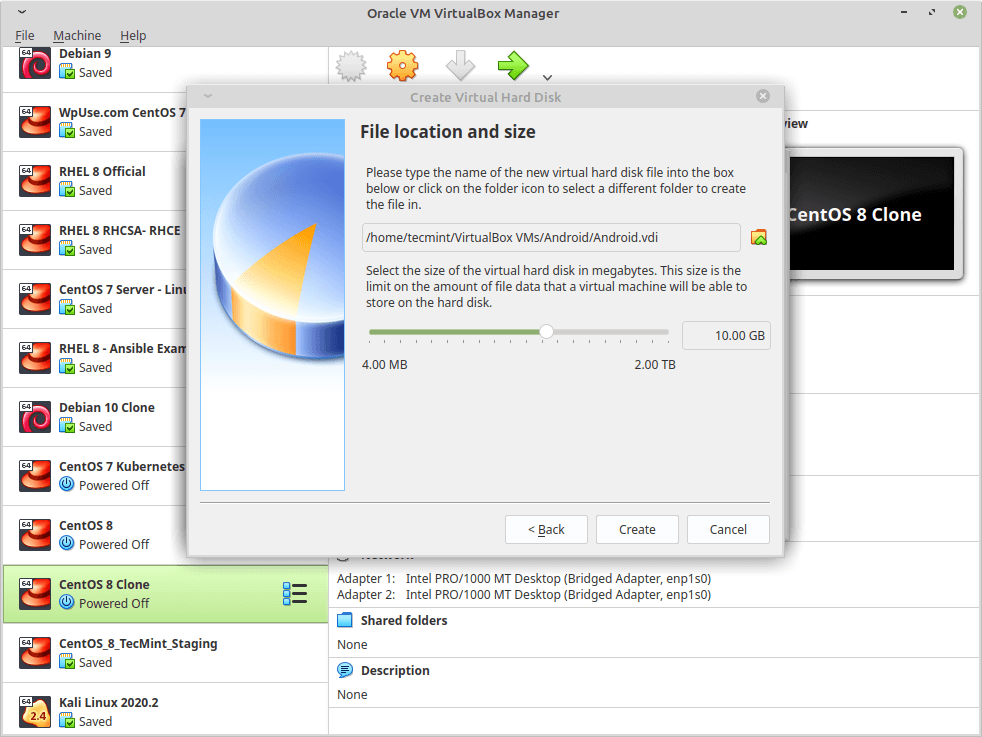
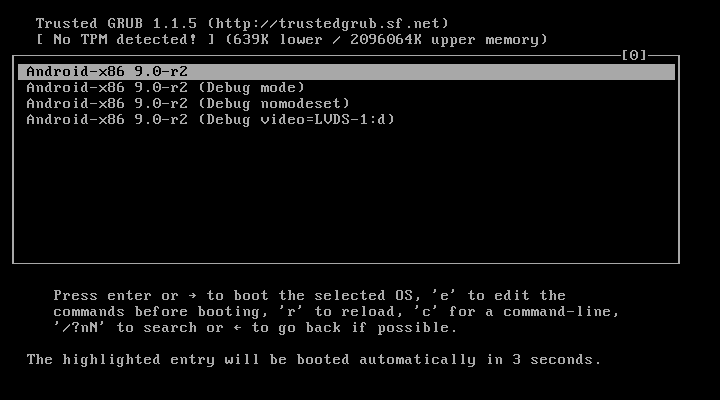
8. Now that’s your first virtual machine is created, now to boot from the .iso file that you downloaded, select the virtual machine from the list on the left, click on Settings, and go for “storage”, do as follow, and select the .iso image of Android.
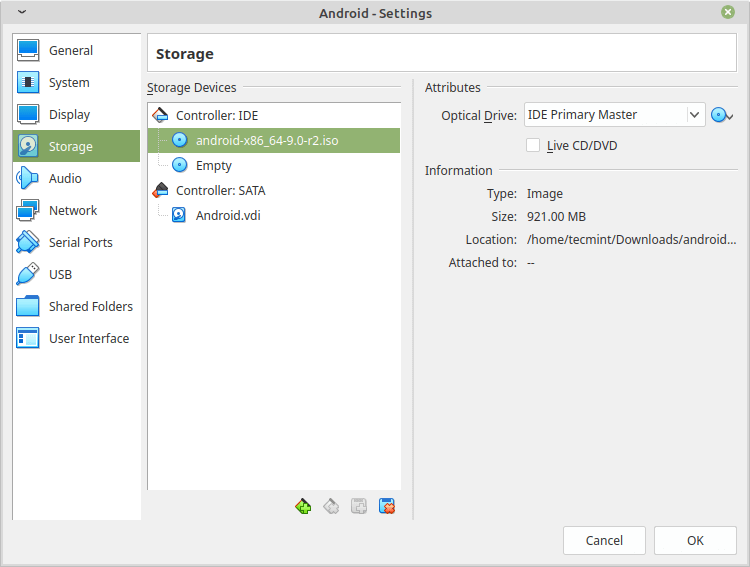
9. Click on OK, and start the machine to boot the .iso image, choose “Installation” to start installing the system on the virtual machine.

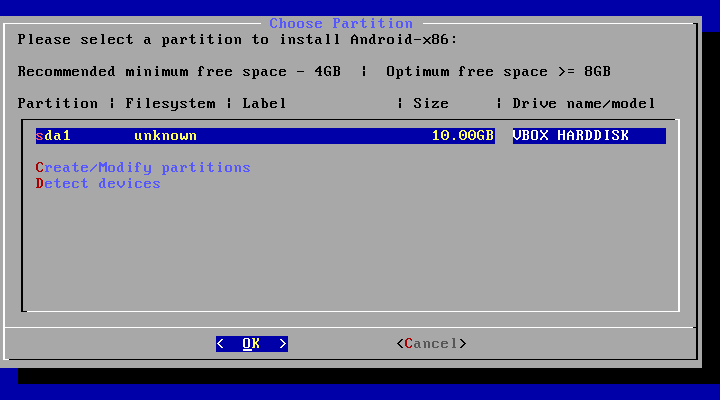
10. Please select a partition to install Android-x86.
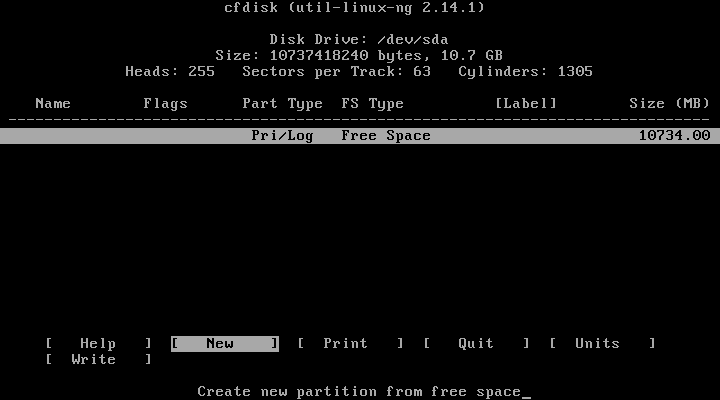
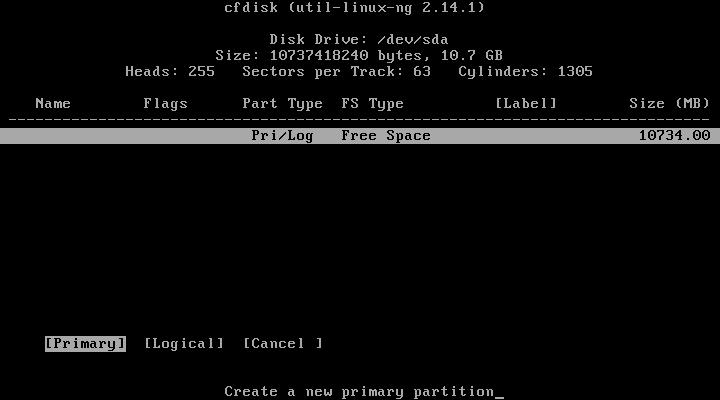
11. Now you will be prompted cfdisk which is a partitioning tool that we will use to create a new hard drive, so we can install android on it, click on “New”.
12. Choose “Primary” as partition type.
13. Next, select the size of the partition.

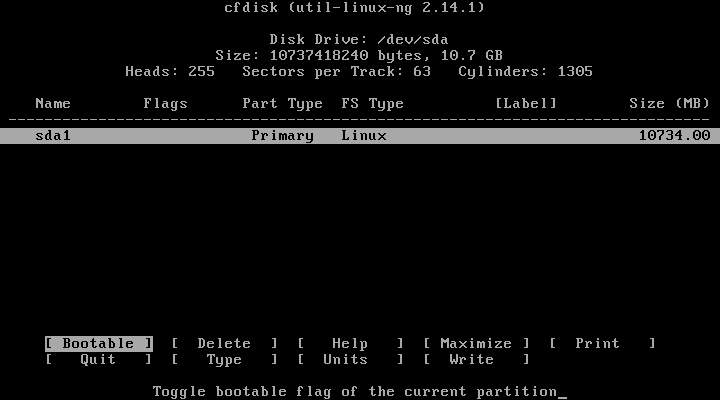
14. Now, we have to make the new hard drive bootable in order to be able to write changes to the disk, click on “Bootable” to give the bootable flag to the new partition, you won’t notice any changes in fact but the bootable flag will be given to that partition.
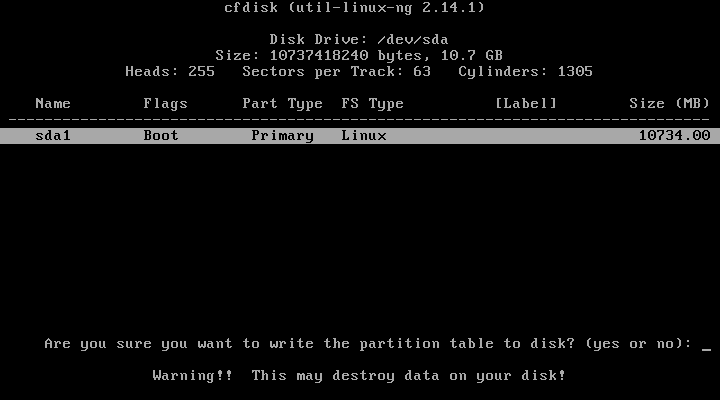
15. After that, click on “Write” to write the changes to the hard drive.

16. It will ask you if you are sure, write “yes”, and click on Enter.
17. Now that’s our new hard drive is created, now click on Quit and you will see something like this, select the partition that you created before in order to install android on it and hit Enter.

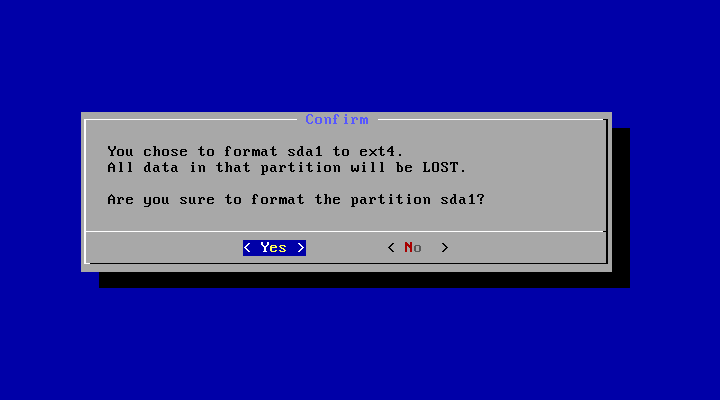
18. Choose “ext4” as a filesystem for the hard drive and format.

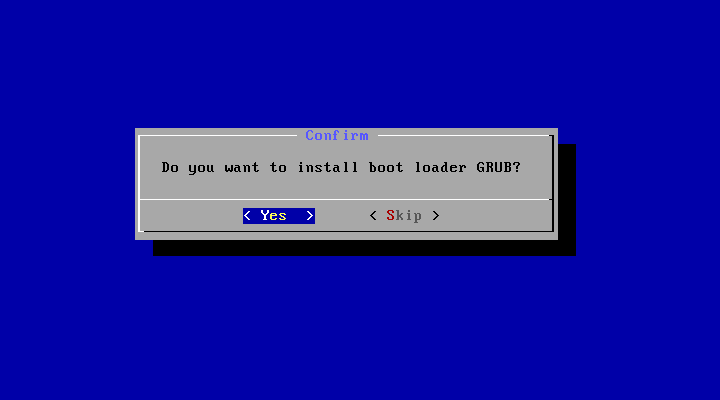
19. You will be asked now if you want to install GRUB bootloader, of course, you will select Yes because if you don’t, you won’t be able to boot the new system, so choose “Yes” and hit Enter.
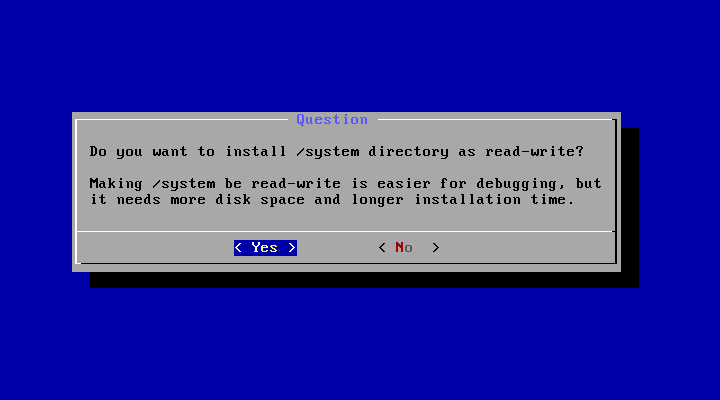
20. Finally, you will be asked if you want to make the /system partition writeable, choose Yes, it will help in a lot of things later after you install the system.
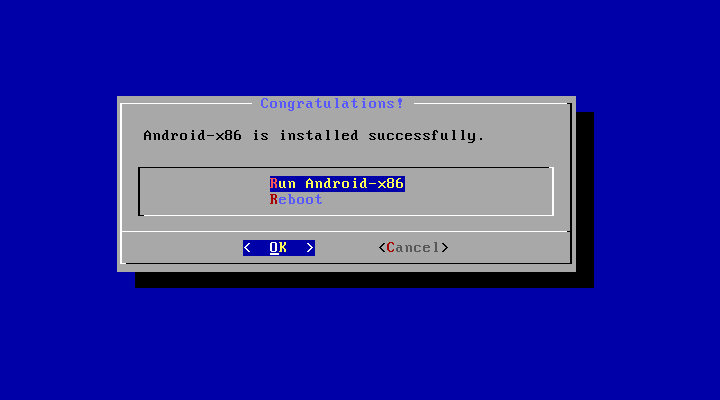
21. The installer will start the installation process after the installer finishes the job, choose Reboot.
22. Now that’s we installed Android on our hard drive, the problem is now that VirtualBox will keep loading the .iso image file instead of booting from the virtual hard drive, so to fix this problem, go to Settings, under “storage” select the .iso file and remove it from the booting menu.
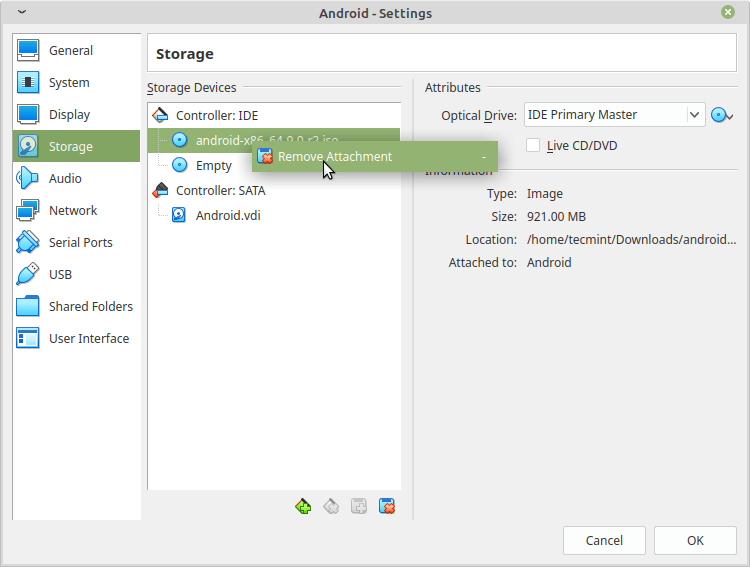
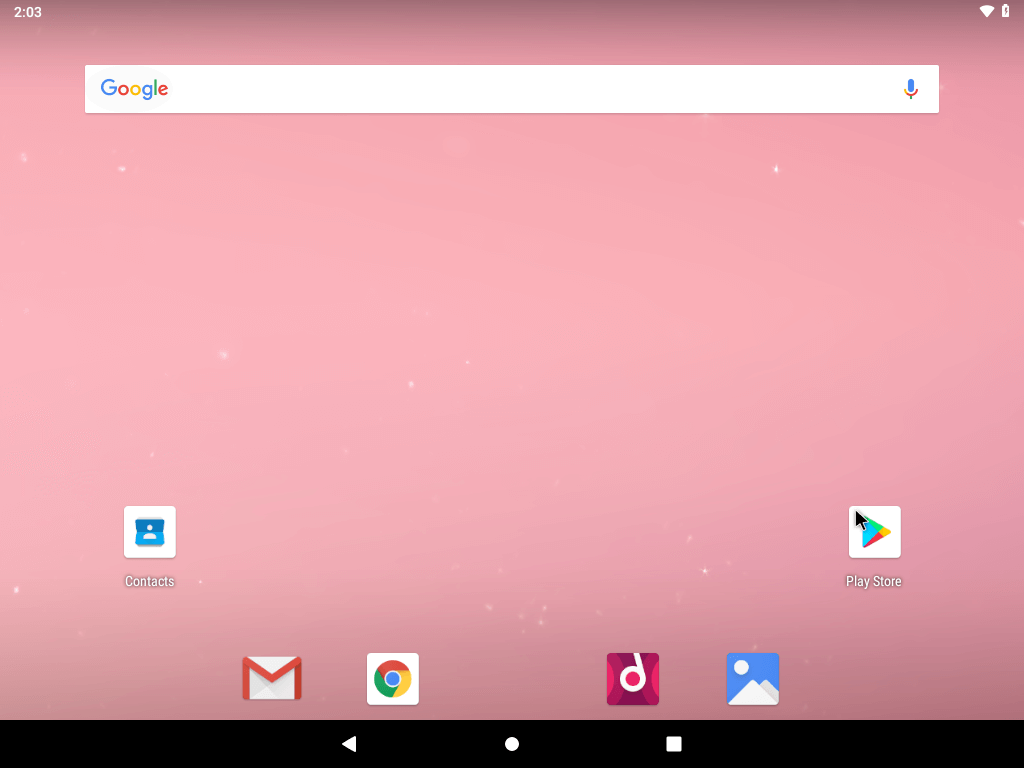
23. Now you can start the virtual machine with the installed android system.
Installing Android x86 will be good for you if you don’t have a smartphone and you want to use the Play Store apps easily, have you ever tried to install android x86? What were the results? Do you think that android may become a “real operation system” targeting PCs in the feature?
What knowledge/expertize is required to port android to custom arm device?
I am working on a system on which currently linux kernel and microwindows windowing system is running. Code of current linux system drivers is available to me. I want to port android on it, just as a hobby project. can you please tell me what all understanding of linux-kernel is required to port it? Please give me references (Books, Tutorials) to build-up understandings. Thanks, Sunny. P.S. I have basic understanding of linux. Configuration of device is
450 Mhz ARM9, 64 MB RAM, 256 MB NAND 480x272 resolution.
Part of the reason might be that you posed your question on Friday in the United States. Also your question borders on the subjective. Not that it is a wrong question, merely explaining some possible reasons.
3 Answers 3
Since you already have Linux up and running on your board you most likely won’t need to have a deep understanding of the kernel. It will need to be modified, however, to include the following additional Android specific features. This may be as easy as applying some patches but it could be more involved.
- Low Memory Killer
- Android Logger
- Android Shared Memory Subsystem (Ashmem)
- Android Power Management (Wakelocks)
- Binder IPC
In user space, Android uses its own display software called Surface Manager so you won’t be using the Nano-X Window System (formerly known as Microwindows).
For an overview of what will likely be involved in a port, I would give the Android Porting Guide a read.
Websites on porting Android to other ARM based devices that may include helpful tips:
- Beagleboard (Cortex)
- Rowboat (I tried this one and it works)
- Embinux
- Zoom OMAP (Cortex)
- OMAPpedia
- Nokia Internet Tablet (ARM9E)
- NITdroid
- Neo 1973 (ARM9TDMI)
- Benno Leslie’s Blog
- Intel Bulverde Evaluation Board (XScale)
- NemusTech Blog
- Sharp Zaurus SL-C760 (XScale)
- EU Edge Blog
Online groups that may be able to help:
Hi tkryger, I know that drivers part I have to write for my board in device. How much linux kernel has been modified by android? What is the architecture of Android? Is there any step by step guide or tutorial for it? Which simply tells me where I have to write my default screen resolution, Cache Prefrences.
Normally on development boards we get BSPs, Does Android comes with something similar to BSP? Which documents Beagle Board developers had read before porting android?
I’m not sure how many kernel changes are necessary to support Android. Probably not that many. I think the majority of the features of Android are in userland. A good description with a picture of the architecture is available at developer.android.com/guide/basics/what-is-android.html or if you like videos more check out youtube.com/watch?v=Mm6Ju0xhUW8
the Embinux link does not describe what they had to do, just the shell scripts you have to do to install it on that board. So these steps are only valid for beagleboard, not for any other board.
To start porting Android, a basic understanding of the changes to the linux kernels is required. Also, you’ll need to understand which drivers besides the Linux are required. linuxfordevices describes what was changed to the Linux kernel for the sake of Android. They also provide handy links like a diff of the changes they made.
On Android architecture, I found the youtube presentation Android Architecture]1 helpful.
I expect some issues in the display resolution. Android applications expect a number of standard resolutions. As a first step, I suggest to limit display to the next smaller size and then improve on this once it is up and running.
Since I’ve looked into Adroid for use in e-readers, I’m very interested in the porting myself. For this reason, I have registered for a (web based) training on android hardware (porting). I have looked for books etc. on the subject, but the books I found were much more on using Android and writing applications.