- how to restrict my android wifi connect to only one access point?
- Suggested Topics
- Grey Wifi and mobile data icon after upgrading to CM 10.2 20131102 Mobile Testing • cyanogenmod wi fi sync language samsung galaxy nexus • • Anderson
- How can I restore remembered wifi networks and saved wifi passwords? Mobile Testing • wi fi google ac languagec langu • • Rossere
- Can you use a minute plan with Google Voice? Mobile Testing • wi fi google voic languagee • • fbio
- Nexus5 not connecting to only my wifi network Mobile Testing • wi fi networking nexus 5 • • charlenef
- How do I debug my wi-fi connection? Mobile Testing • wi fi • • jeanid
- Как заставить Android-устройство подключаться только к Wi-Fi 5 ГГц
- Как заставить Android-устройство подключаться только к Wi-Fi 5 ГГц
- ИСПРАВЛЕНИЕ 1. Отключите автоматическое подключение для частоты 2,4 ГГц.
- ИСПРАВЛЕНИЕ 2. Переключение на MAC-адрес устройства
- ИСПРАВЛЕНИЕ 3. Используйте Band Steering
- ИСПРАВЛЕНИЕ 4. Используйте фильтр MAC-адресов беспроводной сети
- ИСПРАВЛЕНИЕ 5. Используйте сетку WiFi
- Why is only one device being allowed on the Internet through my Asus router?
- 4 Answers 4
how to restrict my android wifi connect to only one access point?
I like to restrict my android device’s wi-fi connect to one and only one access point. The attempt to connect to any other access points should be prevented. Is it possible to check the SSID value of access point in wi-fi driver and allow connection to only one particular SSID value?
By default Android will not connect to an access point unless it is in your list of «Remembered» networks. A network is remembered automatically the first time you connect to it. The solution is to open Settings -> Wi-Fi then select each Wi-Fi access point and click «Forget». This will remove it from the list of «Remebered» networks. From this point forward, Android will notify you that networks are available, but will not connect without solicitation. If you’re asking for security reasons, there is no security mechanism for white listing Wi-Fi networks. Android has no parental controls, if that’s what you’re after.
Suggested Topics
Grey Wifi and mobile data icon after upgrading to CM 10.2 20131102
Mobile Testing • cyanogenmod wi fi sync language samsung galaxy nexus • • Anderson
Upgrading gapps to the correct version (I was running 10.1 gapps on a 10.2 CM build) solved the issue. I did not have to reinstall the ROM or anything like that, simply flash the new gapps over the old.
How can I restore remembered wifi networks and saved wifi passwords?
Mobile Testing • wi fi google ac languagec langu • • Rossere
When you set up a phone and choose not to restore its previous backups, it creates a new «set» of backup data, independent of your old backups. From now on, your phone will only backup to and restore from this new set. There’s no simple way to make it switch back to the old set, to restore your old Wi-Fi settings, but my answer on a question about backing up multiple devices explains how a power user can use the bmgr tool to find old sets of backup data and switch to (i.e. restore from) a different set. I’m afraid you’ll have to look at the data and use your judgement: there’s no one step-by-step solution that will work for every case.
Can you use a minute plan with Google Voice?
Mobile Testing • wi fi google voic languagee • • fbio
You can use Google Voice with a non-smart phone, but it will be somewhat limited. If the only device you carry is the dumb phone, you won’t be able to do any calling over wifi (obviously). However, if you carry a wifi android device with you, you can set up Google Voice over wifi using a few methods, such as GrooveIP, or SIP Droid with these setup instructions. To only show your Google Voice number to callees when using your non-smart prepaid, follow Option 1 in this answer. Note that it will cost you 10-15 seconds each time you call someone, as the phone will manually dial the number after calling your own google voice number. Receiving calls won’t take up any extra time. If you don’t care about your friends and families having 2 numbers for you, you don’t need to do anything different for your prepaid. Just know that if they call you on your non-GV number, you won’t be able to accept it on your wifi android device (it won’t ring). You would need to explain that they should only ever call you on your GV number.
Nexus5 not connecting to only my wifi network
Mobile Testing • wi fi networking nexus 5 • • charlenef
This question thread has been very helpful — I too developed the same problem, which started after 2 events: being away from my home for 2 months, and also receiving the latest Android 4 updates (over-the-air) — across 3 Android devices: my HTC one, my Nexus 7, and an Alcatel Fierce. All have Android 4+ After hours inside the router’s setup panel, testing, I solved it with your help, Izzy. But it wasn’t the channel. It was the GHz setting! The home router was set for 5ghz. everything always worked fine, until the latest Android updates. Now, none will work; all give the same famous message: Not in Range. This is absolutely erroneous, since all PCs/Macs in the house could use the Wifi network just fine. (I won’t even mention the brand of router since it doesn’t matter.) To solve the problem, I tried eliminating most variables, in both the router and the android devices: SSID on/off — didn’t matter; not in range; Channel changing — no effect; still not in range; restarting router and phones and tablets — no luck; toggling WIFI optimizations/power saving/dhcp-vs-static — no luck What DID work was changing the broadcast channel from 5ghz back to the more crowded 2.4 GHz. Success. And rats, I’d rather be using the 5GHz. So I conclude that this is an Android 4+ software bug. (Phone hardware, you think? How could all three devices have a problem with 5ghz, when they ALL worked fine before on this same network, before joining other networks fine?) There’s something wrong with the software such that once they join a 5GHz wifi network, then connect later to another network (cafe hotspot, other network, etc.), they lose the ability to «see» the network they first connected to.
How do I debug my wi-fi connection?
Mobile Testing • wi fi • • jeanid
In the end I fixed it using the old «have you tried turning it off and on again?» on one of the APs. Make sure to try that first. So here is my little checklist, least annoying first: (If you have other suggestions or things that worked for you let me know and I’ll add them!) Recheck the password it is almost always the problem! (Hint to the Android devs: A more descriptive error for this case would be great. ) Reboot all devices. Yes, even if it works for other computers and if it will cut their network connection. Try adding the network manually and entering all the data manually. Try restricting all devices to specific channels and bands instead of using automatic discovery. If you use multiple devices make sure they don’t interfere by setting them to different channels or selectively turning them off. Try using «adb logcat» to get more information. Try resetting your phone.
Как заставить Android-устройство подключаться только к Wi-Fi 5 ГГц
В этом руководстве мы покажем вам различные способы заставить ваше Android-устройство подключаться только к Wi-Fi с частотой 5 ГГц. Если у вас есть сети Wi-Fi 2,4 ГГц и 5 ГГц, то обычно у них есть два отдельных SSID. [network name]. Это разделение позволит вам легко подключаться/отключаться от WiFi по вашему выбору. Однако недавно пользователь задал мне довольно интригующий вопрос:
В то время как его WiFI имеет обе вышеупомянутые частоты, но они оба находятся под одним и тем же SSID. В результате он не может просто отключить 2,4 ГГц, так как это окажет прямое влияние и на частоту 5 ГГц. Даже если бы это было не так, то отключение частоты 2,4 ГГц также не является жизнеспособным подходом.
Это связано с тем, что в вашем доме может быть несколько устройств, поддерживающих только 2,4 ГГц, поэтому отключение этой частоты напрямую повлияет на работу этих устройств. Поэтому, чтобы не мешать этим настройкам, в этом руководстве будут представлены несколько отличных обходных путей, которые должны помочь вам заставить ваше устройство Android подключаться только к Wi-Fi 5 ГГц. Итак, без лишних слов, давайте проверим их.
Как заставить Android-устройство подключаться только к Wi-Fi 5 ГГц
Программы для Windows, мобильные приложения, игры — ВСЁ БЕСПЛАТНО, в нашем закрытом телеграмм канале — Подписывайтесь:)
Рекомендуется попробовать каждый из перечисленных ниже обходных путей, а затем посмотреть, какой из них принесет вам успех. Итак, имея это в виду, давайте начнем. Примечание. В приведенных ниже исправлениях может потребоваться войти в маршрутизатор. Вот как вы могли бы сделать то же самое:
- Для начала введите один из четырех IP-адресов в веб-браузере, чтобы получить доступ к домашней странице маршрутизатора.
- Затем введите идентификатор и пароль. Это может быть комбинация любого из этих ID: ПАРОЛЬ: ID: admin ПАРОЛЬ: admin ID: ПАРОЛЬ: admin ID: admin ПАРОЛЬ:
ИСПРАВЛЕНИЕ 1. Отключите автоматическое подключение для частоты 2,4 ГГц.
Вместо того, чтобы отключать 2,4 ГГц на уровне маршрутизатора, вы можете отключить его на уровне устройства. Таким образом, ваше устройство Android будет работать только на частоте 5 ГГц, тогда как другие устройства смогут без проблем использовать частоту 2,4 ГГц. Поэтому обратитесь к приведенным ниже шагам, чтобы попробовать это исправление и проверить результаты. [Note: If you have only a single SSID, then you will first have to split your router into 2 different SSID for both bands and then try out the below steps]
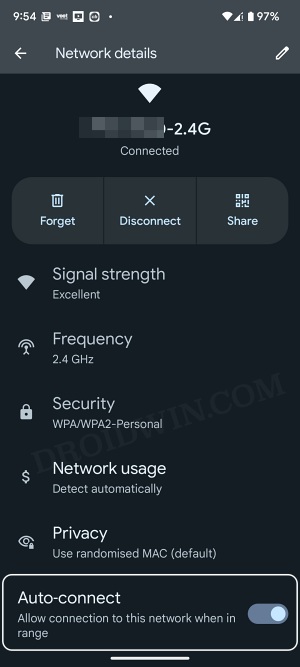
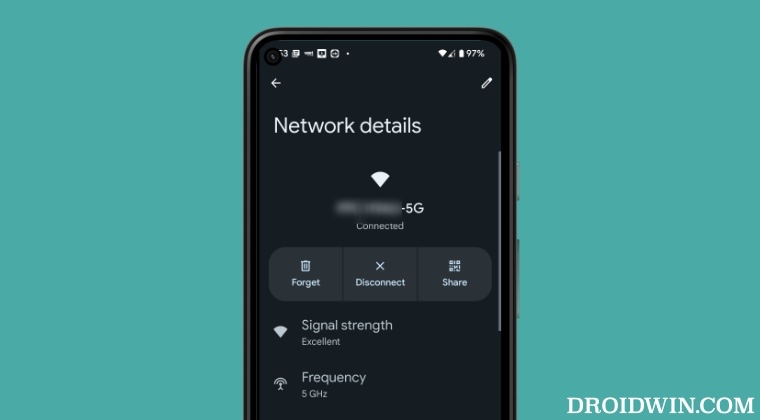
- Перейдите в «Настройки» > «Сеть и Интернет» и подключите свое устройство к сети Wi-Fi 2,4 ГГц.
- Затем нажмите на значок настроек рядом с ним и отключите переключатель рядом с Auto Connect.
- Вот и все. Теперь это заставит ваше устройство Android подключаться только к Wi-Fi 5 ГГц.
ИСПРАВЛЕНИЕ 2. Переключение на MAC-адрес устройства
По умолчанию ваш телефон использует случайный MAC-адрес. Однако вы можете переключить его на фактический MAC-адрес устройства, что, в свою очередь, отдаст приоритет соединению 5 ГГц, а не 2,4 ГГц. Вот как это можно сделать:

- Перейдите в «Настройки» > «Сеть и Интернет» и подключите свое устройство к сети Wi-Fi 5 ГГц.
- Затем нажмите на значок настроек рядом с ним и перейдите в раздел «Конфиденциальность».
- Теперь выберите «Использовать MAC-адрес устройства» из списка и проверьте результаты.
Примечание. Пока вы выбрали «Использовать MAC-адрес устройства», прокрутите немного вниз и обратите внимание на значение в разделе «Mac-адрес устройства». Это пригодится позже.
ИСПРАВЛЕНИЕ 3. Используйте Band Steering
Некоторые маршрутизаторы оснащены функцией Band Steering, которая переводит поддерживаемые устройства на частоту 5 ГГц, сохраняя при этом частоту 2,4 ГГц для остальных устройств, не поддерживающих 5 ГГц. Поэтому войдите в свой маршрутизатор и сразу же попробуйте эту функцию.

Кредиты: TP-Link
ИСПРАВЛЕНИЕ 4. Используйте фильтр MAC-адресов беспроводной сети
Вы также можете использовать метод Wireless MAC Filter на своем маршрутизаторе, чтобы заблокировать диапазон 2,4 ГГц для вашего устройства Android. Все, что вам нужно сделать, это получить MAC-адрес вашего устройства и ввести его в Wireless MAC Filter. В результате ваше устройство Android не сможет подключиться к Wi-Fi 2,4 ГГц и будет вынуждено подключаться только к 5 ГГц.

Кредиты: TP-Link
ИСПРАВЛЕНИЕ 5. Используйте сетку WiFi

- Если у вас дома есть ячеистая сеть, загрузите и установите соответствующее приложение для Android.
- Затем запустите его, перейдите в меню «Настройки» и отключите сеть 2,4 ГГц для сетки.
- Отныне подключайте свое Android-устройство через Mesh [which now only has support for 5GHz network ]
- Принимая во внимание, что остальные ваши устройства подключайте напрямую через маршрутизатор. [which still has support for both 2.4 and 5GHz networks].
Вот и все. Это были некоторые из удобных методов, с помощью которых вы могли заставить свое Android-устройство подключаться только к сети Wi-Fi с частотой 5 ГГц. если вы знаете о каких-либо других подобных настройках, не перечисленных здесь, поделитесь ими с нами через раздел комментариев ниже.
Why is only one device being allowed on the Internet through my Asus router?
Only one specific device (always the same one laptop) is able to connect to the internet. I did a factory reset but the problem still happens. The other devices (Android, Symbian, another laptop) can connect to Wi-Fi, but cannot connect to the internet. Two weeks ago there wasn’t any problem with the devices mentioned above.
4 Answers 4
This can happen when your Wi-Fi «router» is actually just bridging, and your broadband modem latches onto the first LAN-side MAC address it sees after it boots. DOCSIS-compliant cable modems are especially likely to do this to you.
The solution is to put your Wi-Fi router back into NAT gateway mode and make sure your Wi-Fi router’s WAN port (not its LAN port) is the only thing connected to the LAN side of the cable modem. Then fully power down the cable modem and then boot it back up. That the router’s WAN MAC address will be the one the cable modem latches onto, because no other machine’s MAC address will be visible to the cable modem.
Note: If your cable modem includes telephone gateway functionality (VoIP, «digital voice», eMTA, etc.), it may have a built-in battery backup, so when you unplug the cable modem, be sure to look to see if you need to also unplug the backup battery in order to fully power-down the unit.
Note also that accidentally connecting one of your Wi-Fi router’s LAN ports to the cable modem can have this same effect, as it means that the Wi-Fi router will simply be bridging your LAN/WLAN traffic over to the cable modem, so all your devices’ MAC addresses will be visible to the cable modem. So if someone accidentally (re-)connected a cable to the wrong port, just switch it back to the WAN port.