- How to call Wi-Fi settings screen from my application using Android
- Solution 2
- Solution 3
- Solution 4
- Solution 5
- Расширенные настройки Wi-Fi на Android-устройствах
- Автоматическая настройка Wi-Fi сети на Android
- Ручная настройка Wi-Fi на Android
- Настройка Wi-Fi на планшете или смартфоне с Андроид: Видео
- Как сбросить настройки Wi-Fi
- How to call Wi-Fi settings screen from my application using Android
- 9 Answers 9
- How to configure WiFi manually on Android
- Add a new WiFi connection on Android
- Configure connection
- Additional data
How to call Wi-Fi settings screen from my application using Android
Look at android.provider.Settings for a series of Intent actions you can use to launch various settings screens (e.g., ACTION_WIFI_SETTINGS ).
EDIT: Add the coding line.
Solution 2
ConnectivityManager manager = (ConnectivityManager) getSystemService(MainActivity.CONNECTIVITY_SERVICE); /* * 3G confirm */ Boolean is3g = manager.getNetworkInfo( ConnectivityManager.TYPE_MOBILE).isConnectedOrConnecting(); /* * wifi confirm */ Boolean isWifi = manager.getNetworkInfo( ConnectivityManager.TYPE_WIFI).isConnectedOrConnecting(); if (is3g) < textView.setText("3G"); >else if (isWifi) < textView.setText("wifi"); >else < textView.setText("nothing"); // Activity transfer to wifi settings startActivity(new Intent(Settings.ACTION_WIFI_SETTINGS)); >Solution 3
Just have to call an intent with a context, try this:
startActivity(new Intent(WifiManager.ACTION_PICK_WIFI_NETWORK)); Solution 4
If you want to do it from the xml file:
This will show an entry in your settings that will call the platform’s settings activity
Solution 5
If you’re on Android 10, and your goal is to make the user to turn on the WiFi, you don’t have to actually navigate to the Wifi settings screen anymore. You can use Settings Pannel
an API which allows apps to show settings to users in the context of their app.
Intent panelIntent = new Intent(Settings.Panel.settings_panel_type); startActivityForResult(panelIntent); Расширенные настройки Wi-Fi на Android-устройствах
Настройки Wi-Fi на Android устройствах, а на сегодняшний день это самый широкий рынок мобильных устройств – должен знать всякий владелец такого девайса. Существует несколько видов настроек:
Автоматическая настройка Wi-Fi сети на Android
Чаще всего пользователи системы Андроид, используют автонастройку доступа к беспроводной сети. Это показывает, что мобильный аппарат изначально настроен и готов к работе. Вам же потребуется только войти в раздел Wi-Fi на вашем аппарате и активировать Wi-Fi модуль.
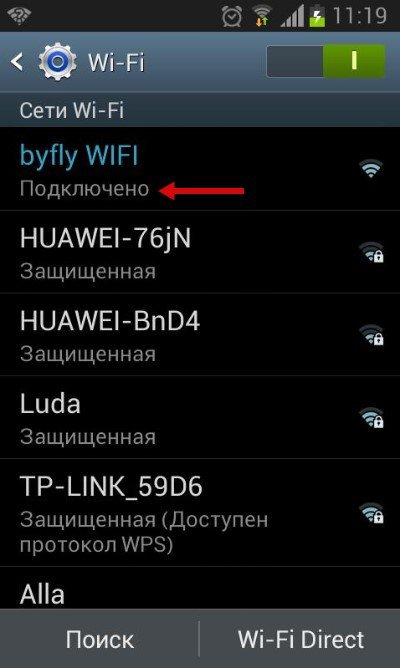
После включения модуля, система начнет искать возможные подключения и выдаст вам целый список доступных. Выберите интересующее подключение и если для синхронизации потребуется пароль, то введите его в отдельное поле.
Расширенные настройки сети Wi-Fi могут потребоваться, когда:
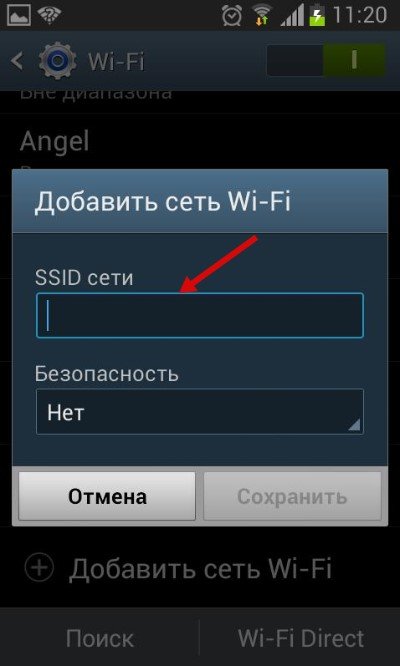
- Беспроводная сеть, к которой вы собираетесь совершить подключение, скрыта от общего доступа.
- Если в настройках доступа отключен протокол DHCP.
Ручная настройка Wi-Fi на Android
Для начала возьмите смартфон и перейдите в настройки Wi-Fi, после чего включите адаптер. После того как на экране возникнет список возможных подключений, у вас появится два варианта:
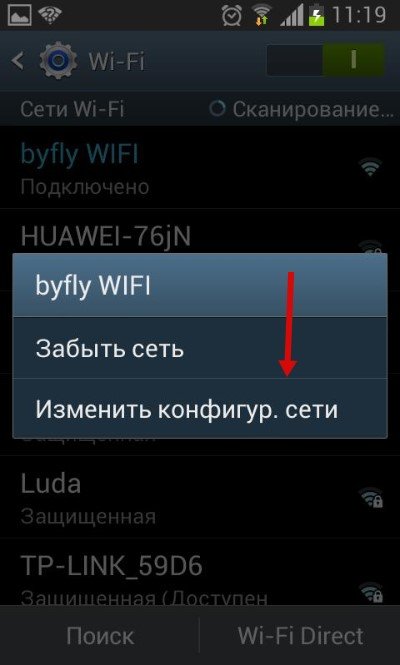
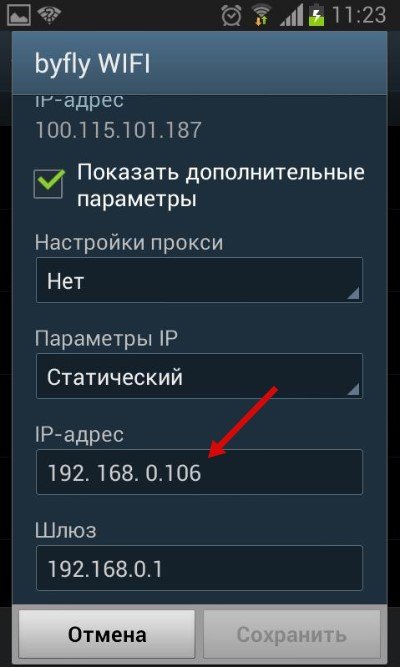
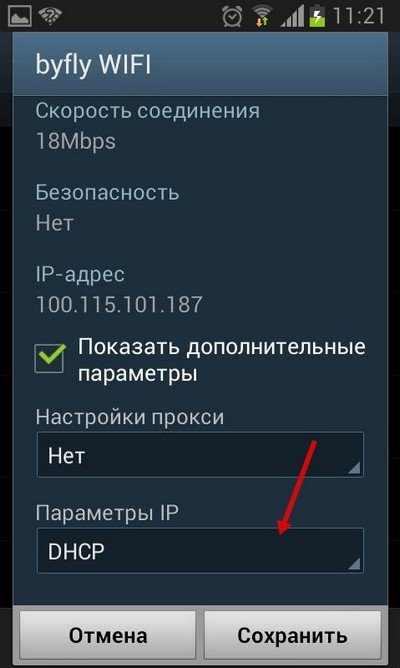
- Если требуется поменять конфигурацию уже имеющейся точки в связи со сменой настроек доступа, то найдите в списке, нужное название сети и удерживайте на ней палец, пока на экране не всплывет дополнительное меню. В нем и нужно выбрать функцию «Изменить конфигурацию сети Wi-Fi».


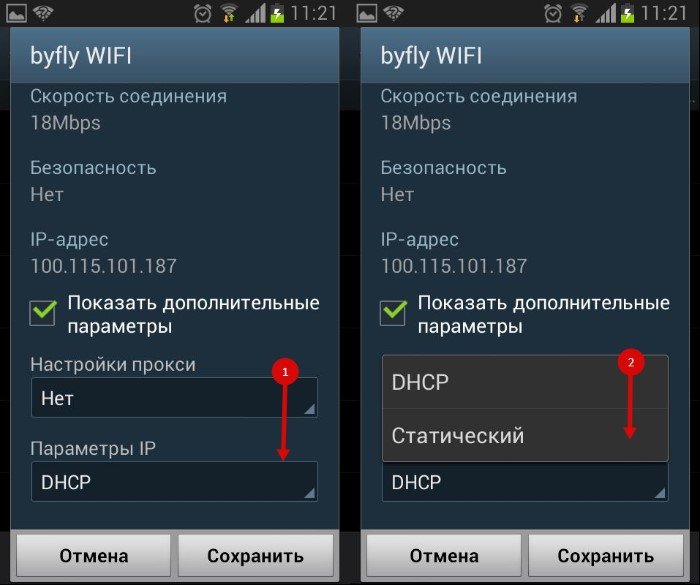
- IP-адрес – это адрес смартфона. Этот адрес должен оказаться в диапазоне, который указан в настройках точки доступа. Например, от 192.168.0.100 до 192.168.0.199. Иначе говоря, у вас имеется сотня вариантов. Изменению подвергается только конечное значение (100-199). Диапазон может быть менее широким. Да и сам адрес также может отличаться. Все эти особенности зависят от конфигураций маршрутизатора.
Настройка Wi-Fi на планшете или смартфоне с Андроид: Видео
Как сбросить настройки Wi-Fi
В самом начале нужно сказать, что вы изменяете конфигурацию только для выбранного подключения. То есть данные настройки не будут распространяться на остальные точки. Иначе говоря, чтобы сбросить конфигурацию Wi-Fi в вашем смартфоне для конкретного соединения, вам потребуется просто активировать модуль Wi-Fi и ту сеть, которую хотите удалить. В новом окне тапните на «Забыть сеть» или же нажмите на «Изменить конфигурацию».
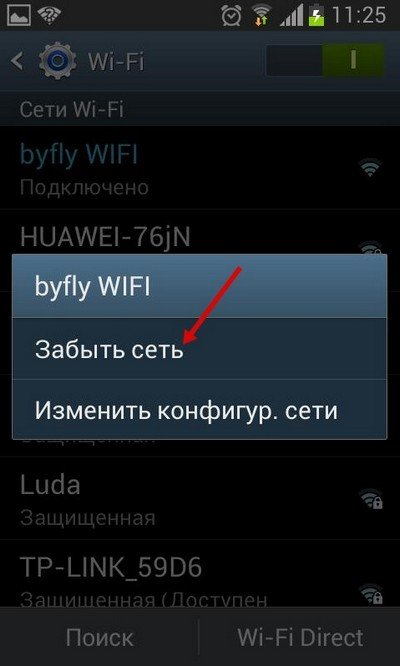
В первом варианте, конфигурации для этого подключения удалятся, и вам придется вводить пароль. Во втором варианте вы можете включить функцию DHCP в настройках IP. Она позволит вашему смартфону получать нужные настройки в автоматическом режиме.
Откатить настройки Wi-Fi к первоначальному состоянию на Android автоматически невозможно. Все придется делать в ручном режиме. Но, так как в данном вопросе нет ничего сложного, то это не займет у вас много времени.
How to call Wi-Fi settings screen from my application using Android
Normally I am getting Wi-Fi setting screen on the emulator by clicking on the Settings > Wireless controls > wifi settings . I need to go directly to the Wi-Fi settings screen from my program when pressing on the Wi-Fi button which I have created. Contacts, Call Logs we can handle by using Intent.setData(android.provider.contacts. ). Is there any way to open settings sub-menus/menu from an android program?
Please give me advise or sample code on this.
9 Answers 9
Look at android.provider.Settings for a series of Intent actions you can use to launch various settings screens (e.g., ACTION_WIFI_SETTINGS ).
EDIT: Add the coding line.
to be more specific, android.app.activity.startActivity(new android.content.Intent.Intent(android.provider.settings.Settings.ACTION_WIFI_SETTINGS)); or with proper using, startActivity(new Intent(Settings.ACTION_WIFI_SETTINGS));
@Mr_and_Mrs_D: Possibly. I can see where the Settings app might not handle these Intents properly when the Settings app is already in memory, but I haven’t tried this specific scenario.
to open general wireless settings use this: startActivity(new Intent(Settings.ACTION_WIRELESS_SETTINGS));
@patrickjason91: «if it will be possible that the app’s Intent call can control some configuration to how the WiFi settings, or to any other settings screen in general, will display?» — not in general, and not using any documented extras.
How to configure WiFi manually on Android

The normal thing is that when we we connect to a WiFi network from our Android phone, the steps we follow are usually the same. We connect the WiFi in the phone and if it is a network that we already know, we connect to it. But in some cases, we can do this in a different way, as we can add a network ourselves. Something that may be necessary in case it is a new network.
Therefore, on Android phones there is the possibility to configure a connection manually. Thus, we add it to the phone and we have everything configured so that this network can be used at all times when we need it. The steps are the same on all OS phones.
Add a new WiFi connection on Android
First of all we will have to go to the WiFi settings on the phone. To go here we have two ways, on the one hand it is possible to use the phone settings and enter the wireless connection section. We can also make use of the quick settings of Android, since if we press and hold on the WiFi icon, the settings of this theme will open on the phone screen. Then we can start.
Depending on the layer, you may directly exit the button to add a new connection. In other telephones, you have to go to the settings menu in that menu, so that you have access to this option. But in all cases, we have to select the option to add or add a new connection. So let’s start then with the steps to add it in our case. Next we will have to enter the details of this connection.

Configure connection

First of all we will have add the basic data of this connection to the phone. On the one hand, we will have to give a name to this WiFi connection that we add on our phone. The name is not something really important, but it should be clear to us, to recognize the network at all times. Although the normal thing is that it is the name of a router or WiFi network, so we have to use the name of that network, respecting upper and lower case letters at all times.
In addition to this, Android asks us to add the type of security of said network. In this sense we have several options, such as WEP, WPA / WPA2 PSK, 802.1x EAP. They tend to always come out, although on other phones there are also some additional security options. It will depend on each phone. Depending on whether or not that network has a password, we will use one or the other. If it’s a passwordless network, then we use none.
But if we have any key in said network, then we have to indicate the type of security of it. We will also have to add the password, which will only be necessary the first time. Since these passwords are then stored on our Android phone. If you have doubts about security, check your router, but the normal thing is that it is usually WPA / wPA2 PSK, which is the most used in that case.

Additional data

The normal thing is that with the data that we have entered, the process has been completed. So this network has already been added to our Android phone and is ready to be used. But it may be the case that it is a specific network that has specific requirements, so that we will have to make use of the advanced options. In this section we find some additional options, which we also have to configure. The sections present are mostly:
- proxy. This option allows you to configure a proxy server to use in this specific connection
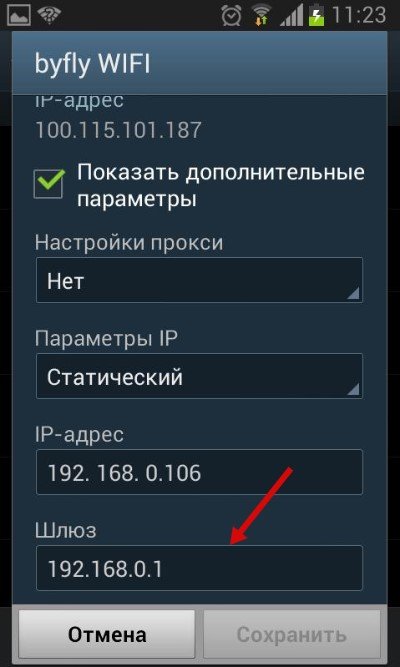
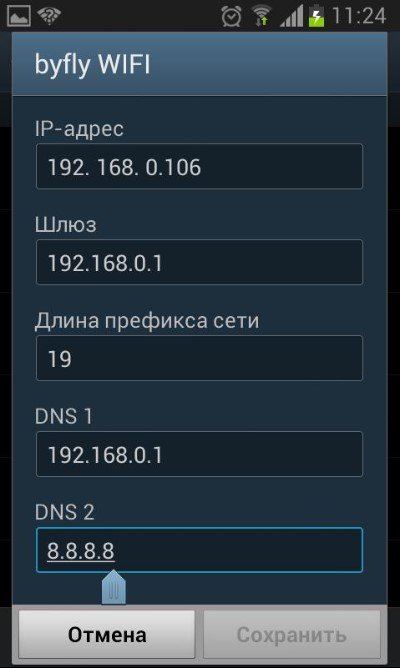
- IP settings. This section offers the possibility to choose between the automatic IP mode (DHCP protocol) or to establish a manual IP. If the second is used, certain data is requested, since it will be necessary to enter the IP address, the gateway, the length of the network prefix and the two DNS addresses. Then it is already configured.
- Metered use. It is used to indicate that the Wi-Fi connection is not for unlimited use. This means that for the extra use of data you will have to pay additional money. When these types of networks are activated, Android will limit the use of the network in the compatible applications, to avoid an additional cost.
- Hidden network. In this section it is possible to determine if the connection has its SSID hidden or not.
Once everything has been configured in these sections, in case something had to be done, then you can click on save. So everything is saved and We have configured this WiFi connection directly on our Android phone. The process is not complex, so it is convenient to know how to do it on some occasions.
The content of the article adheres to our principles of editorial ethics. To report an error click here.
Full path to article: Androidsis » Tutorials » Android cheats » How to configure WiFi manually on Android