- Forbidden 403 error when trying to access Apache 2.4.7 web server in browser
- 3 Answers 3
- 1. You should configure your /etc/hosts file like that:
- 2. You should define and enable a Virtual Host (VH):
- 3. With this configuration you should access:
- 4. You need properly configured `/etc/apache2/apache2.conf`.
- 5. Set up the Firewall.
- 6. If you have a router don’t forget to forward some ports:
- “Forbidden – You don’t have permission to access / on this server” Error
- Demystifying the Forbidden Error
- 1. Incorrect File / Directory Permissions
- 2. Misconfiguration of the Apache Configuration Files
- Fixing the ‘403 Forbidden Error’
- 1. Adjust file permissions & ownership of the webroot directory
- 2. Adjust directives in Apache main configuration file
Forbidden 403 error when trying to access Apache 2.4.7 web server in browser
What settings do I need to do at which place? Please help.
I would throw out ServerName 192.168.0.2 line as ServerName directive should have the name like www.server.com and not the IP number. I think this could solve the problem. For ServerName you should enter the name of the server if you have it. ServerName allows name based virtual hosting, which allows to have more web sites on the same IP.
3 Answers 3
1. You should configure your /etc/hosts file like that:
127.0.0.1 localhost 127.0.0.1 test-site 127.0.1.1 my-hostname # The following lines are desirable for IPv6 capable hosts. etc. Where test-site is the second «localhost». And my-hostname is the «System hostname» defined in /etc/hostname .
2. You should define and enable a Virtual Host (VH):
There is a default HTTP VH. It’s placed in /etc/apache2/sites-available/ . The filename is 000-default.conf . You have to edit it (you can rename it, if you want, or make some other .conf files, based on it) and after that you have to enable it.
You can enable it manually through creation of «soft, symbolic link»:
sudo ln -s /etc/apache2/sites-available/000-default.conf /etc/apache2/sites-enabled/ Or you can use Apache2 tool called a2ensite, which make the same:
sudo a2ensite 000-default.conf Let’s assume there has 3 Virtual Hosts, enabled SSL, and registered private domain (SOS.info for an example):
/etc/apache2/sites-available/http.SOS.info.conf /etc/apache2/sites-available/https.SOS.info.conf And one which is created for the purposes of this topic:
/etc/apache2/sites-available/http.test-site.conf The content of First 2 VHs is:
$ cat /etc/apache2/sites-available/ http.SOS.info.conf
ServerName SOS.info ServerAlias www.SOS.info ServerAdmin admin@SOS.info # Redirect Requests to SSL Redirect permanent "/" "https://SOS.info/" ErrorLog $/http.SOS.info.error.log CustomLog $/http.SOS.info.access.log combined This one redirects all HTTP requests to HTTPS.
$ cat /etc/apache2/sites-available/ https.SOS.info.conf
ServerName SOS.info ServerAlias www.SOS.info ServerAdmin admin@SOS.info DocumentRoot /var/www/html SSLEngine on SSLCertificateFile /etc/ssl/certs/SOS.info.crt SSLCertificateKeyFile /etc/ssl/private/SOS.info.key SSLCertificateChainFile /etc/ssl/certs/SOS.info.root-bundle.crt #etc.. This is the HTTPS VH.
The content of these two files can be posted in one file, but in this case their management ( a2ensite / a2dissite )will be more difficult.
The third Virtual Host is that, which is created for our purposes:
$ cat /etc/apache2/sites-available/ http.test-site.conf
ServerName test-site ServerAlias test-site.SOS.info DocumentRoot /var/www/test-site DirectoryIndex index.html ErrorLog $/test-site.error.log CustomLog $/test-site.access.log combined # Allow .htaccess AllowOverride All Allow from All 3. With this configuration you should access:
http://localhost # pointed to the directory of the mine Domain https://localhost # iin our case: /var/www/html (SOS.info), but you should get an error, because the SSL certificate http://SOS.info # which redirects to https://SOS.info https://SOS.info # you should have valid SSL certificate http://www.SOS.info # which is allied to http://SOS.info and redirects to https://SOS.info https://www.SOS.info # which is allied to https://SOS.info On the main example you should access and:
http://test-site # pointed to the directory /var/www/test-site http://test-site.SOS.info # which is allied to http://test-site Try to open the site in the web browser or just try (in the terminal) with next commands:
$ curl -L http://test-site/index.html $ curl -L http://test-site.SOS.info/index.html Of course, you need to have some index.html pages in their DocumentRoot 🙂
I will leave next notes by reason of pedantry 🙂
4. You need properly configured `/etc/apache2/apache2.conf`.
Ii is good idea to spend some time to improve your server’s security. These manuals are about the security configuration: 1st and 2nd. Here you can get free SSL certificate. These sites will help you to check your progress: 1st and 2nd.
According to above security manuals /etc/apache2/apache2.conf file must looks like:
Mutex file:$ default PidFile $ Timeout 60 #KeepAlive Off KeepAlive On MaxKeepAliveRequests 100 KeepAliveTimeout 5 HostnameLookups Off ErrorLog $/error.log LogLevel warn IncludeOptional mods-enabled/*.load IncludeOptional mods-enabled/*.conf Include ports.conf Options None FollowSymLinks AllowOverride None Require all denied Options None FollowSymLinks AllowOverride None Require all granted AccessFileName .htaccess Require all denied LogFormat "%v:%p %h %l %u %t \"%r\" %>s %O \"%i\" \"%i\"" vhost_combined LogFormat "%h %l %u %t \"%r\" %>s %O \"%i\" \"%i\"" combined LogFormat "%h %l %u %t \"%r\" %>s %O" common LogFormat "%i -> %U" referer LogFormat "%i" agent IncludeOptional conf-enabled/*.conf IncludeOptional sites-enabled/*.conf # Hide Server type in the http error-pages ServerSignature Off ServerTokens Prod # Etag allows remote attackers to obtain sensitive information FileETag None # Disable Trace HTTP Request TraceEnable off # Set cookie with HttpOnly and Secure flag. # a2enmod headers Header edit Set-Cookie ^(.*)$ $1;HttpOnly;Secure # Clickjacking Attack Header always append X-Frame-Options SAMEORIGIN # CX-XSS Protection Header set X-XSS-Protection "1; mode=block" # Disable HTTP 1.0 Protocol RewriteEngine On RewriteCond % !HTTP/1.1$ RewriteRule .* - [F] # Change the server banner @ ModSecurity # Send full server signature so ModSecurity can alter it ServerTokens Full # Alter the web server signature sent by Apache SecServerSignature "Apache 1.3.26" Header set Server "Apache 1.3.26" Header unset X-Powered-By # Hde TCP Timestamp # gksu gedit /etc/sysctl.conf # >> net.ipv4.tcp_timestamps = 0 # Test: sudo hping3 SOS.info -p 443 -S --tcp-timestamp -c 1 # Disable -SSLv2 -SSLv3 and weak Ciphers SSLProtocol all -SSLv2 -SSLv3 SSLHonorCipherOrder on SSLCipherSuite "EECDH+ECDSA+AESGCM EECDH+aRSA+AESGCM EECDH+ECDSA+SHA384 EECDH+ECDSA+SHA256 EECDH+aRSA+SHA384 EECDH+aRSA+SHA256 EECDH+aRSA EECDH EDH+aRSA !aNULL !eNULL !LOW !3DES !MD5 !EXP !PSK !SRP !DSS !RC4" 5. Set up the Firewall.
To allow/deny external access to your web server you can use UFW (Uncomplicated Firewall):
sudo ufw allow http sudo ufw allow https To allow only tcp protocol use:
sudo ufw allow http/tcp sudo ufw allow https/tcp You can use and the port number directly:
sudo ufw allow 80/tcp sudo ufw allow 443/tcp Just in case you can reload the «rules table»:
You can use and UFW’s GUI interface, called gufw.
sudo apt update sudo apt install gufw gufw & Choice the Office profile. It will set: Status:ON , Incoming:Deny and Outgoing:Allow and add your rules.
6. If you have a router don’t forget to forward some ports:
If you have a router and you want your web server to be accessible from Internet, don’t forget to add some port forwarding. Something like this.
“Forbidden – You don’t have permission to access / on this server” Error
Apache web server is one of the most popular and widely used open-source web servers thanks to its stability and reliability. The web server commands a huge market, especially in the web hosting platforms.
Be that as it may, you may get a “Forbidden – You don’t have permission to access / on this server” error on your browser after setting up your website. It’s quite a common error and a good chunk of users have experienced it while testing their site. So what is this error?
Demystifying the Forbidden Error
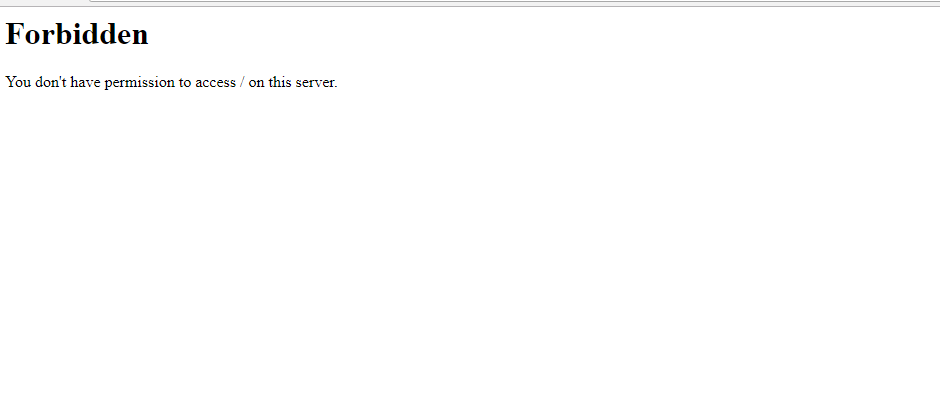
Also referred to as the 403 Forbidden error, Apache’s ‘Forbidden Error’ is an error that is displayed on a web page when you are attempting to access a website that’s restricted or forbidden. It’s usually splashed on the browser as shown.
Additionally, the error can manifest in several ways on the browser as indicated below:
- HTTP Error 403 – Forbidden
- Forbidden: You don’t have permission to access [directory] on this server
- 403 Forbidden
- Access Denied You don’t have permission to access
- 403 forbidden requests forbidden by administrative rules
So what causes such errors?
The ‘403 Forbidden Error‘ occurs due to the following main reasons:
1. Incorrect File / Directory Permissions
This error can be triggered due to incorrect file/folder permissions on the webroot directory. If the default file permissions are not adjusted to grant users access to the website files, then the chances of this error popping on a web browser are high.
2. Misconfiguration of the Apache Configuration Files
This error can also be attributed to a misconfiguration of one of the Apache configuration files. It could be an incorrect parameter that has been included or missing directives in the configuration file.
Fixing the ‘403 Forbidden Error’
If you have encountered this error, here are a few steps that you can take to remedy this.
1. Adjust file permissions & ownership of the webroot directory
Incorrect file permissions & directory ownership are known to restrict access to website files. So, firstly, be sure to assign the file permissions recursively to the webroot directory as shown.
The webroot directory should always have EXECUTE permissions and the index.html file should have READ permissions.
$ sudo chmod -R 775 /path/to/webroot/directory
Additionally, adjust the directory ownership as shown:
$ sudo chown -R user:group /path/to/webroot/directory
Where the user is the regular logged-in user and the group is www-data or apache .
Finally, reload or restart the Apache webserver for the changes to take effect.
$ sudo systemctl restart apache2 OR $ sudo systemctl restart httpd
If this does not resolve the issue, proceed to the next step:
2. Adjust directives in Apache main configuration file
If you are on Debian-based Linux, in Apache’s main configuration file /etc/apache2/apache2.conf , ensure that you have this block of code:
Options FollowSymLinks AllowOverride None Require all denied AllowOverride None Require all granted Options Indexes FollowSymLinks AllowOverride None Require all granted
Save and exit and thereafter, restart the Apache.
If you are running Apache on RHEL-based distributions / CentOS systems, ensure that you relax access to the /var/www directory in the /etc/httpd/conf/httpd.conf main Apache configuration file.
AllowOverride None Require all granted
Then save all the changes and reload Apache.
If after trying all these steps you are still getting the error, then please check the configuration of your virtual host files. We have detailed articles on how you can configure the Apache Virtual host file on:
I hope that the steps provided have helped you clear the 403 error.