- How to Create and Configure Sudo User on Arch Linux
- Step 1) Install sudo package
- Step 2) Create a regular user
- Step 3) Configure the regular user as sudo user
- Step 3) Testing the sudo user
- Как Добавить пользователя в Sudoers или Sudo Group на Arch Linux
- Добавить в группу sudo
- Удаление пользователей из группы Sudoers в Arch Linux
- Заключение
- How to Use SUDO on Arch Linux
- Sudo on Arch Linux
- Installing sudo
- Running a command with root privilege
- Current sudo settings
- Managing sudoers
- Groups
- Allowing a user with sudo access
- Adding to wheel group
- Adding in the sudoers
- File permissions
- Passing environment variables
- Editing a file
- Final thoughts
How to Create and Configure Sudo User on Arch Linux
It’s always advised against running administrative-level commands as the root user. In fact, as a rule of thumb, it’s recommended to configure or create a sudo user on any Linux server that you intend to manage. Executing commands as the root user is risky and can cause detrimental damage to your system. All it takes is a single command to accidentally crash your system. To avoid that, running elevated operations as the sudo user comes highly recommended.
A sudo user (short for super user do ) is a regular user that has been granted root or elevated privileges and hence can perform elevated tasks similar to those which are a reserve for the root user. These include editing configuration files, installing and removing software packages, starting and stopping services, and so much more.
In this guide, we focus on how you can create and configure sudo user on Arch Linux.
Step 1) Install sudo package
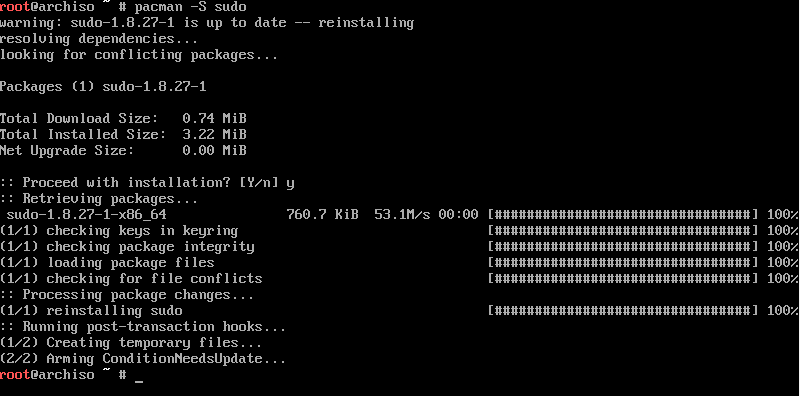
Right off the bat, we need to install the sudo utility. Unlike other Linux distributions, this is not included by default in the base install. To install this, execute the following command as root:
Step 2) Create a regular user
Next, we need to create a regular user. We will later add this user to the sudoers group to enable them to carry out administrative tasks.
To create a sudo user, use the useradd command as shown:
# useradd -m -G wheel -s /bin/bash username
Let’s break down the command:
The -m option creates a home directory for the user /home/user.
The -G option adds the user to an additional group. In this case, the user is being added to the wheel group.
The -s option specifies the default login shell. In this case, we are assigning bash shell denoted by /bin/bash.
So, let’s assume you want to add a regular user called techuser. To accomplish this, run the command as follows:
# useradd -m -G wheel -s /bin/bash techuser
Step 3) Configure the regular user as sudo user
What we have so far done is to create a regular login user. The user does not yet have the capability of running elevated commands. We need to edit the sudoers file located at /etc/sudoers
The wheel group is a special type of group in Linux systems that controls who has access to sudo commands.
To confirm that the wheel group is enabled, execute the command:
# visudo Or # vi /etc/ sudoers
This ushers you to the sudoers file which is rendered on a vim editor. The sudoers file defines access rights and can be edited to grant or deny certain privileges to regular users.
Once you have opened the sudoers file, scroll and locate the following entry. In the basic arch linux installation it would be commented. Uncomment it and save the file to enable the wheel group.
As we have already a regular user, let’s assign password as shown using the passwd command .
When prompted, provide the new user’s password and confirm it.
Alternate way to configure regular user as sudo user, add following user’s entry in the sudoers file as shown below,
Under the User privilege specification section, add the following line.
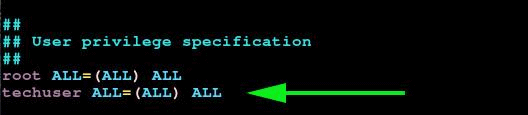
Save and exit the sudoers file
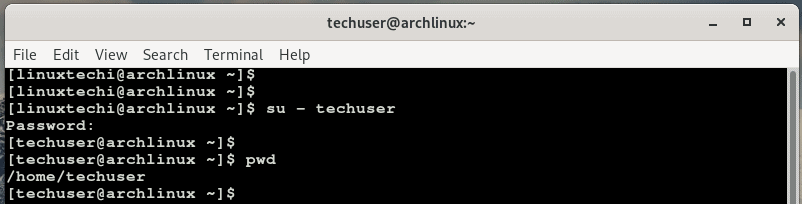
Step 3) Testing the sudo user
Lastly, we are going to confirm if the user can perform root tasks. First, switch over to the new user.
Provide the user’s password and hit ENTER.
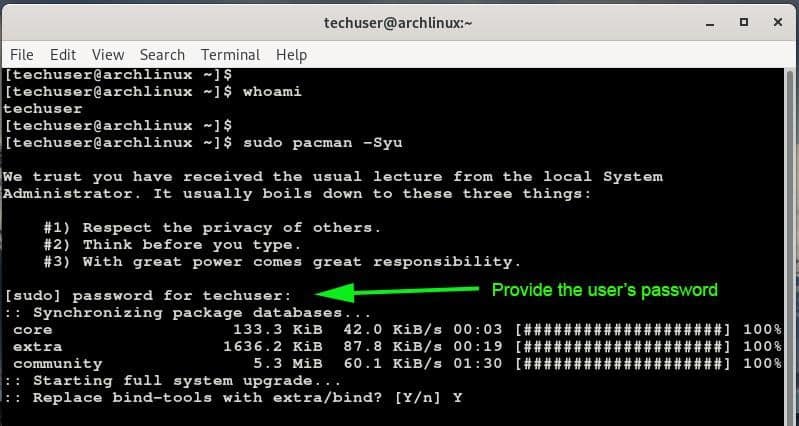
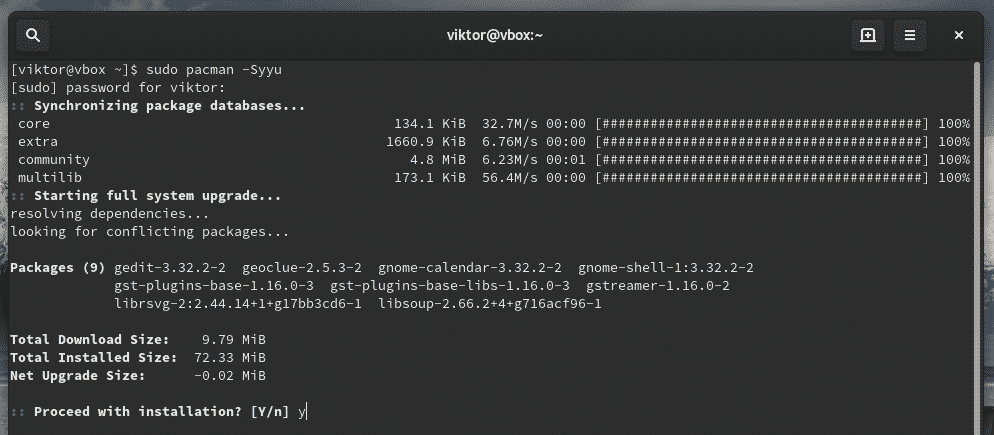
Now try invoking sudo along with a command that is usually reserved for the root user. In the example below, we are updating Arch Linux.
You will be provided with a disclaimer informing you of the salient things to keep in mind when invoking sudo and later, you will be prompted for the password.
That’s conclude the article, we hope that this guide has provided enough insights in the creation of a sudo user in Arch Linux. Please do share your feedback and comments in below comments section.
Как Добавить пользователя в Sudoers или Sudo Group на Arch Linux
Sudo позволяет пользователю запускать команды или программы с правами другого пользователя ( по умолчанию суперпользователя). Суперпользователь в Linux называется «root«.
Это одна из лучших практик безопасности использовать некорневого пользователя для выполнения администрирования сервера.
В этой краткой статье мы создадим пользователя и добавим его в группу sudo в Arch Linux.
Добавить в группу sudo
Как уже упоминалось ранее, команда sudo позволяет запускать программы с привилегиями суперпользователя. В Arch Linux sudo не является частью базовой установки. Итак, если вы еще не установили sudo, то установите его с помощью следующей команды.
Теперь добавьте пользователя и его домашний каталог. Это можно сделать с помощью опции —create-home
Не забудьте назначить пароль

Wheel group -это группа sudo в Arch Linux. Поэтому на этом этапе добавьте вновь созданного пользователя » john’ в группу wheel с помощью команды usermod.
Теперь отредактируйте файл sudoers так, чтобы Wheel group была активирована. Для этого откройте файл sudoer’s и раскомментируйте строку %wheel ALL=(ALL) ALL
Конечный результат должен быть таким:

Сохраните и выйдите из visudo. Нажмите Esc затем : wq и нажмите Enter
Теперь проверьте свою конфигурацию, переключившись на пользователя john и используя команду id для отображения группы. Вы должны увидеть root при вводе команды sudo whoami.

Удаление пользователей из группы Sudoers в Arch Linux
Если вы хотите удалить пользователя из sudo ( wheel group), тогда используйте инструмент gpasswd, как показано ниже. В нашем случае пользователь john,
Заключение
Мы показали вам, как добавить пользователей в группу sudo в Arch Linux. Мы рекомендуем вам использовать пользователя sudo, а не пользователя root при выполнении административных задач. Это также помогает предоставить соответствующее разрешение нужному человеку. Если понравилась статья можете отблагодарить в комментариях.
How to Use SUDO on Arch Linux
![]()
In the Linux system, the most powerful user is the “root”. Root holds the power to perform all sorts of tasks, including access to even the deepest system settings. Because of its power, it has to be managed in a delicate manner. Otherwise, the chance of getting screwed up is nearly 100%. In the case of Arch Linux, it’s no different. The root holds the ultimate control over the Arch system.
For easier management of root access, there’s the “sudo” (superuser do) program. It’s not actually root itself. Instead, it elevates the associated command to the root level. That being said, managing “root” access actually means managing the users that can access the “sudo”. Sudo itself can be used in multiple ways.
Let’s learn more on root and sudo on Arch Linux.
Caution: As the root is all-powerful, playing with it can result in unexpected damages. By design, Unix-like systems assume that the system admin knows exactly what he/she is doing. So, the system will allow even the most unsafe operations without any further asking.
That’s why system admins have to be the most cautious of all when working with “root” access. As long as you’re using the “root” access to perform a certain task, be careful and responsible for the outcome.
Sudo on Arch Linux
Sudo is not just a program. Rather, it’s the framework that governs the “root” access. When sudo is present on the system, there’re also certain user groups that have access to “root”. Grouping allows easier control over the users’ permissions.
Let’s get started with sudo!
Installing sudo
When you installed Arch Linux, it should come with sudo installed by default. However, run the following command to make sure that sudo is actually present in the system.
Running a command with root privilege
Sudo follows the following command structure.

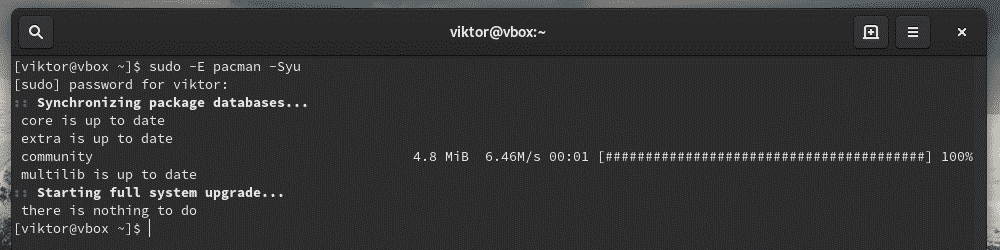
For example, use sudo to tell pacman to upgrade the entire system.
Current sudo settings
Sudo can be custom configured to satisfy the need of the situation. To check out the current settings, use the following commands.
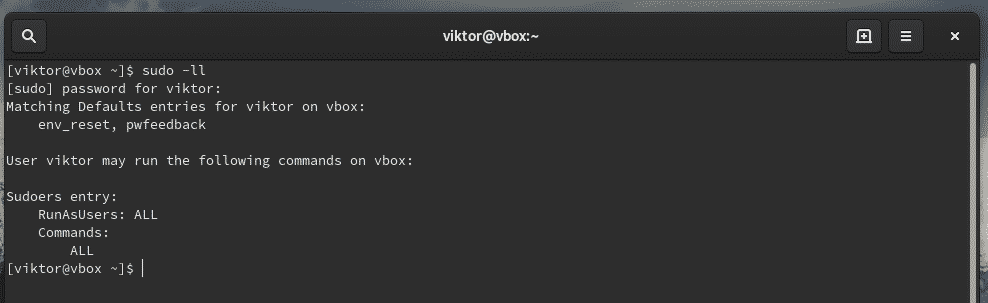
If you’re interested in checking the configuration for a certain user, use the following command.

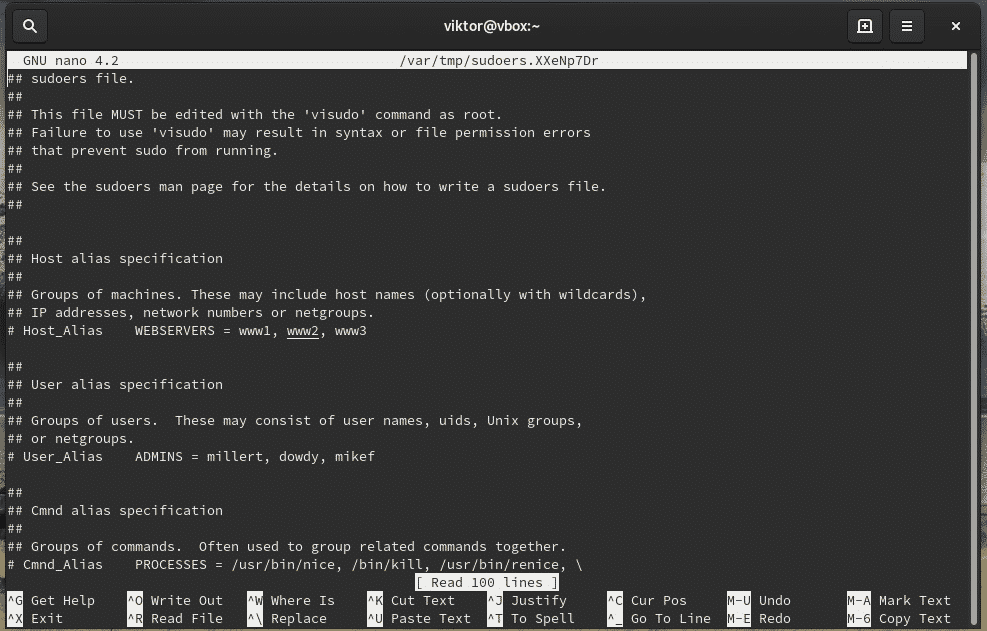
Managing sudoers
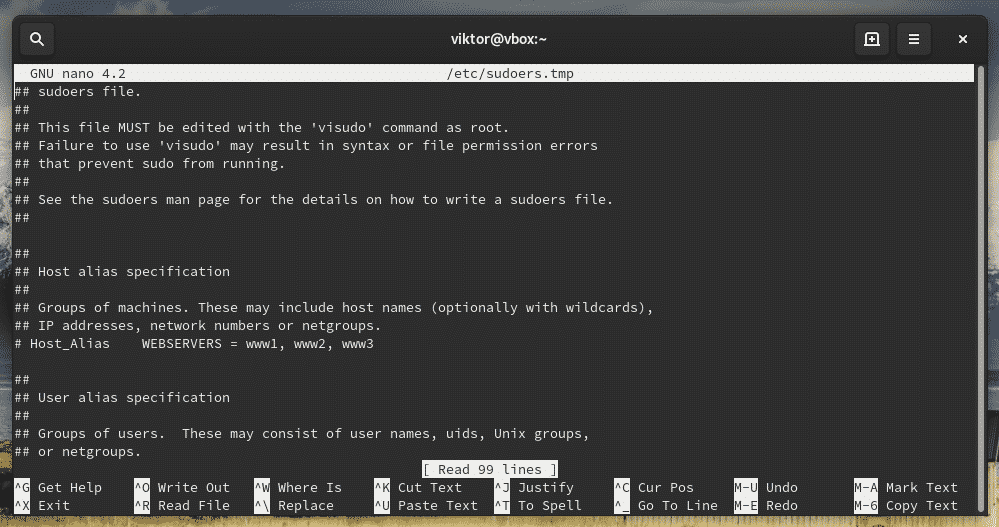
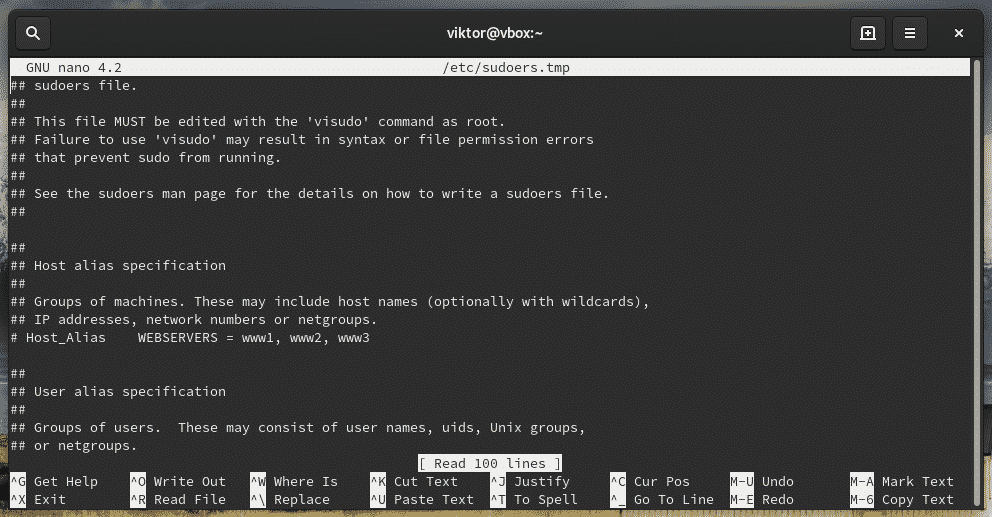
When you install sudo, it also creates a configuration file named “sudoers”. It holds the configuration for different user groups like wheel, sudo, and other settings. Sudoers should ALWAYS be accessed through “visudo” command. This is a more secure way than directly editing the file. It locks the sudoers file, saves the edited one to a temporary file and checks the grammar before it’s permanently written to “/etc/sudoers”.
Let’s check out the sudoers.

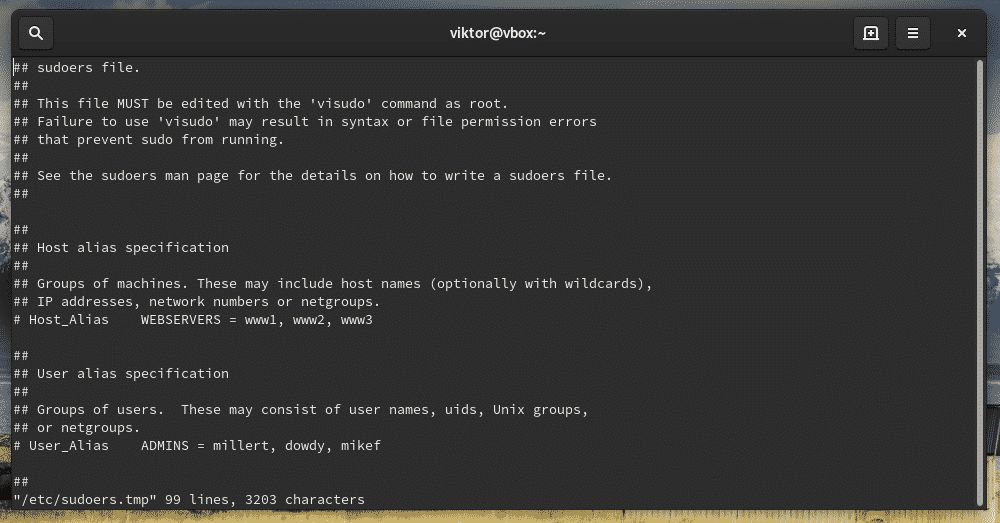
This command will start the editing mode of the sudoers file. By default, the editor will be vim. If you’re interested in using something else as the editor, use the following command structure.

You can permanently change the visudo editor by adding the following line at the end of the file.
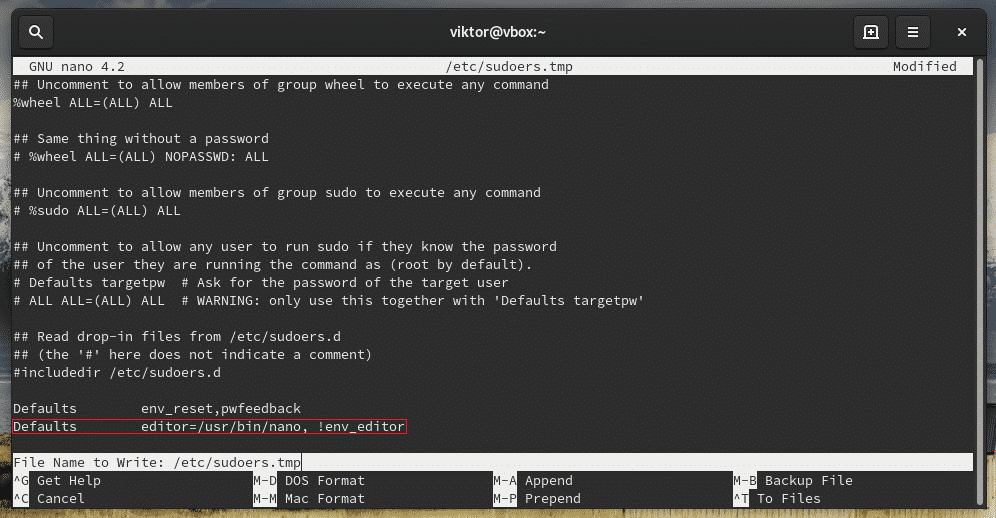
Don’t forget to verify the result.

Groups
“sudoers” dictates the “sudo” permission to users and groups at the same time. For example, the wheel group, by default, has the ability to run commands with root privilege. There’s also another group sudo for the same purpose.
Check out what user groups are currently present on the system.

Check out sudoers on which groups have access to root privilege.
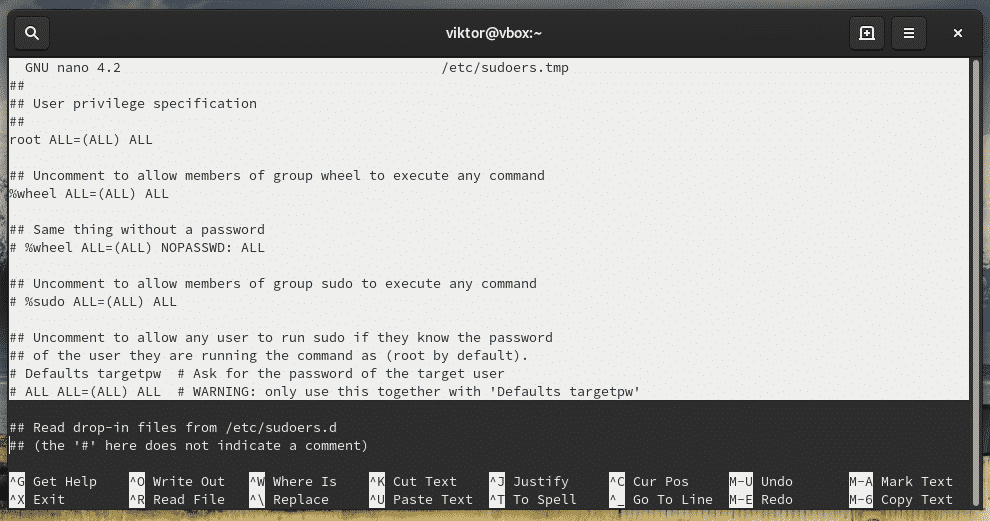

As you can see, the “root” account has access to full root privilege.
- First “ALL” indicates that the rule is for all hosts
- The second “ALL” tells that the user in the first column is capable of running any command with the privilege of any user
- The third “ALL” signifies that any command is accessible
Same goes for the wheel group.

If you’re interested in adding any other user group, you have to use the following structure
For a normal user, the structure would be
Allowing a user with sudo access
This can be performed in 2 ways – adding the user to wheel group or, mentioning the user in the sudoers.
Adding to wheel group
Use usermod to add an existing user to the wheel group.

Adding in the sudoers
Now, add the user with associated root permission.

If you want to remove the user from sudo access, remove the user entry from sudoers or, use the following command.

File permissions
The owner and group for “sudoers” MUST be 0 with the file permission 0440. These are the default values. However, if you tried changing, then reset them to the default values.

Passing environment variables
Whenever you’re running a command as root, the current environment variables don’t get passed to the root user. It’s quite painful if your workflow is highly dependent on the environment variables or, you’re passing the proxy settings through “export http_proxy=”…””, you have to add the “-E” flag with sudo.
Editing a file
When you install sudo, there’s also an additional tool called “sudoedit”. It will allow editing a certain file as a root user.
This is a better and more secure way of allowing a certain user or group to edit a certain file that requires root privilege. With sudoedit, the user doesn’t have to have access to sudo.
It could also be performed by adding a new group entry in the sudoers file.
However, in the above scenario, the user is only fixed with the specific editor. Sudoedit allows the flexibility of using any editor of the user’s choice to do the job.
Try out editing a file that requires sudo access.

Note: Sudoedit is equivalent to “sudo -e” command. However, it’s a better path as it doesn’t require having access to sudo.
Final thoughts
his short guide just showcases only a little portion of what you can do with sudo. I highly recommend checking out the man page of sudo.