- Допиливание Gnome 3 под ArchLinux
- Утилиты
- Настраиваем внешний вид
- Расширяем GNOME Shell
- История со шрифтами
- Иконки, темы и курсоры
- How to Install GNOME in Arch Linux
- Arch Linux GNOME Installation Guide
- Step 1: Update Arch Linux
- Step 2: Install X Window System (Xorg)
- Step 3: Install GNOME Desktop Environment
- Step 4: Start and Enable gdm.service
- Alternate Option: Choose a DM (Display Manager)
- Step 5: Reboot the System
- Step 6: Install Applications
- Customize GNOME Desktop Environment with GNOME Tweak Tool
- Change Background and Lock Screen Wallpaper
- Disable Animations
- Customize Fonts
- Add Applications to the Startup
- Enable Dark Theme
- Enable Extensions
Допиливание Gnome 3 под ArchLinux
Итак, у нас есть свежеустановленная по инструкции Beginners’ Guide система ArchLinux с окружением Gnome 3. Логинимся, осматриваемся. Мое и не только мое мнение — очень непривычно и неудобно. Столкнувшись с рядом проблем подумывал о бегстве на KDE, но посидев на форумах и арчивики пару дней довел все до удобного мне вида. Вот только на доработку системы требуется от силы пол часа, а те почти два дня ушли на поиск способов решения появившихся проблем. Сейчас я постараюсь сделать краткий и емкий список решений для популярных проблем, без лишних картинок и слов, дабы сэкономить другим и себе из будущего (который забудет как это все делается) время. Посмотреть «большую картинку» можно тут.
Будут использоваться различные утилиты, расширения, шрифты и многое другое. Придется подрубить AUR.
Итак, далее идем по пунктам.
Утилиты
Необходимая вещь: Gnome Tweak Tool. Она поможет во всесторонней настройке гнома и управлении расширениями. Так же может помочь dconf-editor, это уже установлено по умолчанию.
sudo pacman -S gnome-tweak-tool
Возвращаем нижнюю панельку. Все таки панель со списком открытых приложений — отличная штука. Удобная и привычная для все пользователей клавиатуры и мышки. Лучшее (по моему мнению) решение для этого — tint2.
Однако есть и море альтернативных решений, например расширение Panel-Docklet S, но оно мне показалось чересчур многокнопочным или Window Icon List , который выводит все это в виде иконок на верхнюю панель, что довольно удобно. Расширения устанавливаются прямо с сайта кнопкой «включить». Что бы увидеть после установки — Alt+F2 и там tint2. Что бы видеть всегда — нужно добавить в автозапуск ~/.config/autostart кнопку запуска приложения.
Настраиваем внешний вид
Где кнопки свернуть и развернуть? Что бы их вернуть заходим в Gnome Tweak Tool (Приложения — Стандартные — Дополнительные параметры системы) и там возвращаем любимые кнопки на место во вкладке «Окна».
Показывать дату вверху? В той же утилите на владке «Shell».
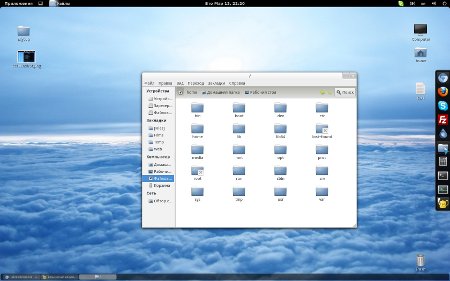
Превью текстовых файлов? Не знаю зачем нужна такая фичча, но мне возможность увидеть на иконке текстового файла 5 символов его содержимого не показалась полезной. Идем в наутилус (проводник файлов, открываем любую папку). Правка-> Параметры -> Образцы и там отключаем эту опцию.
Файлы на рабочем столе? Там же во вкладке «Рабочий стол». Заработает еще и правая кнопка мышки на рабочем столе.
Убрать значок Accesibility? Есть несколько решений. Самое простое — установка Remove Accesibility, просто заходим через браузер и кликаем включить, как и с другими расширениями. Более надежное и прямое решение проблемы — вот тут описали. Работает.
Кадры из видео вместо иконок видеофайлов? Удобно вместо бесполезной иконки видеофайла видеть кадр из него. Для этого:
sudo pacman -S ffmpegthumbnailer totem gstreamer0.10-ffmpeg
И создаем файл
sudo nano /usr/share/thumbnailers/ffmpeg.thumbnailer
с текстом
[Thumbnailer Entry]
TryExec=ffmpegthumbnailer
Exec=ffmpegthumbnailer -s %s -i %u -o %o -c png -f -t 10
MimeType=video/flv;video/webm;video/mkv;video/mp4;video/mpeg;video/avi;video/ogg;video/quicktime;video/x-avi;video/x-flv;video/x-mp4;video/x-mpeg;video/x-webm;video/x-mkv;application/x-extension-webm;video/x-matroska;video/x-ms-wmv;video/x-msvideo;video/x-msvideo/avi;video/x-theora/ogg;video/x-theora/ogv;video/x-ms-asf;video/x-m4v;
И чистим кеш:
rm -r ~/.thumbnails
Затем идем в параметры отображения наутилуса (в любой папке правка — параметры — образцы) и настраиваем показ миниатюр. И как всегда жмем Alt+F2 и там r, что бы перезапустить среду. И наслаждаемся кадрами видеофайлов вместо иконок плеера.
Это были базовые настройки. Теперь переходим к расширению оболочки Gnome Shell.
Расширяем GNOME Shell
Повторюсь, что для установки нужно просто кликнуть по значку «включить» и согласиться с загрузкой. Итак:
Advanced Settings in UserMenu показывает ссылку на Gnome Tweak Tool в ЮзерМеню справа вверху.
Alternative Status Menu вернет в ЮзерМеню кнопки выключения и пр, больше не нужно зажимать Alt, что бы их увидеть.
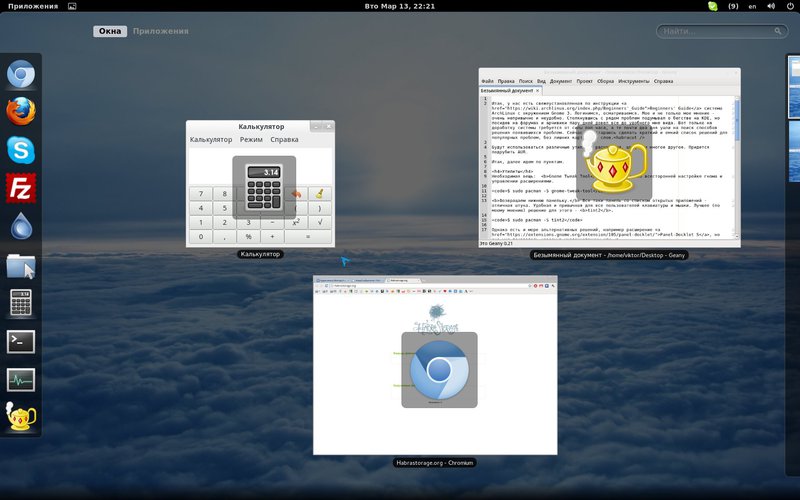
Dock создаст на рабочем столе удобную панельку (у меня она справа), содержимое которой копирует содержимое избранных приложений с панельки «обзор» слева. Появляется при подведении мышки к краю экрана, даже поверх приложений. Быстро и удобно.
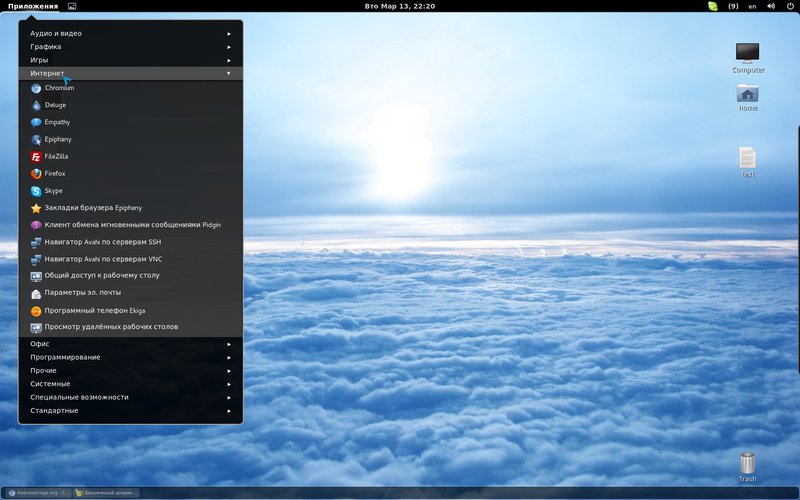
Frippery Applications Menu даст классический список приложений вверху слева. Когда оно появится правой кнопкой по нему и убираем иконку, останется только слово «Приложения». Для владельцев мышки удобнее такой вид, для владельцев сенсорников — «Обзор» может и лучше.
Overlay Icons при просмотре открытых окон через «Обзор» над каждым из них повесил полупрозрачную иконку, для облегчения навигации.
Quit Button заменяет ваше имя справа вверху на кнопку выключения.
Show Desktop Button добавляет кнопку сворачивания всех окон.
Status Icon Fixer переместит значки Dropbox, Skype, vlc и некоторые другие на верхнюю панель. Увы, но Deluge и некоторые другие продолжат жить внизу.
Todo list — отличная штуковина. Список дел, которые нужно сделать. Удаляются по клику, добавляется элементарно, висит справа вверху и показывает список дел к выполнению.

История со шрифтами
Ставим шрифты для оболочки системы:
И применяем их в Gnome Tweak Tool.
Это были шрифты в системе, в окошках и пр. Это помимо всего прочего исправляет проблему огромных заголовков окон. Теперь насчет шрифтов в Web. Людям, имеющим какое то отношение к веб дизайну, критично видеть сайты так, как их видит большинство. А большинство это Windows 7.
Добавляем Windows шрифты. Сразу скажу пакет шрифтов из AUR меня не порадовал, пришлось копировать шрифты из семерки.
В папку ~/.fonts/ или /usr/share/fonts/папка/ копируем все шрифты из винды за исключением файлов с расширением fon. Затем даем две команды:
fc-cache -f -v
sudo fc-cache -f -v
Это обновит кеш шрифтов. После этого шрифты у меня стали больше похожи на Windows, но все же чего то не хватало… сглаживания.
yaourt -S cairo-ubuntu fontconfig-ubuntu freetype2-ubuntu libxft-ubuntu
С заменой пакетов соглашаемся. Стало больше похоже на Windows, но до идеала все равно далеко. Если кто то посоветует лучшее решение проблемы — буду рад.
Иконки, темы и курсоры
Стандартные вызывали у меня негодование. Скачанные наборы кидаем в такие папки:
Для тем, наборов иконок и курсоров соотв-но. Затем включаем это все в Gnome Tweak Tool, но для работы курсоров надо создать файл /usr/share/icons/default/index.theme такого содержания:
P.S. Был вопрос насчет обновления этих расширений. По слухам с форумов оно появится в GNOME 3.4 через несколько месяцев.
P.P.S. Подобные записи уже были от других пользователей, но времена идут, проблемы и их решения меняются.
How to Install GNOME in Arch Linux
Arch Linux remains one of the most popular Linux distributions owing to its versatility and low hardware requirements. The command line environment can, however, be challenging for beginners.
GNOME is a desktop environment offering a stable GUI solution for Arch Linux, making it more convenient to use.
In this tutorial, we offer a step-by-step guide to installing and setting up GNOME in Arch Linux.
Arch Linux GNOME Installation Guide
Follow these steps to install GNOME on Arch Linux:
Step 1: Update Arch Linux
Read up on the latest version of Arch Linux on the official website. Make sure that no manual intervention is required to upgrade from your current version.
1. To apply the update, use:

2. Reboot the system for the update to take effect:
Step 2: Install X Window System (Xorg)
1. Start the X Window System (Xorg) install process with:
sudo pacman -S xorg xorg-server2. Press Enter to select all of the components available for installation.
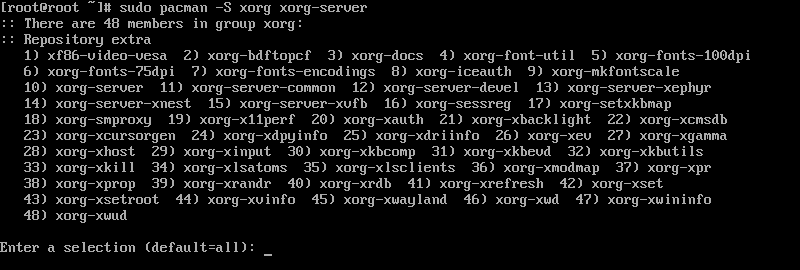
3. When prompted, type Y and press Enter to proceed with the install process.

Note: If you are running an Ubuntu system, learn how to install a GUI on Ubuntu.
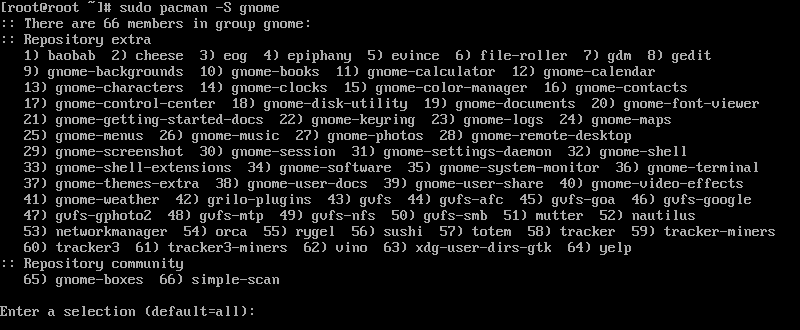
Step 3: Install GNOME Desktop Environment
1. Install the GNOME desktop environment by running the following command:
2. Press Enter to select all of the available components.
4. If you are missing any dependencies, GNOME offers a choice of provider for the download. For each prompt, select the appropriate provider and press Enter to proceed.
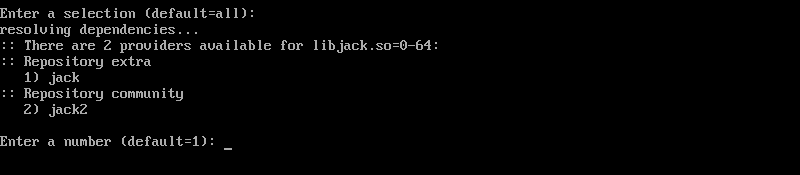
5. When prompted, type Y and press Enter to proceed with the installation.

Step 4: Start and Enable gdm.service
1. Once GNOME is fully installed, start the gdm service by using:
sudo systemctl start gdm.serviceStarting the gdm service enables the GNOME GUI.
2. Log in with your account credentials and open a terminal window.
3. Use the following command to set the gdm service to run on system boot:
sudo systemctl enable gdm.serviceAlternate Option: Choose a DM (Display Manager)
Arch Linux also allows you to use other popular display managers, such as LXDM, MDM, SDDM, or XDM.
1. Start by installing the display manager you want to use. For instance, install LXDM by using:
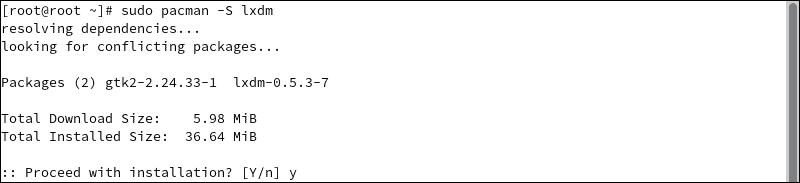
2. When prompted, type Y and press Enter to proceed with the install process.
3. Stop the currently-running gdm service by using:
sudo systemctl stop gdm.service sudo systemctl disable gdm.service4. Start the LXDM display manager with:
sudo systemctl start lxdm.service sudo systemctl enable lxdm.serviceStep 5: Reboot the System
Reboot your Arch Linux system for the changes to take effect:
Step 6: Install Applications
Use the pacman package manager to install any additional applications you require. For instance, use the pacman command to install Firefox, VLC Player, and Leafpad:
sudo pacman -S firefox vlc leafpadCustomize GNOME Desktop Environment with GNOME Tweak Tool
To customize the GNOME desktop environment, install the GNOME Tweaks application.
1. To install GNOME Tweaks, run the following command:
sudo pacman -S gnome-tweaks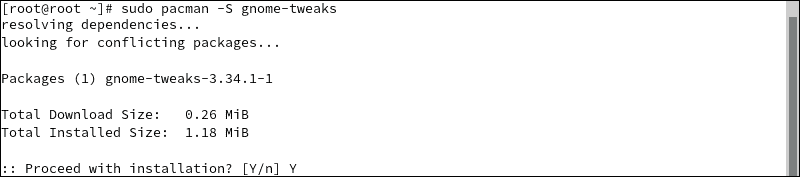
2. Open the Tweaks application to start setting up your version of GNOME.
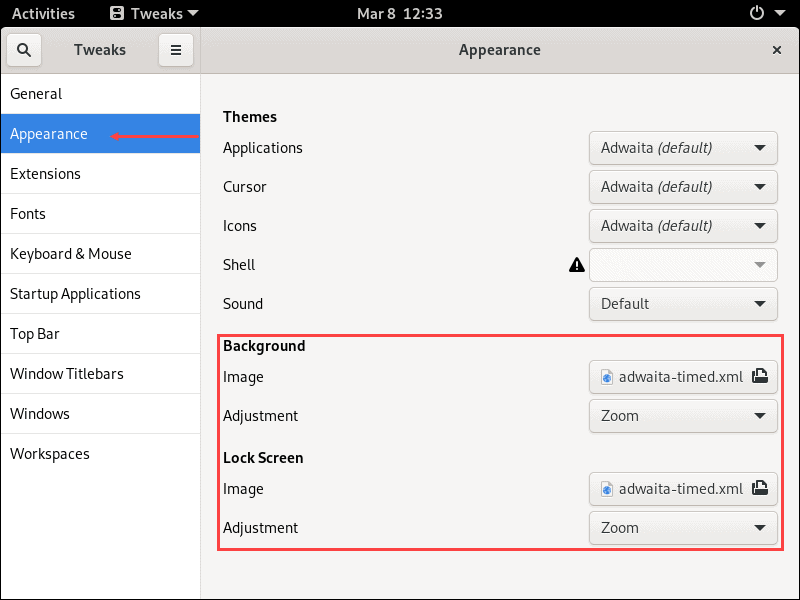
Change Background and Lock Screen Wallpaper
1. Under the Appearance tab, find the Background and Lock Screen sections:
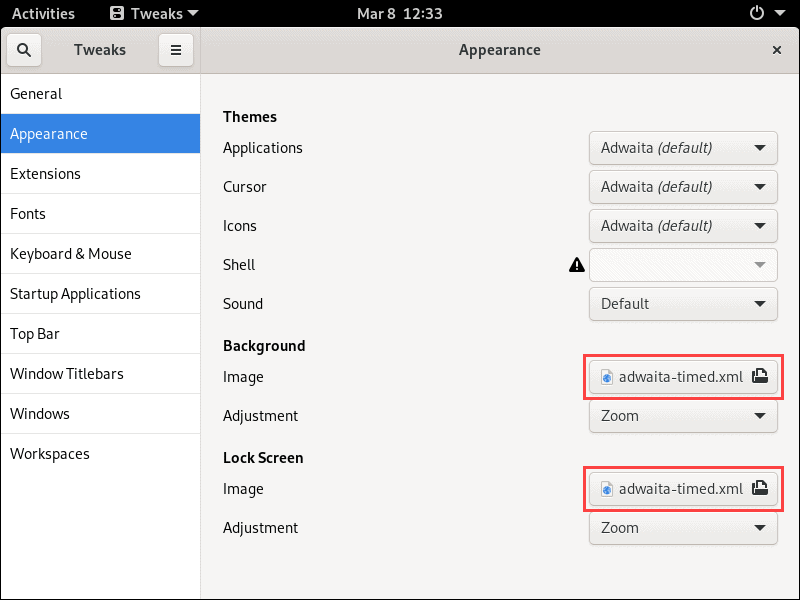
2. Click the Image button to open the image selection window:
3. Once you select the image you want to use, click Open to confirm:
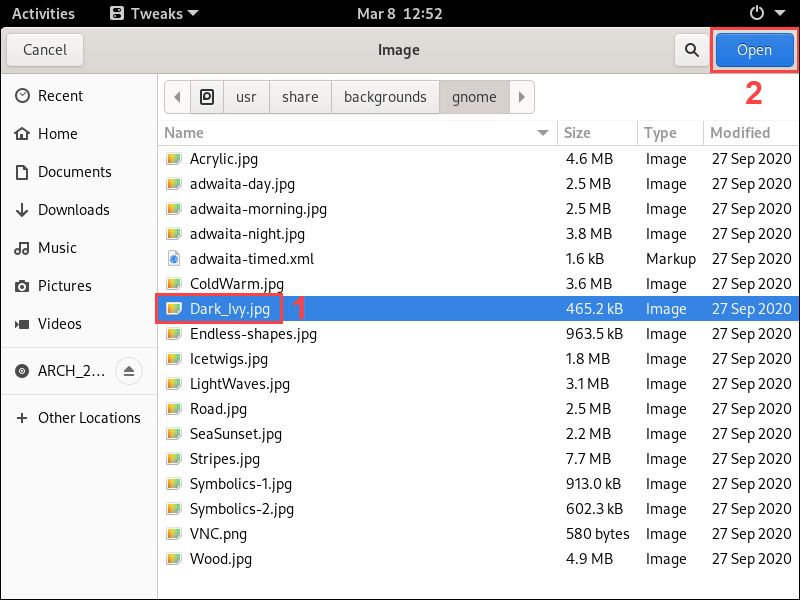
4. Use the Adjustment dropdown menu to select the way you want the new background to fit:

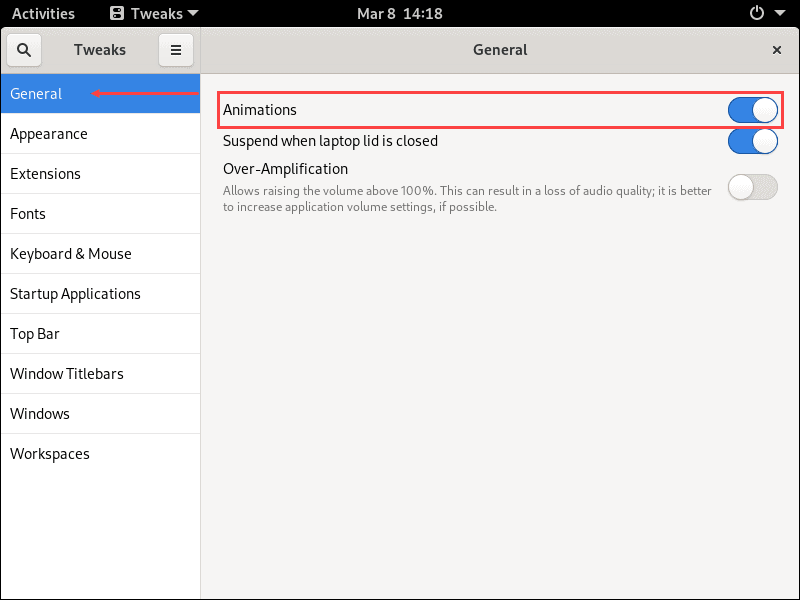
Disable Animations
Navigate to the General tab to turn the animations on or off by using the toggle on the right-hand side:
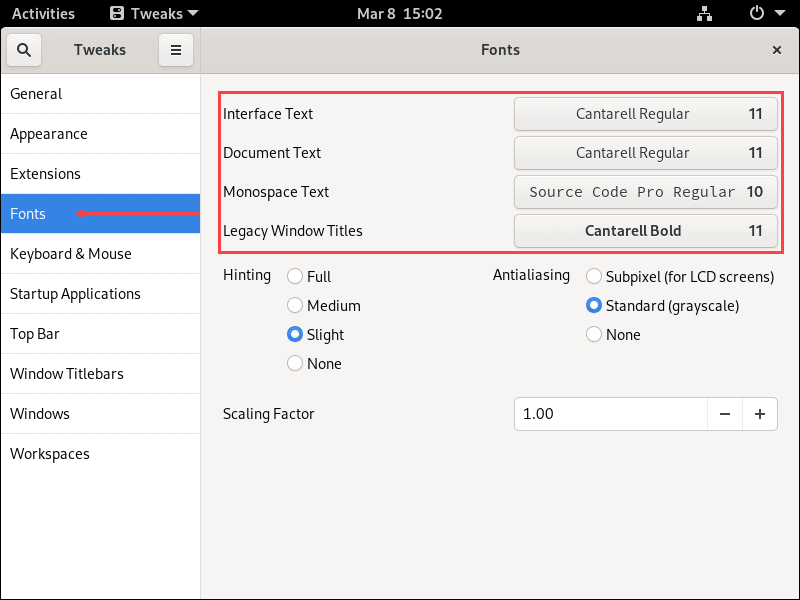
Customize Fonts
1. Use the Fonts tab to select which fonts are used for the interface, documents, monospace text, and legacy window titles.
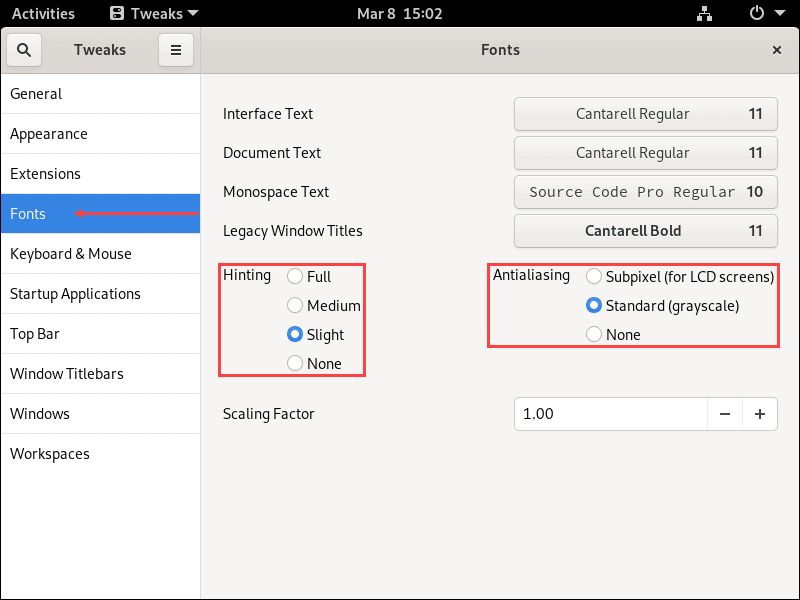
2. You can also change hinting and antialiasing settings.
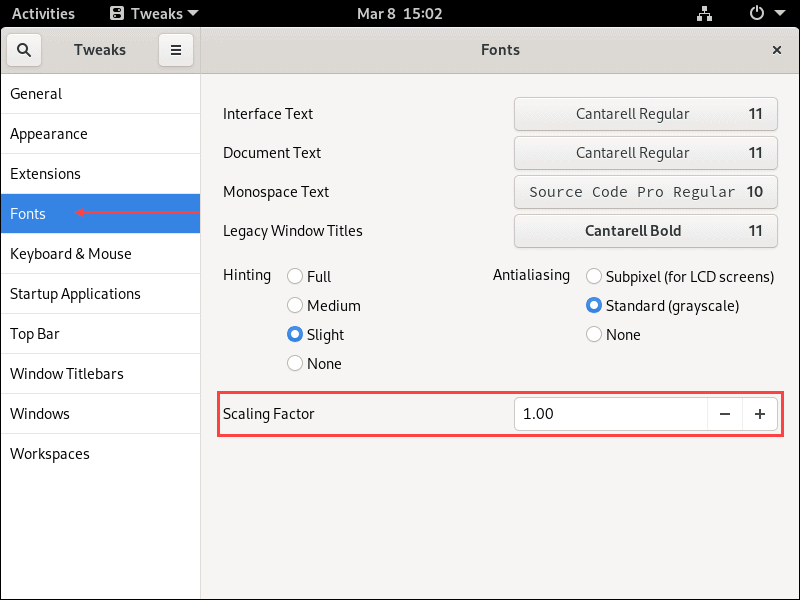
3. Finally, scale on-screen text up and down using the Scaling Factor setting.
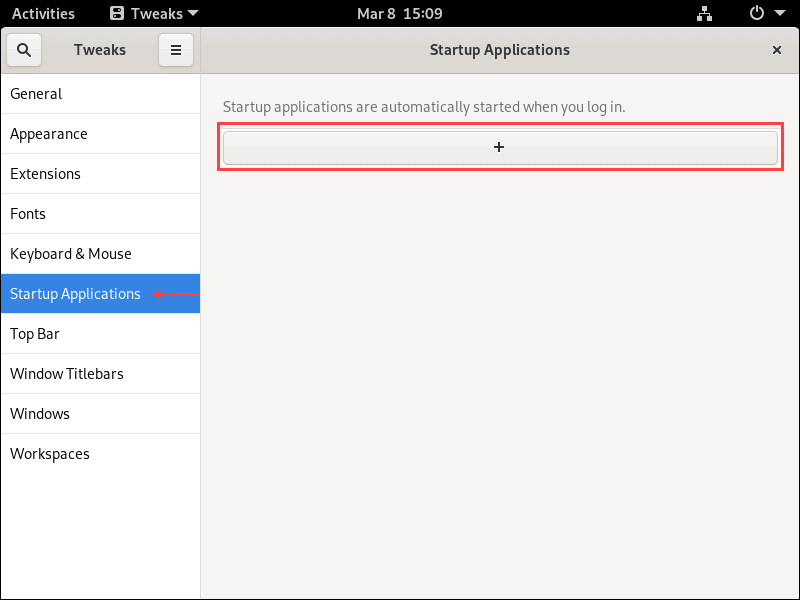
Add Applications to the Startup
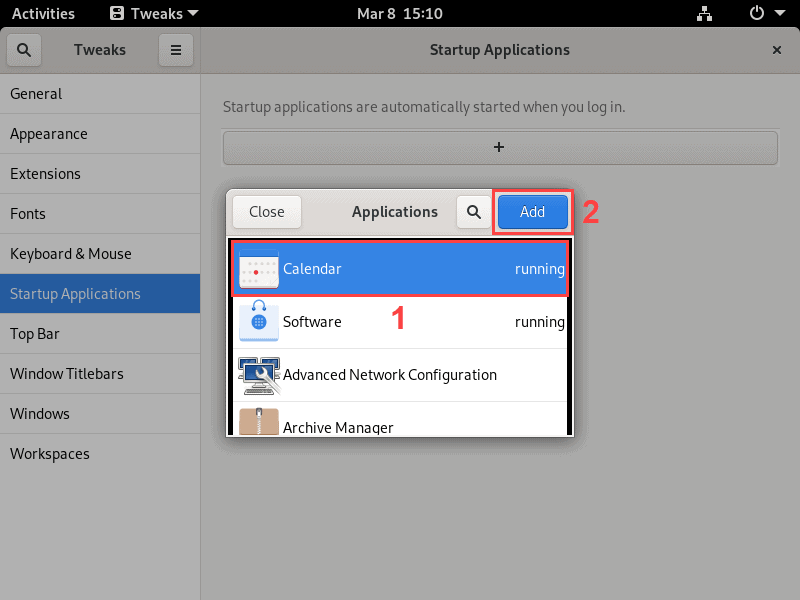
1. The Startup Applications tab lets you set up applications that start on system boot by clicking the + button:
2. Select the application you want to add from the list and click Add to confirm.
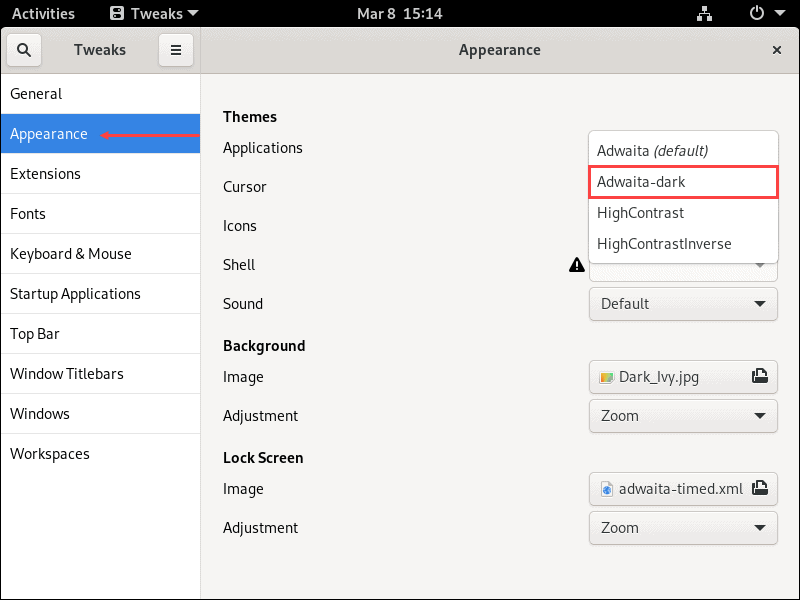
Enable Dark Theme
Under the Appearance tab, open the Applications dropdown menu in the Themes section. Select the Adwaita-dark option to switch to the dark theme.
Enable Extensions
Switch GNOME extensions on or off under the Extensions tab.
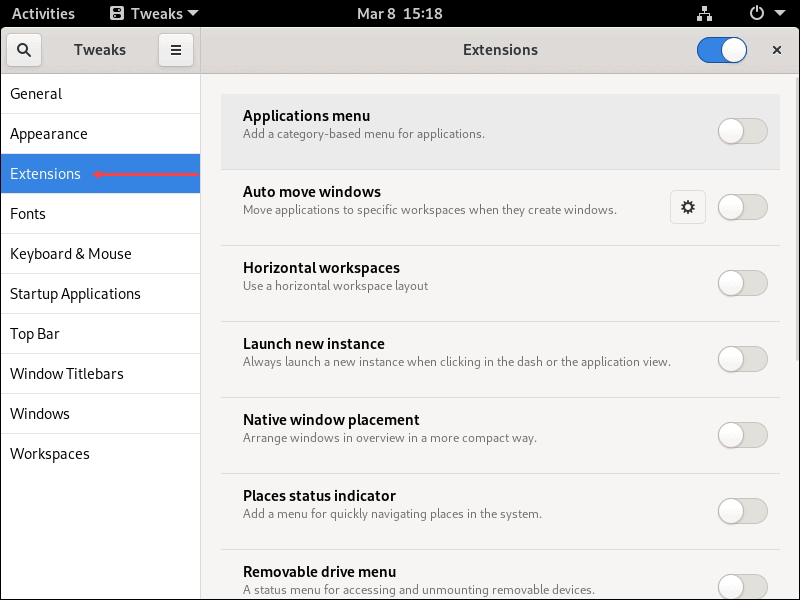
Add new extensions by visiting the GNOME extensions website.
After following this tutorial, you should have a fully set-up and customized copy of Arch Linux using the GNOME display manager.