- Configure SSH on an Arch Linux Server
- SSH Server Setup
- Configure nftables
- Setup OpenSSH
- Enable SSHGuard
- SSH via Password
- SSH Key Generation
- Authorized Key Setup on Server
- Closing Remarks
- Related Content
- How To Install and Configure Putty SSH Client on Linux Desktop
- Putty SSH Client on Linux
- 1. Install Putty SSH Client on Ubuntu Linux
- 2. Install Putty SSH Client on Arch Linux
- 3. Install Putty SSH Client on Red Hat and Fedora
- Get Started With Putty
- Final Words
Configure SSH on an Arch Linux Server
Setting up Secure Shell (SSH) on a server is a somewhat daunting task. Configure SSH and the firewalls incorrectly and the machine will be left defenseless to malicious bots and individuals. Here, we will try to layout a basic setup, which will render the machine reasonably secure (baring any other changes) and enable SSH access.
Beware: subtle errors and / or changes can leave a server vulnerable. The most secure systems simply reject all (or most) inbound traffic. Enabling SSH, intentionally creates an access point, through which you (or anyone) can attempt to access. Our goal in this article, is to minimize the chances of finding the access point (i.e. port number) and block users who attempt to “brute force” the login (try to guess a user & password).
SSH Server Setup
Configure nftables
First item we need to cover is configuring a filter. In this case, we will setup nftables – similar to iptables. The intent is to do packet filtering and define rules or set of rules (chains) to block or direct incoming / outgoing connections. The default in nftables is to block most type of connections, we will continue to use this behavior.
To install and enable the nftables service, execute the following commands:
sudo pacman -Sy nftables systemctl enable nftables.service && systemctl start nftables.service
After install, we will modify the default config to use a custom SSH port (reduces login attempts from automated bots). Easiest thing to do is add the following rule to your /etc/nftables.conf:
Then remove the following line (blocking the standard SSH port):
The ling above enables TCP connections to port 22 (which is normally SSH, but we are not utilizing that port).
That’s all we will do to the nftables, for now.
Setup OpenSSH
Next step to get SSH setup, install OpenSSH:
Then, edit the config /etc/ssh/sshd_config .
Set the custom port by adding in the line:
Improve security on root (see wiki) by uncommenting:
PermitRootLogin prohibit-password
For even more security, I’d recommend:
Skip this step for now, but later we will disable text passwords with the following line:
PasswordAuthentication no
Disable x11 forwarding, removing a potential attack surface, add the following:
That covers most of the basics. There more advanced discussions around securing SSH on the web, but this should be “good enough” for most basic server setups. We can start & enable the service on startup via:
sudo systemctl start sshd && sudo systemctl enable sshd
Finally, make the ~/.ssh/ directory for the user you wish to SSH into:
Enable SSHGuard
To protect against a brute force attack, SSHGuard (or a similar service) is recommended. This service will ban repeated offenders who are attempting to access the machine, but have to main failed password attempts (aka too high of a risk score). Setup is relatively easy:
Once installed, we’ll have an of edit we need to do in the config file.
Because we are utilizing nftables, edit /etc/sshguard.conf and change the Backend:
BACKEND="/usr/lib/sshguard/sshg-fw-nft-sets"
From there, we just start the service (defaults are pretty decent):
sudo systemctl start sshguard.service && sudo systemctl enable sshguard.service
SSH via Password
At this point, it should be possible to SSH into the machine via the following command (will need password):
To access the server, type the users password and that should be it.
Note: it is possible a router can block SSH. If there is an issue at this point, ensure the correct IP is being utilized and that the router is allowing TCP connections over the given port.
SSH Key Generation
At this point, hopefully it’s been validated that the server is accessible via SSH (where a password was used for authentication).
For security, it’s best to disable passwords and instead use keys. To utilized keys, we will first to generate them, then add them to the authorized_keys file on the given server. Key generation is advised to be done on a client machine, i.e. not server.
Step one is make the ~/.ssh directory (this is on client and server):
The next thing we need to do is generate an SSH key, I tend to use a 4096 bit key:
It is also recommended to add a passphrase to the key (leave empty for no passphrase) :
Enter passphrase (empty for no passphrase):
Enter same passphrase again:Your identification has been saved in /home//.ssh/id_rsa.
Your public key has been saved in /home//.ssh/id_rsa.pub.
Once the key is generated, secure copy (SCP) the public key to the server using a password:
After copying the public key from the client to the server, SSH into the server:
Authorized Key Setup on Server
Once logged into the server —
Append the public key to your authorized_keys list:
cd ~/.ssh touch authorized_keys cat id_rsa.pub >> authorized_keys
Then edit /etc/ssh/sshd_config to enable the authorized_keys, uncomment the following line:
Add the authorized key file (believe this is also default):
AuthorizedKeysFile .ssh/authorized_keys
Disable text passwords, add the following:
PasswordAuthentication no
Now, on the client you can add the following ~/.ssh/config and create a short cut to ssh into the server machine:
Host HostName User Port IdentityFile ~/.ssh/secret.key
Once you add an entry in the config it’s possible to quickly ssh into the server:
This will bring you directly to the server.
Closing Remarks
There is a lot of careful consideration that should go into locking down a server. Quite frankly, it makes me sweat thinking about all the potential issues. The primary goal here is the reduction of risk most servers can be broken into.
Here, we attempted to reduce the risk of “brute force” attacks, in which an attacker can gain access to the server via guessing the correct password.
In addition to all of the above, I tend to turn on verbose logging (on the server):
This will let you later inspect what exactly is going on if / when someone is attempting to access the system.
It is also recommended to isolate SSH access to a subset of users (likely without sudo access). Critical systems should run under users without SSH access, as this will help protect the integrity of the server and mitigate damage, even if there is a breach.
Hope this helps! Feel free to leave comments, email, or contact me in any other way to update / improve this post or if you have questions.
Related Content
How To Install and Configure Putty SSH Client on Linux Desktop
Putty SSH client is a free and open-source SSH client that you can use on a Linux system to connect your server, system, network storage, and other SSH clients remotely. Putty allows you to save your sessions on your local Linux directory. Despite having the Linux bash, you might wonder why you would need to install the Putty tool on your Linux system? Well, the answer would be, most servers are built on Linux, but clients might be using Windows, macOS, or other operating systems. It is hassle-free to have the same remote client tool for both ends.
Putty SSH Client on Linux
Though Putty was initially developed for Windows desktop, it has been seen many professional Linux system admins feel more comfortable using Putty on Linux. Installing Putty on any Linux system is straightforward and easy; it won’t take more than a minute. Putty is written in the C programming language, and it has the MIT license. In this post, we will see how to install the Putty SSH client on Debian, Red Hat, Fedora, and Arch-based Linux systems.
1. Install Putty SSH Client on Ubuntu Linux
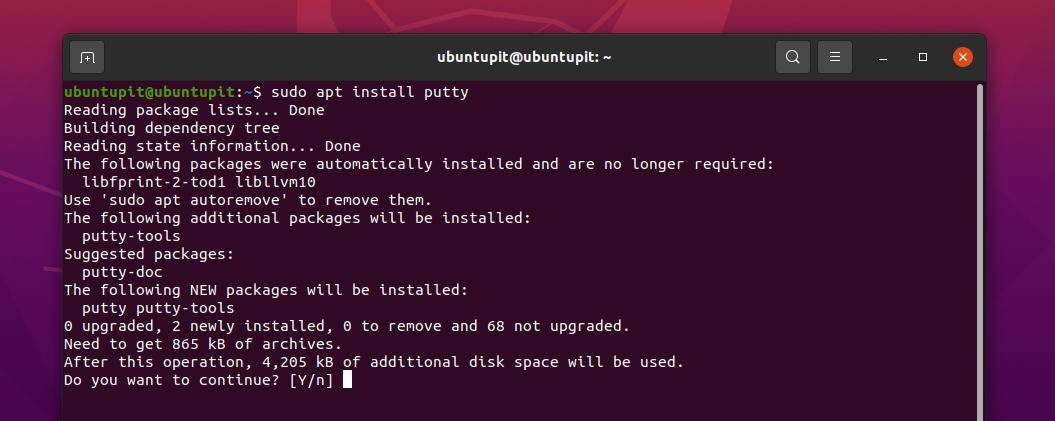
Installing Putty SSH client on a Debian or Ubuntu Linux system requires root privilege. To install the Putty SSH client on your Debian system, you can run the following aptitude command-lines given below on your terminal shell. Here, I’m using Ubuntu to demonstrate the process, but the following commands would be executable on other Debian Linux distributions.
$ sudo add-apt-repository universe $ sudo apt update $ sudo apt install putty
If you find any issues while installing Putty, you can run the apt-get command on your terminal shell instead.
sudo apt-get install putty
2. Install Putty SSH Client on Arch Linux
If you have an Arch-based Linux system, you can install Putty on it through the Pacman commands. To install the Putty tool on an Arch Linux, run the following Pacman command with root privilege on your terminal shell. Here, I’m using the Manjaro KDE Linux to demonstrate the process, but the following commands would be executable on other Arch-based Linux distributions as well.
3. Install Putty SSH Client on Red Hat and Fedora
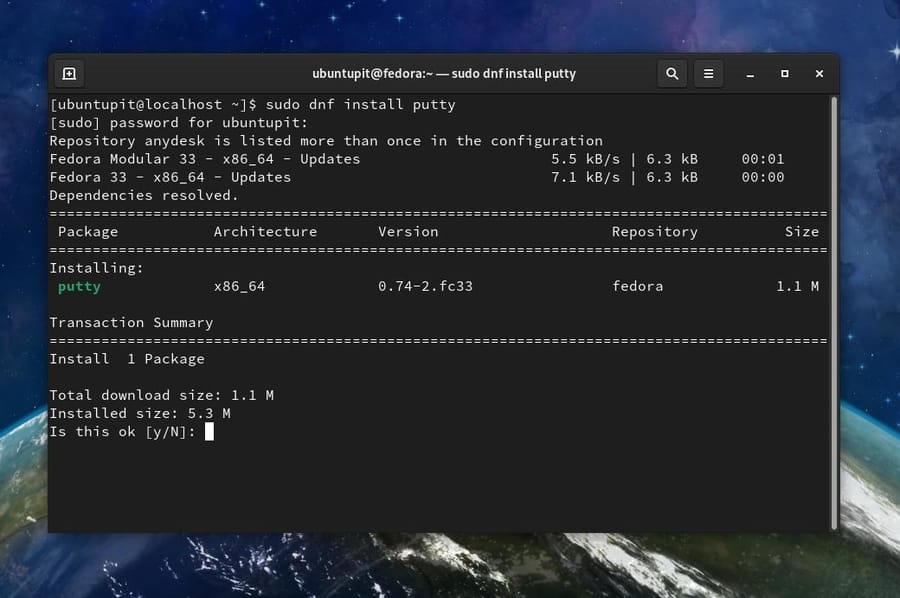
Installing Putty SSH client on Fedora or Red Hat Linux is easy and straightforward with the DNF and YUM command. It is available in the official Linux repository. To install Putty on a Red Hat Linux system, run the following YUM command on your terminal shell.
If you have a Fedora workstation, you need to run the following DNF command on your shell to install the Putty SSH client on your system.
Get Started With Putty
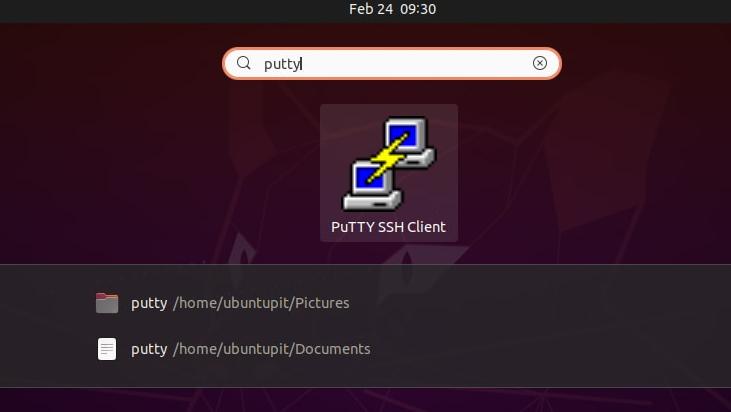
You can use Putty to connect another client using a username and password or using the SSH URL. To open the Putty tool, you can just type Putty on the terminal shell and hit the Enter button. You can also find it on the application menu and open it in the conventional method.
Using the Putty SSH client gives you a professional feeling of server control. If you have issues using it on your Linux machine, ensure no third-party network blocker or any misconfiguration on the firewall on your network.
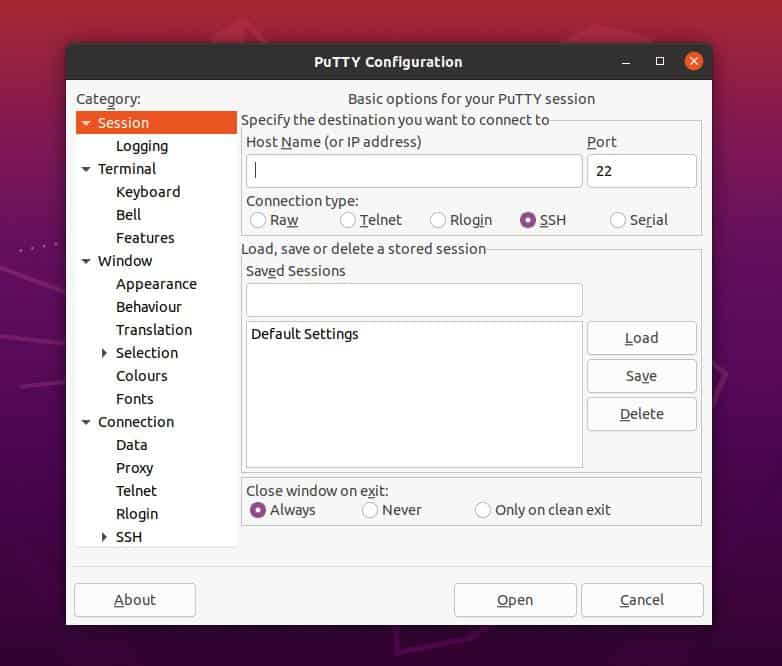
The Putty SSH client is customizable and configurable. You can use your customized keyboard shortcut for the Putty tool on your system. When the Putty tool opens, you would see the window and the menus shown in the picture below.
To make the server-client SSH connections secure through the Putty SSH client, you can use the PuTTYgen tool on your Linux system. It allows you to encrypt your connections through a pair of public and private keys.
Final Words
The Putty SSH client works smoothly on both Windows and Linux systems. You can also use it on a Raspberry Pi machine. If you’re a Linux server admin, Putty can be really a helpful and handy tool for you. I’ve described how to install and use the Putty tool on a Linux system in the entire post. You can also install it on your Linux system through the source code installation method. The Putty source codes are available here.
Please share this post with your friends and the Linux community if you find it helpful and handy. You can also write down your opinions regarding this post in the comment section.


