- Arch Linux and Windows 10 (UEFI + Encrypted) Install Guide
- Installation Media
- Windows Installation Media
- Arch Linux Installation Media
- BIOS Settings
- Installing Windows
- Installing Arch Linux
- Disk Partitioning
- Encrypting and Configuring the Root Partition
- Mounting and Installing
- System Configuration
- Initial Ramdisk Configuration
- GRUB Bootloader Setup
- User Administration
- Enable Networking
- Rebooting
- Создание загрузочной флешки с Windows из под (Arch)Linux
Arch Linux and Windows 10 (UEFI + Encrypted) Install Guide
This post details the installation process for my work and personal computers. At a high-level, my setup is a dualboot system running Windows 10 and Arch Linux. The Windows partition is encrypted with VeraCrypt and the Linux partition with LUKS. The post will detail the step-by-step. The video link below providers more context on how all the pieces fit together.
Installation Media
This section covers creating installation media for Windows and Arch Linux. You’ll need 2 USB drives sized to >= 8GB. These steps cover media creation from Windows (for the Windows 10 ISO) and Linux (for the Arch Linux ISO) workstations. There are many alternative ways to create installation media. If you choose to go with an alternative, skip this section.
Windows Installation Media
As of Windows 10, Microsoft requires you to download a tool to create windows installation media. This .exe requires a Windows host to create the installation media. If you do not have a Windows host to run this installer, Microsoft offers a USB for purchase.
Windows did not historically have this restriction. For example, Windows 8. You could follow this guide using Window 8. To create installation media directly from an ISO, consider WoeUSB.
Arch Linux Installation Media
- Download the Arch Linux ISO. https://www.archlinux.org/download
- Insert a USB drive.
- List block devices and determine the device name.
lsblk NAME MAJ:MIN RM SIZE RO TYPE MOUNTPOINT sda 8:0 1 29.2G 0 disk |-sda1 8:1 1 602M 0 part `-sda2 8:2 1 64M 0 part nvme0n1 259:0 0 477G 0 disk |-nvme0n1p1 259:1 0 512M 0 part /boot `-nvme0n1p2 259:2 0 476.4G 0 part `-cryptroot\x5cx2callow-discards\x5cx2cheader 254:0 0 476.4G 0 crypt `-vg0-root 254:1 0 476.4G 0 lvm / dd bs=4M if=path/to/archlinux.iso of=/dev/sdx status=progress oflag=sync - dd : copies and converts a file based on arguments.
- bs : amount of bytes to write at a time.
- if : specify a file to read rather than stdin.
- of : specify a file to write to rather than stdout.
- status : level to log to stderr; progress shows periodic transfer stats.
- oflag : set to sync synchronizes I/O for data and metadata.
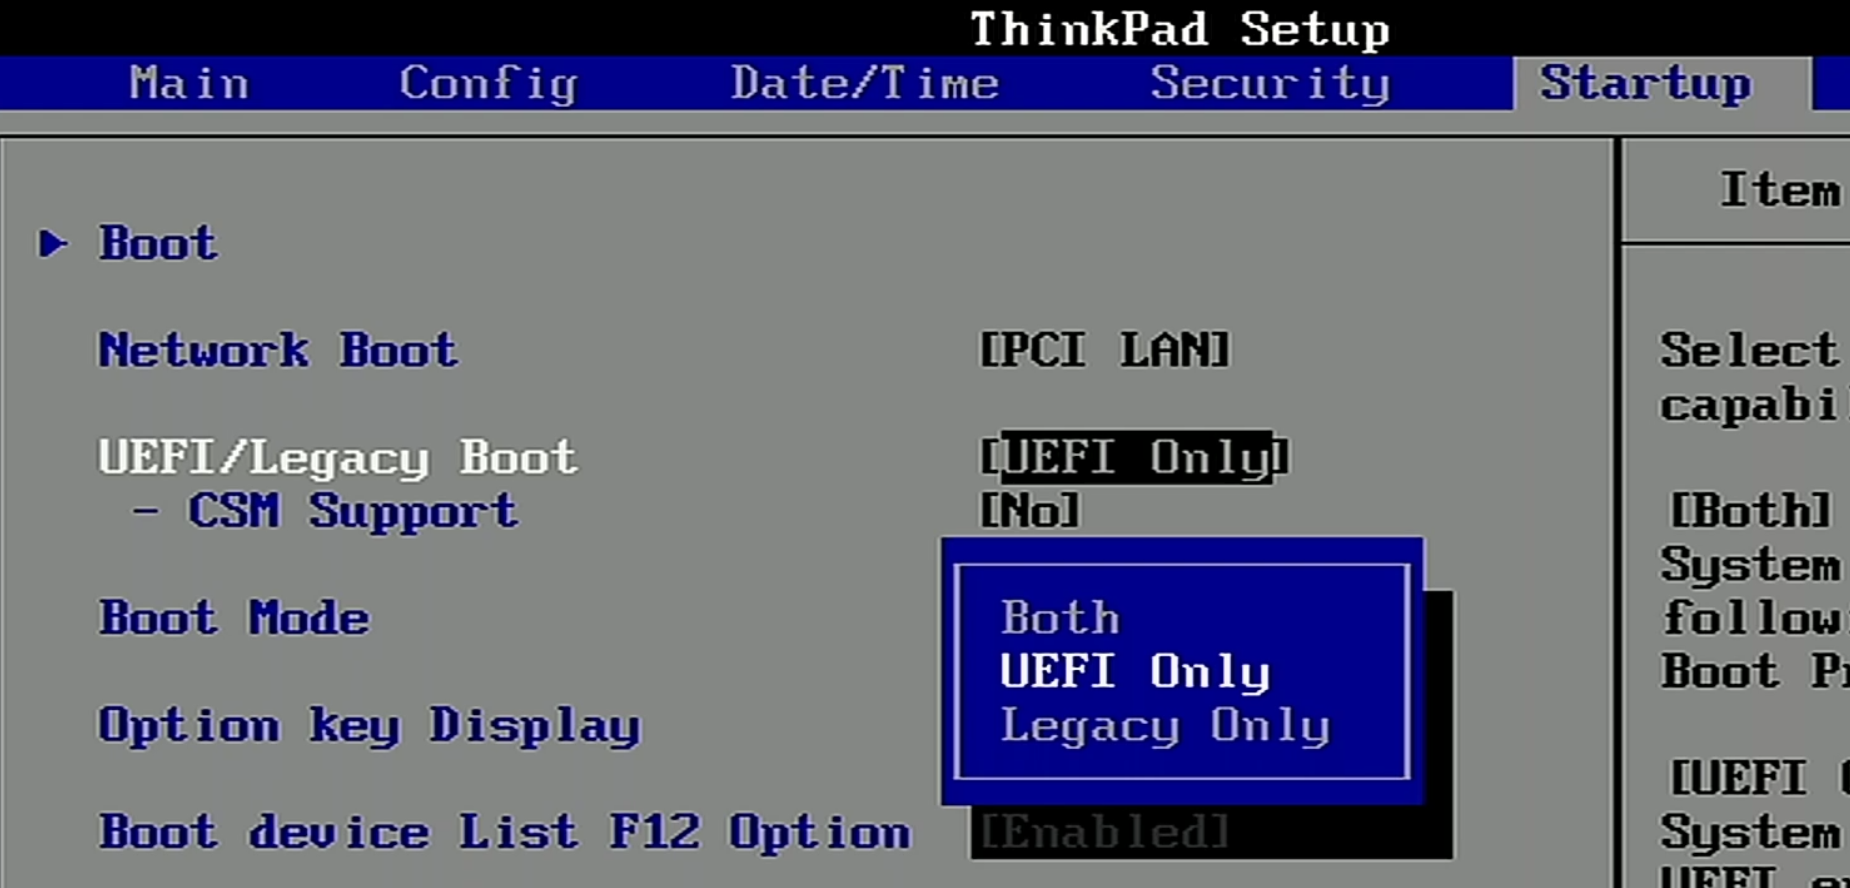
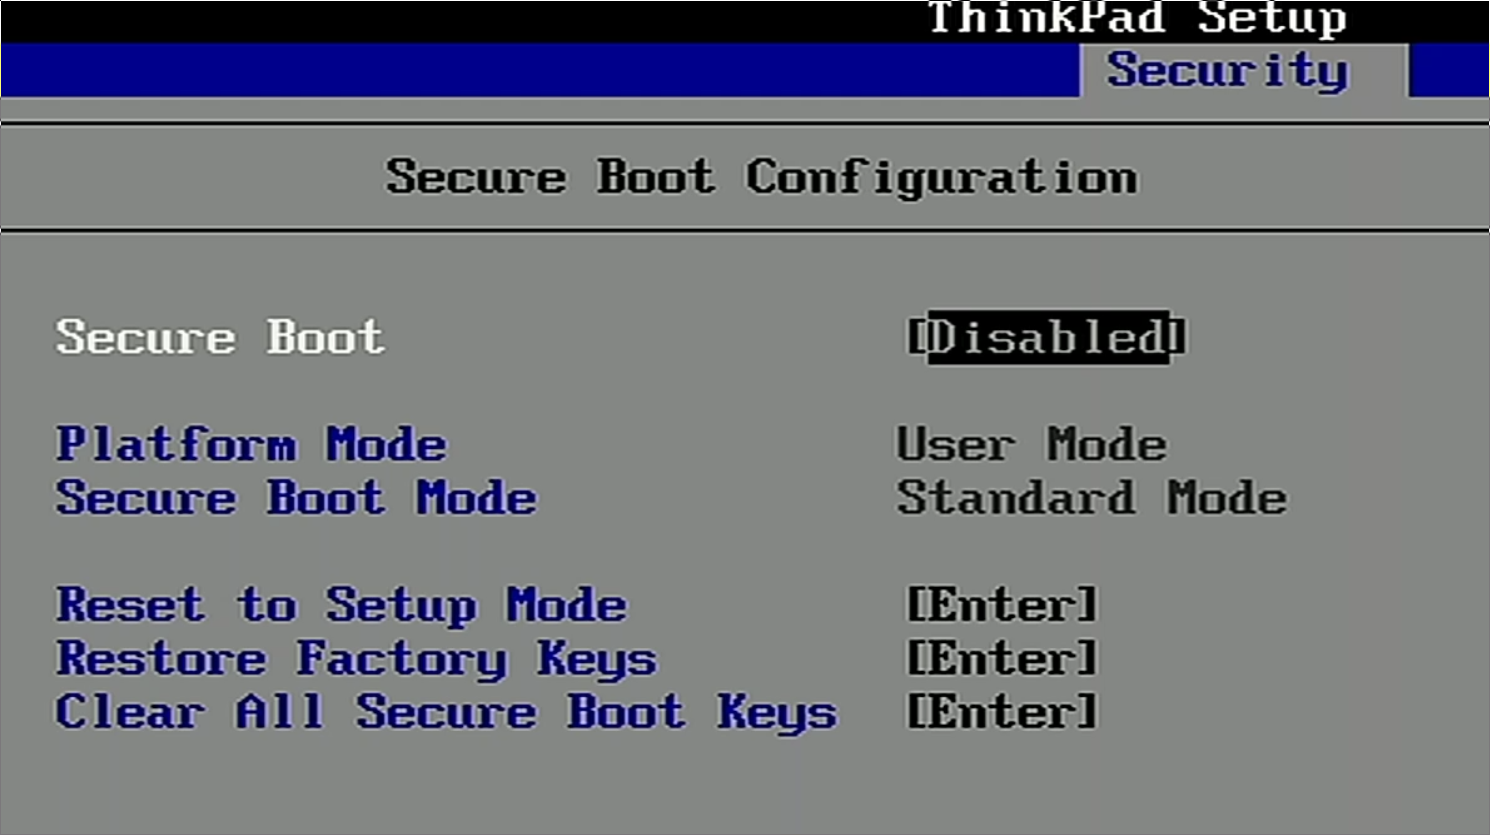
BIOS Settings
Installing Windows
This section covers installing Windows. Installing it first allows reuse of the Windows-created EFI partition. Using VeraCrypt, the Windows partition will be encrypted.
- Insert the USB containing Windows.
- Power on.
- While booting, open the device boot menu.
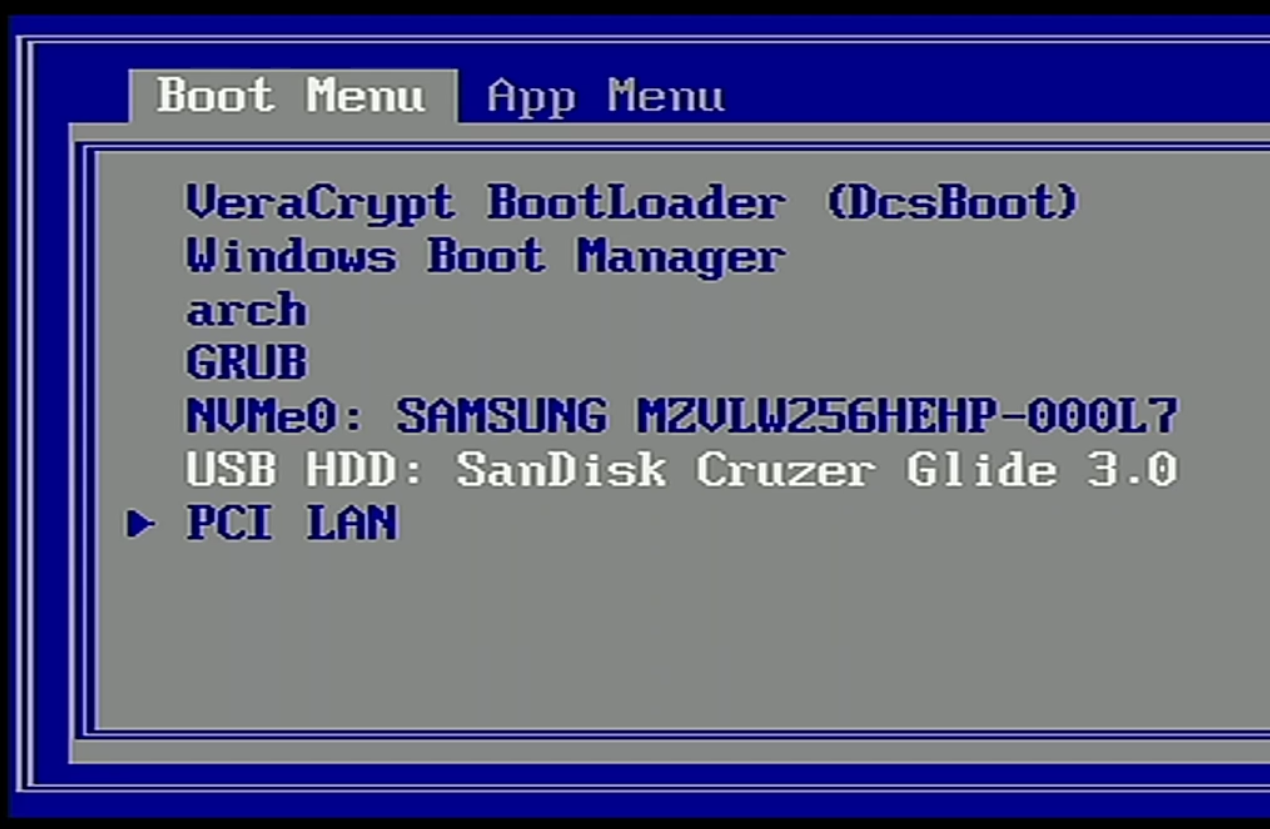
Select the USB device in UEFI mode.


Windows creates additoinal partitions including the 100.0MB System partition that will act as the EFI partition. 1. Click Next and wait for Windows to install.


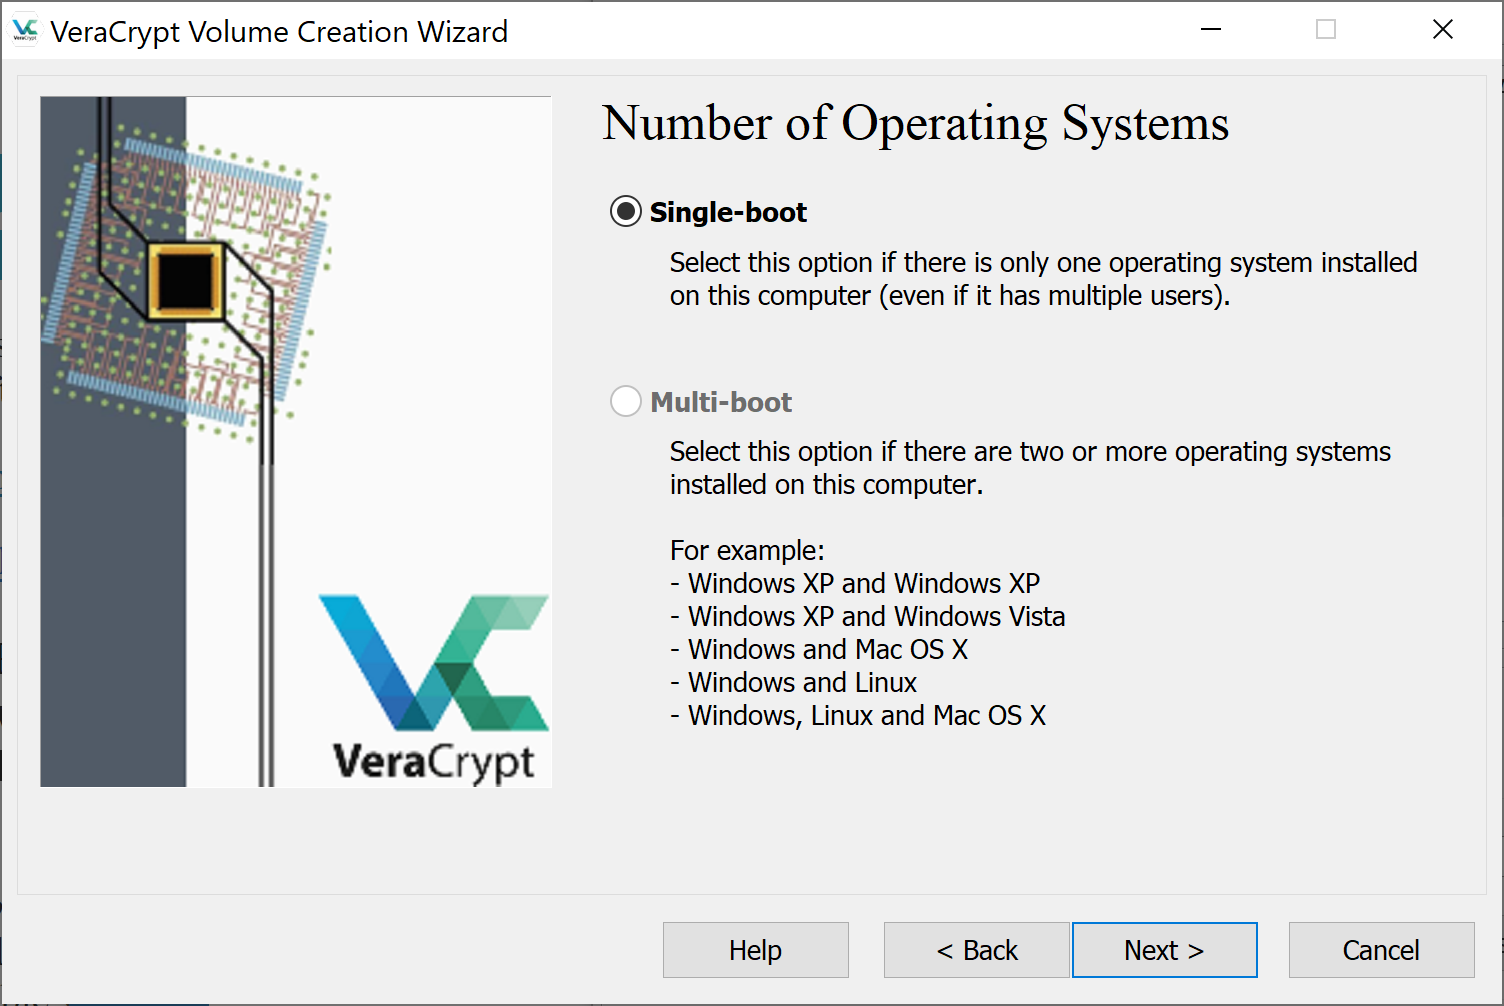
While you will have a multi-boot system eventually. This installation will have grub point to veracrypt that will then decrypt and point to windows. Thus, vercrypt needs to know nothing about Linux.


Installing Arch Linux
This section covers installing Arch Linux. Using Linux Unified Key Setup (LUKS), the root partition will be encrypted.
- Insert the USB containing Arch Linux.
- Boot the machine.
- While booting, open the device boot menu.

ping google.com PING google.com (216.58.193.206) 56(84) bytes of data. 64 bytes from lax02s23-in-f14.1e100.net time=809 ms 64 bytes from lax02s23-in-f14.1e100.net time=753 ms After the steps above, I always start sshd (included in the archiso) and finish the installation process from another computer. This enables me to have access to copy and paste, editors, and browsers rather than the restricted terminal on my target machine. This is optional, but the steps below may make your experience better.
- Set a root passwd for archiso.

From this point forward, I’m completing the installation from another Linux desktop. You can also use Windows (putty) or Mac.
Disk Partitioning
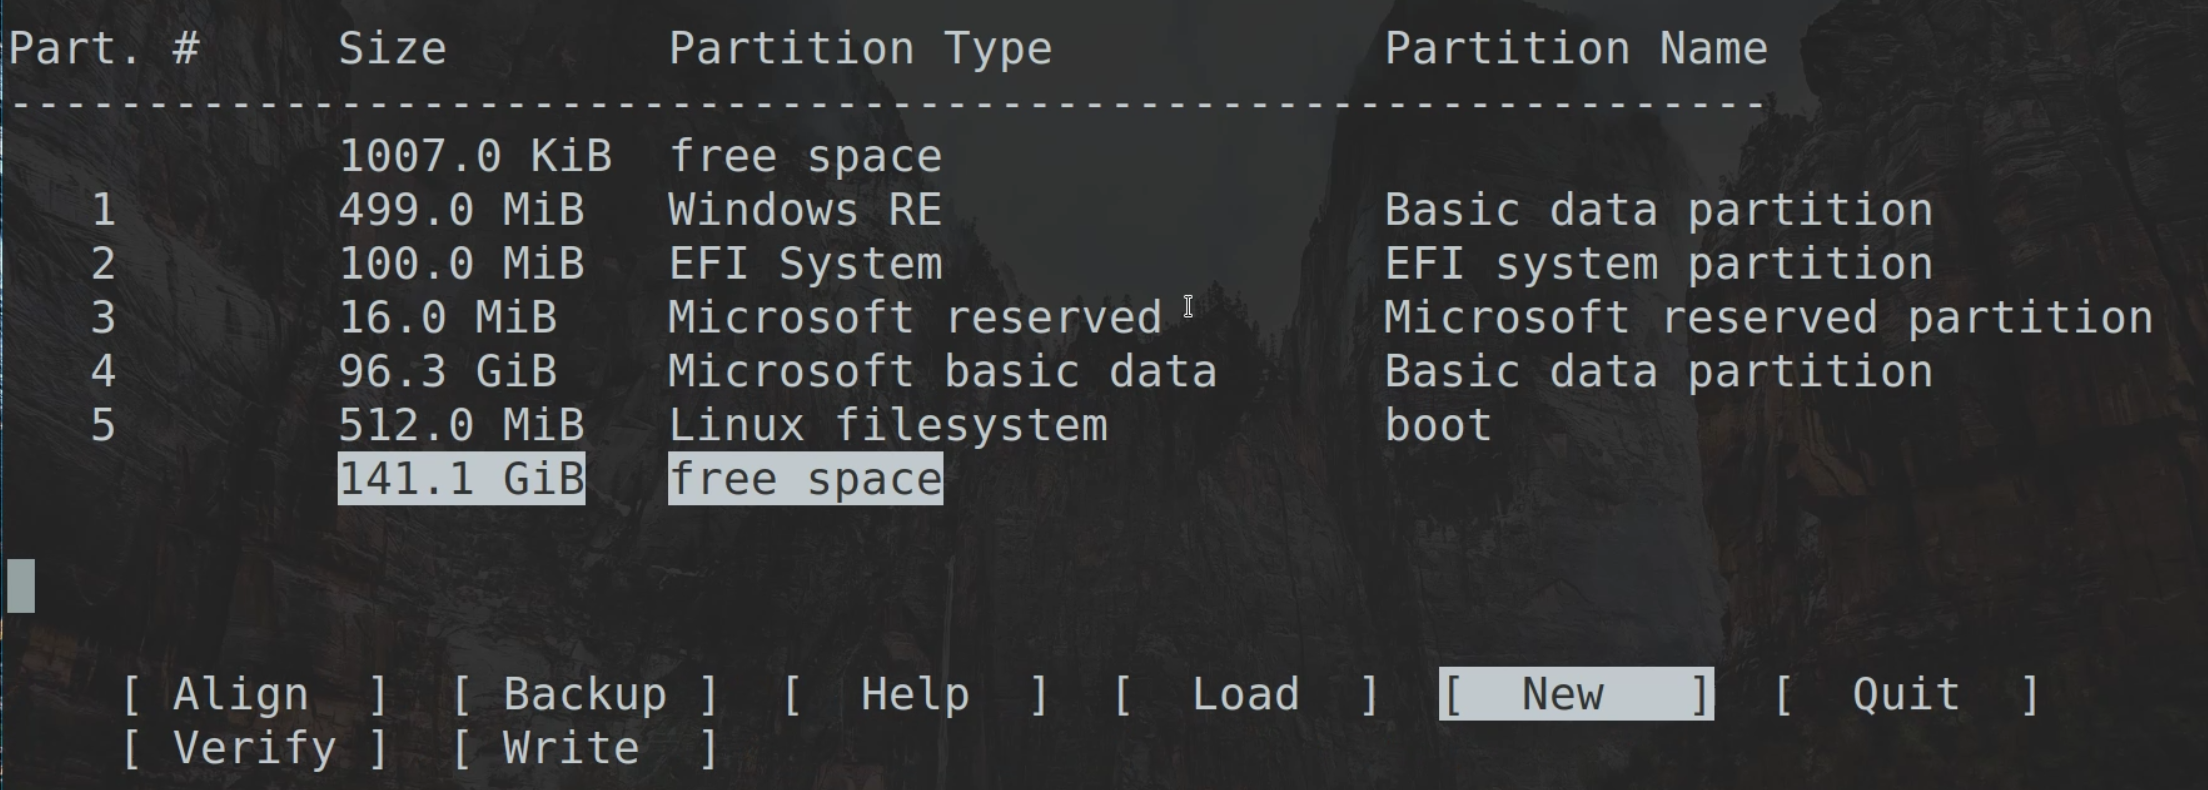
lsblk NAME MAJ:MIN RM SIZE RO TYPE MOUNTPOINT nvme0n1 259:0 0 477G 0 disk |-nvme0n1p1 259:1 0 512M 0 part /boot `-nvme0n1p2 259:2 0 476.4G 0 part `-cryptroot\x5cx2callow-discards\x5cx2cheader 254:0 0 476.4G 0 crypt `-vg0-root 254:1 0 476.4G 0 lvm / cgdisk is an ncurses-based GUID partition table manipulator. Unlike the command-only fdisk approach, cgdisk provides a text-menu for writing partitions.

This means the Linux partition starts directly at the end of the Windows partition. Some believe it is best to leave a small amount of free space between partitions. However, I have not had issues with this.

Encrypting and Configuring the Root Partition
cryptsetup -y --use-random luksFormat /dev/nvme0n1p6 - -y : interactively requests the passphrase twice.
- —use-random : uses /dev/random to produce keys.
- luksFormat : initializes a LUKS partition.
cryptsetup luksOpen /dev/nvme0n1p6 cryptroot mkfs.ext4 /dev/mapper/cryptroot Mounting and Installing
mount /dev/mapper/cryptroot /mnt mount /dev/nvme0n1p5 /mnt/boot mount /dev/nvme0n1p2 /mnt/boot/efi pacstrap /mnt linux linux-firmware base base-devel grub efibootmgr vim git intel-ucode networkmanager - linux : linux kernel ( https://www.archlinux.org/packages/core/x86_64/linux ).
- linux-firmware : linux kernel ( https://www.archlinux.org/packages/core/any/linux-firmware ).
- base : common packages for Linux ( https://www.archlinux.org/groups/x86_64/base ).
- base-devel :common package for development in Linux ( https://www.archlinux.org/groups/x86_64/base-devel ).
- grub : (GRand Unified Bootloader) is a multi-boot loader.
- vim : text editor.
- git : version control system.
- efibootmgr : userspace application used to modify the Intel Extensible Firmware Interface (EFI) Boot Manager.
- intel-ucode : processor microcode; assumes Intel x86 processor.
- networkmanager : handles connecting to wireless and wired networks.
genfstab -U /mnt >> /mnt/etc/fstab System Configuration
This section enters the new Arch Linux system and configures the system.
- Enter the system root via arch-chroot .
ln -sf /usr/share/zoneinfo/MST /etc/localtime #en_SG.UTF-8 UTF-8 #en_SG ISO-8859-1 en_US.UTF-8 UTF-8 #en_US ISO-8859-1 #en_ZA.UTF-8 UTF-8 echo "LANG=en_US.UTF-8" >> /etc/locale.conf Initial Ramdisk Configuration
The initial ramdisk is a root file system that will be booted into memory. It aids in startup. This section covers setup and generation of an mkinitcpio configuration for generating initramfs.
- Add encrypt to HOOKS in /etc/mkinitcpio.conf (order matters).
HOOKS=(base udev autodetect modconf block encrypt filesystems keyboard fsck) HOOKS=(base udev autodetect keyboard modconf block encrypt filesystems fsck) GRUB Bootloader Setup

Edit the GRUB boot loader configuration.
GRUB_CMDLINE_LINUX="cryptdevice=UUID=4f7301bf-a44f-4b90-ad6d-5ec10a0c2f2a:cryptroot root=/dev/mapper/cryptroot" #!/bin/sh exec tail -n +3 $0 # This file provides an easy way to add custom menu entries. Simply type the # menu entries you want to add after this comment. Be careful not to change # the 'exec tail' line above. if [ "$" == "efi" ]; then menuentry "Windows 10" < insmod part_gpt insmod fat insmod search_fs_uuid insmod chain # use: # after --set=root, add the EFI partition's UUID # this can be found with either: # # a. blkid # - or - # b. grub-probe --target=fs_uuid /boot/efi/EFI/VeraCrypt/DcsBoot.efi # search --fs-uuid --set=root $FS_UUID chainloader /EFI/VeraCrypt/DcsBoot.efi >fi #!/bin/sh exec tail -n +3 $0 # This file provides an easy way to add custom menu entries. Simply type the # menu entries you want to add after this comment. Be careful not to change # the 'exec tail' line above. if [ "$" == "efi" ]; then menuentry "Windows 10" < insmod part_gpt insmod fat insmod search_fs_uuid insmod chain # use: # after --set=root, add the EFI partition's UUID # this can be found with either: # # a. blkid # - or - # b. grub-probe --target=fs_uuid /boot/efi/EFI/VeraCrypt/DcsBoot.efi # search --fs-uuid --set=root 8E12-69DD chainloader /EFI/VeraCrypt/DcsBoot.efi >fi This assumes your efi is located in /boot/efi ; additional flags are available if you used an alternative location.
grub-mkconfig -o /boot/grub/grub.cfg User Administration
## Uncomment to allow members of group wheel to execute any command %wheel ALL=(ALL) ALL Enable Networking
systemctl enable NetworkManager Rebooting
Создание загрузочной флешки с Windows из под (Arch)Linux
Может понадобиться записать флешку с Windows, когда в наличии только Linux.
Приведенный способ наиболее легко применяется в системах ArchLinux и Manjaro, так как в их AUR репозиториях есть ms-sys .
Для начала, установим необходимые утилиты (если они отсутствуют): ~ yaourt -S util-linux ntfs-3g ms-sys
Для дальнейших действий необходимо определить флешку. Сделать это можно либо через программу GParted , либо в консоли с помощью программы df в консоли. ~ df Файловая система Размер Использовано Дост Использовано% Cмонтировано в dev 1,9G 0 1,9G 0% /dev run 1,9G 1,2M 1,9G 1% /run /dev/sda4 188G 21G 158G 12% / tmpfs 1,9G 162M 1,8G 9% /dev/shm tmpfs 1,9G 0 1,9G 0% /sys/fs/cgroup tmpfs 1,9G 24K 1,9G 1% /tmp /dev/sda6 321M 256K 321M 1% /boot/efi tmpfs 386M 12K 386M 1% /run/user/1000 /dev/sdb1 15G 3,7G 11G 26% /run/media/lab/USB DISK
В данном случае раздел на флешке имеет адрес /dev/sdb1 , а сама флешка — /dev/sdb .
На всякий случай отмонтируем флешку, если она уже примонтирована: ~ sudo umount /dev/sdb1 [sudo] пароль для lab:
Затем отформатируем флешку: ~ sudo mkfs.ntfs -n ‘Windows’ /dev/sdb1
И примонтируем все что нужно: #Создадим папки, куда будут подключаться iso-образ и флешка: ~ sudo mkdir -p /mnt/ ~ sudo chmod 777 /mnt/ #Монтируем iso-образ и флешку: ~ sudo mount -o loop ~/Загрузки/win7.iso /mnt/iso ~ sudo mount /dev/sdb1 /mnt/usb
Теперь копируем все установочные файлы Windows: ~ cp -r /mnt/iso/* /mnt/usb/
И устанавливаем загрузчик Windows 7 на флешку: ~ ms-sys -7 /dev/sdb