- How To Install Arduino IDE on Linux Mint 21
- Install Arduino IDE on Linux Mint 21 Vanessa
- Install the Arduino Software (IDE) on Linux
- Download the Arduino Software (IDE)
- Extract the package
- Run the install script
- Proceed with board-specific instructions
- Please Read.
- Arduino IDE 1 Installation (Linux)
- Quick Start
- Download the Arduino Software (IDE)
- Extract the package
- Run the Install Script
- Please Read
- arduino on Linux Mint 21 «Vanessa»
- 2. Uninstall / Remove arduino package
- 3. Details of arduino package
- 5. The same packages on other Linux Distributions
How To Install Arduino IDE on Linux Mint 21
In this tutorial, we will show you how to install Arduino IDE on Linux Mint 21. For those of you who didn’t know, Arduino is a widely-used, open-source electronics platform used to create devices that interact with their environment using sensors and actuators. It consists of a programmable hardware board and a software (Integrated Development Environment) for writing and uploading programs to the board. Arduino runs on Linux, Windows, and macOS, and Linux.
This article assumes you have at least basic knowledge of Linux, know how to use the shell, and most importantly, you host your site on your own VPS. The installation is quite simple and assumes you are running in the root account, if not you may need to add ‘ sudo ‘ to the commands to get root privileges. I will show you the step-by-step installation of Arduino IDE on Linux Mint 21 (Vanessa).
Prerequisites
- A server running one of the following operating systems: Linux Mint 21 (Vanessa).
- It’s recommended that you use a fresh OS install to prevent any potential issues.
- SSH access to the server (or just open Terminal if you’re on a desktop).
- A non-root sudo user or access to the root user . We recommend acting as a non-root sudo user , however, as you can harm your system if you’re not careful when acting as the root.
Install Arduino IDE on Linux Mint 21 Vanessa
Step 1. Before running the tutorial below, it’s important to make sure your system is up to date by running the following apt commands in the terminal:
sudo apt update sudo apt install software-properties-common apt-transport-https wget ca-certificates gnupg2
Step 2. Installing Arduino IDE on Linux Mint 21.
By default, Arduino is available on the Linux Mint 21 base repository. Now install the latest stable version of Arduino IDE to your system using the following command:
Step 3. Accessing Arduino on Linux Mint 21.
Once we finish with the installation, we will find Arduino in the Mint menu, in the Programming section:
Congratulations! You have successfully installed Arduino. Thanks for using this tutorial for installing the latest version of Arduino IDE on the Linux Mint system. For additional help or useful information, we recommend you check the official Arduino website.
If you don’t have time to do all of this stuff, or if this is not your area of expertise, we offer a service to do “VPS Manage Service Offer”, starting from $10 (Paypal payment). Please contact us to get the best deal!
Install the Arduino Software (IDE) on Linux
The Linux build of the Arduino Software (IDE) comes in different packages depending on your system architecture. There are no specific instructions needed for the different distributions of Linux (e.g. Ubuntu).
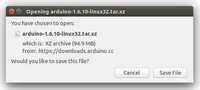
Download the Arduino Software (IDE)
Get the latest version from the download page. You can choose between the 32, 64 and ARM versions. It is very important that you choose the right version for your Linux distro. Clicking on the chosen version brings you to the donation page and then you can either open or save the file. Please save it on your computer.
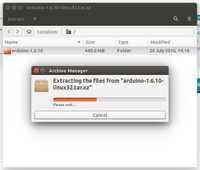
Extract the package
The file is compressed and you have to extract it in a suitable folder, remembering that it will be executed from there.

Run the install script
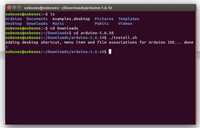
Open the arduino-1.6.x folder just created by the extraction process and spot the install.sh file. Right click on it and choose Run in Terminal from the contextual menu. The installation process will quickly end and you should find a new icon on your desktop.
If you don’t find the option to run the script from the contextual menu, you have to open a Terminal window and move into the arduino-1.6.x folder. Type the command ./install.sh and wait for the process to finish. You should find a new icon on your desktop.

Proceed with board-specific instructions
When the Arduino Software (IDE) is properly installed you can go back to the Getting Started Home and choose your board from the list on the right of the page.
Please Read.
It might happen that when you upload a sketch — after you have selected your board and the serial port -, you get an error Error opening serial port . If you get this error, you need to set serial port permission.
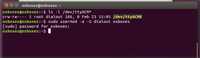
you will get something like:
crw-rw—- 1 root dialout 188, 0 5 apr 23.01 ttyACM0
The «0» at the end of ACM might be a different number, or multiple entries might be returned. The data we need is «dialout» (is the group owner of the file).
Now we just need to add our user to the group:
where is your Linux user name. You will need to log out and log in again for this change to take effect.
This is the procedure to access the serial port from the Arduino Software (IDE) if you get an error
After this procedure, you should be able to proceed normally and upload the sketch to your board or use the Serial Monitor.
The text of the Arduino getting started guide is licensed under a Creative Commons Attribution-ShareAlike 3.0 License. Code samples in the guide are released into the public domain.
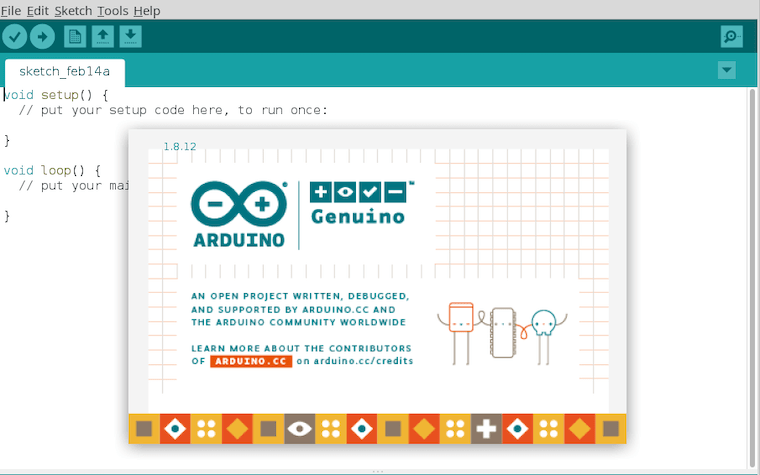
Arduino IDE 1 Installation (Linux)
This document explains how to install the Arduino Software (IDE) on Linux machines.
Quick Start
The Linux build of the Arduino Software (IDE) comes in different packages depending on your system architecture. There are no specific instructions needed for the different distributions of Linux (e.g. Ubuntu).
Download the Arduino Software (IDE)
Get the latest version from the download page. You can choose between the 32, 64 and ARM versions. It is very important that you choose the right version for your Linux distro. Clicking on the chosen version brings you to the donation page and then you can either open or save the file. Please save it on your computer.

Extract the package
The file is compressed and you have to extract it in a suitable folder, remembering that it will be executed from there.
Run the Install Script
Open the arduino-1.x.x folder just created by the extraction process and spot the install.sh file. Right click on it and choose Run in Terminal from the contextual menu. The installation process will quickly end and you should find a new icon on your desktop.
If you don’t find the option to run the script from the contextual menu, you have to open a Terminal window and move into the arduino-1.x.x root directory and run the following command:
This method only works for versions greater or equal than 1.6.5. Remove
You should find a new icon on your desktop.
Please Read
It might happen that when you upload a sketch — after you have selected your board and the serial port -, you get an error Error opening serial port . If you get this error, you need to set serial port permission.
you will get something like:
crw-rw---- 1 root dialout 188, 0 5 apr 23.01 ttyACM0The «0» at the end of ACM might be a different number, or multiple entries might be returned. The data we need is «dialout» (is the group owner of the file).
Now we just need to add our user to the group:
sudo usermod -a -G dialout username>is your Linux user name. You will need to log out and log in again for this change to take effect.

This is the procedure to access the serial port from the Arduino Software (IDE) if you get an error
After this procedure, you should be able to proceed normally and upload the sketch to your board or use the Serial Monitor.
The text of the Arduino getting started guide is licensed under a Creative Commons Attribution-ShareAlike 3.0 License. Code samples in the guide are released into the public domain.
arduino on Linux Mint 21 «Vanessa»
This tutorial shows how to install arduino package:
2. Uninstall / Remove arduino package
This guide let you learn how to uninstall arduino package:
3. Details of arduino package
Package: arduino
Architecture: amd64
Version: 2:1.8.19+dfsg1-1
Priority: optional
Section: universe/electronics
Origin: Ubuntu
Maintainer: Ubuntu Developers
Original-Maintainer: Debian Electronics Team
5. The same packages on other Linux Distributions
![]()
arduino (2:1.0.5+dfsg2-4.1) Ubuntu 18.04 LTS (Bionic Beaver)
![]()
arduino (2:1.0.5+dfsg2-4) Ubuntu 16.04 LTS (Xenial Xerus)
![]()
arduino (2:1.8.13+dfsg1-2) Ubuntu 21.04 (Hirsute Hippo)
![]()
arduino (2:1.0.5+dfsg2-4.1) Ubuntu 20.10 (Groovy Gorilla)
![]()
arduino (2:1.8.15+dfsg1-1) Ubuntu 21.10 (Impish Indri)
![]()
arduino (2:1.8.19+dfsg1-1) Ubuntu 22.04 LTS (Jammy Jellyfish)
![]()
arduino (2:1.0.5+dfsg2-4.1) Debian 10 (Buster)