- Установка драйвера CH340 для китайского ардуина UNO
- Драйвера чипа CH340 для разных операционных систем:
- Инструкция по установке драйвера CH340 на Windows
- Инструкция по установке драйвера CH340 на Linux
- Инструкция по установке драйвера CH340 на Mac OS
- Платы ARDUINO по низкой цене
- Нажми на изображение, чтобы заказать в интернет-магазине:
- Установка драйверов
- Драйвер FT232
- Install the Arduino Software (IDE) on Linux
- Download the Arduino Software (IDE)
- Extract the package
- Run the install script
- Proceed with board-specific instructions
- Please Read.
- How to install arduino driver Software (IDE) on ubuntu 16.04
- How to fixed error after install Arduino on Ubuntu
- Related Posts
Установка драйвера CH340 для китайского ардуина UNO
Подробная инструкция по установке драйвер CH340 для для китайского клона Arduino UNO/Nano на Windows XP, Windows 7, Windows 10, Linux, Mac OS.
Китайская ардуина отличается от оригинальной тем, что в ней для программирования основного микроконтроллера используется чип CH340 вместо МК Atmega16. Этот недорогой чип позволяет снизить итоговую стоимость платы ардуины (например, ардуина UNO на CH340 будет стоить около $3 вместо $5). Китайская Arduino UNO с чипом CH340 выглядит так:
Соответственно для зашивки программы в такую ардуино на компьютере должен быть установлен драйвер для чипа CH340. В остальном работа с такими платами ничем не отличается от оригинальных.
Драйвера чипа CH340 для разных операционных систем:
Эти драйвера подходят не только для китайских ардуино UNO, но и для любой другой ардуине на базе CH340 — NANO, MEGA и т.п.
Инструкция по установке драйвера CH340 на Windows
Этот метод проверялся на Windows XP и Windows 7, но должен также работать на Windows 10 и т.п.
Если драйвер для CH340 не был предварительно установлен на Windows, то сразу после подключения вашей платы Arduino UNO с чипом CH340 к компьютеру/ноутбуку через USB-кабель в списке устройств (Device manager) будет обнаружено новое USB-устройство USB2.0-Serial (как показано на рисунке). Восклицательный знак указывает на то, что драйвер для устройства не установлен.
Поэтому скачиваем драйвер CH340 для Windows отсюда , если вы это еще не сделали, и распаковываем архив куда-нибудь.
В распакованном архиве находим файл CH341SER.EXE и запускаем его. Появится такое окошко:
Здесь, естественно, нажимаем INSTALL , чтобы установить драйвер на компьютер (или UNINSTALL, если наоборот нужно удалить драйвер с компьютера).
После установки драйвера в списке устройств, а точнее в разделе порты COM & LPT вы увидет устройство USB-SERIAL CH340 (COM19) — это и есть ваша плата ардуина, подключенная через USB-порт, но работать она будет в режиме виртуального (последовательного) COM-порта.
То есть теперь вы можете использовать разные программы для работы с COM-портами, чтобы обмениваться сообщениями с вашей ардуиной. Это удобно, так как программировать USB-порт гораздо сложнее. Номер COM-порта в нашем случае определился как 19, но, вообще говоря, он может быть любым (из сводобных). Так что если номер COM-порта будет другим, то ничего страшного — всё должно работать.
Если устройство не было ображено, то возможно надо перезагрузить винду.
Инструкция по установке драйвера CH340 на Linux
На свежих линуксах ничего устанавливать не надо, всё работает из коробки. Тем не менее драйвер также имеется и его можно скачать здесь .
Инструкция по установке драйвера CH340 на Mac OS
Платы ARDUINO по низкой цене
Нажми на изображение, чтобы заказать в интернет-магазине:
Now 17.07.23 16:29:13, Your IP: 95.143.190.109; arduino.zl3p.com/basic/13_ch340
ePN
Установка драйверов
В набор входит “китайская” Ардуино-совместимая плата, у которой для подключения по USB используется контроллер CH340/CH341. Чтобы он распознавался компьютером, нужно установить драйвер.
Скачать драйвер можно по ссылке:
Запускаем и в появившемся окошке нажимаем INSTALL. Готово!

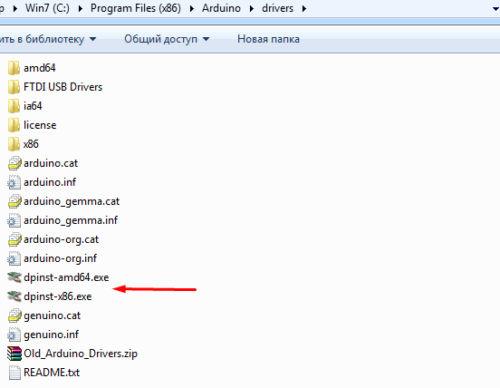
Если во время установки Arduino IDE вы по какой-то причине пропустили установку драйверов, то их можно установить вручную из папки с программой, расположенной по пути
- C/Program Files/Arduino/drivers (для 32-х разрядной системы)
- C/Program Files (x86)/Arduino/drivers (для 64-х разрядной системы).
- dpinst-x86.exe (для 32-х разрядной системы)
- dpinst-amd64.exe (для 64-х разрядной системы)
Драйвер CH341 для Mac можно скачать по ссылке с моего сайта , либо со страницы источника . Если у вас будут какие-то проблемы с OSX Sierra и выше, читайте вот эту статью .
Рекомендация от подписчика – устанавливать версию драйвера v1.4 вот отсюда
В Linux уже встроен необходимый драйвер, но Arduino IDE может отказаться с ним работать: Linux определяет ардуинку как устройство ttyUSB*, обычно это ttyUSB0 (это можно узнать командой dmesg в терминале), то есть в системе появляется интерфейс /dev/ttyUSB0. Чтобы с ним работать, нужны права доступа. Читать и писать на устройство /dev/ttyUSB0 имеет пользователь root и пользователи группы dialout. Работы с правами суперпользователя лучше избегать, поэтому следует занести своего пользователя в группу dialout. Это можно сделать следующей командой (обратите внимание, команда whoami в обратных кавычках)
sudo usermod -a -G dialout `whoami`
После этого нужно перелогиниться. Дальше запускаем Arduino IDE и в меню «Инструменты/Порт» ставим галочку напротив /dev/ttyUSB0.
Вся информация по работе с IDE на данной ОСи есть вот в этой статье
Драйвер FT232
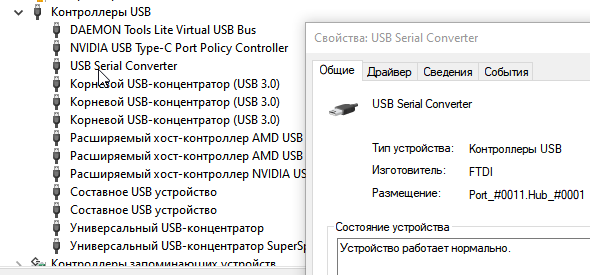
На Wemos Mini в некоторых партиях (003) стоит преобразователь FT232. Для него нужен отдельный драйвер:
Скачать, распаковать архив и установить. Wemos отобразится как USB Serial Converter
Install the Arduino Software (IDE) on Linux
The Linux build of the Arduino Software (IDE) comes in different packages depending on your system architecture. There are no specific instructions needed for the different distributions of Linux (e.g. Ubuntu).
Download the Arduino Software (IDE)
Get the latest version from the download page. You can choose between the 32, 64 and ARM versions. It is very important that you choose the right version for your Linux distro. Clicking on the chosen version brings you to the donation page and then you can either open or save the file. Please save it on your computer.
Extract the package
The file is compressed and you have to extract it in a suitable folder, remembering that it will be executed from there.

Run the install script
Open the arduino-1.6.x folder just created by the extraction process and spot the install.sh file. Right click on it and choose Run in Terminal from the contextual menu. The installation process will quickly end and you should find a new icon on your desktop.
If you don’t find the option to run the script from the contextual menu, you have to open a Terminal window and move into the arduino-1.6.x folder. Type the command ./install.sh and wait for the process to finish. You should find a new icon on your desktop.
Proceed with board-specific instructions
When the Arduino Software (IDE) is properly installed you can go back to the Getting Started Home and choose your board from the list on the right of the page.
Please Read.
It might happen that when you upload a sketch — after you have selected your board and the serial port -, you get an error Error opening serial port . If you get this error, you need to set serial port permission.
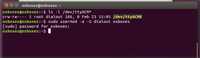
you will get something like:
crw-rw—- 1 root dialout 188, 0 5 apr 23.01 ttyACM0
The «0» at the end of ACM might be a different number, or multiple entries might be returned. The data we need is «dialout» (is the group owner of the file).
Now we just need to add our user to the group:
where is your Linux user name. You will need to log out and log in again for this change to take effect.
This is the procedure to access the serial port from the Arduino Software (IDE) if you get an error
After this procedure, you should be able to proceed normally and upload the sketch to your board or use the Serial Monitor.
The text of the Arduino getting started guide is licensed under a Creative Commons Attribution-ShareAlike 3.0 License. Code samples in the guide are released into the public domain.
How to install arduino driver Software (IDE) on ubuntu 16.04
My son wants to learn Arduino microcontroller for making the robot. Now, he likes Ubuntu OS. Because it is very fast and good no ads and no virus. He likes to play Minecraft game on this OS. It very fast and smooth.
How to install Arduino driver Software (IDE) on ubuntu 16.04
Its installation difficult than others OS. But for us it’s fun to learn it, challenging, customized by ourselves.
First , go to https://www.arduino.cc . Then, click on Download
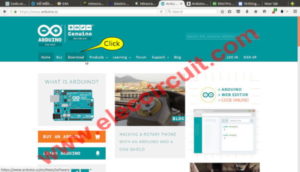
To download the “Download the Arduino Software (IDE)”, there are all OS very good!
You can read more detail on this site.
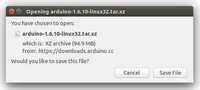
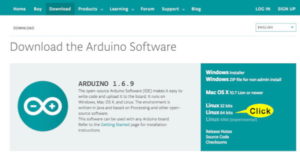
Second , his Ubuntu is Linux 64 bits. So Click here.
Then, wait for downing file: Arduino-1.6.9-linux64.tar.xz and about 93M size.
Third , click to read at link Learning > Getting started.
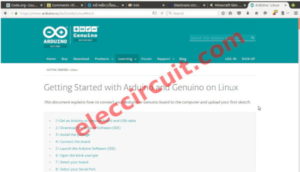
Look at: Install the Arduino Software
and Linux or Click a link: https://www.arduino.cc/en/Guide/Linux
Please Read that for full detail!
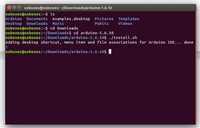
Fourth , extract the package to the Desktop folder. As Arduino-1.6.9 folder.
Then, Open the terminal by alt + Crl + T on keyboard
Then type:
ls
cd Desktop
cd arduino*
sudo ./installl.sh
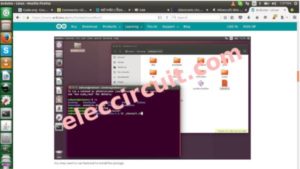
More detail:
ls //for list file and folder
cd Desktop //Go to Desktop folder
cd arduino* //Go to arduino-1.6.9 folder
./installl.sh // install program
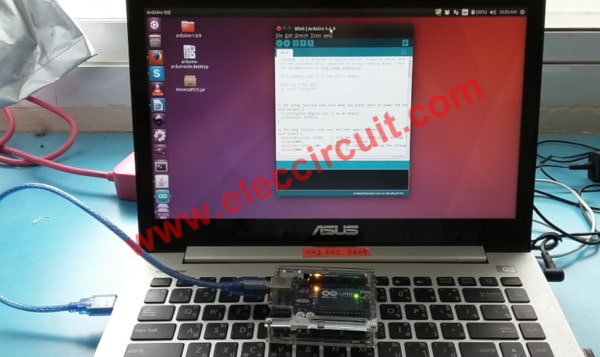
Fifth , apply USB cable to the computer and Launch the Arduino Software (IDE)
Next, test it by open the blink example:
Go to File > Examples > 01.Basics > Blink.
After that, select your board is Arduino/Genuine Uno
Sixth , select the serial device of the Arduino / Genuine board from the Tools > Serial Port menu. This should be something with /dev/ttyACM0.
Now , simply click the “Upload” button in the environment. Wait a few seconds – you should see the RX and TX LEDs on the board flashing. If the upload is successful, the message “Done uploading.” will appear in the status bar.
How to fixed error after install Arduino on Ubuntu
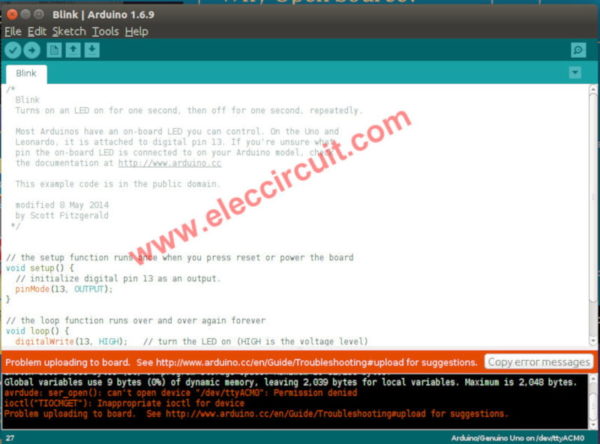
But now it error.
If you get an error Error opening serial port … you need to set serial port permission.
We fixed it that way, Open Terminal and type:
$ sudo usermod -a -G dialout
$ sudo chmod a+rw /dev/ttyACM0
Where is your username in Ubuntu. You will need to log out and log in again for this change to take effect.

Now my son can play Arduino on Ubuntu, then he was so happy.
Related Posts


Get Updates via Email
We always try to make Electronics Learning Easy .