- How can I share files between two Linux machines over LAN?
- 5 Answers 5
- Share files between Linux and Windows computers
- Access Linux from Windows
- 1. Install and configure Samba
- 2. Modify LinuxSE
- 3. Enable your user
- 4. Start Samba
- 4. Configure the firewall
- 5. Access Samba from Windows
- Access Windows from Linux
- 1. Enable file sharing
- 2. Define a shared folder
- 3. Mount the shared folder under Linux
- Summary
- Send your scans to a Linux machine over your network
- 5 open source alternatives to Dropbox
- Linux File Sharing Over Network Computers Using scp And rsync
- What Is SCP?
- Install OpenSSH Server In Linux
- Install OpenSSH Server
- Syntax – How To Share Files Over A Network Computer?
- Using SCP Parameters For More File Sharing Options
- What Is rsync?
- Install rsync In Linux
- Syntax To Sync Folder Between Network Computers
- Conclusion
How can I share files between two Linux machines over LAN?
I am currently running Fedora 18 with Gnome on two computers which are connected to the same router. I have been using Samba to share files between the two, but I know there must be a better way. On the left panel in Nautilus, there is a menu for me to access my other computer’s shared directories via Network -> Browse Network -> Windows Network -> Computer. What is the way to accomplish a similar way to access a shared directory between two Linux machines, without going through the «Windows Network»? Preliminary research suggests that using SSH to mount a remote directory may be what I’m looking for, but when I SSH into the other computer, I am left at the console scratching my head. If that is the correct method, I would greatly appreciate it if someone would offer some insight on how to accomplish the sharing.
5 Answers 5
In Nautilus, select File | Connect to Server .
There are a lot of options to share a file-system over a network in unix/linux. Nautilus supports some of them: ssh, webdav, ftp, smb and others. Obviously, any of these solutions requires that the corresponding daemon is running on remote host.
NFS is unix native «standard» way to share a file-system in a lan but the time needed to configure and manage such a solution is not worth the result in a so simple network as yours. IMHO, ssh is the best solution in your environment.
Usually ssh is used to log on and to execute commands on a remote machine. The way you connect to the remote machine is not the way to share a file-system but the way to execute remote commands. If you want to mount a remote file system via ssh via command line, try something like: sshfs remoteusername@host:/home/remoteusername /home/localusername/somedir (or use nautilus wizard).
Share files between Linux and Windows computers

If you work with different operating systems, it’s handy to be able to share files between them. This article explains how to set up file access between Linux (Fedora 33) and Windows 10 using Samba and mount.cifs.
Samba is the Linux implementation of the SMB/CIFS protocol, allowing direct access to shared folders and printers over a network. Mount.cifs is part of the Samba suite and allows you to mount the CIFS filesystem under Linux.
Caution: These instructions are for sharing files within your private local network or in a virtualized host-only network between a Linux host machine and a virtualized Windows guest. Don’t consider this article a guideline for your corporate network, as it doesn’t implement the necessary cybersecurity considerations.
Access Linux from Windows
This section explains how to access a user’s Linux home directory from Windows File Explorer.
1. Install and configure Samba
Start on your Linux system by installing Samba:
Samba is a system daemon, and its configuration file is located in /etc/samba/smb.conf . Its default configuration should work. If not, this minimal configuration should do the job:
[global] workgroup = SAMBA server string = %h server (Samba %v) invalid users = root security = user [homes] comment = Home Directories browseable = no valid users = %S writable = yesYou can find a detailed description of the parameters in the smb.conf section of the project’s website.
2. Modify LinuxSE
If your Linux distribution is protected by SELinux (as Fedora is), you have to enable Samba to be able to access the user’s home directory:
setsebool -P samba_enable_home_dirs onCheck that the value is set by typing:
getsebool samba_enable_home_dirsYour output should look like this:
![]()
3. Enable your user
Samba uses a set of users and passwords that have permission to connect. Add your Linux user to the set by typing:
You will be prompted for a password. This is a completely new password; it is not the current password for your account. Enter the password you want to use to log in to Samba.
To get a list of allowed user types:
4. Start Samba
Because Samba is a system daemon, you can start it on Fedora with:
This starts Samba for the current session. If you want Samba to start automatically on system startup, enter:
On some systems, the Samba daemon is registered as smbd .
4. Configure the firewall
By default, Samba is blocked by your firewall. Allow Samba to access the network permanently by configuring the firewall.
You can do it on the command line with:
firewall-cmd --add-service=samba --permanentOr you do it graphically with the firewall-config tool:

5. Access Samba from Windows
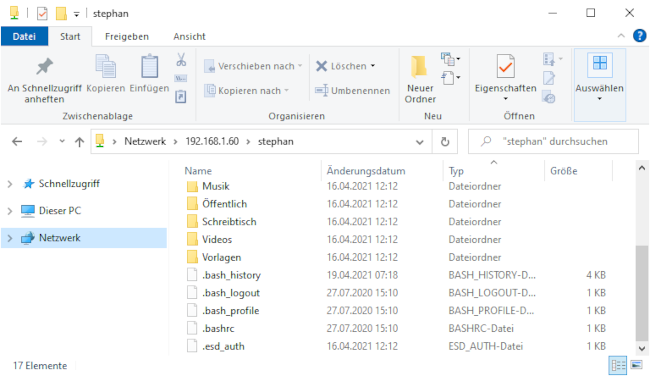
In Windows, open File Explorer. On the address line, type in two backslashes followed by your Linux machine’s address (IP address or hostname):
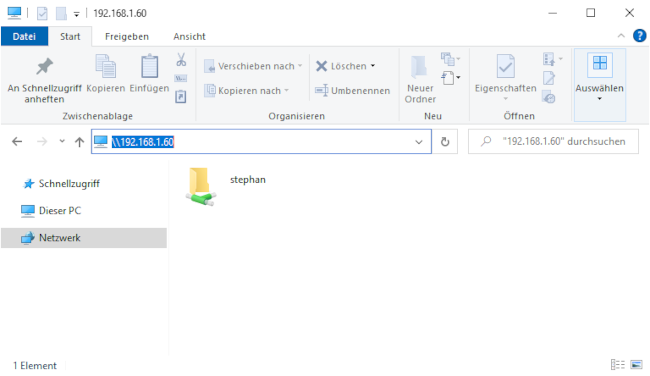
You will be prompted for your login information. Type in the username and password combination from step 3. You should now be able to access your home directory on your Linux machine:
Access Windows from Linux
The following steps explain how to access a shared Windows folder from Linux. To implement them, you need Administrator rights on your Windows user account.
1. Enable file sharing
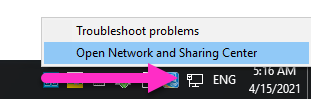
Open the Network and Sharing Center either by clicking on the
Windows Button > Settings > Network & Internet
or by right-clicking the little monitor icon on the bottom-right of your taskbar:
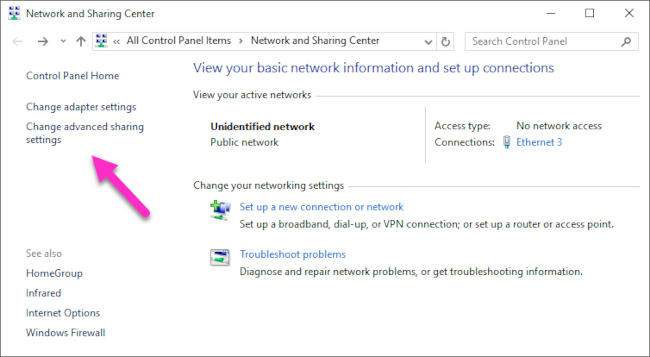
In the window that opens, find the connection you want to use and note its profile. I used Ethernet 3, which is tagged as a Public network.
Caution: Consider changing your local machine’s connection profile to Private if your PC is frequently connected to public networks.
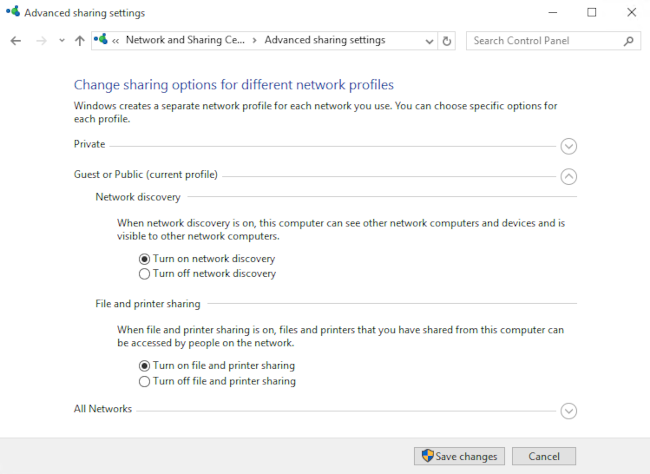
Remember your network profile and click on Change advanced sharing settings:
Select the profile that corresponds to your connection and turn on network discovery and file and printer sharing:
2. Define a shared folder
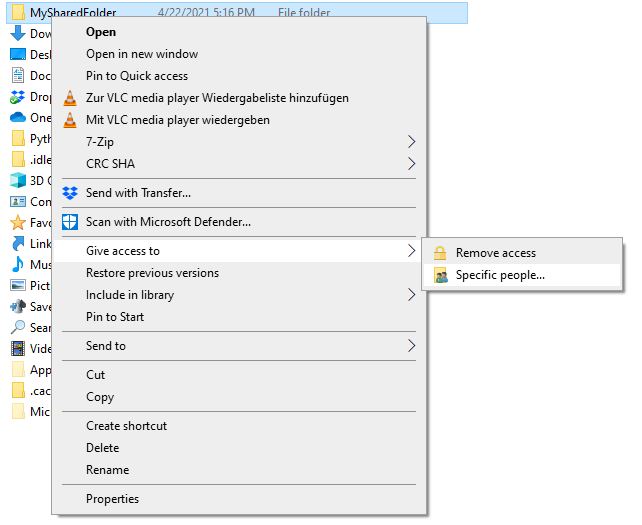
Open the context menu by right-clicking on the folder you want to share, navigate to Give access to, and select Specific people. :
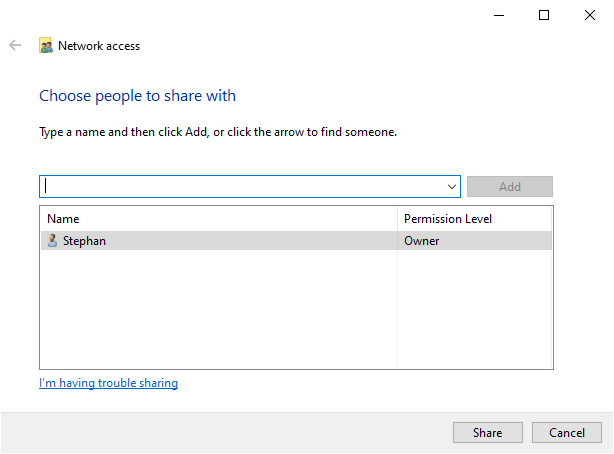
Check whether your current username is on the list. Click on Share to tag this folder as shared:
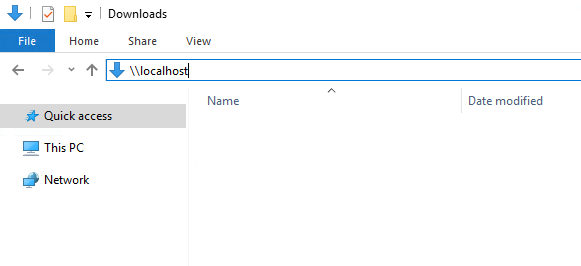
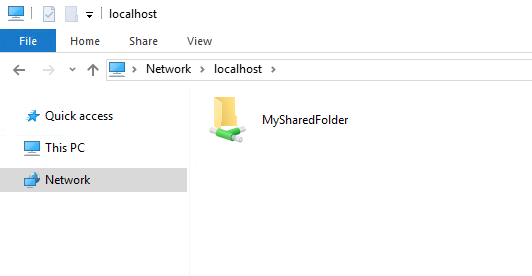
You can display a list of all shared folders by entering \\localhost in File Explorer’s address line:
3. Mount the shared folder under Linux
Go back to your Linux system, open a command shell, and create a new folder where you want to mount the Windows share:
Mounting Windows shares is done with mount.cifs, which should be installed by default. To mount your shared folder temporarily, use:
sudo mount.cifs ///MySharedFolder ~/WindowsShare/ -o user=,uid=$UID- is the Windows PC’s address info (IP or hostname)
- is the user that is allowed to access the shared folder (from step 2)
You will be prompted for your Windows password. Enter it, and you will be able to access the shared folder on Windows with your normal Linux user.
To unmount the shared folder:
You can also mount a Windows shared folder on system startup. Follow these steps to configure your system accordingly.
Summary
This shows how to establish temporary shared folder access that must be renewed after each boot. It is relatively easy to modify this configuration for permanent access. I often switch back and forth between different systems, so I consider it incredibly practical to set up direct file access.

Send your scans to a Linux machine over your network
Set up a Samba share to make a scanner easily accessible by a Linux computer over your network.

5 open source alternatives to Dropbox
Find a filesharing application that doesn’t compromise your security, freedom, or bank balance.
Linux File Sharing Over Network Computers Using scp And rsync
In this article, we will look at scp and rsync , two powerful Linux utilities for sharing files and folders across networks. scp allows you to simply copy directories or files from or to any remote destination, whereas rsync , in addition to simply copying files, also acts as a synchronising tool, synchronising changes between source and destination. The following discussion focuses on their application and the various parameters that can be used in conjunction with them to improve speed and security.
What Is SCP?
The SCP protocol is a network protocol that is based on the BSD RCP protocol. It allows file transfers over a network using Secure Shell (SSH). A client can use SCP to send files to another client or server on the same network. It can also connect to a server and request or download files. If a user wants to share multiple files across a network computer, there are two options. The user has the option of specifying each file in the command and then providing the destination path. The second method is for the user to save all of the files in one folder and share the entire folder across the network computer. Both methods are discussed further below. You are free to use whoever you want.
Install OpenSSH Server In Linux
For Linux data transfer over the network, OpenSSH is required. I discovered that it is not already installed in some Linux distributions, so the commands fail. Install OpenSSH server before you begin sharing files via SCP.
Install OpenSSH Server
For Debian or Ubuntu based Linux distributions –
sudo apt-get install openssh-serverFor Fedora Based Linux distributions -
sudo dnf install openssh-serverSyntax – How To Share Files Over A Network Computer?
scp [optionalParameters] source destinationExample – If you want to share a file name “myMovieList.txt” to a remote host(192.168.1.102), you can use the following command based on the above syntax. SCP Linux File Sharing
To copy file from remote machine to your local machine
To copy multiple files, provide space separated list of files and at the last destination path SCP – Copy multiple files
Using SCP Parameters For More File Sharing Options
You can use scp command with certain optional parameters that help you in faster copying and/or secure data transfer.
r: To copy directory you have to use parameter r to recursively copy the contents.
The r command makes it very simple to transfer multiple files contained in a single folder. It’s one of the best methods to do quick and secure Linux file sharing over network computers. ‘r’ Parameter to copy the folder to a host computer
For example to copy blogs folder to remote machine, you would use command –
P: To send out file on the machine with different portBy default, scp shares file over network computers through port 22. In many cases, you would want to use another port then you can P parameter to use another port for folder sharing. ‘P’ Parameter to share files on host computer through a different port
c: Change Encryption algorithm by default, scp uses Triple-DES cipher to encrypt data before transferring it. You can use other ciphers like blowfish (which has higher performance over default one). ‘c’ Change Encryption Algorithm
C: To transfer even faster you can use compression parameter that would compress the data while transferring and auto decompress it on the destination.
What Is rsync?
Rsync is useful for both sharing and synchronising files and folders. In contrast to SCP, rsync only transfers differences between source and destination files/folders. It is faster than SCP because it uses compression and decompression by default. It will save you a lot of time once you get used to it.
Install rsync In Linux
For Debian or Ubuntu based Linux distributions –
sudo apt-get install rsyncFor Fedora based Linux distributions –
Syntax To Sync Folder Between Network Computers
rsync [optionalParameters] source destinationWith rsync user can synchronize two folders existing over network computers. To transfer/sync folder from local to the remote host, use the following command – Sync folder using rsync
[a and r params preserve timestamp, owner, links, etc and recursively syncs the files respectively].List of optional parameters are:
-z: compress data.
-a: preserve links, owner, timestamp, etc.
-r: recursive.
–progress: show progress while transferring.
–include and — exclude: include or exclude pattern or files. Example
only rsync files/folders starting with S.
— delete: delete the directory if it doesn’t exist at source but exists at the destination.
–max-size : max transfer size limit. [eg: –max-size=’2000k’]
— remove-source-files: remove files at source after sync
— bwlimit: limit bandwidth for transfer [–bwlimit=1000] (limit by 1000 bps)
If you are unsure of rsync command result, you can also do a dry run with the command : –dry-run.
Conclusion
Both Linux utilities are useful for sharing files between computers on a network. Because it transfers only differences and compressed data by default, rsync is more efficient. That’s all I’ve got for now. More information can be found on man pages. Please leave any suggestions, comments, or questions in the section below.