‘Hello World!’ in ARM assembly
Over the last few weeks, in an effort to port a small C library to the platform, I’ve been doing a fair bit of tinkering around with the Android NDK. The NDK is primarily intended to allow Android developers to write performance-critical portions of their apps in native C or C++, which interface with the Android Java API through JNI. As the C library in question required porting some x86 SIMD assembly, I figured it would be helpful for me to get to know the bare bones of the ARM architecture. As a means to this end, we can use the NDK’s cross-compiler as a standalone tool to write a simple ‘Hello World!’ console app in ARM assembly. As Android is effectively Linux under the hood, we can apply our Linux assembly programming skills to this task.
Update: this guide also works if you are targetting an ARM device running Linux, such as a Raspberry Pi.
The structure of a minimal ‘Hello World!’
To make our app as simple as possible, we will (perhaps counter-intuitively) forgo use of the C standard library in favour of a lower-level interface to the Linux kernel: system calls (syscalls). Our syscall ‘Hello, World!’ app in C looks like:
Note the call to exit : in C, this normally happens behind the scenes when control returns from main . We get no such convenience in assembly: we must explicitly tell the kernel when to terminate our app.
Invoking syscalls
At a high level, our app needs to do the following in order to invoke a syscall:
- Load syscall arguments into registers.
- Tell the kernel which syscall to invoke.
- Pass control to the kernel.
The ABI (application binary interface) is the protocol that we follow to achieve these tasks. The ARM ‘EABI’ calling convention is described vaguely in these patch notes. We can glean that each system call has a unique identifier that is passed in register R7 , arguments are passed in R0 — R6 (respecting “EABI arrangement” where appropriate, i.e. 64-bit arguments), and control is passed to the kernel with the SWI 0 instruction.
To find the system call identifiers corresponding to write and exit we refer to the Linux kernel source: $LINUX_SOURCE_ROOT/arch/arm/include/asm/unistd.h . Note that these identifiers are not guaranteed to be the same on each platform.
To assembly
Our ARM assembly code, in GAS syntax, therefore looks like (see inline comments for details):
.data /* Data segment: define our message string and calculate its length. */ msg: .ascii "Hello, ARM!\n" len = . - msg .text /* Our application's entry point. */ .globl _start _start: /* syscall write(int fd, const void *buf, size_t count) */ mov %r0, $1 /* fd := STDOUT_FILENO */ ldr %r1, =msg /* buf := msg */ ldr %r2, =len /* count := len */ mov %r7, $4 /* write is syscall #4 */ swi $0 /* invoke syscall */ /* syscall exit(int status) */ mov %r0, $0 /* status := 0 */ mov %r7, $1 /* exit is syscall #1 */ swi $0 /* invoke syscall */ Assembling
Save the above as hello.S and run it through the GNU cross-assembler provided with the NDK. I will assume that you have the prebuilt NDK toolchain directory in your PATH (in my case /Users/peterdn/android-ndk/toolchains/arm-linux-androideabi-4.4.3/prebuilt/darwin-x86/bin ):
arm-linux-androideabi-as -o hello.o hello.S arm-linux-androideabi-ld -s -o hello hello.o Update: if running natively on an ARM device with binutils installed, the arm-linux-androideabi- probably won’t work: simply use as and ld instead.
Deploying to Android
For many, the easiest way to test the above binary is by deploying it to an Android device with an ARM processor. This also means we can take advantage of the insanely useful adb tool. If you happen to be running vanilla Linux on an ARM device, the binary should still run, providing your kernel supports the newer EABI (I believe 2.6.15 and above).
To deploy and test on Android, simply run:
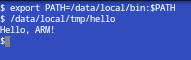
adb push hello /data/local/tmp/hello adb shell /data/local/tmp/hello It is also possible to run the binary locally on your device using the Android Terminal Emulator, as below:
© Peter Nelson 2019. Powered by Hugo. Theme based on hugo-classic.
Compiling and debugging ARM assembly with GDB and qemu
Recentely I’ve been involved with simple ARM assembly programming at university. The toolchains provided to me were either clunky (CYGWIN on Windows) or totally broken (the linux binaries), so I had to come up with something.
Installing the ARM toolchain
The first thing you need to compile an ARM program is a compiler, of course. Fortunately, the ARM architecture is widely supported nowadays, therefore this won’t be a problem.
I’ve choosen the GCC-based toolchain, which you can probably find in your favourite distro’s package repository.
In my case (Archlinux) I had to install the following packages from AUR:
arm-none-eabi-gcc arm-none-eabi-gdbThe last one is actually the debugger, but we’ll need it later anyway.
To test your compiler, try to save this snippet in a file, e.g. empty.s
.text .global _start _start: mov r0, #1 b _startTo compile it, we will assemble and link it:
arm-none-eabi-as empty.s -o empty.o arm-none-eabi-ld empty.o -o emptyI everything goes well, you should obtain an empty ELF executable. Unfortunately, unless you have an ARM machine at hand, it will be difficult to execute it: the easiest way to overcome this is to use qemu .
Debugging with qemu and GDB
After having installed qemu, you will be able to run your program as follows:
To understand what is really going on in the program, we’ll connect gdb to qemu, that will serve as a gdb server. We first need to be sure that the program has been built with debugging symbols turned on:
arm-none-eabi-as empty.s -g -o empty.o arm-none-eabi-ld empty.o -o emptyTo run our program, we’ll use:
qemu-arm -singlestep -g 1234 emptyso that it halts on the first instruction (useful for debugging). The -g parameter specifies which port will be used by the gdb server to listen for clients.
There are many GUIs one can use to make GDB more palatable, but none of them satisfied me, and I sticked to the integrated terminal UI that gdb offers.
Here’s what you need to do to connect to qemu:
➜ arm-none-eabi-gdb GNU gdb (GDB) 7.9.1 Copyright (C) 2015 Free Software Foundation, Inc. License GPLv3+: GNU GPL version 3 or later > This is free software: you are free to change and redistribute it. There is NO WARRANTY, to the extent permitted by law. Type "show copying" and "show warranty" for details. This GDB was configured as "--host=x86_64-unknown-linux-gnu --target=arm-none-eabi". Type "show configuration" for configuration details. For bug reporting instructions, please see: . Find the GDB manual and other documentation resources online at: . For help, type "help". Type "apropos word" to search for commands related to "word". (gdb) file empty Reading symbols from empty. done. (gdb) target remote localhost:1234 Remote debugging using localhost:1234 _start () at empty.s:4 4 mov r0, #1 (gdb)We first load the debugging symbols using the file command, then we connect to our remote target.
##Crash course on GDB The TUI provided by GDB is good enough to debug simple (and complex) programs: press Ctrl+x and then A to active it: above your usual GDB command prompt, you will see the source being debugged. Enter this command to have a good view of the registers.
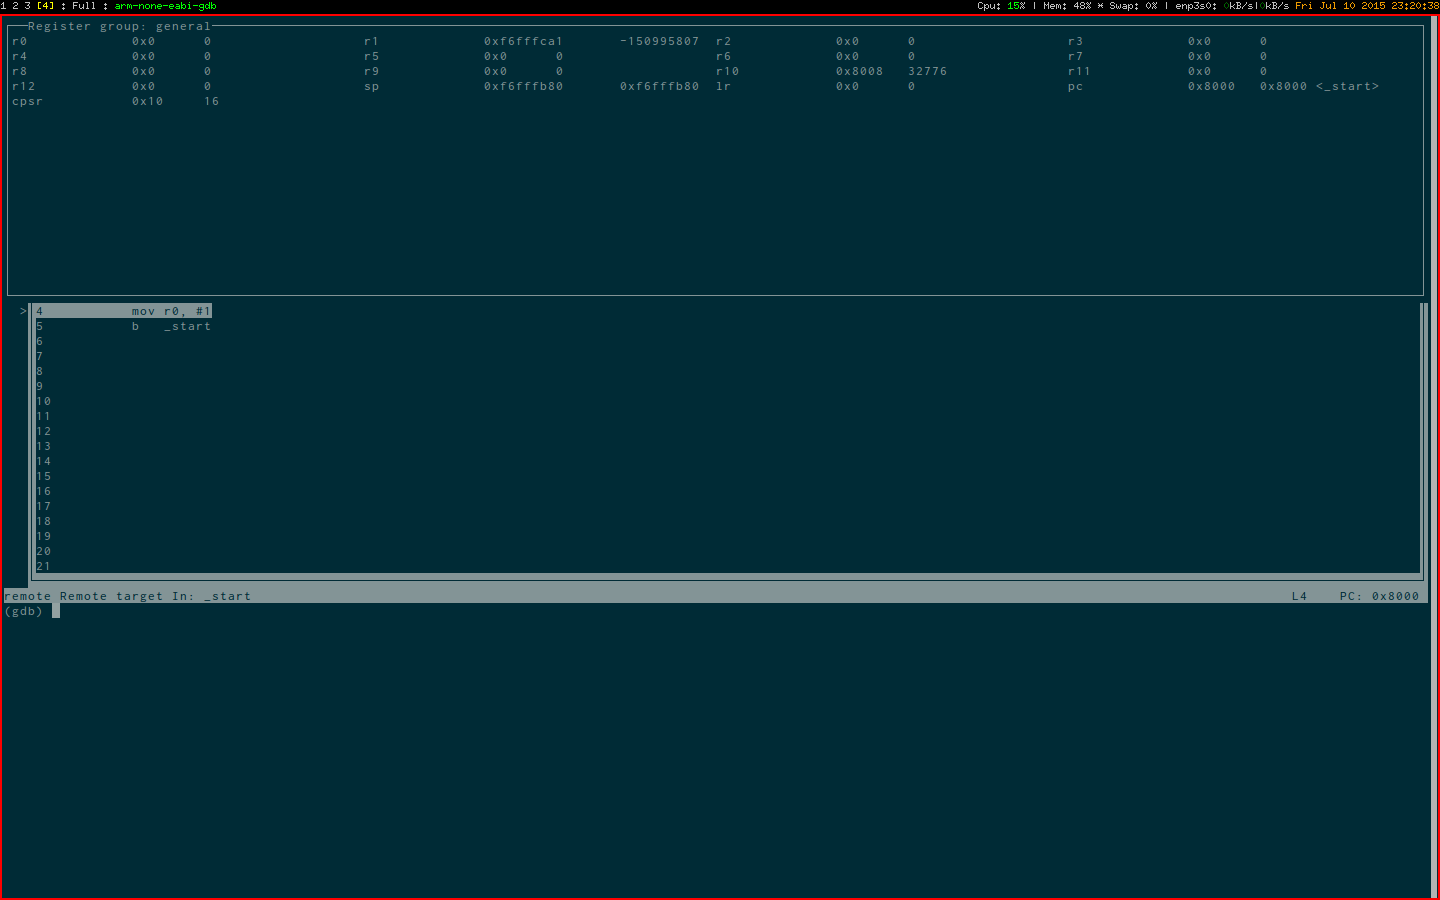
You should end up with something like this:
These are some basic commands to know, only one key press away:
- s Step by a single instruction
- b Set a breakpoint. You can use this in many ways, like b source.s:312 where source.s is the source and 312 the line number where you want the breakpoint.
- c Continue until next breakpoint
For more commands, like setting watchs or printing memory data, you can follow the official guide.