Battle net linux manjaro
Recently I built out a guide for this forum on how to improve your performance in WoW while running Linux. It received some pretty positive response from much of the user base. As such it inspired me to do a little testing and to play with another Distro that’s quickly rising the ranks of popularity, and much to my surprise it was much faster than my custom Mint version, more specifically going well beyond the 200FPS range. This distribution of Linux is called Manjaro.
While most of you have heard of the big names such as Debian, Ubuntu, Mint, Fedora, Arch etc, this one decided to approach the subject of stability differently. Manjaro has taken the Debian approach in selecting stable packages, but it has done so using the Arch (AUR) Repositories. The result of this difference is a far more cutting edge OS package than Debian, with similar stability. Pair that with direct access to bleeding edge Arch software, if you choose or need it, its a win.
Since this Linux PC is basically for gaming only, and Manjaro exceeded my expectations of gains in performance, its genuinely unlikely I will return to Debian, Ubuntu, or Mint in the near future. Thus, this guide was born.
Installing Manjaro (Skip if already installed)
This is pretty straight forward like any other OS. You can burn the ISO to a CD, plug it into a thumb drive using software like UNetBootIn for Windows, or even install it from your current Linux to a thumb drive using DD.
For simplicity in drivers, make sure you use the restricted driver installation option before you boot into the live environment to install. For nVidia this will lob driver version nVidia-418 directly into action. This driver is completely compatible with the rest of the guide for nVidia users, and can be upgraded at any time in the future, though rolling back to far might lose support for translation layers. For AMD users you will want to double check everything is running correctly. Maybe someone with one of those cards can comment below on any additional requirements, my appologies as I havent a recent enough AMD card to test with (Though I want one).
Once you have the OS installed, run the following command to get it all up to date, then move on with the installation of the game.
Installing World of Warcraft(Classic/Retail) — The easy way.
The first thing we need to do is begin adding dependency libraries and software. You can pick and choose how you want to do this, while I find the command line easiest, others may find the software manager easiest. Please add these items in the order presented below to help avoid conflicts and troubleshooting.
1. Install Wine (Required)
You want to add this because its always just a good idea when using any other software based on Wine. Its going to come with a package of dependencies that other software such as Lutris below might or might not have. Enter the commands below. (If you have trouble with these commands you can find the package in your software manager.)
2. Install Lutris (Required)
Lutris is software that is based on Wine but managed and packaged in a format that includes some configuration tricks for each supported game. Its very simple to use, lightweight in sense, and very powerful for Linux gaming. It also allows for a simple tweak included at the end of this guide to massively improve your game play experience. (If you have trouble with these commands you can find the package in your software manager.)
3. Install Dependencies (Required)
Dependencies are small packages of software that the larger programs require to operate correctly. I am going to chop these dependencies up on a per item basis for each piece of software. These are required to run the launcher as well as the game. Skipping any of these could result in poor performance or failure to launch the client. As I am splitting them up by requirements, there may be duplicates, our system will simply rewrite them if duplicated and it will not cause issues.
— WINE Dependencies (Copy and Paste the whole block into terminal)
sudo pacman -S giflib lib32-giflib libpng lib32-libpng libldap lib32-libldap gnutls lib32-gnutls mpg123 lib32-mpg123 openal lib32-openal v4l-utils lib32-v4l-utils libpulse lib32-libpulse libgpg-error lib32-libgpg-error alsa-plugins lib32-alsa-plugins alsa-lib lib32-alsa-lib libjpeg-turbo lib32-libjpeg-turbo sqlite lib32-sqlite libxcomposite lib32-libxcomposite libxinerama lib32-libgcrypt libgcrypt lib32-libxinerama ncurses lib32-ncurses opencl-icd-loader lib32-opencl-icd-loader libxslt lib32-libxslt libva lib32-libva gtk3 lib32-gtk3 gst-plugins-base-libs lib32-gst-plugins-base-libs vulkan-icd-loader lib32-vulkan-icd-loader
— Battle.net Dependencies (Copy and Paste the whole block into terminal)
sudo pacman -S lib32-gnutls lib32-libldap lib32-libgpg-error lib32-sqlite lib32-libpulse
— Vulkan GPU Requirement Dependencies (Select only what applies to you)
nVidia — sudo pacman -S vulkan-icd-loader lib32-vulkan-icd-loader
AMD — sudo pacman -S vulkan-radeon lib32-vulkan-radeon vulkan-icd-loader lib32-vulkan-icd-loader
Intel — sudo pacman -S vulkan-intel lib32-vulkan-intel vulkan-icd-loader lib32-vulkan-icd-loader
4. Install Battle.net (Required)
This is where we start making familiar headway and see the fruits of our labor. Open up Lutris from your start menu and then click on the search option (magnifying glass top right) and search for «World of Warcraft». Select World of Warcraft Classic from the menu and click install. Several windows will pop open during this request, any software requests Wine makes click «YES» as these items are required. Eventually the Battle.net app will request an install as well and when complete the familiar Battle.net interface will appear.
NOTE: There is a semi-common bug where after all of the changes to system have been made, Battle.net might stop installing at folder creation. If this happens to you simply abort the install and fully reboot your PC. Then try again.
5. Install World of Warcraft (Required)
Installing WoW in Lutris is just like installing WoW in Windows. The only difference in this case is Lutris must be running to activate Battle.net . Simply start Lutris from your menu, or type Lutris in console. If World of Warcraft is not immediately shown in the options, click on WINE in the left menu and it should appear. Click on the «PLAY» option to start Battle.net and install it just like you would in Windows, you can install either Classic or Retail this way. The default folders of install are ideal, moving the install location can cause issues so this should be done by advanced users, or people who just feel lucky.
5. Install Game Mode (Optional: but HIGHLY recommended)
Gamemode is a piece of software written by Feral Interactive. What this software is going to do is authorize WoW to bypass the operating system governors to improve performance. Do not fear, this does not put your hardware at risk, they are still protected by the hardware and CMOS defined mechanisms. Depending on your system, this tweak can yield amazing results. In particular it can completely eradicate stutter in heavily populated areas as well as improve Min/Max FPS. Simply put, if your going to perform just one tweak to the game, it should be this one. What makes this even more special is that it can also improve other games, even native Linux games or Steam games!
To keep this simple the best way to get Gamemode installed is through your software manager. If you have troubles installing game mode in the default Octopi software manager, you can instead install Pamac. Pamac is a wonderful software manager that does the same thing as Octopi, but a little better. You can also find it in the default Octopi Software Manager. Once you have Gamemode installed continue below. I have copied this from another of my guides.
**Its important to note that simply installing this software is not enough, you need the software to know when to run for increased performance. Below you will find (3) ways to use this utility with popular gaming software in Linux and the console. Particularly in this case being with WoW, Lutris is the best way to use it.**
Open console and type the command below, save output of this command for Value in Lutris later, you can Copy/Paste the input as required.
sudo find /usr/ -name libgamemodeauto.so
2. Now follow the steps below after you have a game installed in Lutris. You will navigate the options below, click ADD, and then enter the Key and Value items to the command box, press enter after each item or it will not register. Hit the save button when complete.
Open Lutris -> Right Click Game -> Configure -> System Options -> Key/Value
Value = «Copied from the console command above without quotes»
3. Check if Gamemode is operating. While the game is running open up a console window and type the command listed below. It will tell you if the optimizations have started or not with an active or inactive output.
Open steam up and right click an installed game. Navigate to the following path then enter the command listed below into the box that STEAM provides without the quotation marks.
Properties -> General -> Set Launch Options -> (Enter Text Below)
2. Check if Gamemode is operating. While the game is running open up a console window and type the command listed below. It will tell you if the optimizations have started or not with an active or inactive output.
— CONSOLE START
Open a console window and type the following command below. Replace the word game with the command that starts the game or process you wish to run.
2. Check if Gamemode is operating. While the game is running open up a console window and type the command listed below. It will tell you if the optimizations have started or not with an active or inactive output.
Congratulations. You installed WoW on Manjaro!
Запуск Battle.net на Linux посредством Wine.
Установка не представляет проблем. Пример создания префикса с именем .wineBattleNet:
WINEARCH=win64 WINEPREFIX='/home/$USER/.wineBattleNet' winecfgПоместить загруженный клиент Battle.net-Setup.exe в свежесозданный префикс. Вариант расположения:
/home/$USER/.wineBattleNet/drive_c/Battle.net-Setup.exeУстановка в префикс с использованием DOS-путей:
WINEPREFIX='/home/$USER/.wineBattleNet' wine start /unix 'C:\Battle.net-Setup.exe'wine start /unix — указать Wine, что необходимо использовать DOS-пути, которые перечисляются через обратную косую черту \.
Через несколько секунд должно отобразиться окно обновления агента:

Прогресс может «залипнуть» на пару минут. После отобразится окно с выбором места установки:

Путь оставить по умолчанию, но снять отметку с «Запускать Battle.net при загрузке компьютера«, чтобы программа не включалась при любом действии в префиксе, включая его обновление.

Запуск.
Клиент Battle.net несколько проблемный в плане работоспособности, но в основном ничего серьёзного.
По завершении установки Battle.net сразу попытается включиться, что может привести к такому:

На деле ничего страшного. Необходимо закрыть окно и вручную перезапустить клиент Battle.net. Пример запуска:
WINEPREFIX='/home/$USER/.wineBattleNet' wine start /unix 'C:\Program Files (x86)\Battle.net\Battle.net.exe'ВАЖНО! Необходимо запускать именно с использованием DOS-путей, иначе будет показана ошибка:

Если кнопка авторизации остаётся с крутящимся значком в течение минуты, то стоит попробовать полностью завершить программу и запустить снова.

Если это не помогло, то в настройках программы нажать на кнопку с шестерёнкой / Настройки / Дополнительно и снять отметку с «Использовать аппаратное ускорение браузера». Перезапустить программу.
Либо запустить с опцией —disable-gpu :
WINEPREFIX='/home/$USER/.wineBattleNet' wine start /unix 'C:\Program Files (x86)\Battle.net\Battle.net.exe' --disable-gpuВместо кнопки авторизации может отобразиться чёрная прямоугольная область, нужно навести курсор, чтобы кнопка появилась:

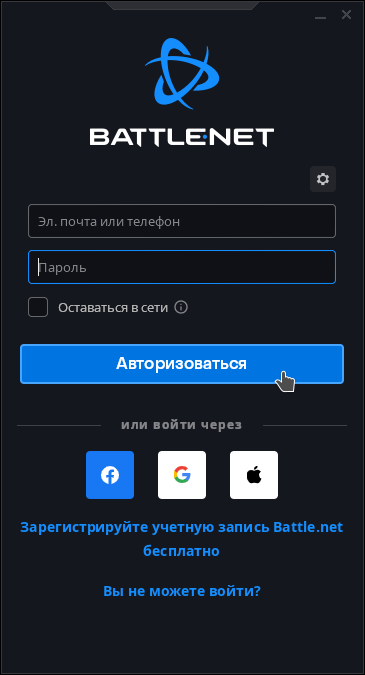
Теперь можно авторизоваться под своим аккаунтом. Результат должен быть подобным:

При потере фокуса отрисовка содержимого окон может «залипать», заполняясь сплошной заливкой, достаточно пошевелить или отмасштабировать окно, чтобы содержимое обновилось.
Весь функционал клиента полностью работоспособен на Linux в среде Wine, включая покупки.