- Урок 15. Bluetooth модуль HC-06 подключение к Arduino. Управление устройствами с телефона.
- Arduino — Bluetooth
- Hardware Required
- About HC-05 Bluetooth Module
- Pinout
- How It Works
- HC-05 Default Settings
- About Bluetooth Serial Monitor App
- Wiring Diagram
- How To Program For Bluetooth
- Arduino sends data to Bluetooth App on Smartphone
- Quick Steps
- Bluetooth App Send data To Arduino
- Quick Steps
- Arduino Code — Control LED with smartphone App via Bluetooth
- Arduino Code — Control Servo Motor with smartphone App via Bluetooth
- Video Tutorial
Урок 15. Bluetooth модуль HC-06 подключение к Arduino. Управление устройствами с телефона.
ГЛАВНАЯ / Уроки и проекты / Урок 15. Bluetooth модуль HC-06 подключение к Arduino. Управление устройствами с телефона.
Очень часто в ваших проектах возникает необходимость в дистанционном управлении или передачи данных с ваших телефонных гаджетов.
Один из самых популярных и распространенных методов обмена данными посредством Bluetooth.
Сегодня мы разберем простые примеры как можно подключить Bluetooth модуль к Arduino и настроить дистанционное управление с телефона.
Нам понадобится:
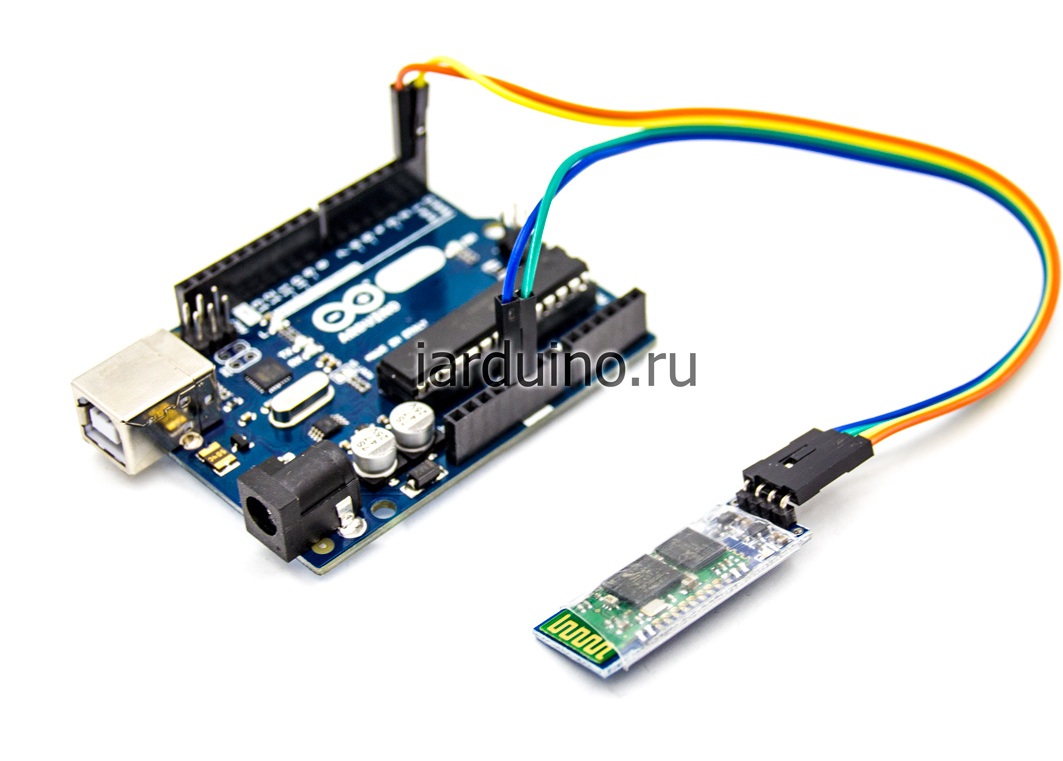
Схема подключения Bluetooth к Arduino:
Подключать Bluetooth модуль к микроконтроллеру Arduino удобнее всего с помощью проводков ПАПА-МАМА.
| Arduino | Bluetooth |
|---|---|
| Pin 1 (TX) | RXD |
| Pin 0 (RX) | TXD |
| GND | GND |
| 5V | VCC |
Будьте внимательны, подключать подключать нужно TX -> RXD ,RX -> TXD.
Теперь необходимо записать пробный код программы:
Во время загрузки скетча необходимо что бы Bluetooth модуль был отключен от микроконтроллера arduino. В противном случае скетч не запишется, потому что связь с Bluetooth модулем происходит по одному и томуже порту RX и TX, что и USB.
int val; int LED = 13; void setup() < Serial.begin(9600); pinMode(LED, OUTPUT); digitalWrite(LED, HIGH); >void loop() < if (Serial.available()) < val = Serial.read(); // При символе "1" включаем светодиод if (val == '1') < digitalWrite(LED, HIGH); >// При символе "0" выключаем светодиод if ( val == '0') < digitalWrite(LED, LOW); >> >
После того как скетч записан и Bluetooth модуль подключен к Arduino, можно перейти к следующему шагу.
Подключение Bluetooth к телефону
Желательно в качестве источника питания для arduino использовать не USB, а внешний Блок питания на 9 В.
- Включаем Bluetooth на телефоне и ищем новые устройства
- Находим в списке расстройств «HC-06″ и подключаемся к нему.
- Телефон спросит пин-код. необходимо ввести «1234» или «0000«
- Ура. Устройство подключено.
Теперь нужно скачать bluetooth terminal на ваш телефон. Мы рассмотрим на примере платформы Android.
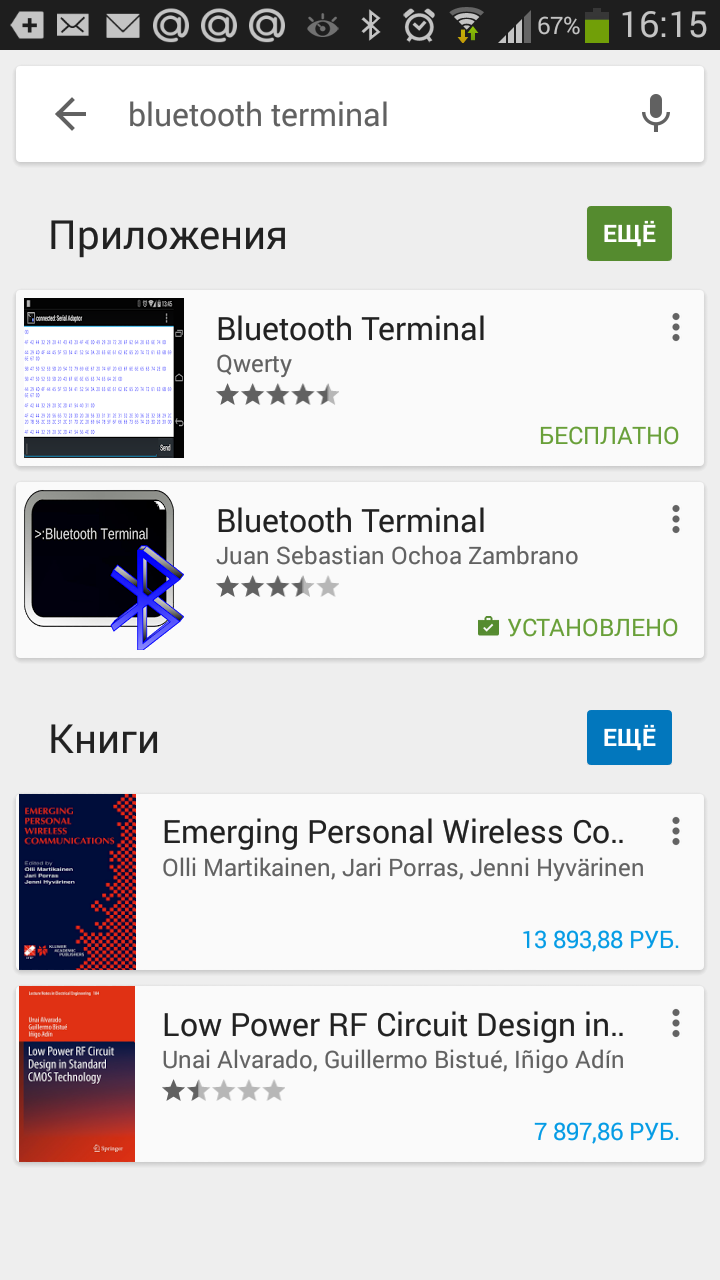
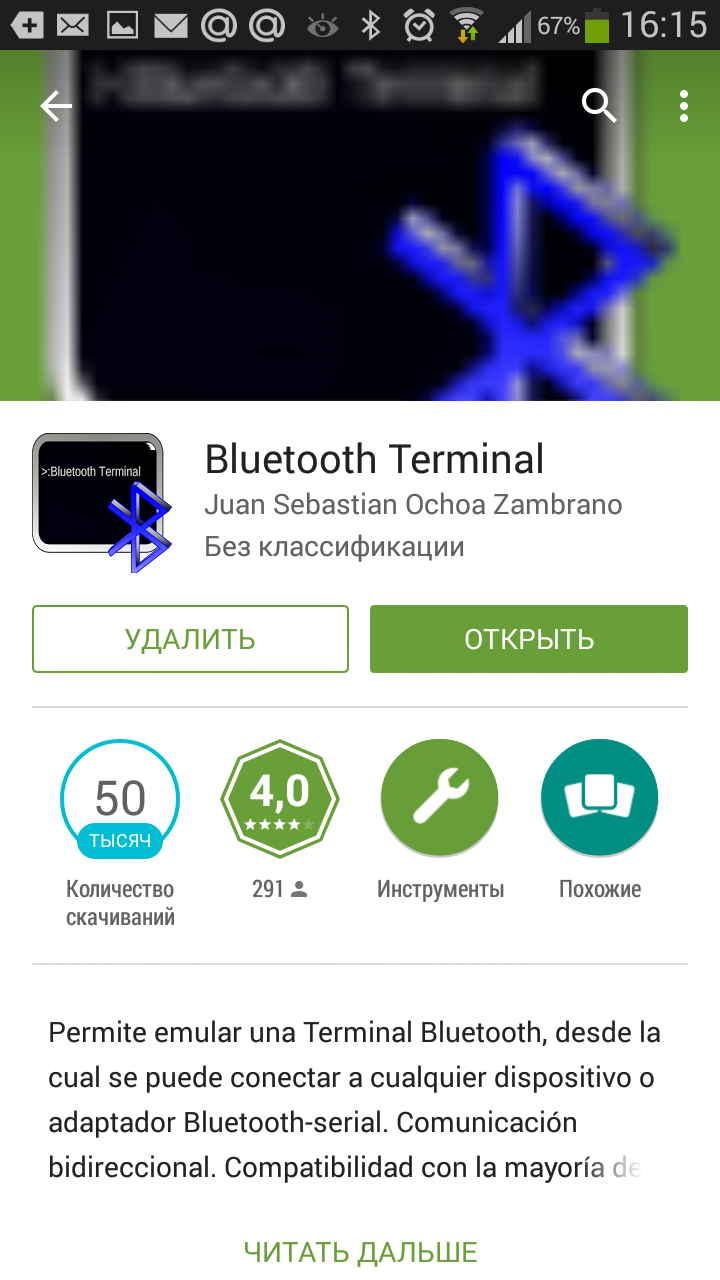
Вы можете установить разные bluetooth терминалы, как правило они отличаются только разными дизайнами, функционал от этого не меняется. Так же можно найти и терминал и для продуктов ios.
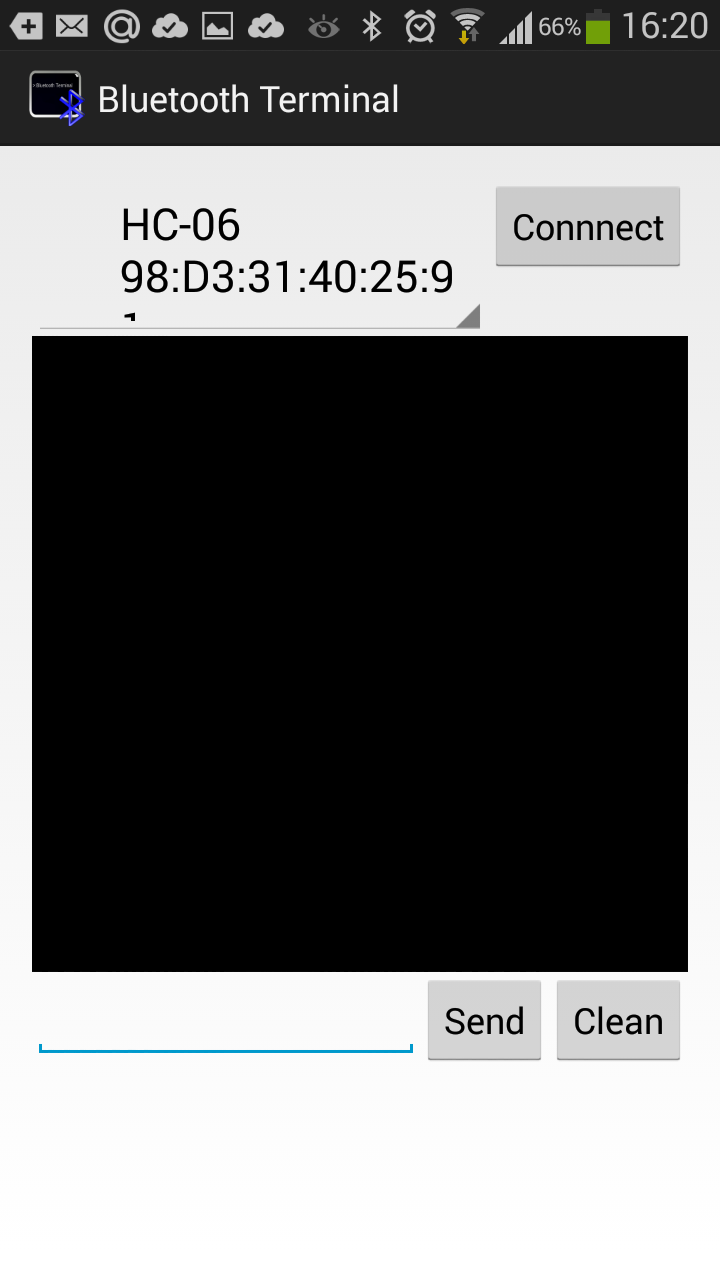
После того как мы установили терминал, запускаем его выбираем наш bluetooth модуль HC-06 и подключаемся к нему.
Пришло время попробовать проект в деле. Пишем в терминале цифру «0» и отправляем. Светодиод L который находится на плате arduino рядом с pin 13, должен погаснуть. Теперь отправим через терминал цифру «1» и светодиод L должен зажечься.
Демонстрация работы:
Домашняя работа:
- Изменить скетч так, что бы светодиод зажигался и потухал с помощью одной и той же команды например «G».
- Дописать скетч и научить его преобразовывать текстовые данные приходящие через блютус в цифровые и реализовать димер, зажигать светодиод с помощью ШИМ, на заданную яркость от 0 до 254 приходящую через bluetooth.
Arduino — Bluetooth
Arduino exchanges data with the smartphone app. The communication between two Arduino via Bluetooth will be presented in another tutorial.
You can use any Android/iOS app. This tutorial will use Bluetooth Serial Monitor App on Android for demonstration.
You can control anything connected to Arduino from the smartphone app. This tutorial will take LED and servo motor as examples.
This tutorial is about using Classic Bluetooth (Bluetooth 2.0). If you are looking for a Bluetooth Low Energy — BLE (Bluetooth 4.0), See this similar tutorial: Arduino — Bluetooth Low Energy
Hardware Required
Or you can buy the following sensor kit:
Please note: These are affiliate links. If you buy the components through these links, We may get a commission at no extra cost to you. We appreciate it.
About HC-05 Bluetooth Module
HC-05 is a Serial Bluetooth module. It works as a Serial to Bluetooth Converter. It does:
Receive data from the Serial RX pin and transmit the data to the paired device (such as a smartphone) via Bluetooth
More specifically, In the context of Arduino communicates with smartphone App (Android/iOS):
Pinout
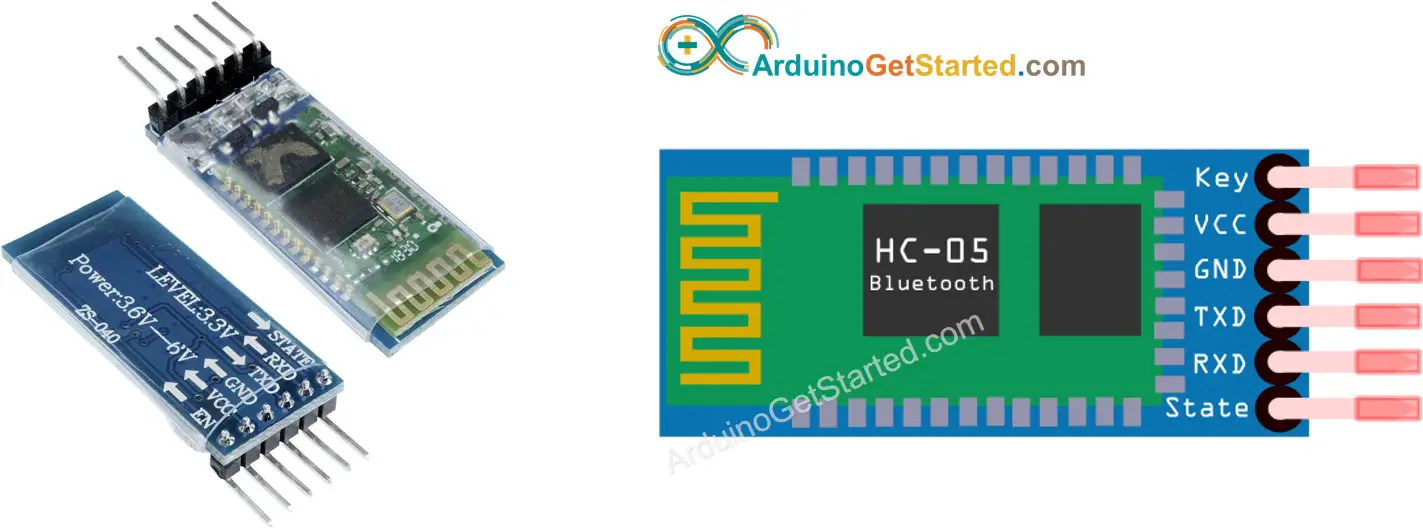
The HC-05 Bluetooth Module has 6 pins:
Enable/Key pin: This pin is used to toggle between Data Mode (set LOW ) and Command mode (set HIGH ). If not connected, it is in Data mode by default
TX pin: Serial data pin, connect this pin to the RX pin of Arduino. The data received via Bluetooth will be sent to this pin as serial data.
RX pin: Serial data pin, connect this pin to the TX pin of Arduino. The data received from this pin will be sent to Bluetooth
State: The state pin is connected to the onboard LED, it can be used as feedback to check if Bluetooth is working properly.
However, for basic functions, we just need to use 4 pins of The HC-05 Bluetooth Module to connect to Arduino.
The HC-05 Bluetooth Module also has two built-in components:
Button: can be used to control the Key/Enable pin to select the operation mode (Data or Command Mode)
How It Works
The HC-05 Bluetooth module has two operation modes:
Fortunately, The HC-05 Bluetooth module can work with Arduino by using the default setting without configuration.
HC-05 Default Settings
| Default Bluetooth Name | “HC-05” |
|---|---|
| Default Password | 1234 or 0000 |
| Default Communication | Slave |
| Default Mode | Data Mode |
| Default Data Mode Baud Rate | 9600, 8, N, 1 |
| Default Command Mode Baud Rate | 38400, 8, N, 1 |
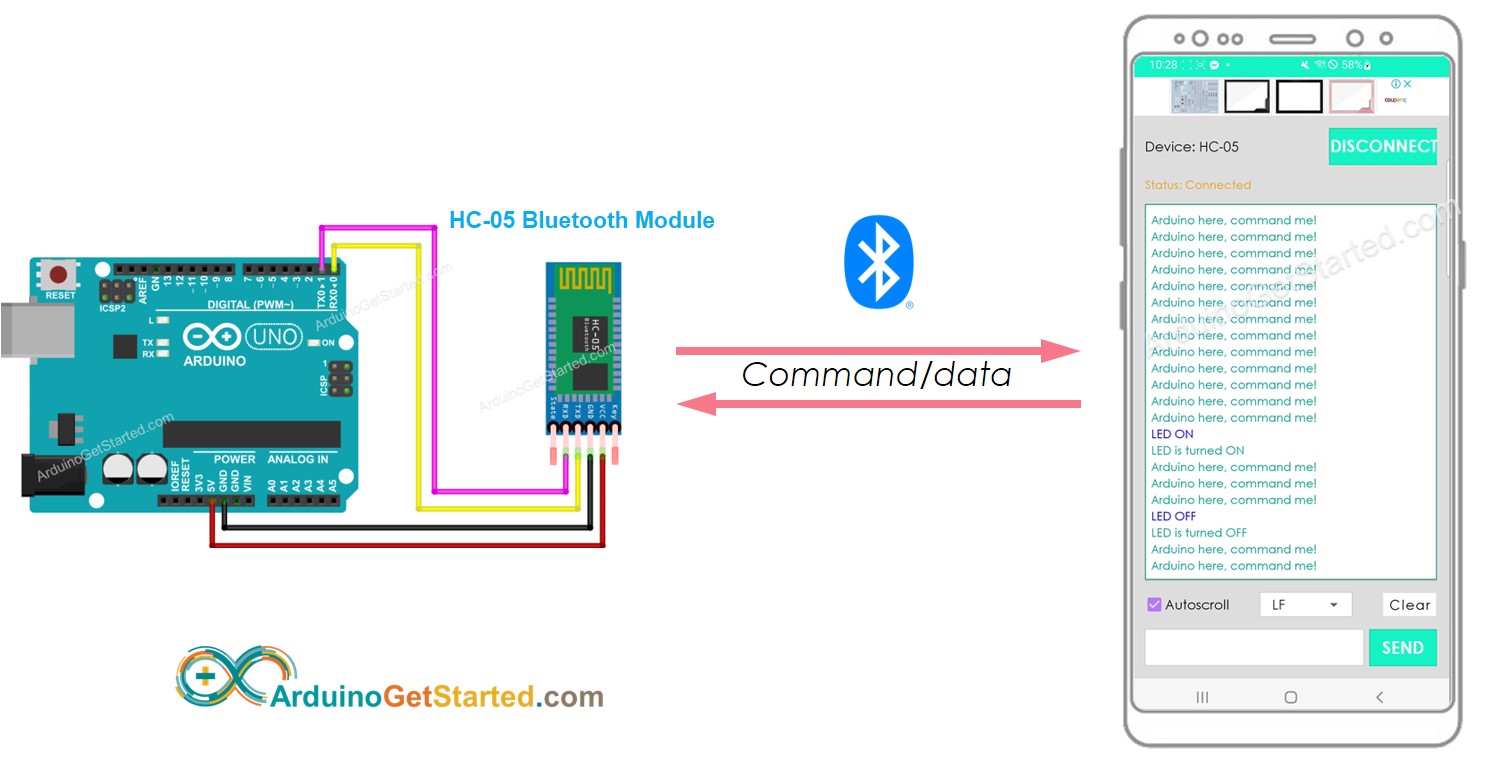
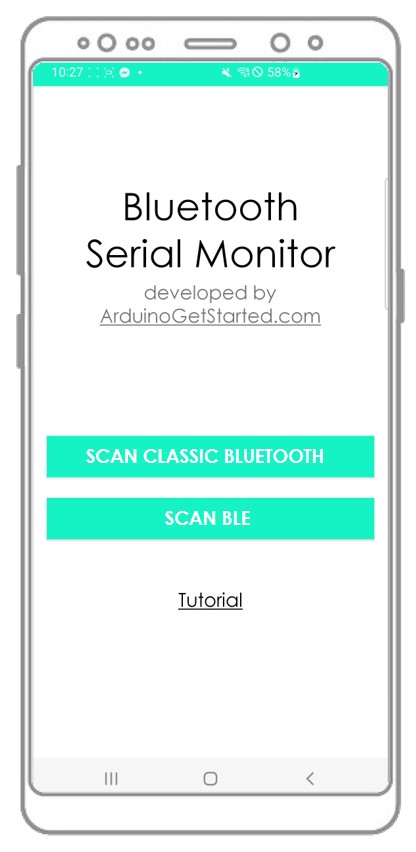
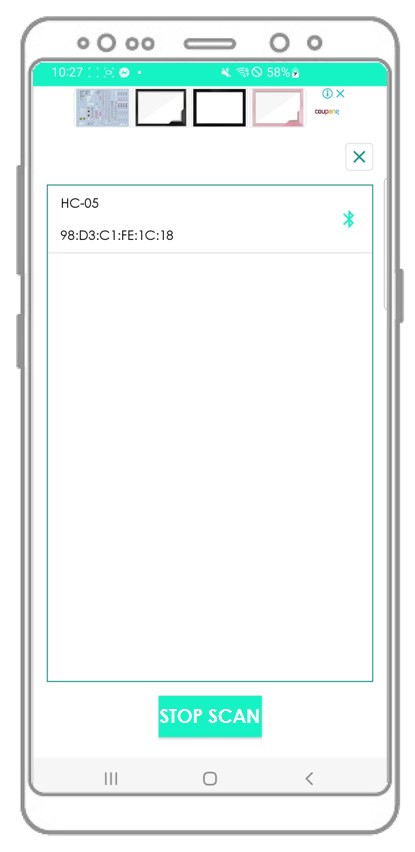
About Bluetooth Serial Monitor App
The Bluetooth Serial Monitor App is a mobile app that has the User Interface that looks like the Serial Monitor of Arduino IDE. It communicates with Arduino via Bluetooth. You can interact with Arduino via this app as if Serial Monitor on your PC, without adding any special code for the Bluetooth module in your Arduino code, by doing the following step:
And now you can send/receive data from Arduino just like the Serial Monitor of Arduino IDE. You do not need to modify the existing Arduino code or do not need to add any Bluetooth code to the new Arduino code.
Wiring Diagram
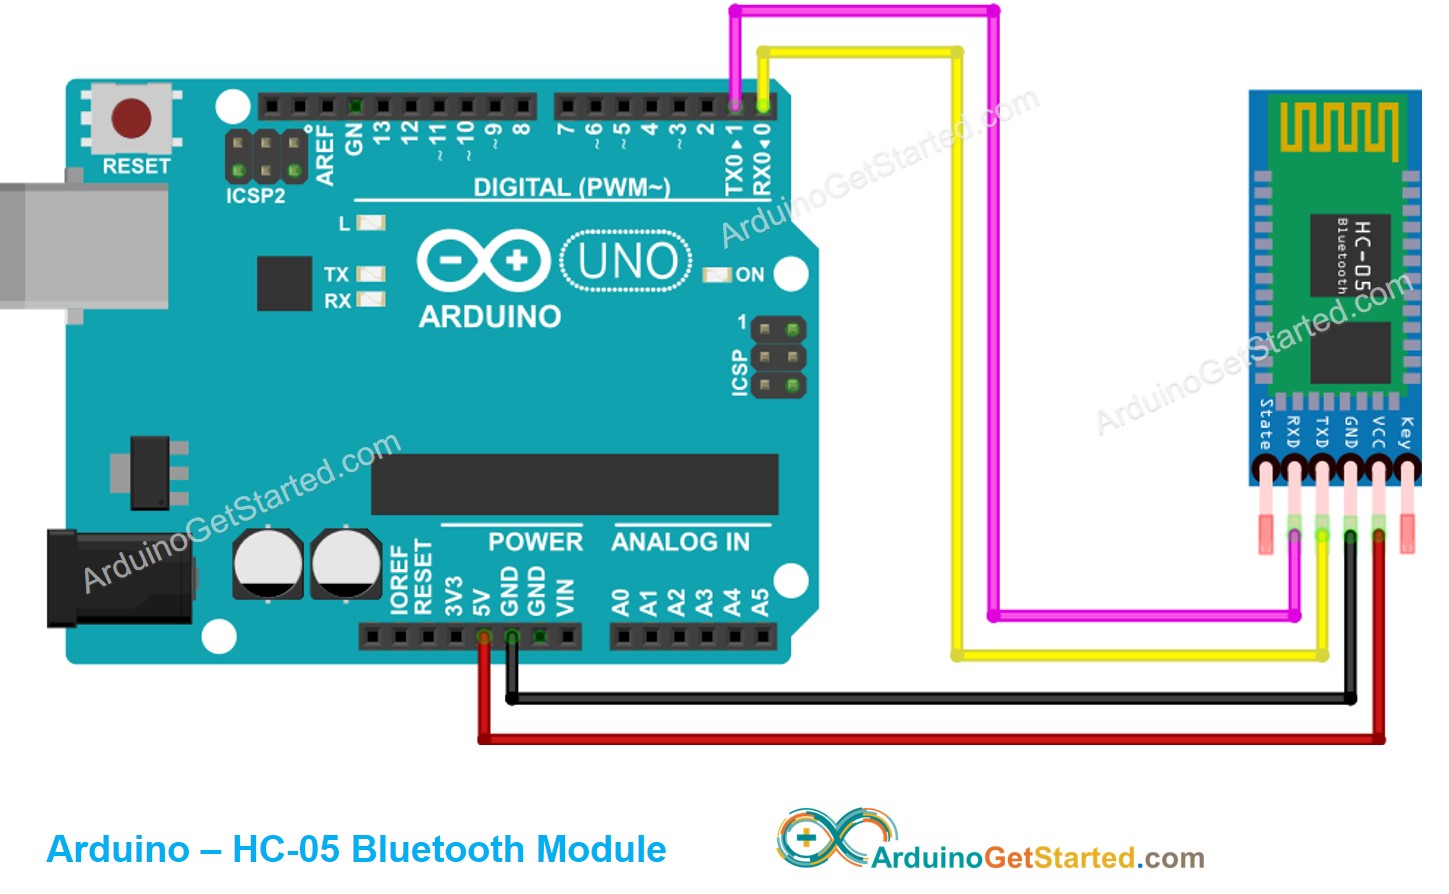
This image is created using Fritzing. Click to enlarge image
| Arduino Pins | HC-05 Bluetooth Pins |
|---|---|
| RX (Pin 0) | TX |
| TX (Pin 1) | RX |
| 5V | VCC |
| GND | GND |
| Enable/Key (NOT connected) | |
| State (NOT connected) |
You can use other Arduino pins by changing the Serial object in the Arduino code to another Serial1, Serial2. or SoftwareSerial if available.
How To Program For Bluetooth
No Bluetooth-dedicated code is required. We just need to use the Serial code.
Arduino sends data to Bluetooth App on Smartphone
To send data from Arduino to Bluetooth App on Smartphone, we need to use the following Arduino code:
In this example, we will send the “Arduino here, command me!” from Arduino to Bluetooth App on Smartphone every second
/* * Created by ArduinoGetStarted.com * * This example code is in the public domain * * Tutorial page: https://arduinogetstarted.com/tutorials/arduino-bluetooth */ void setup () < Serial . begin (9600); >void loop () < Serial . println ( "Arduino here, command me!" ); delay (1000); >
Quick Steps
Click Upload button on Arduino IDE to upload code to Arduino. You may be failed to upload the code to Arduino. If so, disconnect TX and RX pins from Bluetooth module, upload the code, and then reconnect RX/TX pin again.
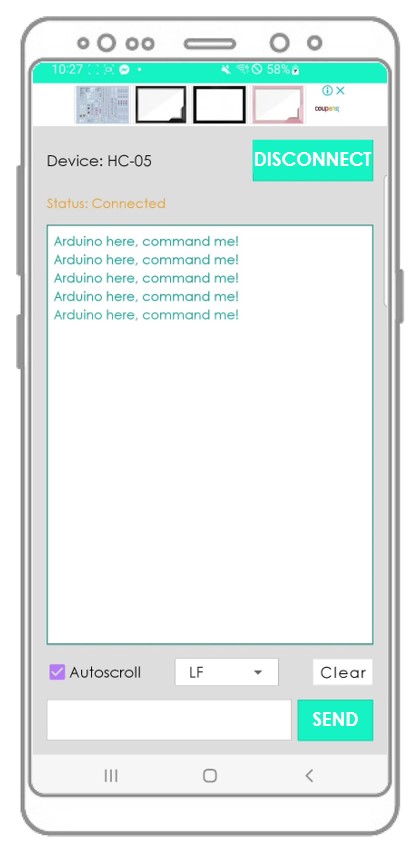
Arduino here, command me! Arduino here, command me! Arduino here, command me! Arduino here, command me! Arduino here, command me!
You will see that the data on the Serial Monitor of Arduino IDE and on the Android App are identical
Bluetooth App Send data To Arduino
Quick Steps
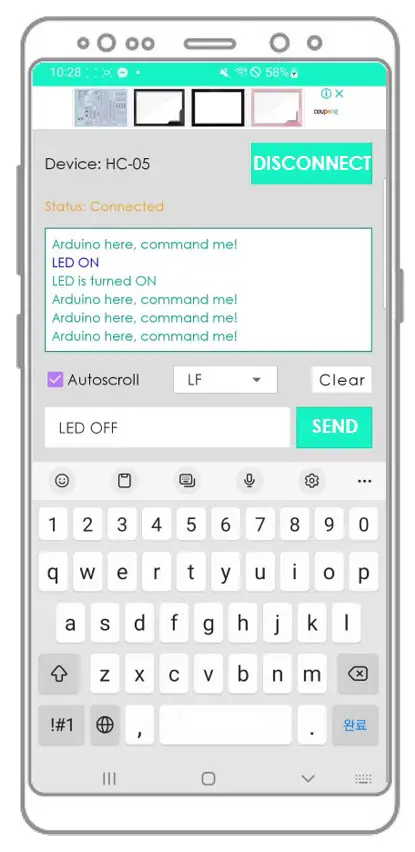
Arduino receives the data and prints the response to the Serial port. This data will be sent to the Bluetooth app
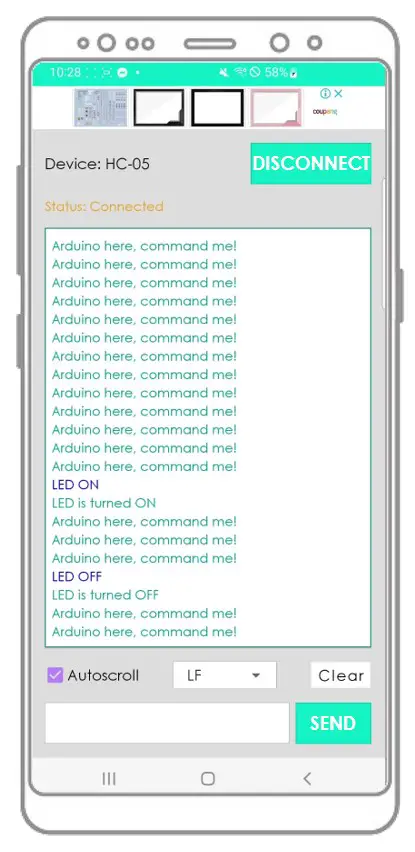
Arduino here, command me! Arduino here, command me! Arduino here, command me! Arduino here, command me! Arduino here, command me! Arduino here, command me! LED ON LED is turned ON Arduino here, command me! Arduino here, command me! Arduino here, command me! LED OFF LED is turned OFF Arduino here, command me! Arduino here, command me!
You will see that the data on the Serial Monitor of Arduino IDE and on the Android App are identical
Arduino Code — Control LED with smartphone App via Bluetooth
The below Arduino example code accepts two commands ( “ON” and “OFF” ) from Bluetooth Serial Monitor App to turn on/off a built-in LED.
You can see the instructions in more detail in Arduino controls LED via Bluetooth/BLE tutorial
Arduino Code — Control Servo Motor with smartphone App via Bluetooth
The below Arduino code received the angle value from Bluetooth Serial Monitor App to control the angle of the servo motor.
/* * Created by ArduinoGetStarted.com * * This example code is in the public domain * * Tutorial page: https://arduinogetstarted.com/tutorials/arduino-bluetooth */ // NOTE: change the Serial to other Serial/Software Serial if you connects Bluetooth module to other pins # include < Servo .h>Servo servo; // create servo object to control a servo int pos = 0; // variable to store the servo position void setup () < Serial . begin (9600); servo. attach (11); // attaches the servo on pin 11 to the servo object >void loop () < if ( Serial . available ()) < // if there is data comming int angle = Serial . parseInt (); if (angle >= 0 && angle <= 180) < servo. write (angle); // rotate servo Serial . print ( "Rotated servo to angle: " ); // reports action to smartphone app Serial . println (angle); >else < Serial . print ( "Invalid angle: " ); // reports invalid value to smartphone app Serial . println (angle); >> >
You can see the instructions in more detail in Arduino controls Servo Motor via Bluetooth/BLE tutorial
If the Bluetooth Serial Monitor app is useful for you, please give it a 5-star rating on Play Store. Thank you!
Video Tutorial
We are considering to make the video tutorials. If you think the video tutorials are essential, please subscribe to our YouTube channel to give us motivation for making the videos.