- Home Assistant Multi room audio setup
- Overview
- Snapcast
- Configuration
- MPD Music player daemon
- Playing notifications
- MPD Configuration
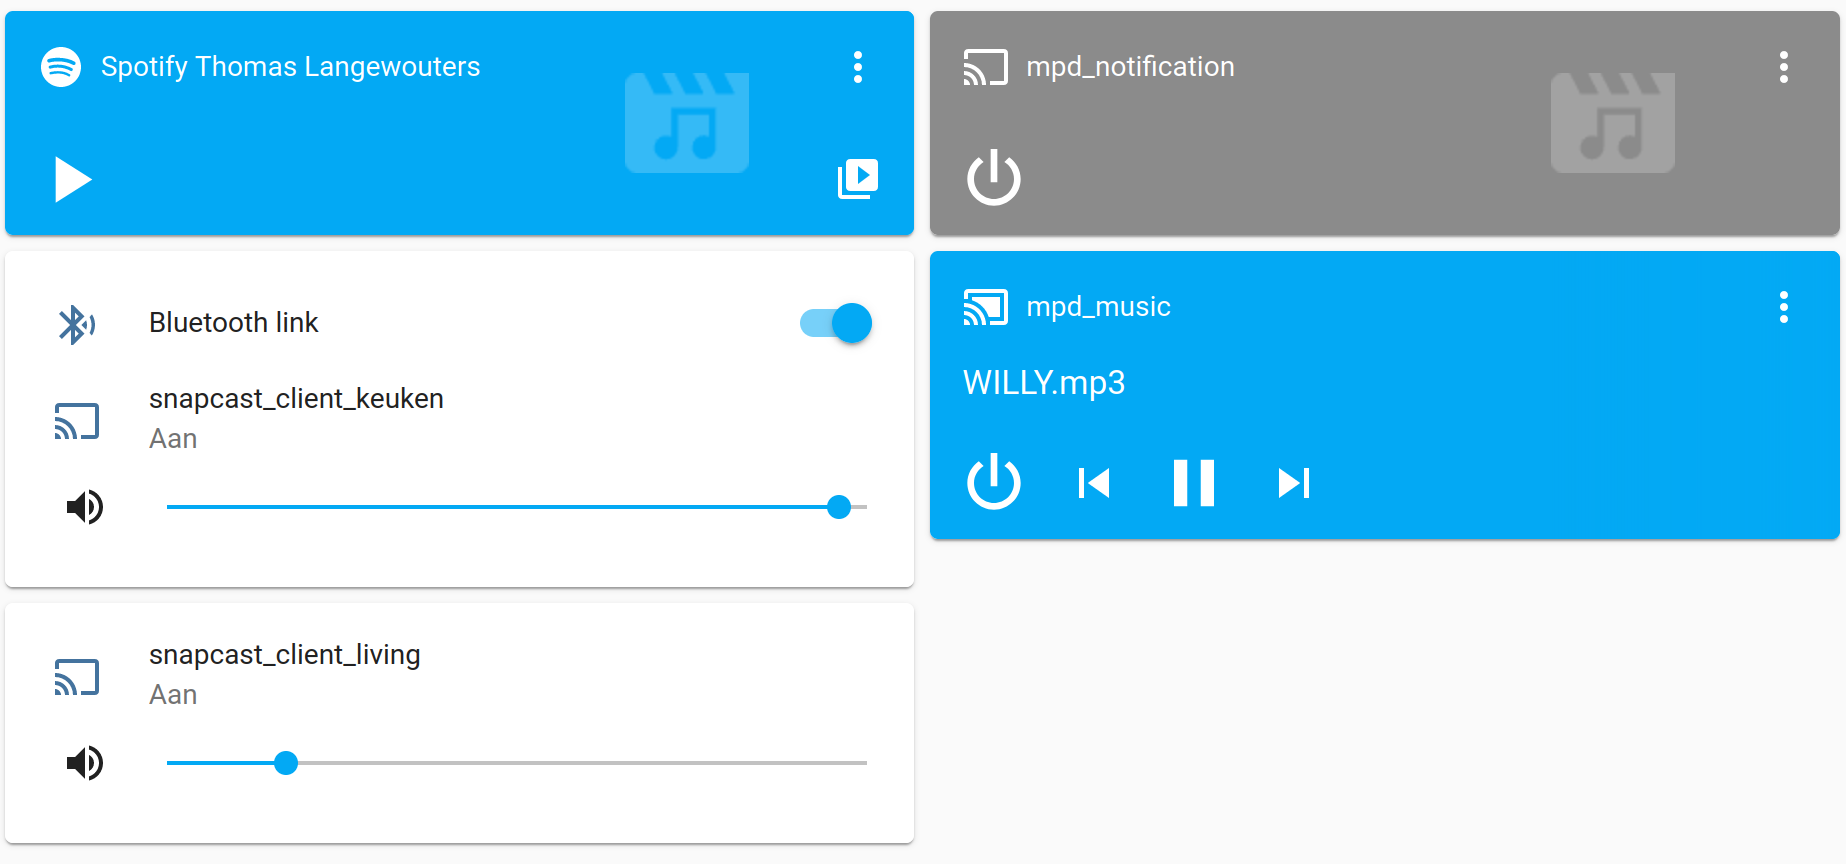
- MPD Home Assistant integration
- Librespot
- Raspberry pi with fixed speaker
- Raspberry pi with Bluetooth speaker
- Home assistant add-on
- More information
- Reply to post
- Home Assistant Bluetooth Speaker
Home Assistant Multi room audio setup
In my setup, a docker container running on the Home Assistant machine takes care of retrieving audio from Spotify, internet radio streams and local storage.
Physical devices like raspberry pi’s or an Android phone/tablet use a snapcast client to use drive speakers.
Overview
Adding sound to a smart home used to be a thing of fancy smart-home solutions sold with their own audio server modules that are wired up to multi-room speaker set-ups. Nowadays modular cloud connected voice assistants bring music and notifications to peoples homes.
If you can live without the fancy voice control and enjoy setting up some Linux services, then adding some of the more classic audio features is a doable task, soon to become easier due to a home assistant add-on.
During 2020’s work-from-home regime I discovered radio, I listen extensively to radio and Spotify when I’m at home. I wanted to mix in audio notifications like the door bell and a garden gate sensor. This turned out to be easily mixed together using Snapcast.
To listen to music in the rooms next to our living room with an amp/speaker setup, I bought a Bluetooth speaker, figuring I could feed it music via a raspberry pi while at home, and still use it with my phone when in the garden or on the road.
Home assistant integration
Being able to move the speaker along around the house while it’s not tied to a particular smart phone (that sometimes walks off) is lovely.
I just had to install and configure existing software, a docker container runs the S6 service supervisor using s6-overlay, like home assistant add-ons. It manages
- the Snapcast audio server, which starts librespot for Spotify playback
- a MPD daemon to play music and internet radio
- a MPD daemon to play notifications
The Snapcast server has a meta source type that will switch between audio sources based on priority which is very powerful yet simple concept. I set it up to prefer notifications over Spotify over music,
The Bluetooth speaker is integrated into home assistant using scripts and a MQTT template ‘switch’, showing its connection status in home assistant and providing Bluetooth disconnect and connect triggers when operating the switch in home assistant.
Snapcast
The Snapcast website explains it best:
Snapcast is a multi-room client-server audio player, where all clients are time synchronized with the server to play perfectly synced audio. It’s not a standalone player, but an extension that turns your existing audio player into a Sonos-like multi-room solution.
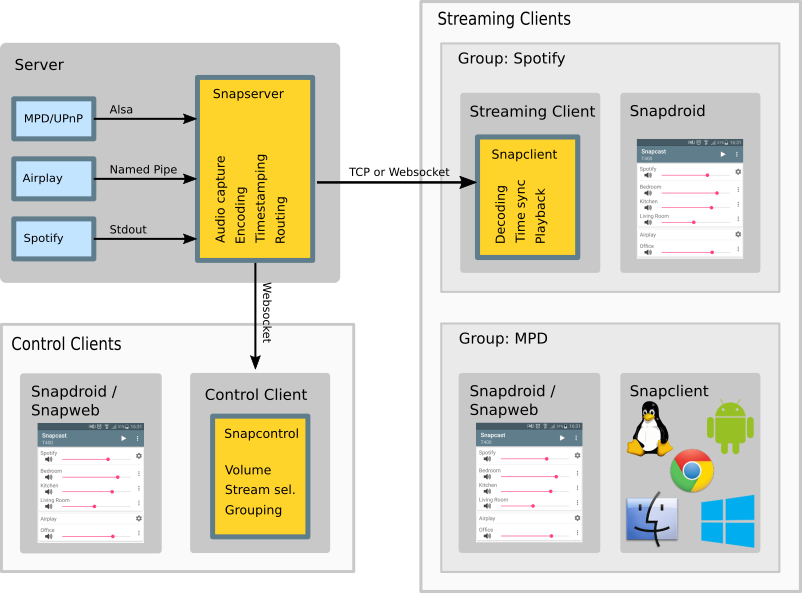
Snapcast overview (from the snapcast github page)
Audio is captured by the server and routed to the connected clients. Several players can feed audio to the server in parallel and clients can be grouped to play the same audio stream. One of the most generic ways to use Snapcast is in conjunction with the music player daemon (MPD) or Mopidy.
The Home Assistant Snapcast platform allows you to control Snapcast from Home Assistant.
To add Snapcast to your installation, add the following to your configuration.yaml file:
# Example configuration.yaml entry media_player: - platform: snapcast host: YOUR_IP_ADDRESS
Configuration
The Snapserver is configured to accept audio from the MPD’s provided at the same sample format of librespot.
The meta source does magic, it switches between sources based on the listed order.
[stream] source = pipe:///tmp/snapfifo?name=Music&sampleformat=44100:16:2 source = pipe:///tmp/mpd-notify?name=Notify&sampleformat=44100:16:2 source = spotify:///librespot?name=Spotify&bitrate=320&enable-volume-normalisation&sampleformat=44100:16:2 source = meta:///Notify/Spotify/Music?name=Mixed&sampleformat=44100:16:2
MPD Music player daemon
The musicPD is an old-school tool, I believe I was already using it ~15 years ago. It is remarkably elegant, has myriad applications, a nice network protocol and support for lots of stuff.
Playing notifications
To play a notification, the usual home assistant service can be called to play audio on the dedicated MPD:
service: media_player.play_media data: entity_id: media_player.mpd_notification media_content_type: music media_content_id: bark.wav
After adding the audio files to the music directory, don’t forget to update the MPD database.
I had some difficulties with the first few seconds of audio disappearing, which I worked around until digging deeper. I used sox to add a few seconds of silence:
sox -n -r 44100 -c 2 silence.wav trim 0.0 1.5 sox silence.wav bark.wav delayedbark.wav
MPD Configuration
The MPD’s are configured to have unique state, database and music paths. They feed their data into their own FIFO (named pipe), and are set to the same (non-standard) sample frequency librespot uses to avoid re-sampling by the Snapcast server.
audio_output type "fifo" name "my pipe" path "/tmp/snapfifo" #format "48000:16:2" format "44100:16:2" mixer_type "software" >
MPD Home Assistant integration
Both MPD’s have an entry in the Home Assistant configuration.yaml:
# Example configuration.yaml entry media_player: - platform: mpd host: IP_ADDRESS port: PORT
They run on the same host, but a different port.
Librespot
Librespot allows the Snapcast source to appear as a Spotify speaker on the local network. It announces itself using multicast DNS and automatically appears to local Spotify players.
Very little configuration at all (just the name it has to announce).
Raspberry pi with fixed speaker
The only remarkable thing here is that I use the hardware mixer, this allows control of the master volume via Snapcast.
pi@living:~ $ cat /etc/default/snapclient # Start the client, used only by the init.d script START_SNAPCLIENT=true # Additional command line options that will be passed to snapclient # note that user/group should be configured in the init.d script or the systemd unit file # For a list of available options, invoke "snapclient --help" SNAPCLIENT_OPTS="-h 192.168.x.xxx --hostID living --mixer hardware"
On Raspberry pi 2 with Ubuntu 21.01 with a HDMI screen connected, some extra configuration was needed:
SNAPCLIENT_OPTS="-h 192.168.x.xxx --hostID living --mixer hardware:Headphone -s plughw:CARD=Headphones,DEV=0"
Raspberry pi with Bluetooth speaker
I ended up creating my own helper scripts and wrote a separate article about this. This configuration of software packages and scripts supports:
- starting/stopping snapclient and a Bluetooth button event watcher.
- network volume control of the Bluetooth speaker
- re-initiating Bluetooth connection from home assistant
Home assistant add-on
I had a bit of a bad experience trying to create a Snapcast Home Assistant add-on. I built a container image based on the example and added the Snapcast server.
My local Add-on did not show up on the Supervisor tab (using < "image": >).
When I omitted the local image reference, the supervisor tried to build it for the wrong architecture (ARM7 instead of aarch64/arm8).
A long-term goal is to package this as an add-on, for now I run everything as a container on my main server.
More information
I still haven’t published info on my snapclient-server-side docker container. TODO.
Liked something? Worked on something similar? Let me know what you think on Mastodon!
You can use your Mastodon account to reply to this post. How does that work?
Reply to post
You can respond to this post with an account on the Fediverse or Mastodon. Since Mastodon is decentralized, you can use your existing account or create your account on a server of your choice.
Copy and paste this URL into the search field of your favourite Fediverse app or the web interface of your Mastodon server.
Home Assistant Bluetooth Speaker
Video unboxing the Xiaomi Motion sensor and adding it to HA, along with pairing and using a Bluetooth speaker!
Posted on: 2021-02-25 Last updated on: 2021-02-25 Written by: Mark Lewis Comments: 28 Categorised in: Smart Home
So there are two things I want to cover in this post. First, I have done a second unboxing video which can be found below. Felt this was slightly better than the first. Will just keep practicing, putting myself out there and hopefully getting more comfortable with this sort of thing.
Secondly, I have managed to get Home Assistant working with a Bluetooth speaker. Why you might ask, well, I had one sat doing nothing and thought it would be nice to announce stuff (like door open, play a doorbell sound etc). At the moment, I do not have an Echo or Google speaker to make us of so this is the next best thing. Anyway, please watch the video below. I am working on my presentation skills.
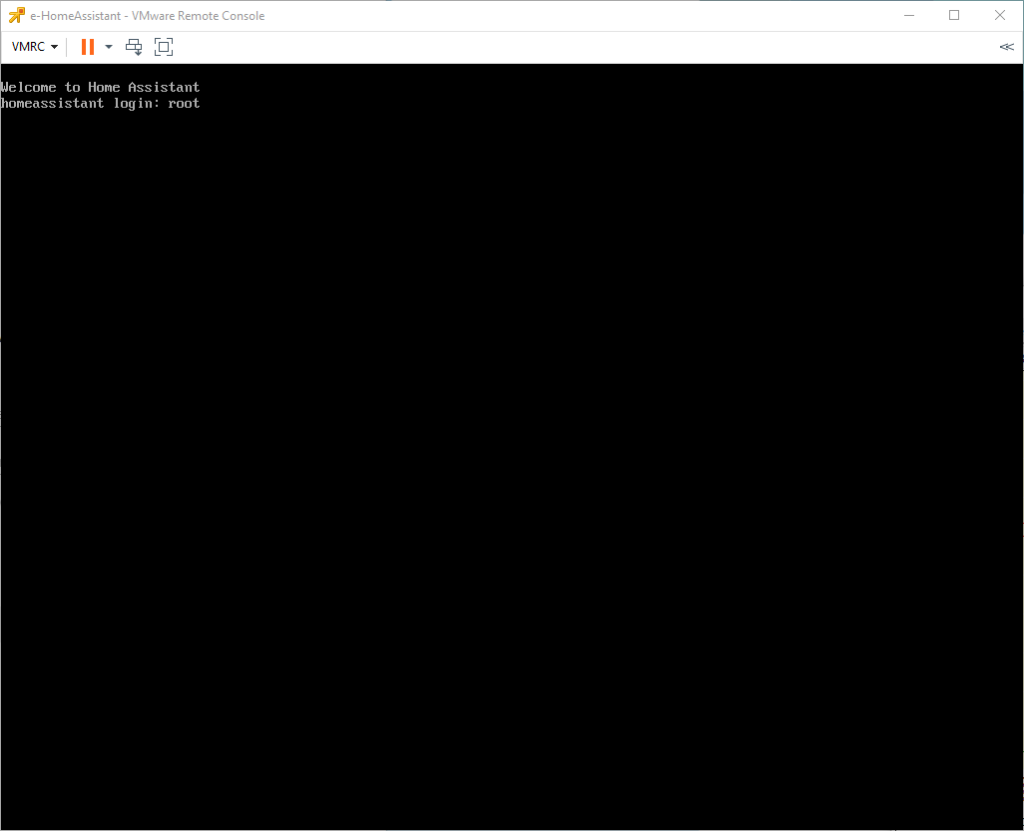
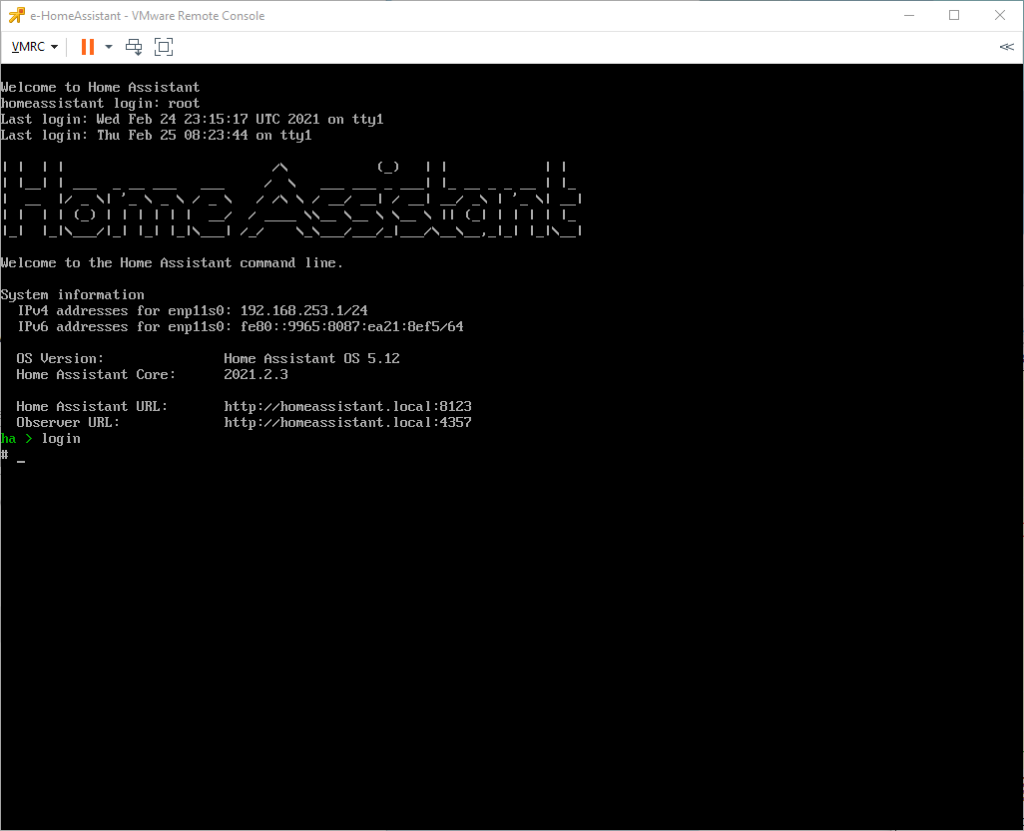
When logged in, at the ha prompt, type login to get to the shell prompt
I can’t screen grab the following as it’s all already done but I used the following commands from the above post:
bluetoothctl # note no SUDO available on HA VM list # Controller XXXXXX mydevice [default] power on agent on default-agent scan on # [NEW] Device AA:BB:CC:DD:EE:FF XYZ # Now I Press the pairing button on the device (disabling bluetooth on any nearby devices) pair AA:BB:CC:DD:EE:FF connect AA:BB:CC:DD:EE:FF trust AA:BB:CC:DD:EE:FF exitAt this point my speaker was paired to my HA VM. Winning! Except it wasn’t. I tried doing the du command and it couldn’t find a working asound.conf file. The ones thrown up were generated as part of the Docker processes and were empty. I eventually managed to find the file at
/mnt/data/supervisor/audio/asound
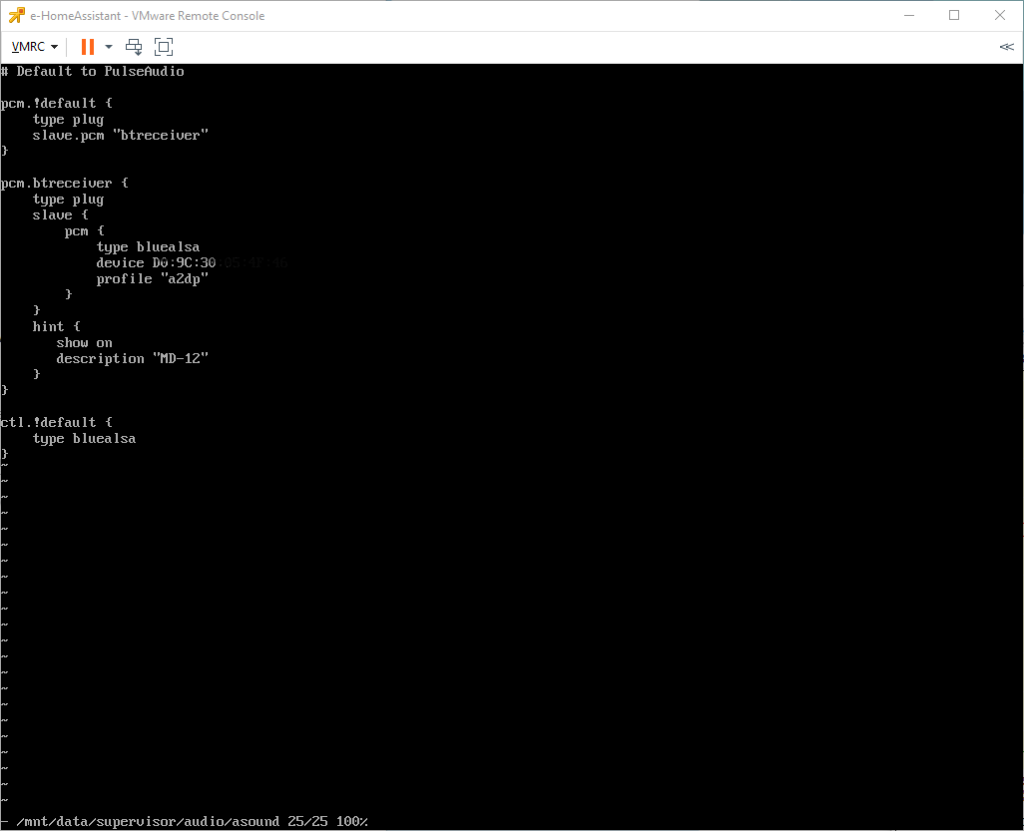
Note: the file name is “asound” not asound.conf or anything like that. I made a backup of the file (mv command) and then I edited the contents as follows using “vi”
So that you can copy/paste the code is below:
pcm.!default < type plug slave.pcm "btreceiver" >pcm.btreceiver < type plug slave < pcm < type bluealsa device AA:BB:CC:DD:EE:FF profile "a2dp" >> hint < show on description "MD-12" >> ctl.!default
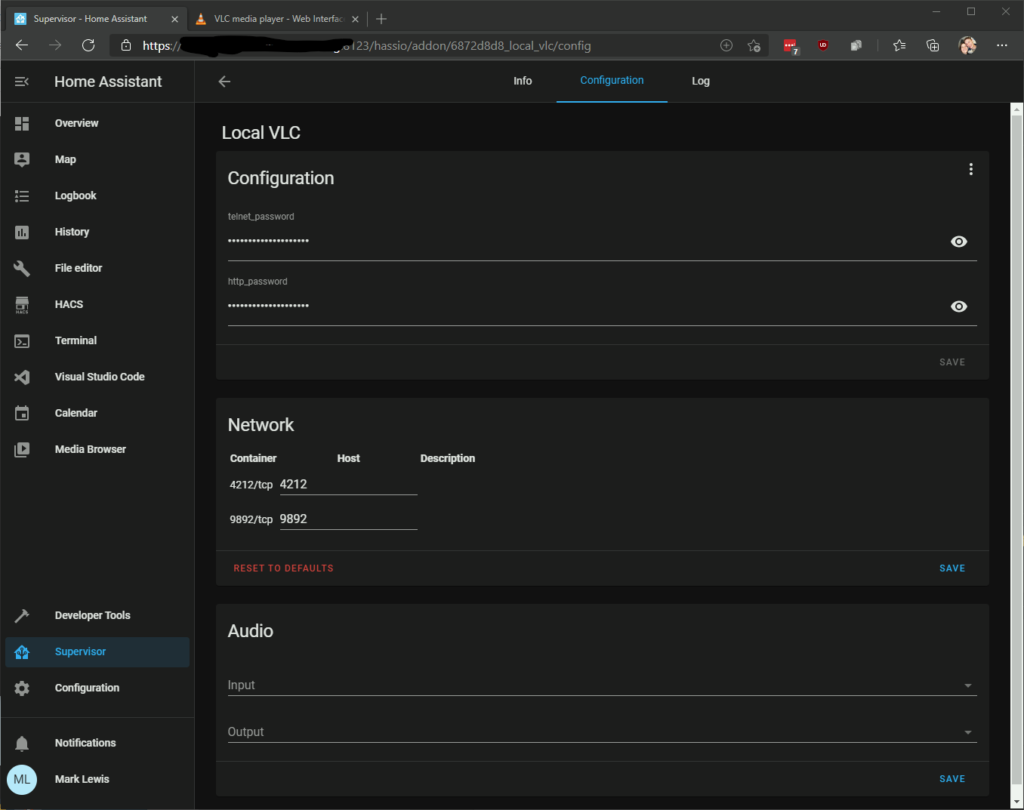
At this point the speaker is paired to the VM and the VM is configured to use this as an output for sound. I gave HA a reboot at this point to see if anything would be discovered. Not surprisingly it was nada. This is where I ended up getting a little more creative. I added the “Local VLC” community Add-on. Once installed, I provided a telnet and HTTP password. I was also able to select MD-12 from the output devices (for some reason this isn’t shown below)
I logged in to the http interface and was able to play a MP3 file (homed in the share directory)! Now we are winning! So how do we use it within Home Assistant? Well, HA has a built in VLC Telnet client, so I added the following to my config.yaml file:
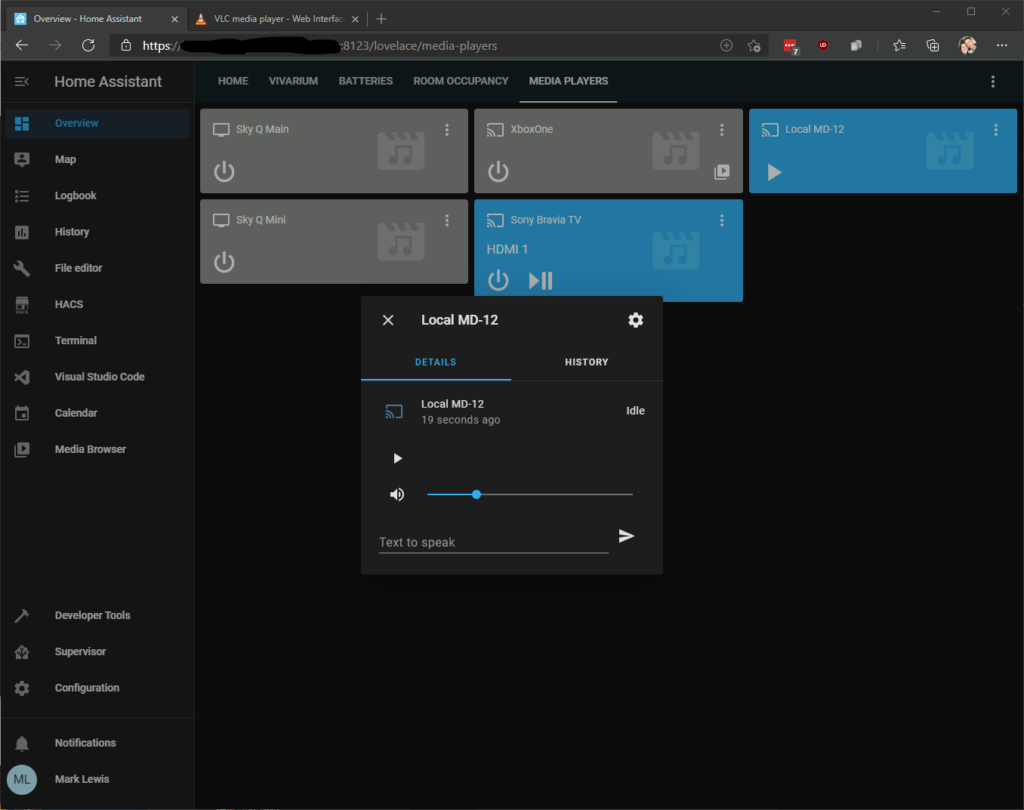
media_player: platform: vlc_telnet name: Local MD-12 host: 127.0.0.1 password: HA HA yeah rightOf course, give HA a restart, look through the Entities and you will findone called “Local MD-12” which is a media player! I added a Love Lace card for it and when clicking the 3 dots I can enter “Text to speak” and sure enough that text is read out via the BT speaker
It’s not perfect, I think I need to do some bash scripting on the host to make sure the speaker remains connected and doesn’t go to sleep. I also think it needs a script to connect at start (probably the same script). Something else that needs a little work is that the range doesn’t quite reach to where I want to place the speaker. Somewhere in my box of cables is a USB extension lead that I will dig out so that the BT adapter is then outside of the rack.
