Dual Boot Windows 10 and Linux Ubuntu on Separate Hard Drives [duplicate]
How would I go about dual booting Windows 10 and Ubuntu, the windows drive is on an ssd as my c drive and my s drive is a hdd that I want to use for Linux. I have no idea what I need to download it or anything.
Before you mark any question as duplicate, please make sure you get the difference in the the new question This question was never a duplicate. It focuses on Two different drives and not Two partitions drives. A problem that people with modern machines are likely to experience. @DavidFoerster I recommend you remove the duplicate flag and show possible solutions kindly.
@GeekGuy: The solutions are the same though, regardless of whether the two partitions end up on the same or a different physical drive. All that changes are the block device node names which already vary a lot depending on the specific set-up anyway.
More generally, if we have two question “How do I do X under condition C1?” and “How do I do X under condition C2?” and the answer to both is “Perform steps S1, S2, S3… while adjusting parameters P1, P2… based on environment conditions E1, E2….” – note that neither C1 nor C2 influence the answer – then, we should flag one question as a duplicate of the other.
@GeekGuy , Suppose in later stage we decided to take out the Windows hard disk to another PC. then what are the steps to do to work this two independently ?
3 Answers 3
This should work for most systems that use UEFI and which have two HDD.
Update: Be careful with newer Windows systems like Windows 10/11 which may depend on a single UEFI bootloader partition to work properly, see 1 and 2
Specification used for the tutorial below:
- Main HDD — 256GB Samsung SSD (Windows 10 installed)
- Secondary HDD — 64GB Transcend mSATA SSD (Mint 18 was installed to this drive)
- Set to «UEFI mode only» (no legacy/CSM).
- Disable «secure boot«
- Disable «Intel Rapid Start» (if equipped)
- Disable «fast boot» in UEFI (note this is different than the «fastboot» setting in Windows 8/10). The options in your UEFI/BIOS might say something like Full/Minimal/Automatic for boot mode. Select Full (or thorough, or complete, etc whatever your UEFI vendor has chosen to call it).
B) Advanced Power Options (Fastboot)
Disable fastboot in Windows 8/10 under «advanced power options«. Restart computer to ensure that this subsequent boot and the next reboot/shutdown will be in «normal» mode.
Install Macrium Reflect (free) and create a backup image and reinstallation media should something go wrong with Windows 10.
C) Rufus / Bootable USB stick
Use Rufus to create a bootable USB stick with your choice of Ubuntu based distro. Make sure in Rufus that you CHOOSE the option UEFI/GPT only. This ensures the Linux environment boots only into UEFI mode during your install.
D) Boot Menu
Reboot your computer and press key for one time boot menu (Dell is typically F12). Select your USB stick from the boot options.
Make sure it says UEFI in front of the USB stick in the boot menu.
If not, return to Windows and recreate your USB stick with Rufus ensuring you choose the UEFI/GPT (only) option.
E) Boot into USB Stick
Boot into Linux live environment and begin install.
F) Installation type
When you get to the installation option, choose «Something else» at the bottom of the Ubiquity installer.
G) Create partitions
Find your secondary HDD that you will be installing Linux to.
In my case it was listed as /dev/sdc (with /dev/sda being the windows drive and /dev/sdb the USB drive [which was invisible in the installer]).
+--------------+--------+---------------------------+--------------------------------+ | Device path | Device | Operating System (OS) | Visible in Ubiquity installer? | +--------------+--------+---------------------------+--------------------------------+ | /dev/sda | HDD | Windows 10 | yes | | /dev/sdb | USB | Ubuntu 16.04 (Live Stick) | no | | /dev/sdc | HDD | None | yes | +--------------+--------+---------------------------+--------------------------------+ - 1st Partition / EFI
- Select your target drive (in my case /dev/sdc)
- Select «Make New Partition Table«
- Partition the target drive as follows:
- Use as: EFI (this will be listed as /dev/sdc1 efi in the partitioning tool once you create it)
- 2nd Partition / Root
- Select «free space» under your target drive (in my case /dev/sdc)
- Select «+«
- Partition the target drive as follows:
- 3rd Partition / Swap
- Select «free space» under your target drive (in my case /dev/sdc)
- Select «+«
- Partition the target drive as follows:
- Use as: swap (if you wish to use hibernation, the swap needs to be just slightly larger than your total amount of RAM — example I have 8 GB so the size of this parition was set at 9000 MB)
- 4th Partition / Home
- Select «free space» under your target drive (in my case /dev/sdc)
- Select «+«
- Partition the target drive as follows:
H) Boot loader Device
- BEFORE clicking «Install Now», from the «device for boot loader installation» option button, select the 650MB EFI partition you just created as the target for the bootloader. (example /dev/sdc1 in my case).
- Click «Install Now«.
I) Installation & Reboot
- Finish installation process and reboot (removing the USB stick when your UEFI/BIOS screen logo appears).
J) Upon reboot
After UEFI/BIOS reads the new bootloader entry that Linux has added to it, you will be presented with the grub menu with a listing of your Linux distro as well as a listing to boot Windows 10.
- Boot into Linux
- Install any updates and then reboot and attempt to enter Windows 10 from the grub menu to make sure that grub correctly handles the hand-off to the Windows 10 bootloader.
What you have done:
You have installed the Linux EFI bootloader to the newly created EFI partition. In the process of this, Linux has added an entry to your UEFI listings in your systems UEFI/BIOS. Linux has also automatically detected your Windows 10 install and added a grub menu item to boot it. Your computer at this point will now automatically boot to Linux unless you choose to boot to Windows (from the Grub menu).
What you have not done:
You have not in any way altered your Windows 10 install or its bootloader or even so much as touched the Windows 10 EFI partition. Everything is reversible simply by removing the Linux UEFI listing from your UEFI/BIOS settings. How to do so varies from each vendor.
Создаём загрузочный USB диск с Windows из под Linux
В ubuntu уже есть приложение для создания образов дисков — Startup Disk Creator, но оно умеет создавать только загрузочные USB с Linux. Для создания загрузочного USB-диска с Windows из Linux, существует WinUSB, но она довольно давно не обновлялась, и честно говоря, у меня не заработала. Данный пост довольно подробный, и рассчитан преимущественно на людей, плохо знакомых с Linux.
Перед тем как я продолжу, следует указать что в Windows мире два метода загрузки:
- MBR, при котором в начале диска резервируется место, и располагается специальный загрузочный файл;
- EFI, при котором исполняемый файл загрузчика хранится в стандартном расположении на FAT32 файловой системе;
Если вы не знаете какой выбрать, то наиболее часто используемый вариант который работает без модификации файлов Windows — это msdos таблица разделов с fat32 файловой системой и загрузочным флагом.
Прежде всего USB-диск необходимо подготовить. В Linux наиболее простой и удобной для этих целей утилитой является gparted.
Ставим его если не установлен:
sudo apt-get install gparted
Подготовка USB диска
Выбираем нашу USB флэшку, отмонтируем её если она смонтирована:
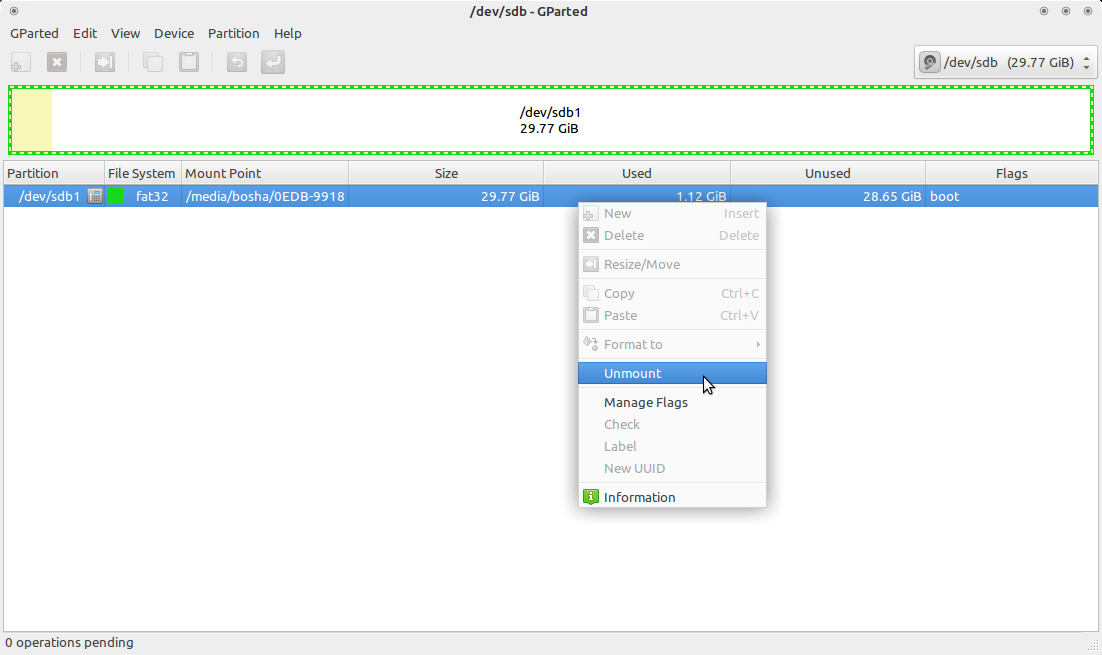
Отмонтирование USB диска в gparted
Теперь необходимо пересоздать таблицу разделов, при этом выбрать тип msdos . Заходим в меню Устройство (Device) и выбираем Создать таблицу разделов (Create partition table) :
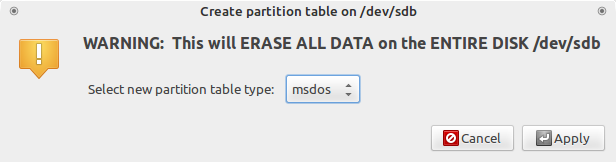
Gparted создание таблицы разделов
После этого выбираем неразмеченную область, нажимаем правой кнопкой мыши по ней же и выбираем пункт меню «Новый». В появившемся окне выбираем файловую систему NTFS или FAT32. Если у вас какая-то нестандартная сборка в которой могут быть файлы больше 4 гигабайт, то файловая система должна быть определенно NTFS, в противном случае, можно выбрать FAT32, и, тогда, так же можно будет загрузиться с UEFI. Так же необходимо указать метку для USB-диска. Важно: метка должна быть не просто «Windows», а какой либо более уникальной. Если файловая система FAT32, то метка должна быть указана заглавными буквами.
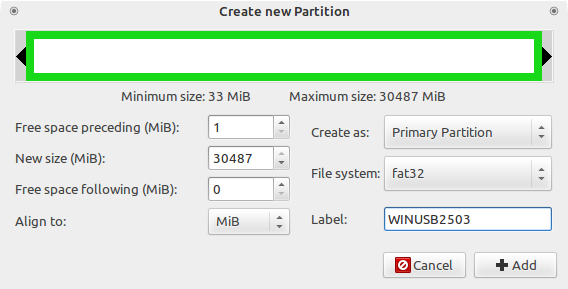
Создание нового раздела Gparted
Применяем все наши изменения:
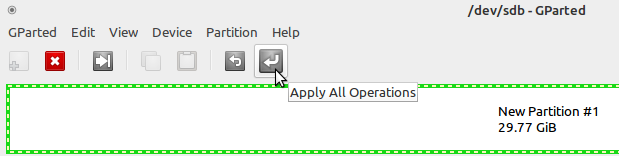
Применение изменений в Gparted
Копирование файлов Windows на USB диск
Теперь необходимо смонтировать образ с Windows и скопировать данные с него на наш подготовленный ранее usb диск. В большинстве современных рабочих окружений это можно сделать из файлового менеджера. По необходимому образу нажимаем правой кнопкой мыши, выбираем Открыть с помощью и выбираем Disk Image Mounter :
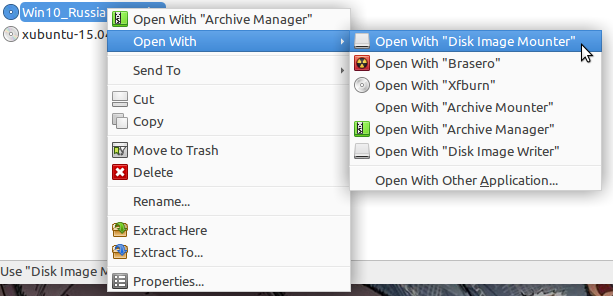
Монтирование образа с Windows в файлом менеджере Thunar
Если у вас нет такой утилиты, то можно смонтировать из командной строки:
sudo mount -o loop $HOME/Загрузки/Windows.iso /mnt/cdrom Где $HOME/Загрузки/Windows.iso необходимо заменить на путь до образа с Windows. Образ будет смонтирован в директорию /mnt/cdrom .
Делаем USB-диск загрузочным
Если создаем MBR загрузочный диск
Для создания MBR загрузочной записи будем использовать grub:
sudo grub-install --target=i386-pc --boot-directory="/media/$user/$drive/boot" /dev/sdX - $user — имя текущего пользователя;
- $drive — название образа;
- /dev/sdX — расположение диска (в моем случае /dev/sdb ;
Если образ монтировали руками, то /media/$user/$drive/boot необходимо заменить на /mnt/cdrom/boot .
В случае, если не было никаких ошибок, то в консоли должны увидеть примерно следующее:
Installing for i386-pc platform. Installation finished. No error reported.
Теперь на USB-диске в директории boot/grub необходимо создать файл grub.cfg с таким содержимым:
default=1 timeout=15 color_normal=light-cyan/dark-gray menu_color_normal=black/light-cyan menu_color_highlight=white/black menuentry "Start Windows Installation" insmod ntfs insmod search_label search --no-floppy --set=root --label $USB_drive_label --hint hd0,msdos1 ntldr /bootmgr > menuentry "Boot from the first hard drive" insmod ntfs insmod chain insmod part_msdos insmod part_gpt set root=(hd1) chainloader +1 boot >
В листинге выше, $USB_drive_label необходимо заменить на метку, которую мы присвоили диску на первом шаге. В данном случае WINUSB2503 .
Перезагружаемся, загружаемся с USB-диска и выбираем Start Windows Installation .
Если создаем UEFI загрузочный диск
С UEFI все несколько проще. Следует обратить внимание, что данный способ подходит только для Windows 7 x64 и выше.
После того, как все файлы скопировались, необходимо зайти в директорию efi/boot . Если в ней присутствуют файлы bootx64.efi или bootia32.efi то всё в порядке, можно пробовать загрузиться с диска.
Если нет ни одного из указанных выше файлов, то необходимо зайти в директорию куда смонтирован образ Windows, открыть файл install.wim архиватором (должен быть установлен 7z). В архиваторе открыть путь ./1/Windows/Boot/EFI , разархивировать файл bootmgfw.efi в директорию efi/boot и переименовать его в bootx64.efi . Если этих файлов нет, то скорее всего у вас 32 битный образ Windows. 32 битная Windows не поддерживает загрузку с UEFI.
Полезные ссылки:
- Make a bootable Windows USB from Linux — содержит немного полезной информации;
- Grub2/Installing — документация Ubuntu;
- Installing GRUB using grub-install — документация GRUB 2.0;