- How would I build python myself from source code on Ubuntu?
- 5 Answers 5
- 2. Using Python on Unix platforms
- 2.1. Getting and installing the latest version of Python
- 2.1.1. On Linux
- 2.1.2. On FreeBSD and OpenBSD
- 2.1.3. On OpenSolaris
- 2.2. Building Python
- 2.3. Python-related paths and files
- 2.4. Miscellaneous
- 2.5. Custom OpenSSL
- Установка Python на Linux
- Подготовка
- Сборка Python в Linux из исходников
- Установка Python в Linux
- Категории
- Свежие записи
- How to Compile & Install Python 3.11/3.10 from Source in Ubuntu
- 1. Preparation:
- 2. Download Python Tarball:
- 3. Configure the source:
- 4. Build and install Python:
- 5. Verify
- 5. Make Python 3.11 default
- Uninstall Python 3.11:
- Ji m
How would I build python myself from source code on Ubuntu?
Ubuntu comes with Python 2.7.2+ pre-installed. (I also downloaded the python dev packages.) Because of another issue I’m having (Explained in extreme depth in How do I replace/update the version of the expat library used by Apache? ), Graham Dumpleton told me my distro had explicitly built Python in a way to use an external pyexpat implementation, so causing my issue. He also said I could build Python myself from source code to resolve the issue. How would I do this on Ubuntu? (Keep in mind I’m new to Linux.)
This is not really ubuntu specific so I think it’s fine over here. The various stack exchange sites have considerable overlap in my opinion.
5 Answers 5
sudo apt-get install build-essential sudo apt-get build-dep python2.7 ./configure --prefix=/path/where/you/want/python/installed If you hit snags on the way, ask back here and I’ll try to offer some guidance.
When I ran sudo apt-get build-dep python2.7 it said «E: You must put some ‘source’ URIs in your sources.list». Any idea? (Also, minor side note: I think you meant to write sudo apt-get install build-essential without the -s at the end of «essentials» in the first command.)
They also need the —enable-shared option when building Python as they want to use it with mod_wsgi and Python doesn’t build shared libraries by default which isn’t ideal for dynamically loading embedded systems.
What are «they»? What are you referring to? Also, before that, how do I resolve the error message? Do I need to add something to sources.list?
I think its better to altinstall instead of install docs.python.org/3/using/unix.html#building-python
The best way to build «hot» very recent python (from github) is as follows:
sudo apt-get update \ && sudo apt-get install -y build-essential git libexpat1-dev libssl-dev zlib1g-dev \ libncurses5-dev libbz2-dev liblzma-dev \ libsqlite3-dev libffi-dev tcl-dev linux-headers-generic libgdbm-dev \ libreadline-dev tk tk-dev git clone https://github.com/python/cpython.git cd cpython && ./configure --prefix=/usr \ --enable-loadable-sqlite-extensions \ --enable-shared \ --with-lto \ --enable-optimizations \ --with-system-expat \ --with-system-ffi \ --enable-ipv6 --with-threads --with-pydebug --disable-rpath \ && make \ && sudo make install It builds the very recent python from the sources on github.
With this I have built Python 3.8.0a0 (heads/master:077059e0f0, Aug 10 2018, 21:36:32) .
2. Using Python on Unix platforms
2.1. Getting and installing the latest version of Python
2.1.1. On Linux
Python comes preinstalled on most Linux distributions, and is available as a package on all others. However there are certain features you might want to use that are not available on your distro’s package. You can easily compile the latest version of Python from source.
In the event that Python doesn’t come preinstalled and isn’t in the repositories as well, you can easily make packages for your own distro. Have a look at the following links:
2.1.2. On FreeBSD and OpenBSD
pkg_add -r python pkg_add ftp://ftp.openbsd.org/pub/OpenBSD/4.2/packages//python-.tgz
pkg_add ftp://ftp.openbsd.org/pub/OpenBSD/4.2/packages/i386/python-2.5.1p2.tgz
2.1.3. On OpenSolaris
You can get Python from OpenCSW. Various versions of Python are available and can be installed with e.g. pkgutil -i python27 .
2.2. Building Python
If you want to compile CPython yourself, first thing you should do is get the source. You can download either the latest release’s source or just grab a fresh clone. (If you want to contribute patches, you will need a clone.)
The build process consists of the usual commands:
./configure make make install
Configuration options and caveats for specific Unix platforms are extensively documented in the README.rst file in the root of the Python source tree.
make install can overwrite or masquerade the python3 binary. make altinstall is therefore recommended instead of make install since it only installs exec_prefix /bin/python version .
2.3. Python-related paths and files
These are subject to difference depending on local installation conventions; prefix and exec_prefix are installation-dependent and should be interpreted as for GNU software; they may be the same.
For example, on most Linux systems, the default for both is /usr .
Recommended location of the interpreter.
prefix /lib/python version , exec_prefix /lib/python version
Recommended locations of the directories containing the standard modules.
prefix /include/python version , exec_prefix /include/python version
Recommended locations of the directories containing the include files needed for developing Python extensions and embedding the interpreter.
2.4. Miscellaneous
To easily use Python scripts on Unix, you need to make them executable, e.g. with
and put an appropriate Shebang line at the top of the script. A good choice is usually
which searches for the Python interpreter in the whole PATH . However, some Unices may not have the env command, so you may need to hardcode /usr/bin/python3 as the interpreter path.
To use shell commands in your Python scripts, look at the subprocess module.
2.5. Custom OpenSSL
- To use your vendor’s OpenSSL configuration and system trust store, locate the directory with openssl.cnf file or symlink in /etc . On most distribution the file is either in /etc/ssl or /etc/pki/tls . The directory should also contain a cert.pem file and/or a certs directory.
$ find /etc/ -name openssl.cnf -printf "%h\n" /etc/ssl
$ curl -O https://www.openssl.org/source/openssl-VERSION.tar.gz $ tar xzf openssl-VERSION $ pushd openssl-VERSION $ ./config \ --prefix=/usr/local/custom-openssl \ --libdir=lib \ --openssldir=/etc/ssl $ make -j1 depend $ make -j8 $ make install_sw $ popd
$ pushd python-3.x.x $ ./configure -C \ --with-openssl=/usr/local/custom-openssl \ --with-openssl-rpath=auto \ --prefix=/usr/local/python-3.x.x $ make -j8 $ make altinstall
Patch releases of OpenSSL have a backwards compatible ABI. You don’t need to recompile Python to update OpenSSL. It’s sufficient to replace the custom OpenSSL installation with a newer version.
Установка Python на Linux
В этой заметке я покажу как собрать из исходников и установить Python на Linux. Я буду все действия производить на Ubuntu 20.04, но инструкция будет одинаково работать и на LinuxMint и Debian.
В моей Ubuntu по умолчанию установлен Python 3.8.10, я хочу установить более свежую версию, как же это сделать?
Подготовка
Устанавливаем все необходимое для сборки Питона из исходников
sudo apt install build-essential zlib1g-dev libncurses5-dev libgdbm-dev libnss3-dev libssl-dev libreadline-dev libffi-dev libsqlite3-dev wget libbz2-dev
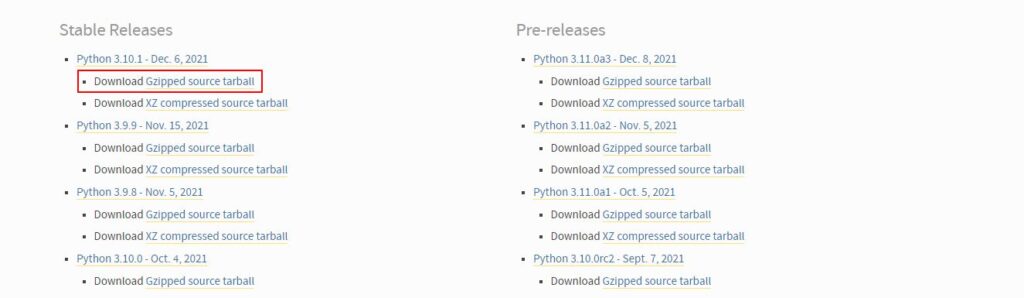
Дальше на странице https://www.python.org/downloads/source/ нужно сохранить ссылку на исходники нужной вам версии Python, например я возьму последнюю на данный момент версию Python 3.10.1
С помощью wget скачиваем исходники в домашнюю директорию
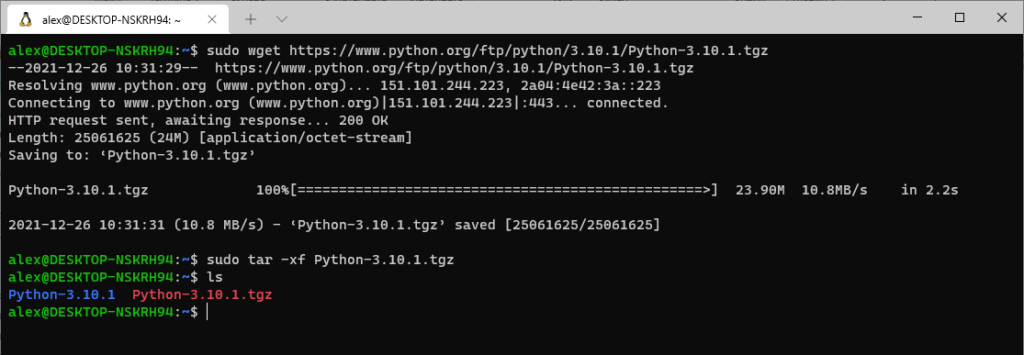
sudo wget https://www.python.org/ftp/python/3.10.1/Python-3.10.1.tgz
Далее разархивируем скаченный архив:
sudo tar -xf Python-3.10.1.tgz
Сборка Python в Linux из исходников
Перейдем в директорию с исходным кодом Python
Далее нужно запустить скрипт конфигурации, он выполнит проверки на необходимые для сборки Python
Мы запускаем скрипт с параметром —enable-optimizations, он оптимизирует собираемый двоичный файл Python (правда это замедлит процесс сборки, https://docs.python.org/3/using/configure.html).
После выполнения скрипта нам остается запустить сам процесс сборки:
Параметром -j 4 я указал количество ядер процессора, узнать эту цифру можно командой nproc .
Установка Python в Linux
Процесс сборки довольно длительная операция, после того, как она завершиться можно установить Python одной из двух команд:
Эта команда устанавливает наш Python рядом с предыдущими версиями, в будущем вы сможете выбирать какой версией пользоваться.
Эта команда установит новую версию Python поверх старых.
В данный момент я воспользовался первой командой altinstall .
Дожидаемся окончания процесса установки и проверяем:
В ответ получаем версию Python 3.10.1
Предыдущая версия python, установленная в Убунту 20.04 по умолчанию так же доступна, можно убедится в этом вызвав команду:
В ответ получаем версию Python 3.8.10
Теперь можно удалить архив с исходниками и папку куда мы их разархивировали:
sudo rm -Rf Python-3.10.1 Python-3.10.1.tgz
Еще раз повторюсь, что инструкция выше по сборке Python из исходников в Ubuntu подойдет и для установки Python в LinuxMint и Debian. В репозиториях этих дистрибутивов уже есть собранные Python, но не всегда самой свежей версии.
Категории
Свежие записи
How to Compile & Install Python 3.11/3.10 from Source in Ubuntu
![]()
This simple tutorial shows how to compile and install Python 3.11, Python 3.10, or other certain Python version in Ubuntu.
For Ubuntu 18.04, Ubuntu 20.04 and Ubuntu 22.04 LTS, there’s well trusted “deadsnakes” team PPA that maintains all the Python packages. For non-LTS releases, you may build the programming language package manually from the source tarball.
NOTE: This tutorial is tested and works in Ubuntu 20.04, Ubuntu 22.04, and Ubuntu 23.04 in my case.
1. Preparation:
Before getting started, you need to install some essential packages for building the computer language package.
Open terminal either by pressing Ctrl+Alt+T on keyboard or by searching from start menu. When it opens, run the command below to install the dependencies:
sudo apt install wget build-essential libreadline-dev libncursesw5-dev libssl-dev libsqlite3-dev tk-dev libgdbm-dev libc6-dev libbz2-dev libffi-dev zlib1g-dev

2. Download Python Tarball:
You can simply download the latest tarball from the Python website via the link below:
In case you’re running Ubuntu without desktop environment, download the source package by running the wget command in terminal:
wget -c https://www.python.org/ftp/python/3.11.0/Python-3.11.0.tar.xz
For other Python version, go and download via web browser in this page. And, change the version number in command accordingly.
And uncompress the tarball either by right-click and selecting ‘Extract Here‘ in file manager, or by running command in terminal:
3. Configure the source:
Depends on how you grab the source tarball, either right-click on it in file manager, extract, and open the source folder in terminal via context menu option:
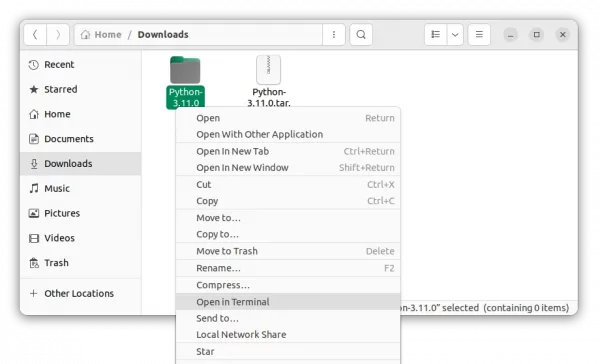
Open Python 3.11 source folder in terminal
If you just did the tar command above, then you may navigate to source folder via:
The command varies depends on which Python version you downloaded.
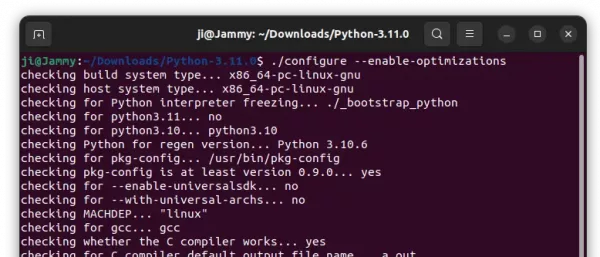
When you’re in source directory, run command to configure the source with expensive, stable optimizations (PGO, etc.):
./configure --enable-optimizations
4. Build and install Python:
Finally compile and install it into “/usr/local/bin” by running command:
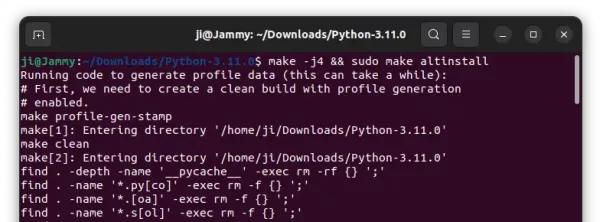
sudo make -j4 && sudo make altinstall
Here -j4 will start 4 threads to speed up the job. Depends on your CPU, you may increase the number or just skip it. And, when make command done, it will ask you to type password for running make install with sudo privilege.
5. Verify
If everything’s done successfully without error, you may verify by running command:
It should output the language version as well as the pip package manager version for you
5. Make Python 3.11 default
After installation, you may set it as default by creating symbolic links to /usr/bin/python3:
sudo update-alternatives --install /usr/bin/python3 python3 /usr/local/bin/python3.10 110
sudo update-alternatives --install /usr/bin/python3 python3 /usr/local/bin/python3.11 100
In the first command change system default python3.10 to python3.8 if you’re on Ubuntu 20.04. Finally, run command below at any time to select which Python to use as default:
sudo update-alternatives --config python3
Uninstall Python 3.11:
Until you removed the source directory, you may first either navigate to that folder in terminal or right-click and select open folder in terminal, finally run make uninstall command to remove Python 3.11:
If you’ve already removed the source, or the previous command does not work for you, try removing all the installed libraries manually via:
cd /usr/local/bin && rm -f sudo rm -f 2to3 2to3-3.11 idle3 idle3.11 pip pip3 pip3.10 pip3.11 pydoc3 pydoc3.11 python3 python3.11 python3.11-config python3-config

Ji m
I’m a freelance blogger who started using Ubuntu in 2007 and wishes to share my experiences and some useful tips with Ubuntu beginners and lovers. Please comment to remind me outdated tutorial! And, notify me if you find any typo/grammar/language mistakes. English is not my native language. Contact me via [email protected] Buy me a coffee: https://ko-fi.com/ubuntuhandbook1