- Ubuntu SSO accounts
- A Windows Guy in a Linux World: Users and File Permission
- Working with the File System
- No More Drive Letters
- Users and Home Folders
- Capitalization is Everything in Linux
- User Accounts
- Windows SIDs
- Linux User IDs
- Linux File Permissions
- File Ownership
- Numeric Notation for File Permissions
- Wrap Up
Ubuntu SSO accounts
Store roles and privileges can be granted to an Ubuntu SSO account.
For example, a dedicated Snap Store is administered by an account that is granted the Administrator Role. New snap names are registered by accounts with the Publisher Role. A developer can upload snaps to a private Store with the Publisher role, or as a Collaborator on a specific snap.
Ubuntu SSO accounts can be assigned SSH and GPG keys. Store assertions should be signed by keys registered to an account. Ubuntu SSO accounts also authenticate users to launchpad.net, forum.snapcraft.io, and many more sites and services.
Anyone can create an Ubuntu SSO account at https://login.ubuntu.com. Each account requires a dedicated email address. You can then see additional account data here: https://dashboard.snapcraft.io/dev/account/
Here are a few points to note regarding Ubuntu SSO accounts:
- It is highly recommended to generate a SSH key and upload a public SSH part to your Ubuntu account. Among other things, this enables you to log onto Ubuntu Core devices on first boot over SSH.
- Note the Ubuntu SSO account’s account-id. This is a critical identifier that is used in many parts of the Snap Store ecosystem.
- When you are logged into snapcraft and run snapcraft whoami , the account ID is displayed as the developer-id:
$ snapcraft whoami email: thisis@theaccountemail.com developer-id: THIS_IS_THE_ACCOUNT_ID A Windows Guy in a Linux World: Users and File Permission
If you’ve managed Windows for some time, you probably have experience with user account management, the NTFS file system, and setting permissions. If so, prepare yourself for a different world with Linux file permissions! In Linux, the file system is a different animal you must learn to be a proficient Linux admin.
This is Part II of our four-part series on learning Linux from a Windows admin perspective! Be sure to read Part I if you haven’t already.
Working with the File System
Let’s first jump into how Linux stores and manages files via the file system.
Note: All examples will be using OpenSUSE Linux.
No More Drive Letters
Unlike Windows, removable drives and other devices don’t automatically get a drive letter and open up on reboot. In Windows, every drive gets mounted as a drive letter: C:\, D:\, etc. How do drive letters in Linux work? There are none!
In Linux, there is a folder called the root folder. This folder is located in the root of the file system or simply / . The forward slash is the first forward slash before every other file in the system comes from. This forward slash is kind of like the base C:\, though only if the other drive letters only existed as a subfolder of C:\.
The root folder is where the core system files lie. Everything else, including other devices, are a subfolder of this central folder.
Linux blurs the line between folders and filesystems. The Linux directory /home is the root of all users’ “profiles” similar to the C:\Users folder in Windows. In this case, /home is a directory. However, “directories” in Linux don’t have to actually be directories. They can also be storage partitions or even a separate hard disk altogether. This concept is analogous to Windows mount points.
Users and Home Folders
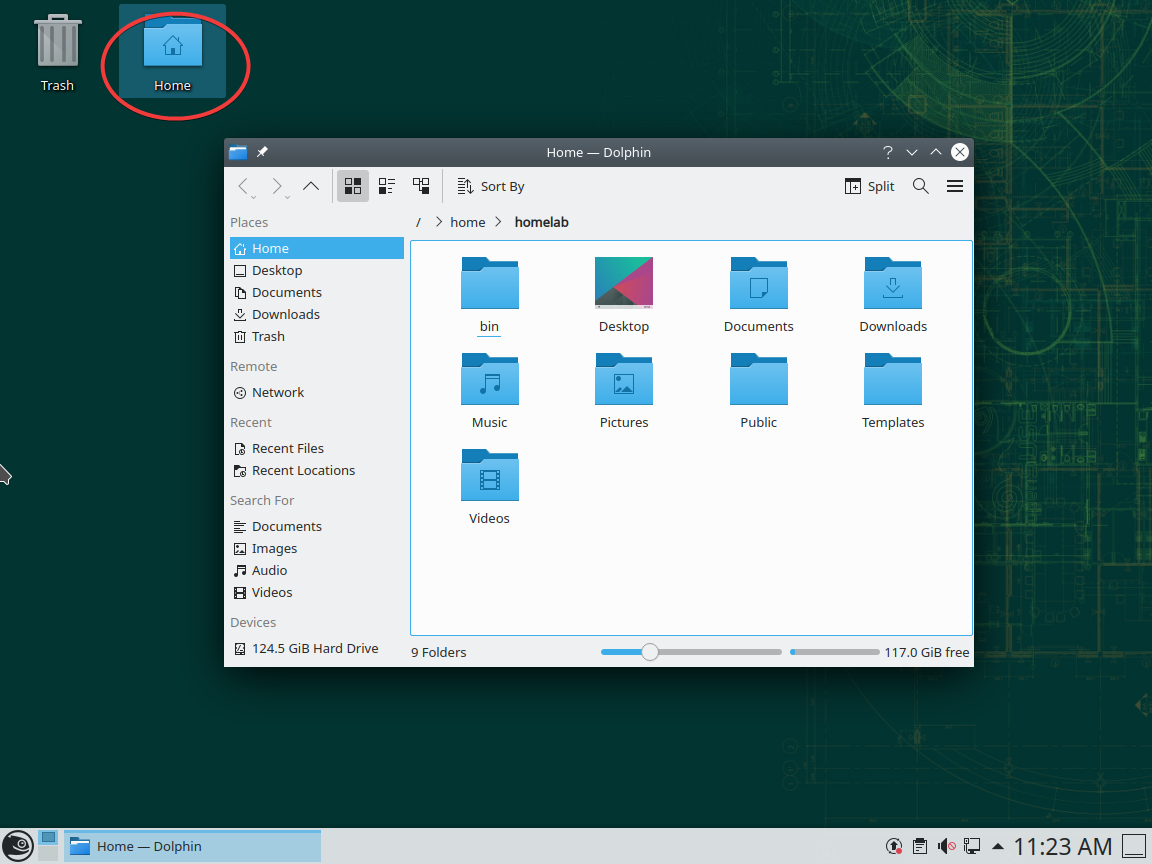
If you’re using OpenSUSE, you might notice a Home folder on your desktop as shown below. This folder is the Linux version of the C:\users\ folder or “profile”. The Linux “users” folder lives under /home on your installation disk by default.
In the example below, the user is called homelab with a “profile” located in /home/homelab.
In Linux (and Windows), the home folder (or user profile in Windows) has a shorthand notation of a tilde (~). If you see something like «~/Documents/blah.txt , it’s actually referring to your /home//Documents/blah.txt file.
Capitalization is Everything in Linux
Everything in Linux is case sensitive. This concept is the complete opposite of Windows where almost nothing is case sensitive.
For example, if you have a directory called /home/homelab, a completely different directory can be called /home/Homelab. This concept also extends to commands. Running cd /home/homelab is different from CD /home/homelab (which should fail).
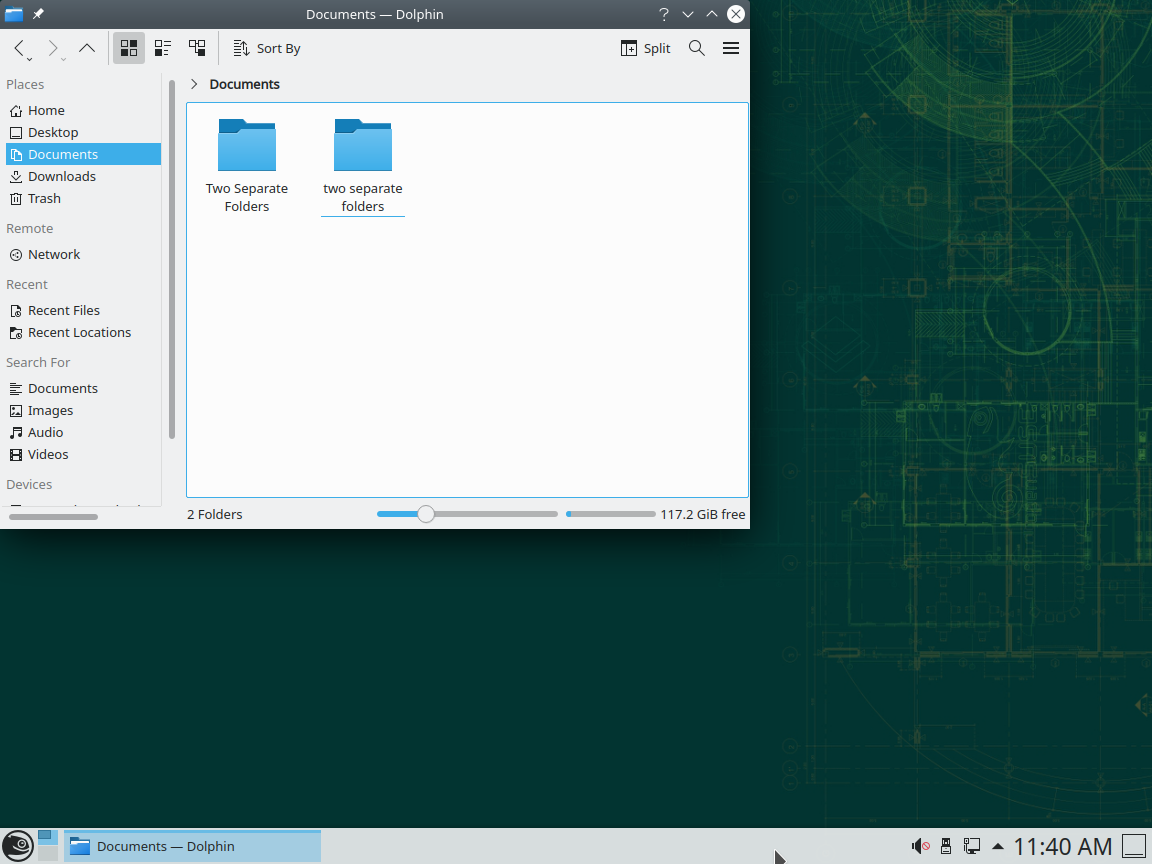
As a Windows person, this concept will trip you up at some point. Be very careful about your capitalization! You can see an example of two separate folders below. The only difference between the two is capitalization: In a Windows environment, this is not possible.
User Accounts
Like Windows, Linux has the concept of user accounts but they behave a little differently. First start off by thinking of Linux user accounts in terms of your familiar Windows user accounts.
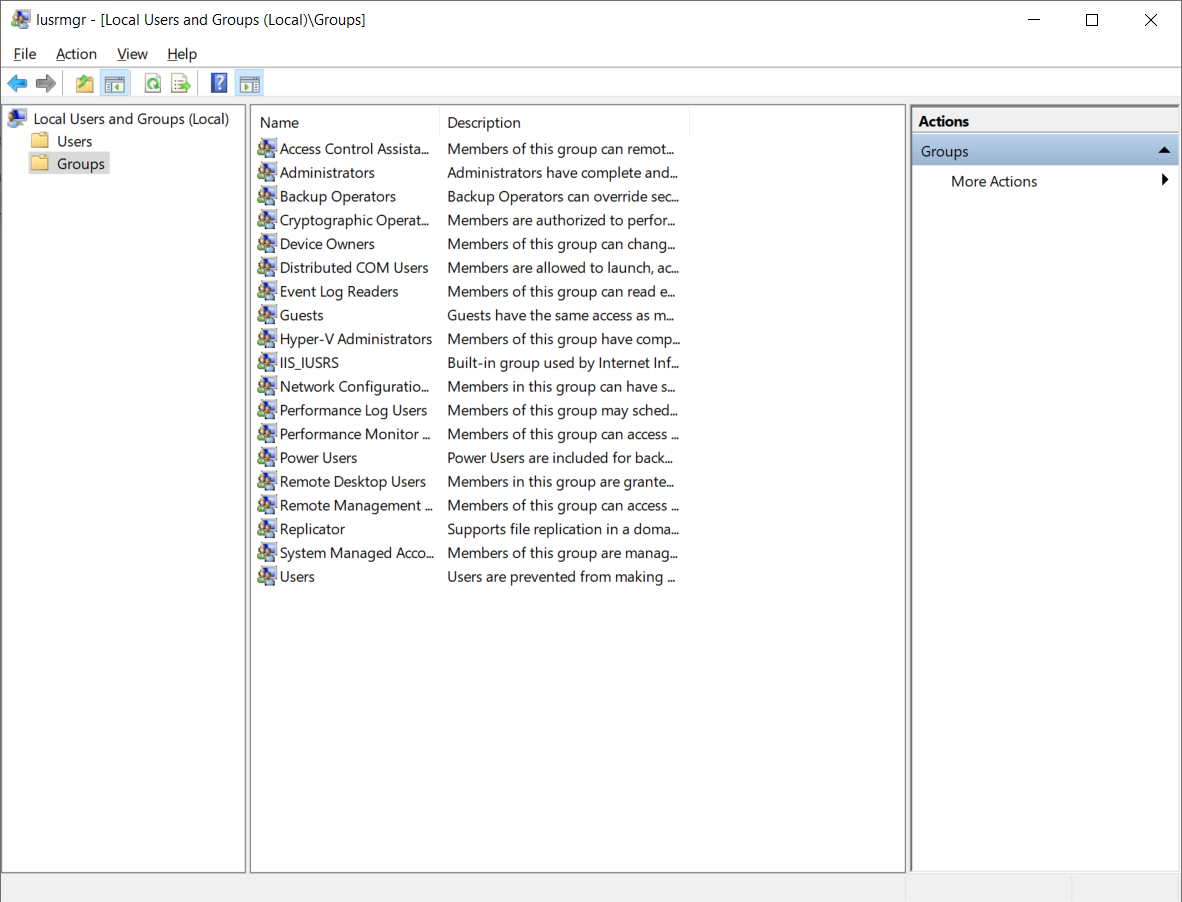
Windows has a few built-in user accounts such as Administrator, the hidden SYSTEM account, Guest, etc. Windows also have various built-in security groups like Administrators, Guests, etc.
You can view all of all Windows users and groups via the Local Users and Groups MMC by running thelusrmgr.msc MMC snapin.
Windows SIDs
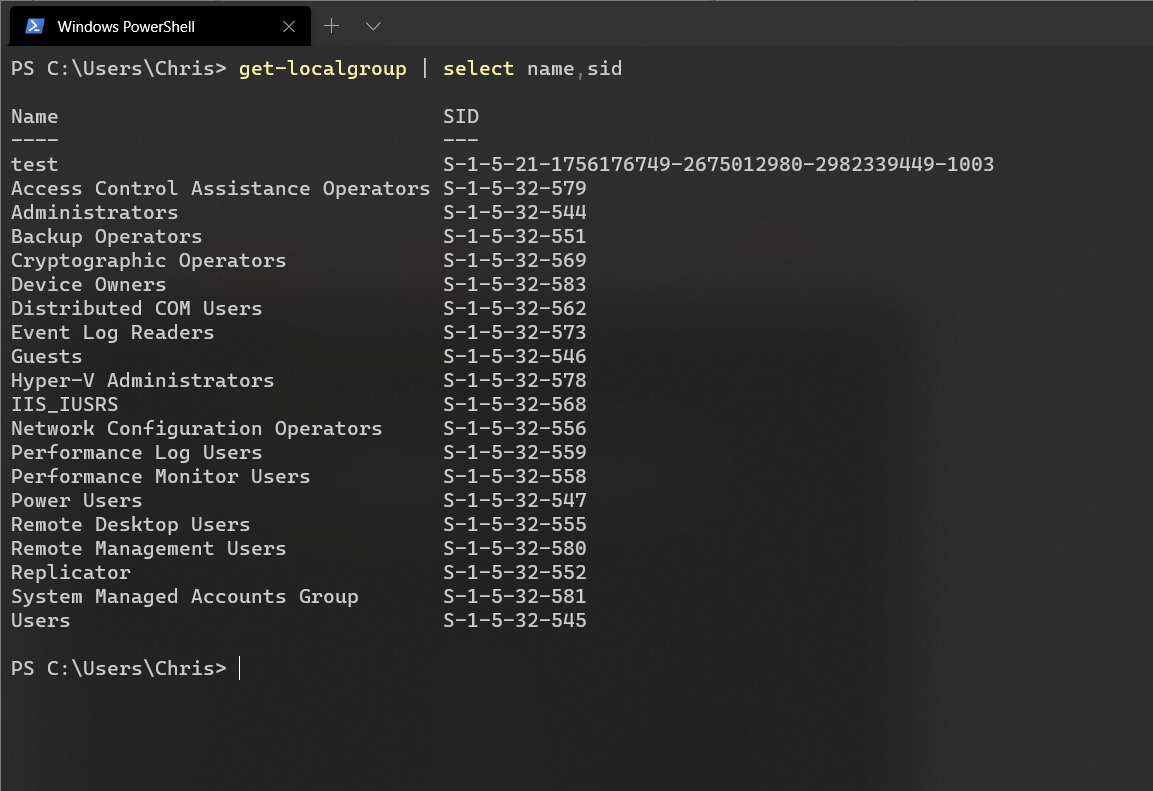
To uniquely identify users and groups, Windows refers to users and groups by something called the SID. In Windows, you can find each user and groups’ SID by running a couple of PowerShell commands below.
Get-LocalUser | select name, sid Get-LocalGroup | select name,sid 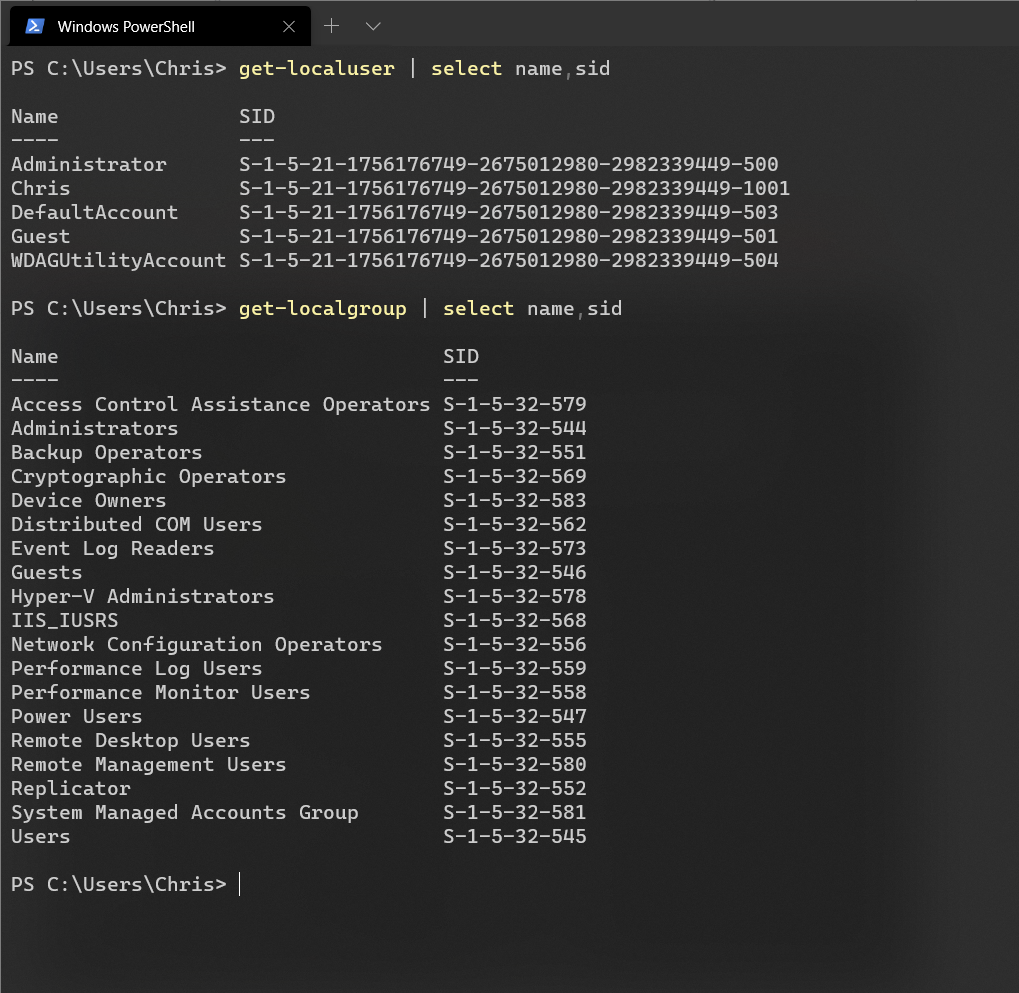
Each Windows group SID is the same across all Windows computers. The built-in user SID s for Windows are unique. That Administrator SID you see in the above screenshot should be different on every Windows computer. Any future user or group created in Windows will be unique. Notice below the test group. If you would create a test group on your Windows computer, the SID would be different.
Linux User IDs
On the flip side, Linux handles users and groups similarly only this time Linux doesn’t use SIDs but user IDs (UIDs) and group IDs (GIDs). Also unlike Windows, Users and groups are unique to the computer but not unique across all computers. This means that your UID on Computer A might be the exact same UID on Computer B, even if it isn’t the same user.
Both UIDs and GIDs follow a simple, numeric convention; each UID and GUID start at 0 and increment by one ranging from 1-999 for internal system accounts and 1000+ for custom user accounts.
The built-in root user always has a UID of 0 and a GID of 0. Also, like the Windows hidden SYSTEM account, this root account is generally (depending on Linux distribution) prevented from logging in.
The built-in root user is similar to Windows SYSTEM and Administrator built-in accounts, kind of rolled into one. Even if you are working as an Administrator in Windows, there are still some built-in safeguards to prevent you completely destroying Windows.
The root user, on the other hand, is an absolute authority. If you purposely drop into the root user (you can do this on the command line using the command sudo su ) and try to delete your whole operating system, root will happily do so until the system dies.
Let’s say you’ve created a user called homelab. The UID for homelab could then be referenced either by 1000 or by homelab. The user will automatically become a member of the internal group users which you can reference with the group ID of 100. You can find a list of these mappings by running the getent passwd command as seen below:
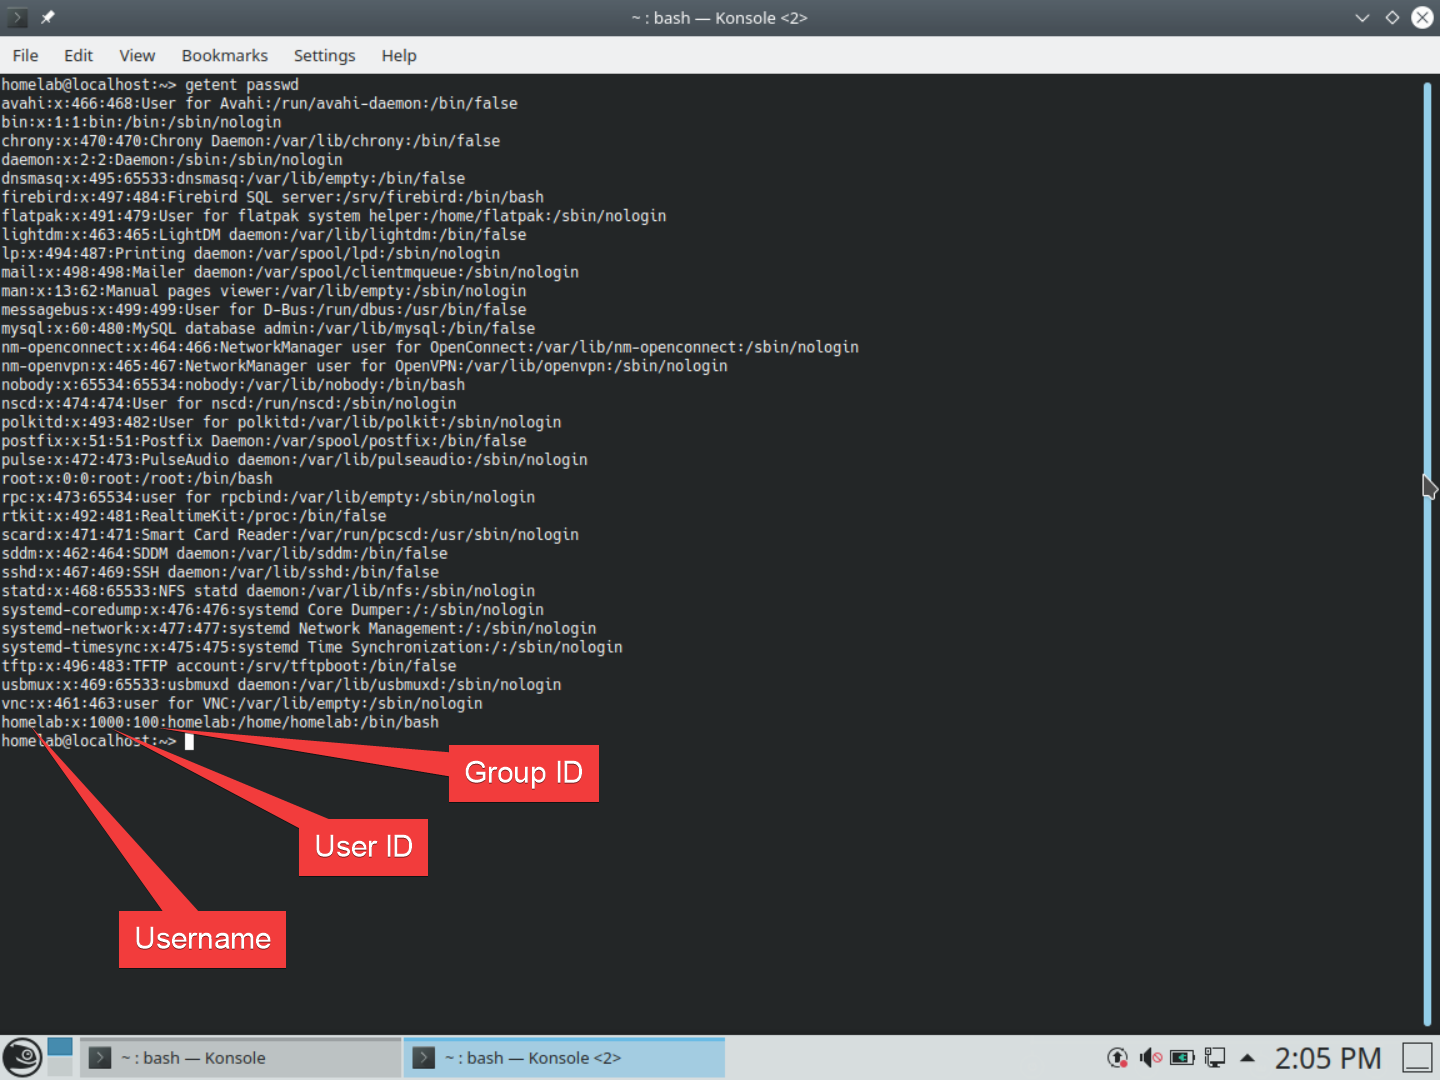
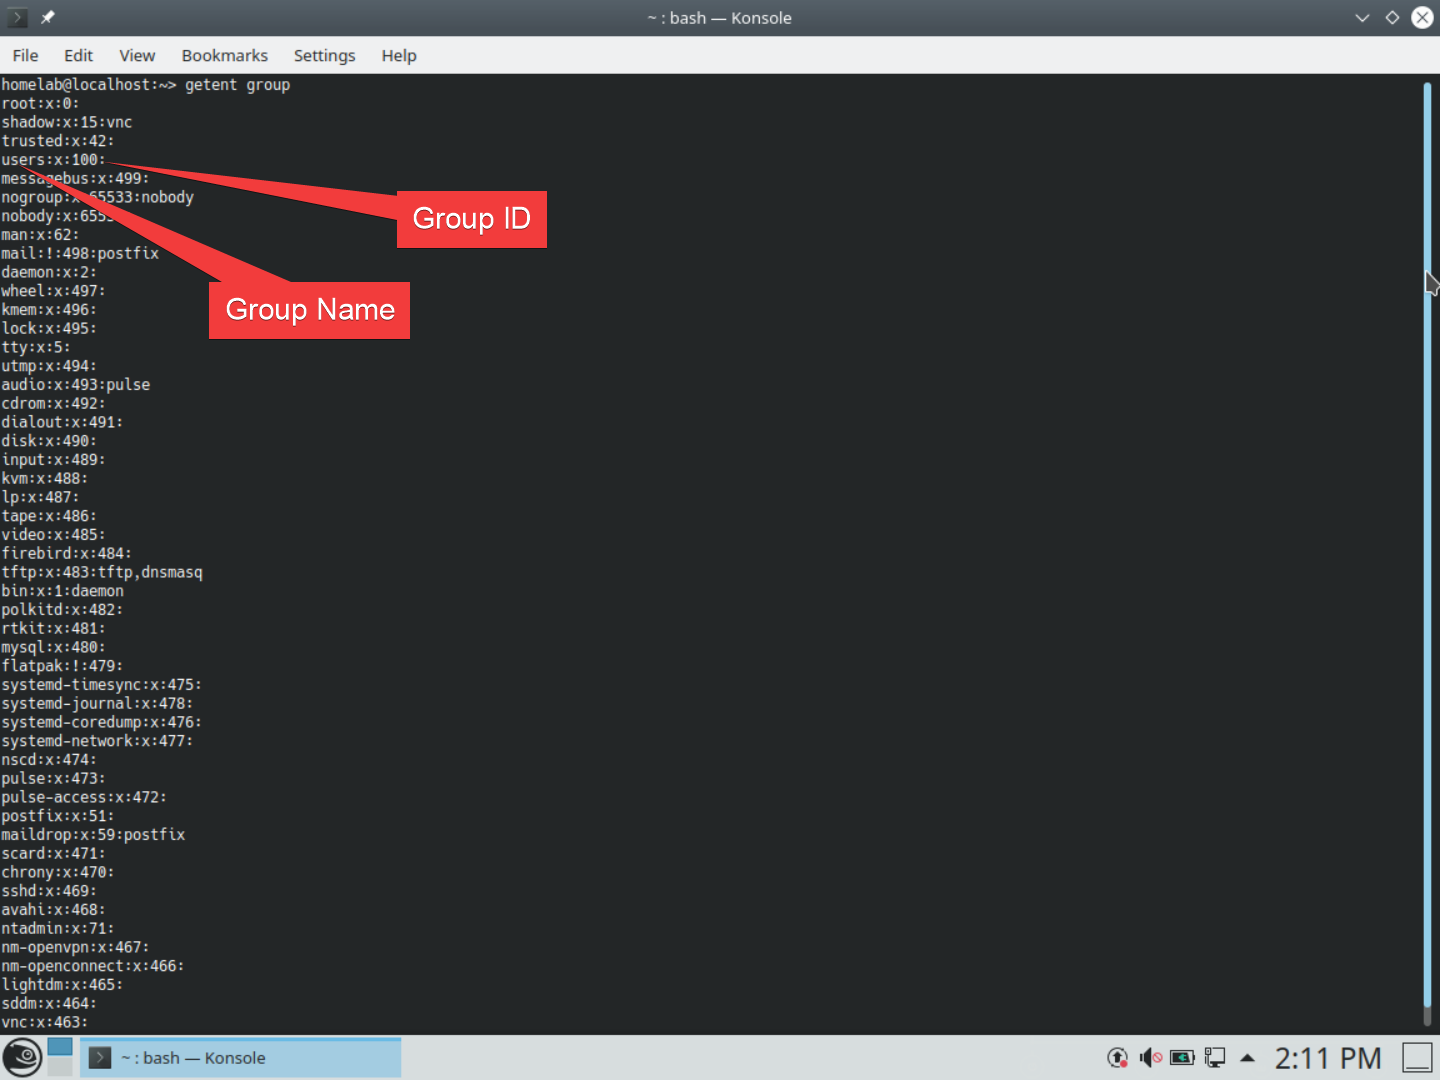
You can also find the same information as above for groups with the getent group command.
Linux File Permissions
In a Windows world, filesystem permissions are not fun. Setting and managing permissions in NTFS can sometimes turn into a nightmare with ACE, ACLs, inheritance, propagation, etc. Luckily, in Linux filesystem permission are much simpler.
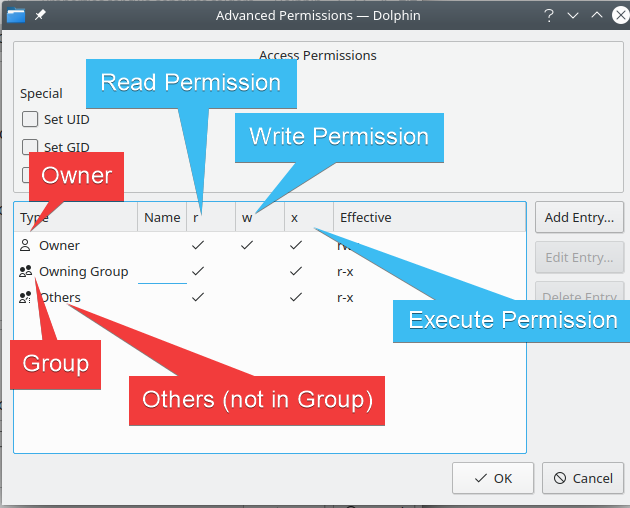
In Linux, you have three types of rights you can assign to a file: read, write, and execute with three categories of access: owner, group, others.
- owner is the user who owns the file/folder. Every file or folder has a designated owner.
- group is the group that owns the file/folder. This does not have to be the same group the owner belongs to. Every file or folder can only belong to one group.
- others is… well… others. It’s people who aren’t part of the owning group or is not the designated owner.
You can allow or deny every option for every category. As an example: you can give read, write, execute options for the owner, and read/execute options for the group and others. You can see that in the screenshot below. This means that anybody besides the user who is the owner of the folder cannot modify it.
Just like Windows explorer, in Ubuntu, you can see this information by doing the following:
- Open up your Home folder on your desktop.
- Navigate to the file/folder in question.
- Right click on the file/folder and click on Properties.
- Click on the Permissions tab.
- Click on Advanced Permissions.
Once you’re in the Advanced Permissions box, you can graphically see all permissions assigned to that file or folder.
Below is what the Advanced Permissions table represents.
File Ownership
Like Windows, each file and folder has an owner. In Windows, you can take ownership of a file in the GUI or via the takeown command. In Linux, you take ownership by running chown : on the command line.
Like Windows, you generally need administrative permission to change ownership of files using sudo. sudo is the Linux equivalent of Windows’ User Account Control (UAC). Instead of opening an administrative command line window, you preface commands with sudo to make it run as an administrator.
Let’s create a folder that’s only owned by root to demonstrate some of these concepts.
- Open up your home folder and navigate to Documents
- Open up a command prompt by right click —> Actions —> Open Terminal Here, and run the following:
sudo mkdir owned-by-root sudo chmod 700 owned-by-root This folder only has read/write/execute permissions for the owner. Because you created the folder with admin rights, that owner is currently root.
You also changed the permissions so only the owner has access. The owning group and other users cannot access this folder at all. In fact, you’ll notice that the folder has a big lock on it indicating you don’t have access.
Below you can see how to take ownership of this folder.
- Open up another terminal in that same folder (or use the one you already had)
- Run sudo chown homelab:users ./owned-by-root
Now that you have ownership, you can also change the file permissions inside the explorer GUI using the properties window.
You (usually) only want to change ownerships, not file permissions. Linux is pretty good at knowing what permissions things are supposed to have by default. You can really screw things up by ‘chmoding’ without knowing the implications.
Numeric Notation for File Permissions
If you have done any Linux troubleshooting, you may have seen people online explain file permissions using a number scheme. You can see that highlighted in the screenshot below:
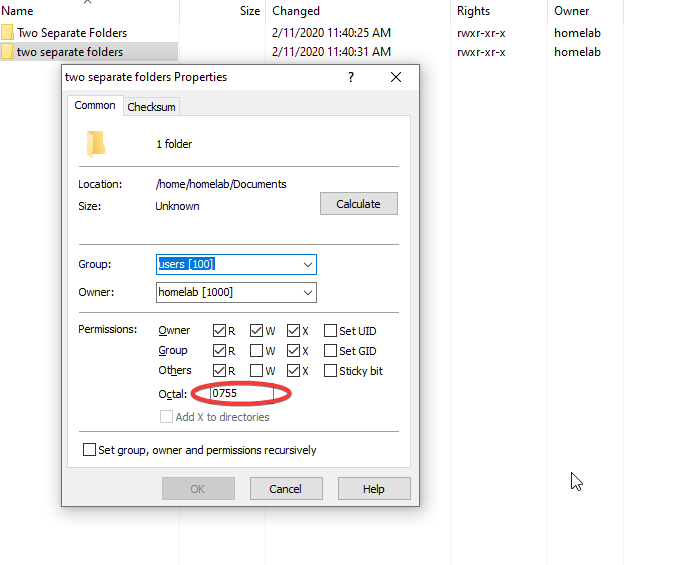
Linux uses a shorthand notation for this access system using numbers, like 0600. The first number is for some special properties you can add, which people generally ignore. In fact, most people only use three digits for the notation and ignore the leading fourth.
For more information about numeric notation for file permissions, check out this article.
Wrap Up
That’s it for Part II of our A Windows Guy in a Linux World blog post series! Be sure to keep up the momentum with Part III !
Hate ads? Want to support the writer? Get many of our tutorials packaged as an ATA Guidebook.