- How To Build A Tin Can WiFi Antenna For $5
- Drill or punch holes in your can to mount the probe
- Assemble the probe and mount in can
- Connect your antenna to your wireless card or access point
- How To Build A Tin Can DIY WiFi Antenna
- Tin Can DIY WiFi Antenna (Cantenna)
- Collecting Your Supplies for Your DIY Wifi Antenna
- Step 1 – Drill Holes in the Can
- Step 2 – Attach the Connector to the Can
- Step 3 – Connect the Antenna
- Final Results
How To Build A Tin Can WiFi Antenna For $5
Got no dough for a commercial WiFi antenna? Looking for an inexpensive way to increase the range of your wireless network? A tin can waveguide antenna, or Cantenna, may be just the ticket. This design can be built for under $5 U.S. and reuses a food, juice, or other tin can.
I am not an electrical engineer, nor do I have access to any fancy test equipment. I’ve built some antennas that worked for me and thought I would share what I learned. I have no idea if this is safe for your radio or wireless network equipment. The risk to you and your equipment is yours.
Building your Cantenna is easy, just follow these steps.
- Collect the parts
- Drill or punch holes in your can to mount the probe
- Assemble the probe and mount in can
- A N-Female chassis mount connector.
- Four small nuts and bolts
- A bit of thick wire
- A can
The Connector
A N type Female Chassis-mount connector. One side is N-female for connecting the cable from your wireless equipment, and the other side has a small brass stub for soldering on wire. These can be found at electronics stores internet suppliers (see the list below under “Connect your antenna…” If you shop around, you should be able to find these for $3-$5.
You’ll need them just long enough to go through the connector and the can. I’ve used #6×1/4″ stainless. If your N-connector is a screw on type, then you won’t need the nuts and bolts.
You’ll need about 1.25″ of 12 guage copper wire. This wire will stick into the brass stub in the N-connector.
This is the fun part. You’re looking for a can between about 3″ and 3 2/3″ in diameter. The size doesn’t have to be exact. I made a good antenna with a Nalley’s “Big Chunk” Beef Stew can that was 3.87″ in diameter. Others have reported good results with big 39oz. coffee cans that are 6″ in diameter. The pringles can is really too small for good performance, however. Try to get as long a can as possible. The old fashioned fruit juice cans should work well.

Drill or punch holes in your can to mount the probe
The N-connector assembly will mount in the side of your can. You need to put holes in the right place to mount the connector. The placement of the hole and connect is very important. It’s location is derived from formulas that use the frequency that the antenna will operate at and the can diameter.

802.11b and 802.11g WiFi networking equipment operates at a range of frequencies from 2.412 GHz to 2.462 GHz. Ideally, with your can size, the TE11 cut-off frequency should be lower than 2.412 and the TM01 cut-off should be higher than 2.462. It would be good, also, if your can is longer than the 3/4 Guide Wavelength. If your can is a little off in length or diameter, don’t despair, experimentation is fun !
You want to mark the location on the can where you will put the hole for the connector. The 1/4 Guide Wavelength number tells you how far up from the bottom metal end of the can to put the center of the hole. Open only one end of your can, eat the contents, and give it a good washing. You’ll probably want to remove the label too. Use a ruler to measure up from the closed end 1/4 Guide Wavelength and mark the can with a dot.
If you’ve got a drill, select a bit that matches the size of the center of your connector. You may want to start with a small bit and work the hole larger and larger. You could even start with a hammer and nail, then use drill bits. If you don’t have a drill, start with a nail hole and use a file to get the hole to the required size. If you’re using a bolt on connector, make four more holes for the bolts – you can use the connector as a drilling guide.
Assemble the probe and mount in can
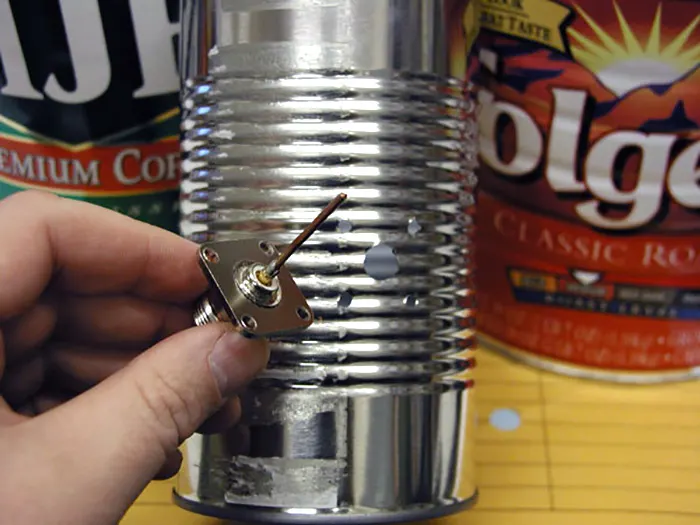
Now you’ll need that bit of wire. You’ll need a soldering iron or a friend with one as well. Cut the wire so that when it is stuck in the connector as shown, the total length of both the brass tube and wire sticking out past the connector is 1.21″. Get as close to this length as you can.
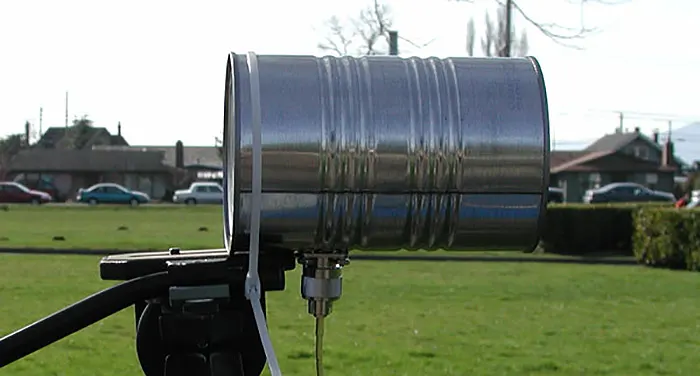
When you’ve got your wire correctly sized, solder it into the connector keeping it as straight and upright as you can. When it’s cooled, bolt or screw the assembly into your can. Put the heads of the bolts inside the can and the nuts on the outside to minimize the obstructions in your antenna. Your Done!
Connect your antenna to your wireless card or access point
To use your cantenna, you’ll need a special cable commonly called a “Pig Tail”. The pig tail connects your wireless card or access point to you antenna. One end of the cable will have a “N” Male connector (just right for connecting your your cantenna), while the other end will have a connector appropriate to your card or access point.
You’ll want to have a wireless NIC or access point with an external antenna connector. Otherwise, you may have to hack into the one you have to hook up the cable. I wouldn’t recommend this unless you’re good with a soldering iron and electronics. For this reason, I like the Agere Orinoco cards which have a nice antenna connector. Pig Tails can be hand made if you have the right tools, but it’s probably easier to get a pre-made one. Try:
- Fleeman Anderson & Bird
- Fleeman Anderson & Bird has a “cantenna kit” for sale that includes the connector and pigtail. Choose one of the “cables” links from the menu and look towards the bottom of the list.
- Antenna Systems
Hook up your cable, point the antenna at a friend’s, and see how far you can stretch you network. Be sure to let me know (greg@turnpoint.net) how it works.
This antenna has linear polarization. That means that how you rotate the antenna will affect the strength of your signal. Usually, you will want to put the connection straight down, but experiment with rotating the can while watching the signal strength on your PC to get the best performance.
For more information, check out these resources:
Copyright 2003-2007 Gregory Rehm – All rights reserved.
For information about reproducing this article in any format,
Contact the author: greg (at) turnpoint (dot) net
How To Build A Tin Can DIY WiFi Antenna

SHTFPreparedness may collect a share of sales or other compensation from the links on this page.
Are you looking to extend the range of your current WiFi network? You can build your own DIY wifi antenna out of a tin can.
And it will only cost you $5! It’s easier than you think and can be a serious game-changer in times of disaster.
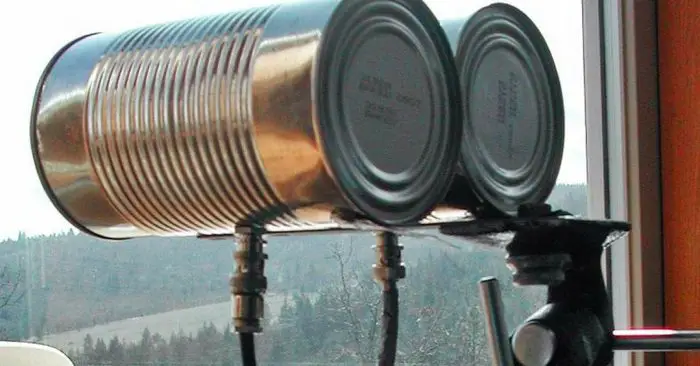
Image Credit: mattparkinson.eu
This is perfect if you’ve been experiencing home WiFi issues.
Instead of going out to buy a new internet modem, why not try out this easy DIY project first? Are you ready to learn how to make your own homemade long-range WiFi antenna?
This DIY build could also be great for post-disaster communications when WiFi signals are limited.
The more range you have the better you are going to be able to use your technology. Your tech is a force multiplier in disaster.
There are a number of reasons why this might be beneficial to you.
It could be that your daily living situation and your location puts you in a place where the WiFi signal strength is less than optimal.
Maybe you don’t have the internet at the moment and want to use your neighbors’ WiFi but can’t seem to get a good signal.
It might also be something that may help during a power outage. If you know how to make a WiFi antenna to get free internet, this is also useful.
As you can see, there are a number of reasons to try out this DIY WiFi antenna, or a cantenna, also known as a tin can WiFi antenna.
Tin Can DIY WiFi Antenna (Cantenna)
This is so frugal it may just put Belkin out of business if we all made one of these bad boys! Use an old tin can from dinner and have the range you need for less than a meal at McDonald’s.
This really is a simple DIY project that we all can do any time of the year to get the most of our modems at home.
Understanding antennas is a very helpful skill. You know, antennas affect many things outside of WiFi signals. You can even make an HDTV antenna that can get you FREE TV!
Although this DIY project involves creating a WiFi antenna, it’s important to point out that understanding antennas is a very helpful skill. You know, antennas affect many things outside of WiFi signals.
Did you know you can even make an HDTV antenna? An antenna for HDTV might not be something you need during a survival situation, but it could be some fun until then.
Every skill you learn right now will make you a better prepper and a better survivor.
A tin can DIY WiFi antenna improves your WiFi range so much that the modem companies tried to hide this little hack for years.
Collecting Your Supplies for Your DIY Wifi Antenna
The things you are going to need for this DIY home project include:
- A tin can (minimum diameter of 3 inches)
- An N-type female jack panel mount connector
- About 1¼” of 12-gauge copper wire
- Four nuts and bolts
- Drill
- Ruler
- Permanent marker
- Soldering iron
- Internet modem
Step 1 – Drill Holes in the Can
The first step is drilling holes into the tin can. Sounds easy enough, right? It is, but it’s a little bit more methodic than you’re thinking.
The N-connector needs to be mounted in the side of your can.
To do this, you need to drill holes in the right location to place the connector in the right spot on the can. This involves finding the right formula.
You can calculate your measurements using an online cantenna calculator.
The ¼ guide wavelength number determines how far up from the bottom, or metal, end of the can you should put the center of the hole. Using a ruler, you’ll measure up from the metal end and use the permanent marker to mark the spot.
When you use the drill to form the hole, you’ll want to choose a bit that matches the size of the connector. It’s ideal to start using a smaller bit to make the hole larger.
An alternative option is using a hammer and a nail for a small hole, followed by drill bits.
If you don’t have a drill, that’s okay. You can start out with a nail hole and then use a file to get the hole as big as it needs to be.
If the connector needs to be bolted on, you’ll need to make four more holes for the bolts. You can use the connector as a guide for where to drill the holes.
Step 2 – Attach the Connector to the Can
Next, you’ll use the soldering iron to cut the copper wire.
You’ll need to cut the wire so that the total length of the brass tube and wire stick out 1.21” past the N-connector. You’ll want to get as close to this length as possible.
When you have the wire at the right size, you can solder it into the N-connector. You’ll want to keep the copper wire as straight and upright as possible.
Once the copper wire has cooled, you will secure the assembly into your can using bolts or screws.
You will want to put the bolt heads inside the can and the nuts outside the can in order to reduce obstructions in your antenna.
Step 3 – Connect the Antenna
The next step is to connect the antenna you’ve just made to your wireless card or access point. You’ll do this using a special cable that’s commonly known as a “Pig Tail.” The cable will connect the wireless card or access point to your antenna.
The cable has an end known as the “N” Male connector. The other end has a connector that works with your wireless card or access point.
You’ll want an access point that has an external antenna connector or a wireless NIC.
Finally, you’ll want to hook up your cable. Point the antenna at one of your neighbor’s houses and see how far you can get your network to reach.
It’s worth noting that the WiFi antenna has what’s known as “linear polarization.” This means that the strength of your WiFi signal will be affected by how you rotate the antenna.
The connection will generally work best when it’s straight down, but be sure to experiment with your can to see how it affects your WiFi reach.
Final Results
If you’ve followed this guide, chances are you’ve probably greatly improved your WiFi reach. This is such an easy, effective life hack.
If you’ve tried out this DIY WiFi antenna, how did it work? Did you find that it greatly expanded your reach? What measurements turned out to be successful for you?
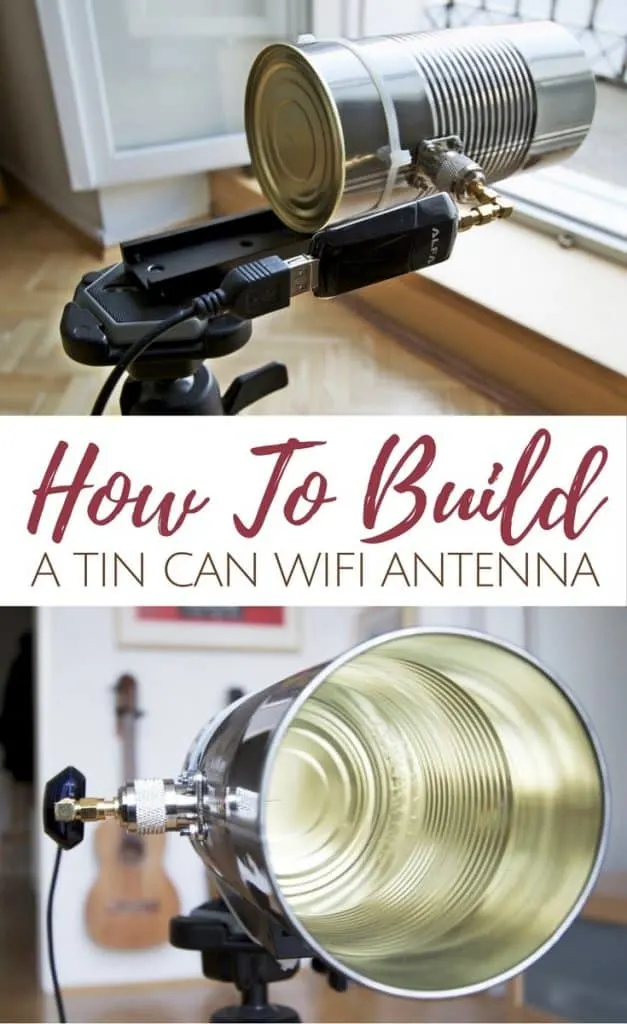
Image Credit: mattparkinson.eu