- How To Setup Remote Desktop From Windows To Linux
- Prepare Linux System
- GNOME Remote Desktop
- Xrdp
- SSH
- Connect From Windows Machine
- How to Setup Remote Desktop from Linux to Windows?
- How to Setup Remote Desktop to Linux VM From Windows?
- Как подключиться к Ubuntu из Windows с помощью RDP, SSH и VNC
- Зачем удаленно подключаться из Windows к Ubuntu
- Как выяснить IP-адрес компьютера с установленной ОС Ubuntu
- Подключение к Linux через SSH
- Подключение из Windows через RDP
- Подключение через VNC
How To Setup Remote Desktop From Windows To Linux
Microsoft’s Remote Desktop Protocol (RDP) has made Windows to Windows remote desktop connection a breeze as both the client and server are built into Windows operating systems.
Windows to Linux, or vice-versa, is slightly more complicated as you have to set up the Linux system as the client or server first. As our main goal is to access the Linux system remotely, we’ll primarily use RDP server implementations like xrdp or FreeRDP. SSH is a viable option as well for CLI login.
We’ve detailed the necessary steps to set up Remote Desktop from Windows to Linux with these methods, and more, in the sections below.
Prepare Linux System
First things first, you’ll need the IP Address of the Linux system you’re trying to access remotely. You can use the ip addr command for this. Once you have the IP, you can use your preferred method to set up Remote Desktop on Linux, after which you should skip ahead to Step 2.
GNOME Remote Desktop
Ubuntu supports desktop sharing by default thanks to GNOME Remote Desktop, which can operate through VNC (LibVNCServer) or RDP (FreeRDP). Setting up remote desktop with this method is extremely simple:
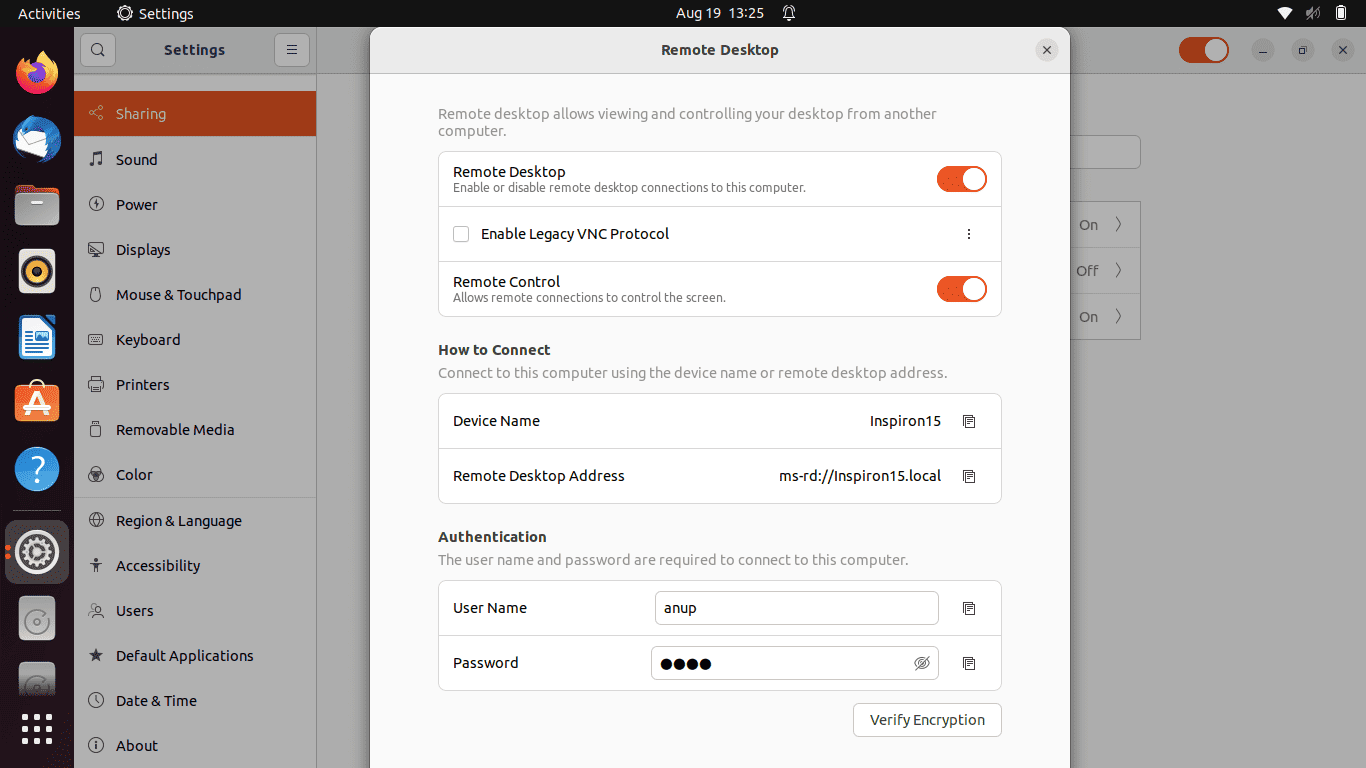
- Open Settings and go to the Sharing tab.
- Enable the Remote Desktop option.
- GNOME Remote Desktop uses RDP by default, but you can enable Legacy VNC protocol if you want.
- Also, note the device name, remote desktop address, user name, and password. These will be necessary later.
Xrdp
Xrdp is an implementation of RDP that supports graphical remoting. Additionally, it also has some useful features like two-way clipboard transfer and the ability to mount local drives on the client machine. Here’s how you can setup xrdp:
- First, install the xrdp package with sudo apt install xrdp .
- Permit xrdp to listen to connections (on port 3389 by default) with sudo ufw allow 3389 .
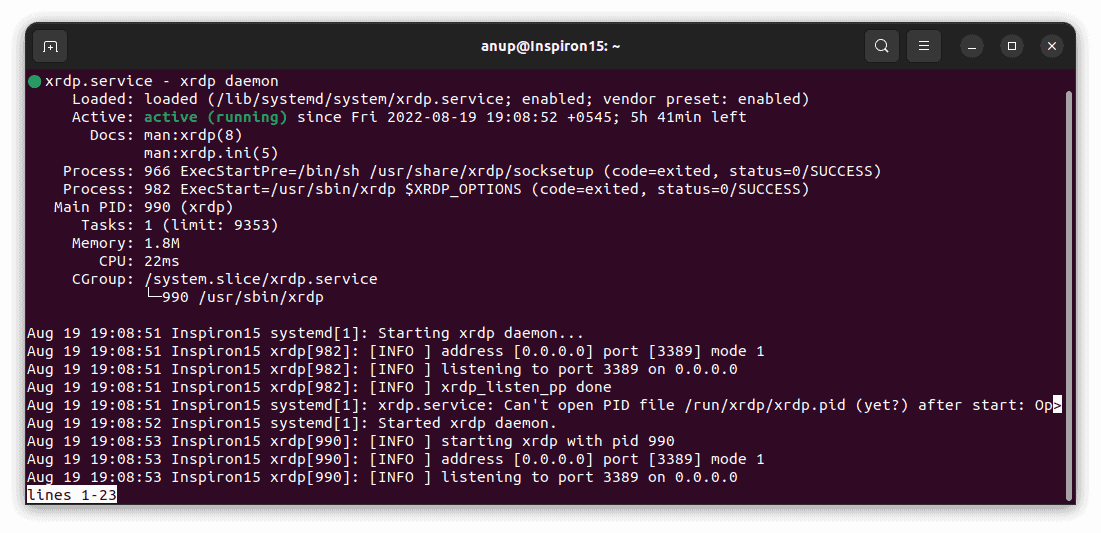
- Now, check the xrdp daemon status with systemctl status xrdp.service .
If the xrdp daemon is loaded and active (running), you’re good. You should log out of your account and skip ahead to Step 2 for steps for the Windows system.
But users often encounter various errors at this stage. In such cases, you’ll have to troubleshoot the issue and get xrdp running first.
- First, use the following commands to start, restart, then check xrdp’s status:
sudo systemctl start xrdp.service
sudo /etc/init.d/xrdp restart
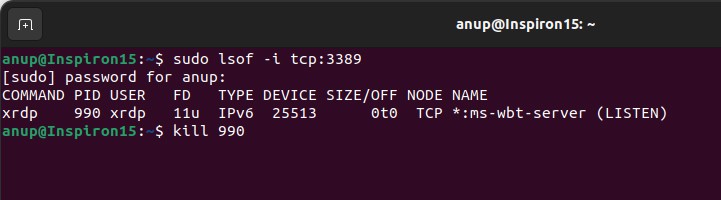
systemctl status xrdp.service - Failed to start xrdp daemon, possibly address already in use is a common error.
To fix this, enter sudo lsof -i tcp:3389 and note the PID of the xrdp instance that’s already running. Use kill to end the process and try starting xrdp now.
- Login failed for Display 0.
First, make sure you’re entering the correct login credentials.
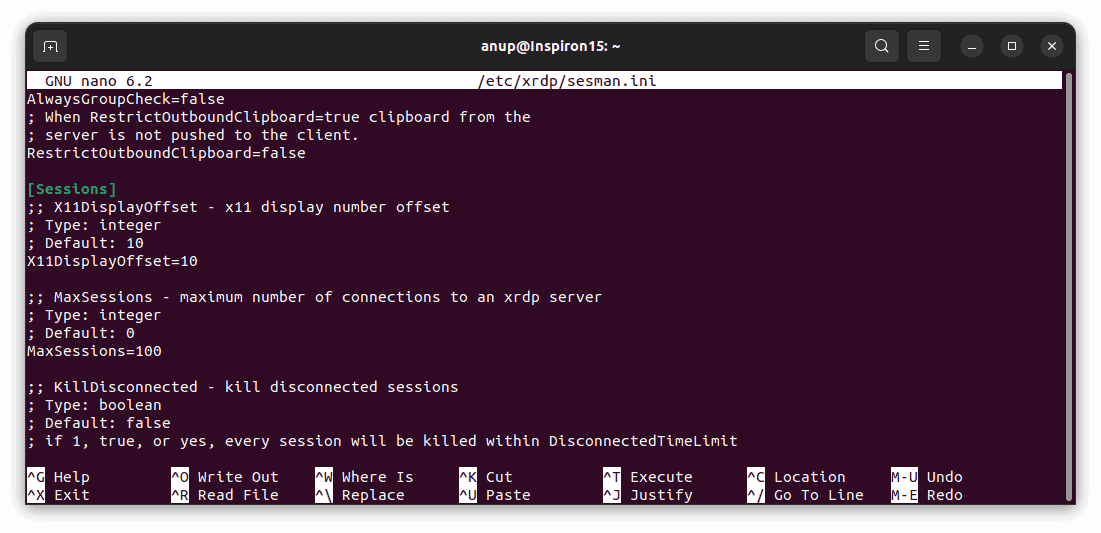
Once you’ve checked that, enter sudo nano /etc/xrdp/sesmain.ini . The Max Sessions field should be 50 by default. Change the value to 100 and save the changes.
Repeat the same for /etc/xrdp/sesman.ini , restart the xrdp service, and check if you can connect now.
- If you encounter a black screen or internal error when trying to connect, make sure you’re logged out of the Linux system when trying to connect.
SSH
The previous two methods used RDP and VNC for graphical login. But if you’re fine with just CLI access, SSH is a great option. Setting up SSH is very simple; just use the following commands to install, enable, and allow it through the firewall:
Before moving on, it’s also worth mentioning that NoMachine is an excellent choice in terms of performance if you’re fine with non-open source options.
Connect From Windows Machine
Both setting up and using Remote Desktop on the Windows machine is very simple. Here are the necessary steps for the RDP methods:
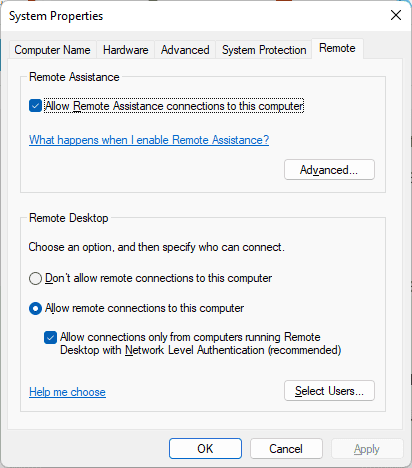
- Press Win + R, type systempropertiesremote , and press Enter.
- Enable the Remote Desktop and Remote Assitance features and press Ok.

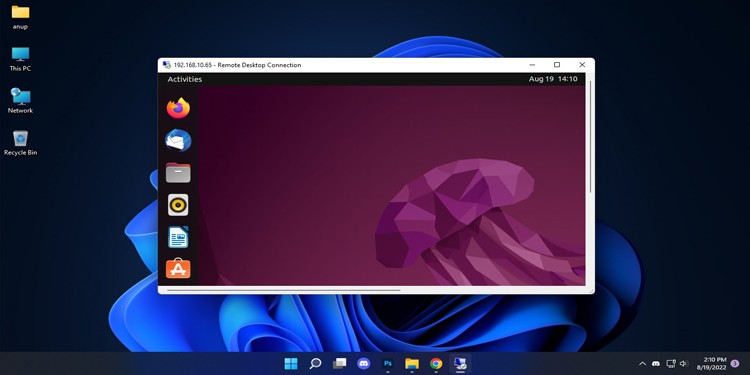
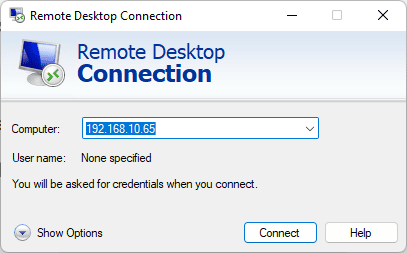
- Press Win + R, type mstsc , and press Enter.
- Optional: Click on Show Options to modify additional settings such as display and audio.
- In the Computer field, enter the Linux system’s IP Address from Step 1 and press Connect.

- Enter the Linux system’s login credentials for authentication.
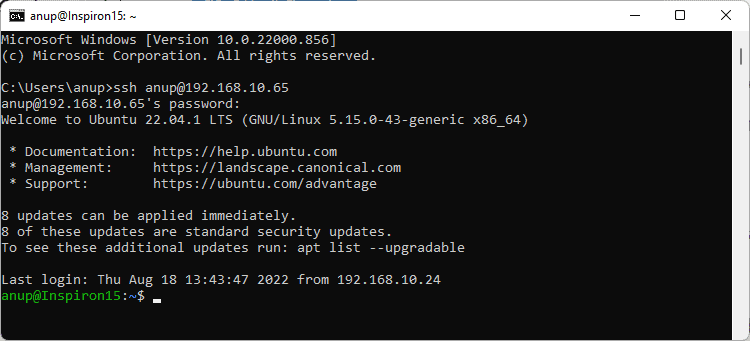
If you’re using SSH, simply enter ssh @ in a command prompt window and enter the password to authenticate and connect.
How to Setup Remote Desktop from Linux to Windows?
Setting up a remote desktop connection from Linux to Windows is even simpler. Ubuntu ships with the Remmina remote desktop client, which supports both RDP and VNC protocols. You can also manually install it with sudo apt install remmina remmina-plugin-vnc .
Here’s how you can set up Remote Desktop from Linux to Windows using Remmina:
- Check the section above for steps to ensure Remote Desktop and Remote Assistance are enabled on Windows.
- Use the ipconfig command and note the device’s IP.
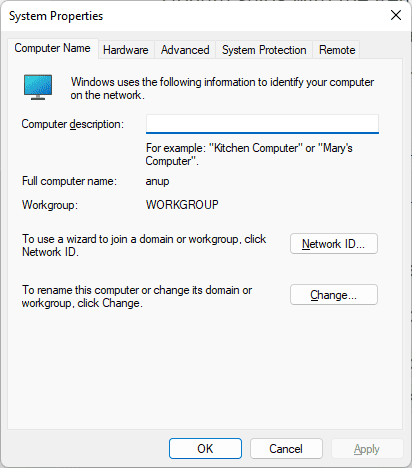
- Also, use the sysdm.cpl run command and note the Workgroup. By default, this will be WORKGROUP .
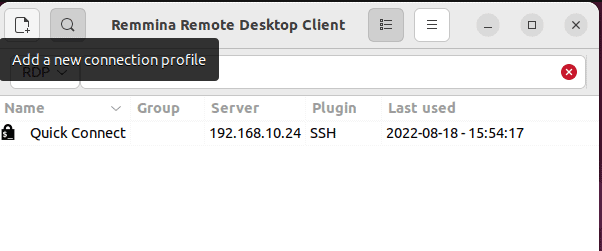
- On Linux, launch the Remmina client.
- Click on Add a new connection profile.

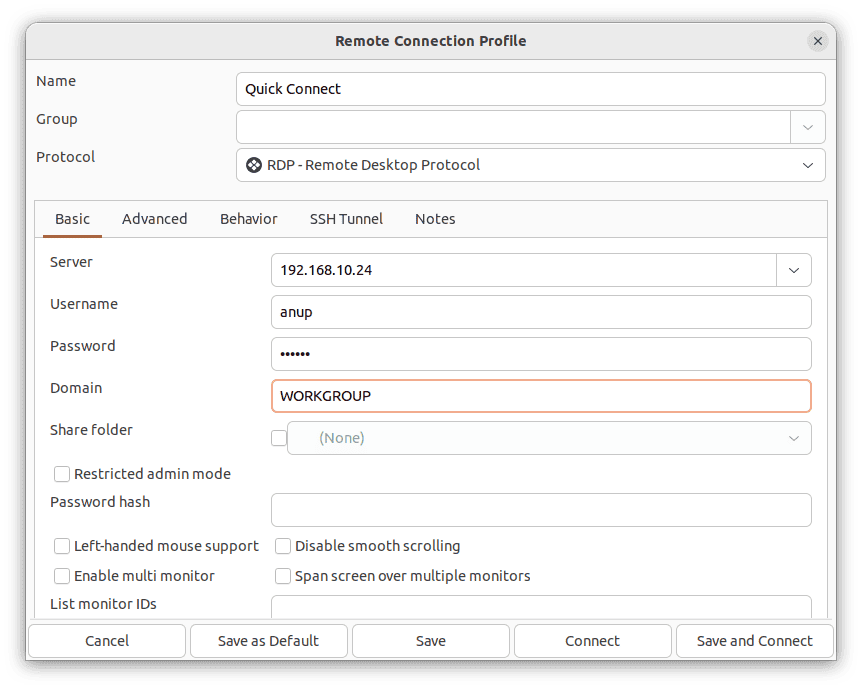
- Enter the IP from Step 2 just above in the server field.
- Fill in the username and password fields for authentication.
- Fill in the workgroup from Step 3.

- Press Connect, or Save and Connect as you prefer.
How to Setup Remote Desktop to Linux VM From Windows?
You can use the same steps that we’ve listed in this article to set up remote desktop from a Windows host to a Linux VM. The only difference is that you must ensure that the host and guest are on the same network. Here’s how you can do so:
- First, check the Windows host’s network configurations with ipconfig .
- Next, launch VMware or whichever hypervisor you’re using.
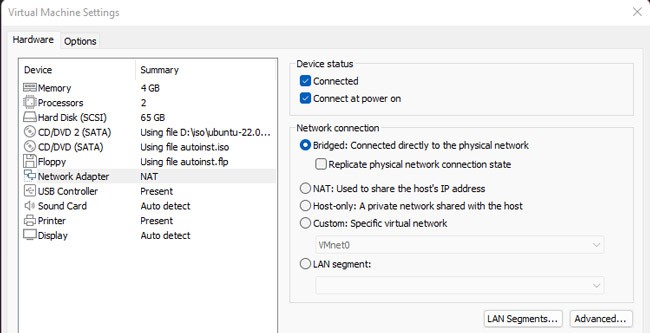
- Right-click the Linux VM and select Settings.
- In the Network Adapter section, set up a Bridged connection and press OK to save the changes.
- Power on the VM and use ip a to check the IP address.
- Assuming the first 3 parts of the address are the same as the Windows host, you should be able to set up the remote connection now.
Anup Thapa primarily covers Windows systems, networking, and computer hardware at TechNewsToday. Anup has been writing professionally for almost 5 years, and tinkering with PCs for much longer. His love for all things tech started when he got his first PC over 15 years ago. It was a Pentium IV system running Windows XP on a single 256 MB stick. He spent his formative years glued to this PC, troubleshooting any hardware or software problems he encountered by himself. Professionally, Anup has had brief forays into a variety of fields from coding and hardware installation to writing. In doing so, he’s worked with people of different backgrounds and skill levels, from average joes to industry leaders and experts. This has given him not just a versatile skill set, but also a unique perspective for writing that enables him to concisely communicate complex information and solve his reader’s problems efficiently. You can reach out to him at anup@technewstoday.com.
Как подключиться к Ubuntu из Windows с помощью RDP, SSH и VNC
Безлимитные тарифы интернета с высокой скоростью соединения упростили администрирование компьютеров. Сегодня все чаще помощь пользователям оказывается удаленно. Это удобно, ведь не надо тратить время на поездки и возможность подключиться есть практически круглосуточно.
Сегодня поговорим об удаленном подключении к Ubuntu из ОС Windows.
Зачем удаленно подключаться из Windows к Ubuntu
Не так важно, где находится удаленный компьютер – в соседней комнате или в другом регионе. Интернет убирает подобные ограничения, главное – чтобы связь оставалась стабильной на все время настройки. Это одинаково относится к машинам, работающим хоть на операционной системе Windows, хоть на Ubuntu. Последние используются, например, для развертывания сервера CS или Minecraft.
Причины, по которым требуется удаленное подключение:
- ручной запуск обновлений на компьютере с Ubuntu;
- настройка системы без подключения локального монитора, клавиатуры;
- работа с машиной, расположенной по другому адресу.
Пользователю доступно три варианта коннекта с компьютеров, работающих на ОС Windows. Выбор зависит от удобства и предпочтений: SSH через приложение PuTTY, встроенная поддержка RDP и виртуальная сеть VNC (понадобится предварительная настройка клиента). В любом случае перед работами понадобится выяснить IP-адрес компьютера, к которому предстоит подключаться.
Как выяснить IP-адрес компьютера с установленной ОС Ubuntu
Если есть физический доступ к компьютеру с установленной Ubuntu, на нем открывается терминал (комбинация клавиш Ctrl+Alt+T) и вводится команда ifconfig. В отображенном перечне данных имеет значение строка, начинающаяся с inet addr. Если используется подключение через Wi-Fi, то рядом будет его маркер в виде «wlan0». При проводном соединении фраза будет заменена на «eth0». Рядом отображается актуальный IP-адрес машины.
Второй способ заключается в применении функций графического интерфейса. Последовательность действий: найти значок подключения на панели, кликнуть правой кнопкой мышки, выбрать пункт «Сведения о подключении». Там и указан постоянный IP-адрес компьютера. Если доступа к нему нет, то можно выяснить данные через маршрутизатор. В панели управления отображаются активные пользователи вместе с их «контактами».
Подключение к Linux через SSH
Перед подключением на компьютер с Windows устанавливается приложение PuTTY. Это популярный инструмент для организации SSH-соединения, которое предоставит удаленный доступ к командной строке Ubuntu. Важно понимать, что этот режим требует определенного опыта в управлении, ведь здесь нет привычной мыши и «окошек», а все команды передаются в текстовом виде. Отчеты предоставляются в таком же виде.
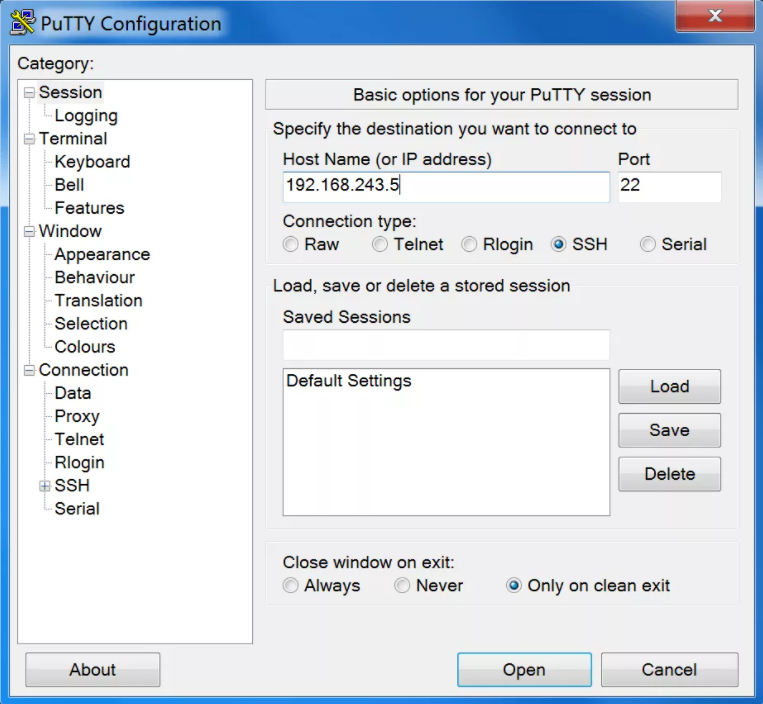
По умолчанию возможность коннекта через SSH в Ubuntu отключена. Так что предварительно эту систему требуется настроить. Активация функции выполняется вводом команды sudo apt install openssh-server (в той же консоли, где ранее был взят IP-адрес). Логин и пароль подключения будут те же, что используются при входе в операционную систему.
Из-за неудобства управления в текстовой среде этот вариант востребован для удаленной активации более удобных инструментов. Например, тех же протоколов RDP или VNC. В них также пригодится IP-адрес, поэтому получить минимальные навыки работы в консоли все равно рекомендуется. Это упростит решаемые задачи, если по каким-то причинам не удается соединение в других режимах.
Подключение из Windows через RDP
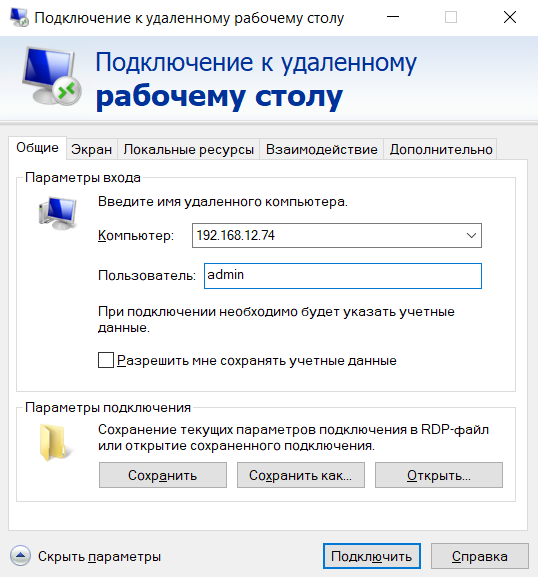
Способ подключения через службу Remote Desktop Protocol (RDP) распространен при работе с машинами на платформе Windows. Популярность инструмента объясняется просто – его поддержка встроена во все виды и версии операционных систем. Все, что понадобится для подключения, уже известно: это IP-адрес, логин и пароль от Ubuntu. Запускается утилита через поиск, называется она «Подключение к рабочему столу».
На компьютере-клиенте требуется установка приложения xrdp.
- Необходимо открыть окно термина нажатием комбинации клавиш Ctrl+Alt+T.
- Ввести текстовую команду sudo apt install xrdp и нажать «Ввод».
- Провести активацию программы командой sudo systemctl enable xrdp.
После установки надо ввести на компьютере-сервере данные доступа и нажать кнопку «Подключить». Если поставить галочку «Разрешить мне сохранять учетные данные», последующие входы будут выполняться без дополнительных вопросов. Но в первый раз пароль всегда вводится вручную. При желании создается отдельный конфигурационный файл (востребовано, когда много компьютеров с удаленным управлением).
После подключения пользователь видит рабочий стол компьютера на Ubuntu. Работа с его окнами не отличается от локального управления – функционируют все настроенные горячие клавиши, перетаскивание мышью. В некоторых версиях Ubuntu, например, 18.04 LTS, RDP не работает, пока не выйдешь из текущего пользователя. Подобные фишки обычно известны системным администраторам.
Подключение через VNC
Есть другой вариант удаленного рабочего стола – сеть Virtual Network Computing (VNC). Она тоже требует предварительной настройки обеих машин. Так, на компьютер с Ubuntu инсталлируется ПО, открывающее доступ к управлению.
- Открыть окно терминала.
- Ввести команду sudo apt update.
- Установить сервер: sudo apt install tightvncserver.
- Активировать его: sudo tightvncserver.
Система предложит ввести пароль для подключения. Он понадобится при активации удаленного соединения, поэтому стоит записать (запомнить) внесенные данные.
На этом все! TightVNC Server готов к работе, остается следом настроить компьютер на Windows. Программа доступна на официальном сайте разработчика в двух версиях: 32 и 64-бит.
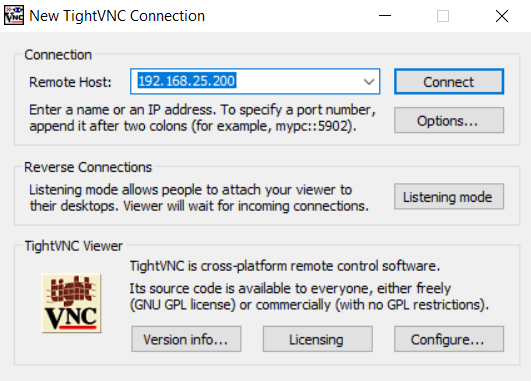
После инсталляции и запуска достаточно ввести IP-адрес хоста и пароль доступа, введенный после активации сервера на Ubuntu. Схема работы VNC аналогична предыдущему примеру: пользователь видит перед собой удаленный рабочий стол и управляет функциями операционной системы, как будто сидит за компьютером локально.