- Установка принтера Canon в Linux
- Установка принтера Canon в Linux : 2 комментария
- How To Install Canon Printer Driver in Ubuntu Linux
- Canon Printer Driver in Ubuntu Linux
- Method 1: Install Canon Printer Driver Via PPA
- Method 2: Install Canon Driver Via Synaptic Package Manager
- Method 3: Install Canon Printer Driver Via Foomatic DB
- Method 4: Add Your Printer via GUI Interface
- Method 5: Download Software From Canon Support
- Final Words
- Принтеры Canon
- Другой вариант с использованием Canon UFRII
- Canon MF4730
- Ссылка
- Для использующих драйвер принтера Canon CAPT (серия LBP)
Установка принтера Canon в Linux
Установка драйверов для принтеров Canon всегда нетривиальна (в части настройки). Ниже мы покажем как установить драйвер для популярного принтера Canon LBP2900 (у Вас может быть другой принтер Canon из числа поддерживаемых CAPT). Эта инструкция подойдёт для следующих принтеров Canon:
i-SENSYS LBP-2900
i-SENSYS LBP3000
i-SENSYS LBP3010
i-SENSYS LBP3100
i-SENSYS LBP3250
i-SENSYS LBP3310
i-SENSYS LBP5050
i-SENSYS LBP5050n
i-SENSYS LBP6300dn
i-SENSYS LBP7200Cdn
Laser Shot LBP-1120
Laser Shot LBP-1210
Laser Shot LBP2900
LaserShot LBP3000
Laser Shot LBP3300
LBP-3200
LBP5000
LBP5100
LBP5300
Все операции производятся от имени привилегированного пользователя root, поэтому запустите Терминал (konsole) и поднимитесь до root:
Временные файлы удобней разместить в директории /tmp (или другой, если Вы думаете что они Вам понадобятся после):
# tar -xvf CAPT_Printer_Driver_for_Linux_V200_uk_EN.tar.gz
Ставим драйвера из пакета CAPT (Canon Advanced Printing Technology):
# cd CAPT_Printer_Driver_for_Linux_V200_uk_EN/Driver/RPM/
# rpm -ivh cndrvcups-capt-2.00-2.i386.rpm cndrvcups-common-2.00-2.i386.rpm
Теперь пошла настройка. Обновляем из репозиториев Avahi LibDNS с которым связан cupsd:
# yum update avahi avahi-compat-libdns_sd avahi-glib
Необходимо прогарантировать создание структур пакета CAPT и выставление верных прав доступа к файлам:
# mkdir /var/captmon
# mkdir /var/ccpd
# mkfifo /var/ccpd/fifo0
# chmod 777 /var/ccpd/fifo0
# chown root:root /var/ccpd/fifo0
# chmod -R a+rx /usr/share/cups/model
Теперь, в файле /etc/udev/rules.d/50-udev.rules прописываем:
KERNEL==»usb/lp*», BUS==»usb», SYSFS==»04a9″, SYSFS==»2676″,NAME==»usb/%k»,MODE=»0666″,RUN+=»/etc/init.d/ccpd restart»
На редактирование этот файл вызывает командой:
Если мы этого не сделаем, то заработавший принтер «потеряется» после перезагрузки компьютера
Перезапускаем службу CUPS:
Проверяем появился ли драйвер для нашего Canon LBP-2900 в системе:
Да, всё нормально. Теперь регистрируем принтер:
# lpadmin -p LBP2900 -m CNCUPSLBP2900CAPTK.ppd -v ccp:/var/ccpd/fifo0 -E
И наконец, добавляем принтер в CUPS:
# ccpdadmin -p LBP2900 -o /dev/usb/lp0
CUPS_ConfigPath = /etc/cups/
LOG Path = None
UI Port = 59787
Entry Num : Spooler : Backend : FIFO path : Device Path : Status
—————————————————————————-
[0] : LBP2900 : ccp : /var/ccpd/fifo0 : /dev/usb/lp0 : New!!
Принтер добавлен. Запускаем демона от Canon — ccpd:
Теперь запустим GUI монитора печати для принтеров Canon:
Монитор соединится с принтером и покажет его состояние. Если соединение прошло неуспешно — выключите и включите питание принтера.
Осталось добавить демона ccpd в автозагрузку:
# ln -s /etc/init.d/ccpd /etc/rc5.d/S99ccpd
Если Вам не нравится этот способ, можно вместо этого прописать инструкцию
в файл /etc/rc.local вызвав его на редактирование командой:
Установка принтера Canon в Linux : 2 комментария
How To Install Canon Printer Driver in Ubuntu Linux
Canon is one of the largest printing giants in the world. It is used widely for both industrial, office, and home usage. Normally, using a mobile printer is easy and doesn’t require a lot of computing knowledge. On Windows, you can find the official software driver for each printer device. But, in Ubuntu Linux, it automatically detects the printer, and the CPU transfers the print command to the printer. However, if you have any issues setting up your Canon printer on your Ubuntu system, you can install a few packages on your system and make your printer ready. There are a few methods available on the web that you can use to install the Canon printer driver in Ubuntu and other Debian distribution-based systems.
Canon Printer Driver in Ubuntu Linux
In Ubuntu Linux, you don’t need to install printer drivers to connect through a Canon printer. You can find the default pre-installed PostScript Printer Description (PPD) system on the device to select your printer model from the drop-down menu. Though Canon also provides a Linux software driver for a few and specific models of printers. In this post, we will see how you can install the Canon Printer Driver in Ubuntu Linux.
Method 1: Install Canon Printer Driver Via PPA
Installing the Canon printer on a Ubuntu Linux system is not that much difficult. A Personal Package Archive (PPA) command is available on the web that you can use to install and update the Canon printer driver on your system.
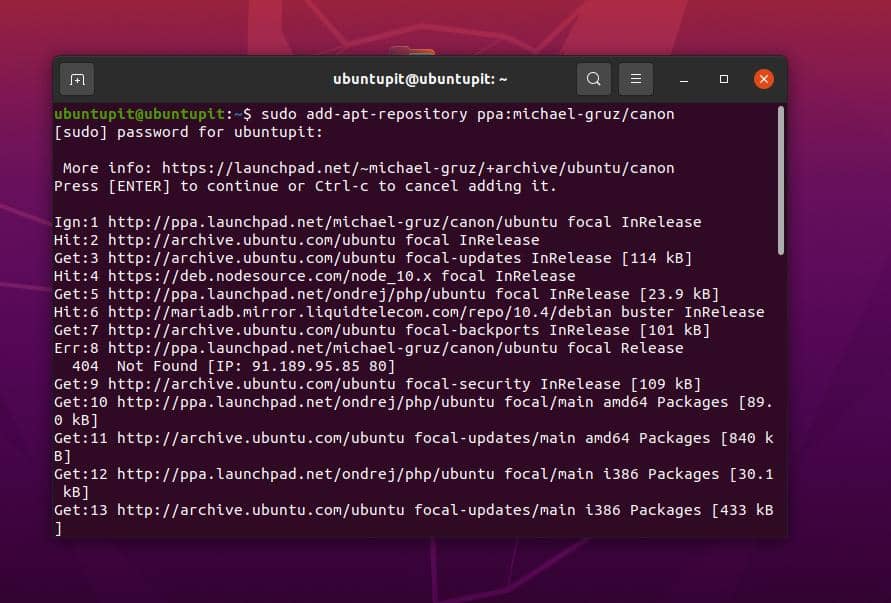
First, run the following PPA command on your terminal shell, then update your Linux repository to install the Canon printer driver on your Ubuntu Linux.
sudo add-apt-repository ppa:michael-gruz/canon sudo apt-get update
If you find any issues while installing the PPA command given above, you can run the following alternative PPA command given below.
sudo add-apt-repository ppa:thierry-f/fork-michael-gruz
When the install finishes, you may now open your web browser and load the following localhost address. You can now find your printer name and model number to set up your printer on the browser web interface.
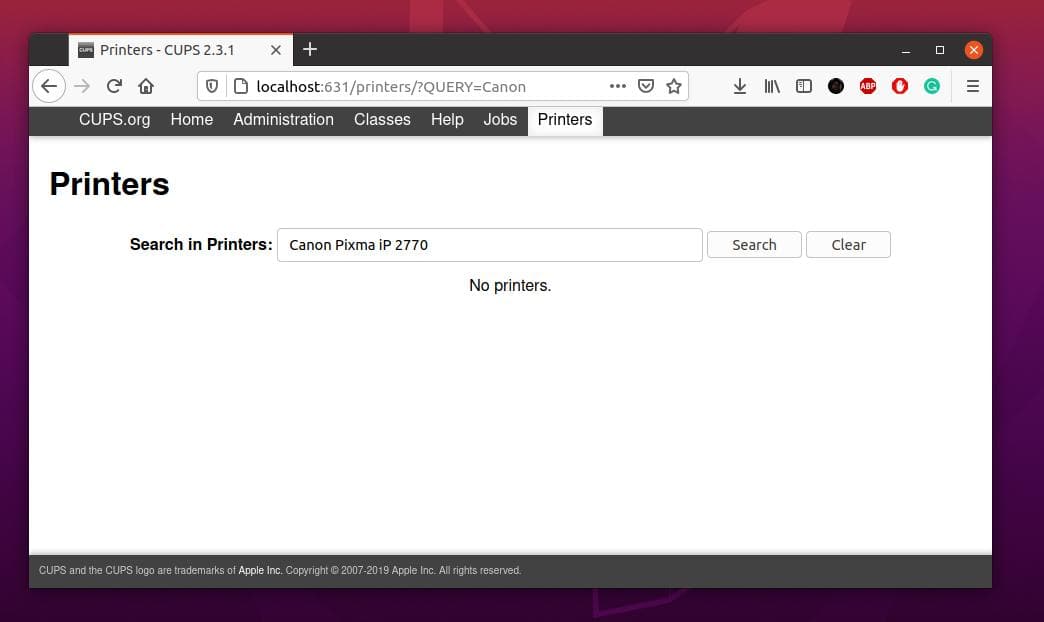
After opening the localhost page on your browser, you can find the ‘Add Printer’ option on the web application. Click on the blank search box and search for your printer model. When your printer name and model appear in the search result, click on the model number to add the printer to your Ubuntu system.
Method 2: Install Canon Driver Via Synaptic Package Manager
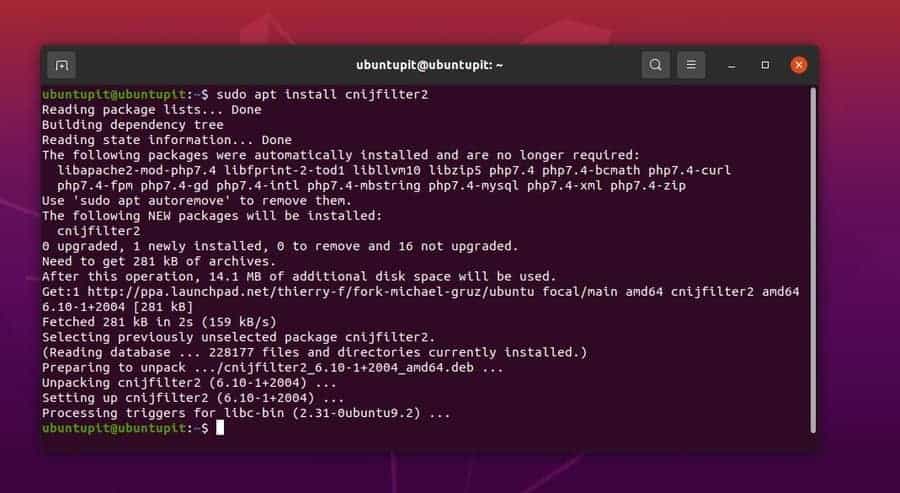
If you own a multi-function Canon printer with both a printer and a scanner, this method will probably help you install your printer’s driver on your Ubuntu Linux. First, run the following aptitude command-lines on your terminal shell to install the scanner and printer driver.
sudo apt install scangearmp2 sudo apt install cnijfilter2
We will now install a few library files for the Canon printer on the Ubuntu system through the Synaptic package manager. If you don’t have the Synaptic package manager installed on your system, run the following command on your terminal shell to install it.
sudo apt-get install synaptic
After installing the Synaptic package manager, please open it and find the following library tools. When the search result appears, install the Canon Cups driver tools from the Synaptic package manager.
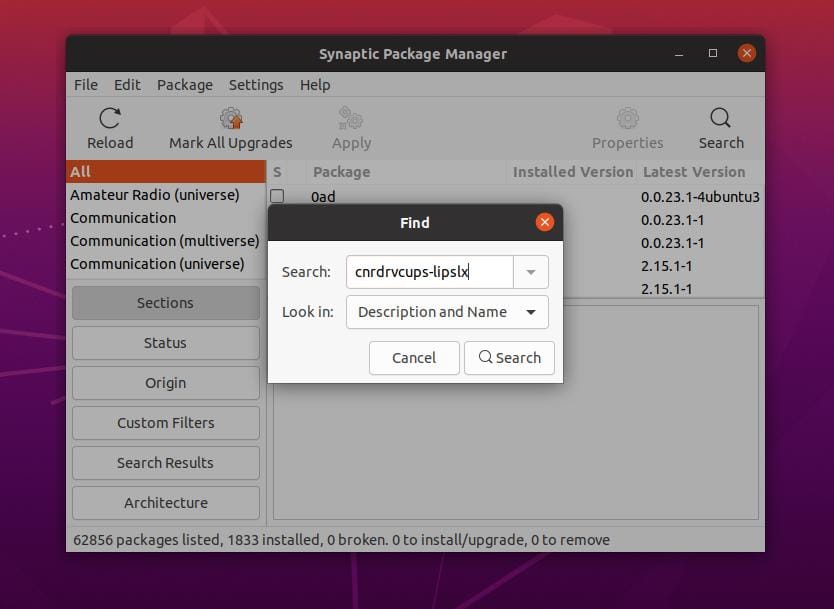
Install all the three packages that are enlisted below to configure your printer properly with your Linux system. When the install finishes, reboot your system and try to connect your Canon printer.
cnrdrvcups-lipslx cnrdrvcups-ufr2-uk cnrdrvcups-ufr2-us
Method 3: Install Canon Printer Driver Via Foomatic DB
In modern Linux distributions, a native printer driver software comes pre-installed with a printer database. Here, we will see how to use the Foomatic DB on a Ubuntu system to configure a Canon printer.
First, run the following command-line on your shell to install the Foomatic DB if you can’t find it on your device.
sudo apt-get install cups cups-client "foomatic-db*"
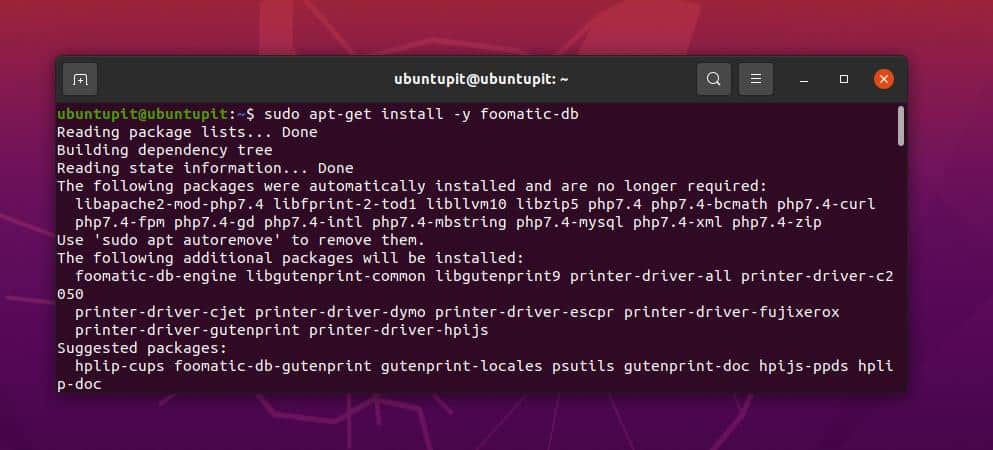
If you find any issues while installing the Foomatic database, you can run the following alternative command given below.
sudo apt-get install -y foomatic-db
Then you might need to allow your user account to use the Foomatic database. You can add a new user or allow your existing user to use the Linux lpadmin tool.
# adduser YOUR_NORMAL_ACCOUNT lpadmin
There you go, you can try printing a new page to test if your Canon printer is functioning on your Ubuntu system or not.
Method 4: Add Your Printer via GUI Interface
Ubuntu also offers you to add your printer into the system from the graphical setting menu. To add your Canon printer, first, you need to open the settings menu, which you can find at the top-right section on your screen. After opening the settings, find the ‘Printers‘ menu. And, there you go, plug your printer and click on the search printer button.
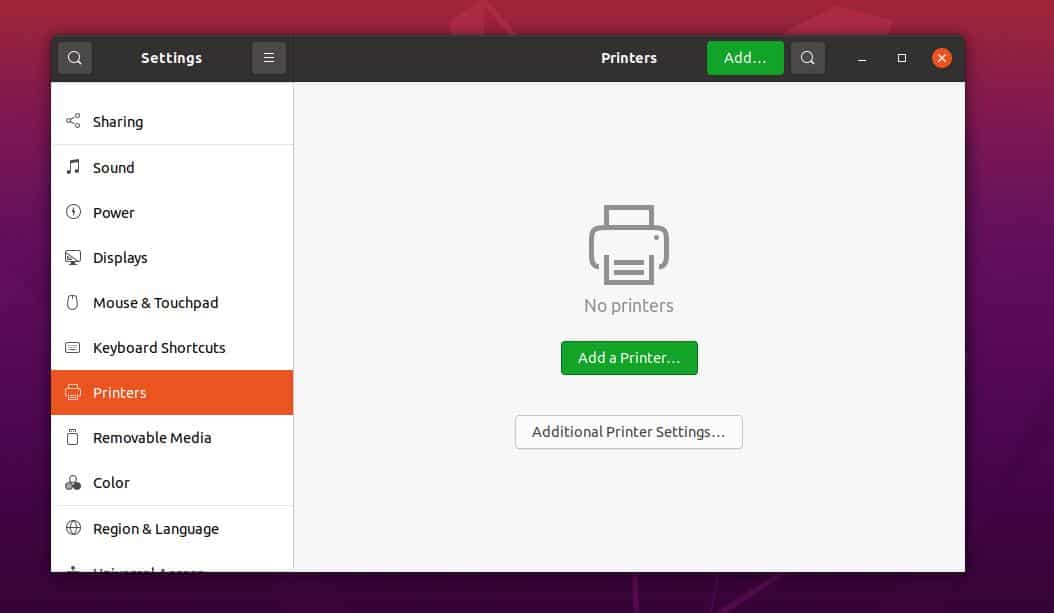
When the auto scan finds your printer, it won’t take more than a few seconds to connect your Canon printer. Here, I’m using a Ubuntu Linux with the Gnome DE; if You’re using any different desktop environment, the setting location might be in a different place.
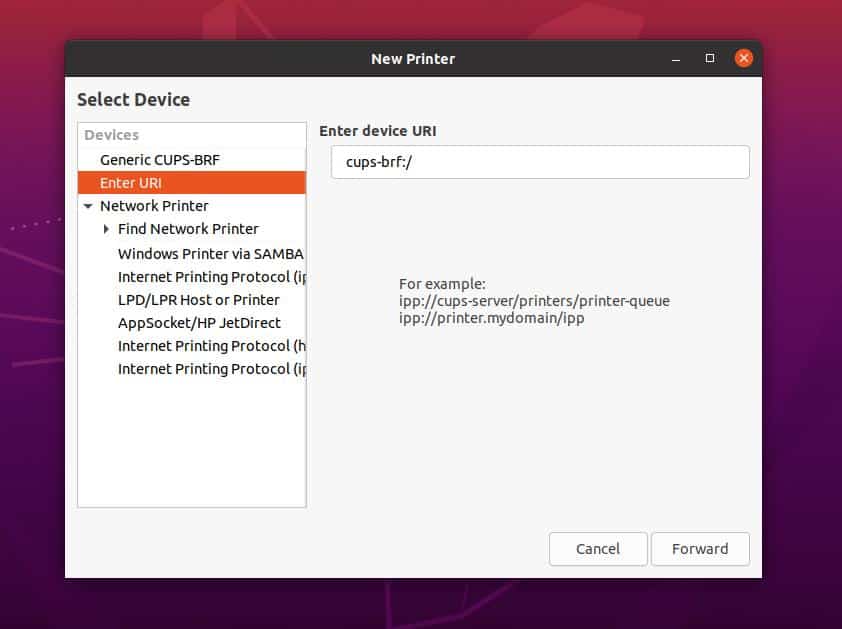
After adding your printer to your device, you can use the printer to print documents through a local area network system. You need to find the network printer to configure with your device. Ubuntu also allows you to connect the printer through the device URL.
Method 5: Download Software From Canon Support
Officially, Canon provides printer drivers and software for only a few models. You can find and download the Debian package of your printer driver from Canon’s website. Canon distributes software geolocation-wise. It would be clever to visit all the Canon domains for your printer’s driver to find the appropriate driver.
To download the Debian driver package for your printer, you need to select the ‘Support’ menu from Canon’s website. Under the Support tool, you will find the ‘Downloads and Help’ menu to download your desired package. From the drop-down menu, select your printer’s model and OS version and hit the Enter button to start downloading.
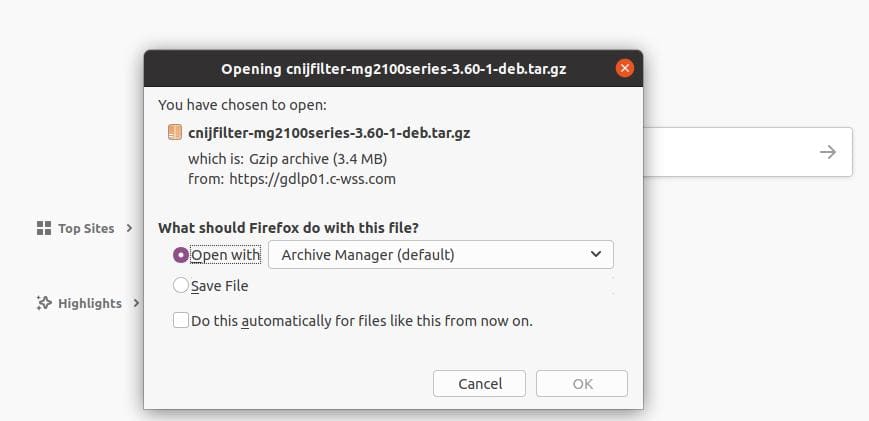
After downloading, you need to install it through the software store of Ubuntu. If you still have an issue with your printer, you can download the source code of the printer driver and install it through installing software via the source-code on Linux.
Final Words
I’ve described a few methods on how you can install the Canon printer driver on your Ubuntu Linux system in the entire post. If you still have issues connecting your Canon printer on Ubuntu after trying all the methods mentioned above, make sure that your printer is functional. Watch the printer indicator lights and the ink level to avoid printing errors.
Please share it with your friends and the Linux community if you find this post useful and informative. We also encourage you to write down your opinions regarding this post in the comment section.
Принтеры Canon
Предварительно установите данные пакеты (возможно часть у вас уже установлена):
$ su - (минус обязателен) # apt-get update # apt-get install libturbojpeg i586-libturbojpeg i586-libbeecrypt7 libbeecrypt7 libbeecrypt-devel i586-libbeecrypt-devel i586-libjbig libjbig i586-libjbig-devel.32bit jbig-utils libjbig-devel i586-libxml2 libxml2 i586-glibc-core i586-libstdc++6 libstdc++6 libgcrypt20 i586-libgcrypt20 i586-libgcrypt-devel libgcrypt-devel i586-libjpeg.32bit i586-libzstd.32bit libzstd libglade i586-libgladeui2.0.32bit i586-libglade.32bit libglade-devel libncurses i586-libncurses.32bit i586-liblzma.32bit
Нужен драйвер версии 3.4 (более новые не корректно работают)
Скачать можно например отсюда [1]
Распаковать например в директорию /home/user/Загрузки
$ su - (минус обязателен) перейдите в директорию # cd /home/user/Загрузки/linux-UFRII-drv-v340-uken выполните скрипт # ./install.sh
на сообщения об ошибках не обращайте внимание
перегрузите cups # systemctl restart cups подключите принтер и установите его через # cnsetuputil
тип подключения usb, напечатайте тестовую страницу из свойств принтера
(проверено на 8 сп, Canon MF4410, 13.07.2020 ov@)
Другой вариант с использованием Canon UFRII
Взять на сервере Canon драйвер (в моём случае это linux-UFRII-drv-v520-uken-05.tar.gz) Скачать можно здесь repo Canon
apt-get install ./linux-UFRII-drv-v520-uken/64-bit_Driver/RPM/cnrdrvcups-ufr2-uk-5.20-1.x86_64.rpm
Настраиваем принтер через web интерфейс cups, всё.
В отличие от описанного выше способа печатает в цвете.
(проверено на p8, Canon imageRunner 3025, 10.01.2021 boyarsh@)
Canon MF4730
Проверено на Рабочей станции 10.1, 2023-03-27 @alexunderboots
- 1. Выкачиваем свежую версию драйвера с сайта Canon, распаковать архив, в папке x64 взять rpm (проверено на версии 5.70-1.11)
- 2. Перепаковываем rpm без скриптов и устанавливаем новым пакет
# apt-get update # apt-get install libturbojpeg libbeecrypt7 libbeecrypt-devel libjbig jbig-utils libjbig-devel libxml2 glibc-core libstdc++6 libgcrypt20 libgcrypt-devel libjpeg8 libzstd libglade libgladeui2.0 libglade-devel libncurses liblzma
# systemctl restart cups # cnsetuputil2
- 5. Добавляем принтер через cups, а для сканирования необходимо на самом МФУ нажать кнопку Scan и выбрать Тип сканирования: Удалённый сканер
Ссылка
Для использующих драйвер принтера Canon CAPT (серия LBP)
Предварительно необходимо установить пакет initscripts-compat-fedora