- Команда chown Linux
- Команда chown Linux
- 1. Синтаксис и опции
- 2. Использование chown
- Выводы
- How do I change the owner of a directory in Linux?
- chown command syntax
- Changing the owner of a directory
- Changing the ownership of all sub-directories
- Changing the owner of a file
- Changing the owners of multiple files
- Changing the owner of directory and file at once
- Changing the owner using wildcards
- Conclusion
- About the author
- Talha Saif Malik
- How to Change Ownership of Files and Folders Recursively
- chown recursively
- Change both owner and group recursively
- Conclusion
- Use chown to set the ownership of all a folder’s subfolders and files?
- 6 Answers 6
Команда chown Linux
Основа философии Linux — все объекты операционной системы — это файлы, для предоставления доступа к тем или иным возможностям системы мы просто даем доступ пользователю к нужным файлам или убираем. Я более подробно рассказывал обо всех правах в статье права доступа к файлам в Linux, здесь же скажу только что у каждого файла есть три группы прав: для владельца, группы и всех остальных.
При создании файла ему тот пользователь, от имени которого он был создан становится его владельцем, а группой устанавливается основная группа владельца. Но владельца файла и группу можно менять, для этого используются команды chown и chgrp. В этой статье будет рассмотрена команда chown linux, а также основные примеры её использования.
Команда chown Linux
1. Синтаксис и опции
Синтаксис chown, как и других подобных команд linux очень прост:
$ chown пользователь опции /путь/к/файлу
В поле пользователь надо указать пользователя, которому мы хотим передать файл. Также можно указать через двоеточие группу, например, пользователь:группа. Тогда изменится не только пользователь, но и группа. Вот основные опции, которые могут вам понадобиться:
- -c, —changes — подробный вывод всех выполняемых изменений;
- -f, —silent, —quiet — минимум информации, скрыть сообщения об ошибках;
- —dereference — изменять права для файла к которому ведет символическая ссылка вместо самой ссылки (поведение по умолчанию);
- -h, —no-dereference — изменять права символических ссылок и не трогать файлы, к которым они ведут;
- —from — изменять пользователя только для тех файлов, владельцем которых является указанный пользователь и группа;
- -R, —recursive — рекурсивная обработка всех подкаталогов;
- -H — если передана символическая ссылка на директорию — перейти по ней;
- -L — переходить по всем символическим ссылкам на директории;
- -P — не переходить по символическим ссылкам на директории (по умолчанию).
Утилита имеет ещё несколько опций, но это самые основные и то большинство из них вам не понадобится. А теперь давайте посмотрим как пользоваться chown.
2. Использование chown
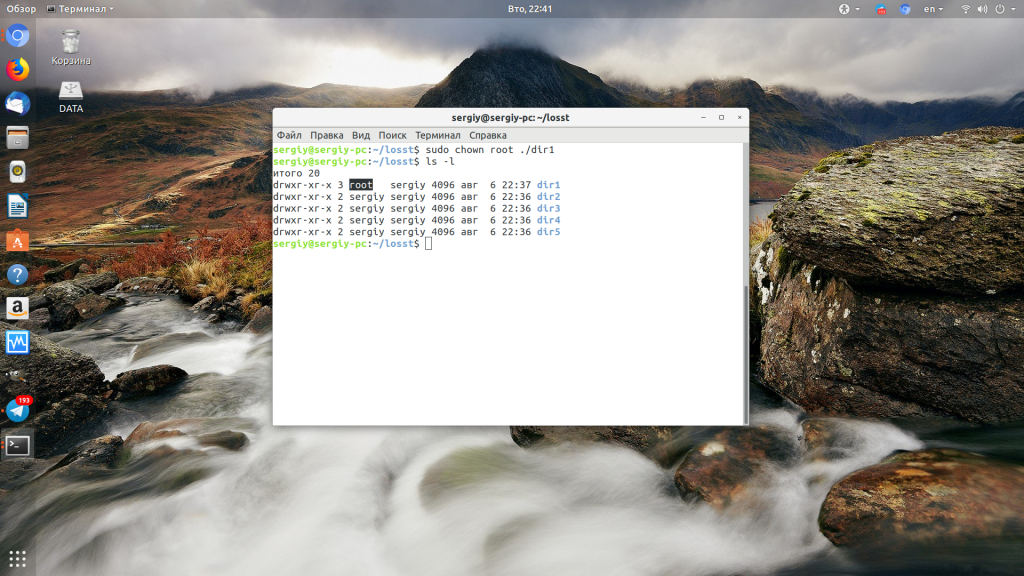
Например, у нас есть несколько папок dir и их владелец пользователь sergiy:

Давайте изменим владельца папки dir1 на root:
Если вы хотите поменять сразу владельца и группу каталога или файла запишите их через двоеточие, например, изменим пользователя и группу для каталога dir2 на root:

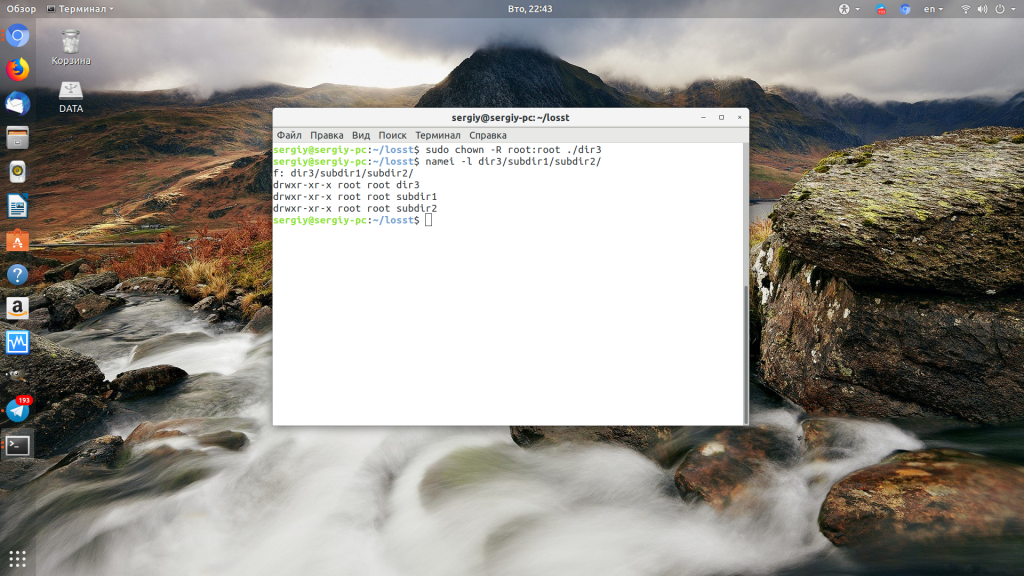
Если вы хотите чтобы изменения применялись не только к этому каталогу, но и ко всем его подкаталогам, добавьте опцию -R:
Дальше давайте изменим группу и владельца на www-data только для тех каталогов и файлов, у которых владелец и группа root в каталоге /dir3:
chown —from=root:root www-data:www-data -cR ./
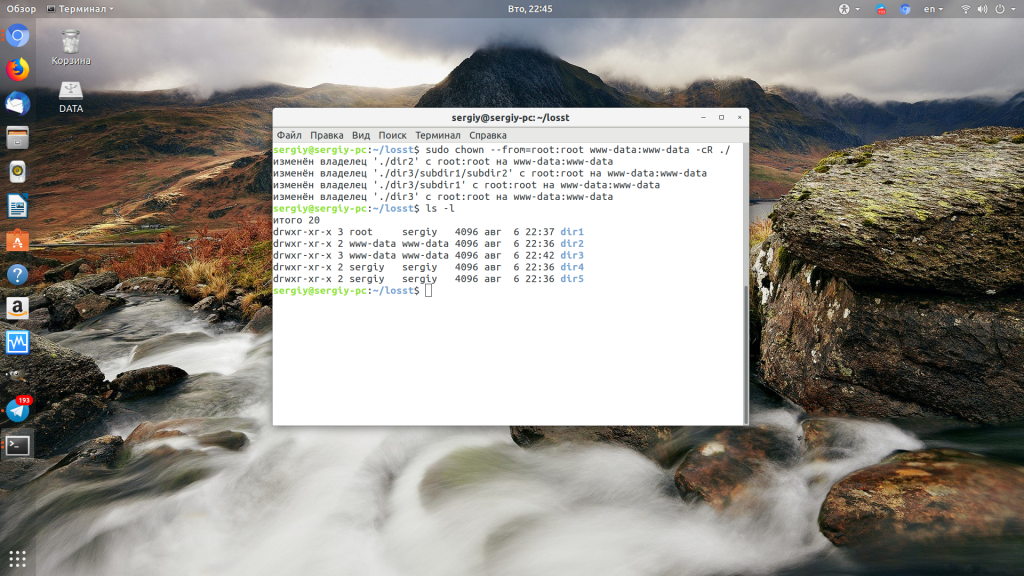
Для обращения к текущему каталогу используйте путь ./. Мы его использовали и выше. Далее указываем нужную группу с помощью опции —from и просим утилиту выводить изменения, которые она делает в файловой системе с помощью опции -c.
Выводы
Команда chown очень простая и позволяет только менять владельца и группу. Если вы хотите более подробно настроить права для владельца, группы и всех остальных, вам понадобится команда chmod. Права — довольно частая проблема при настройке работы различных программ, знание двух этих команд плюс ls и namei может помочь исправить много ошибок.
Обнаружили ошибку в тексте? Сообщите мне об этом. Выделите текст с ошибкой и нажмите Ctrl+Enter.
How do I change the owner of a directory in Linux?
![]()
All files and directories that exist on your Linux system have an owner, a group, and permission access rights that are granted to the file owners, its group members, or others. The chown command permits a Linux user to change any directory or file’s ownership. In this post, we will demonstrate the usage of the chown command for changing ownership through practical examples. But firstly, you should understand why you would want to change the ownership of any directory or file?
Here is the list of few scenarios in which you want to do this:
- For example, you want an already created directory or file to be accessible to a particular user.
- When a user leaves an organization, all of his data comes under the responsibility of another employee. Therefore, you want to change the ownership of the new team member.
- Changing directory or file ownership is also necessary when you are writing a script that has to be used by only a specific person.
- Transferring files between different Linux systems also requires changes in files and directories ownership.
Now let’s check out the syntax of the chown command.
chown command syntax
Utilize the “User” for the username or replace it using the user ID, also known as UID. Add the group name in the “Group” part of the GID (group ID). At the end of the chown command, add files or directories for which you want to change the ownership.
Changing the owner of a directory
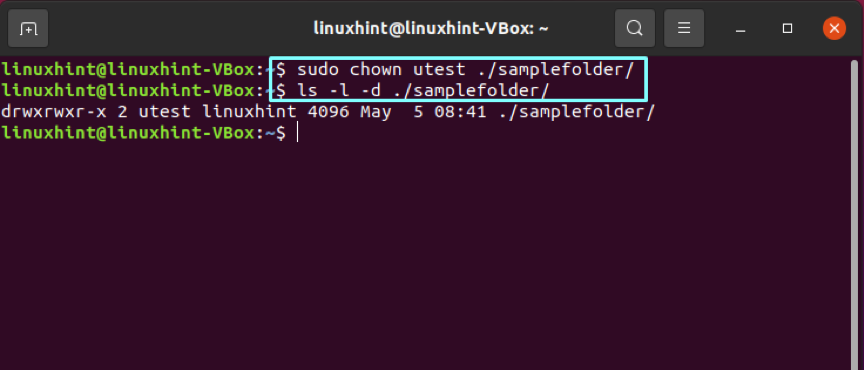
We have created a separate user named “utest” and a group “ugroup” for demonstrating the examples. To change the ownership of any directory, utilize the chown command with the username and path of the directory.
Now, write out the “ls” command and check if your directory ownership is updated or not.
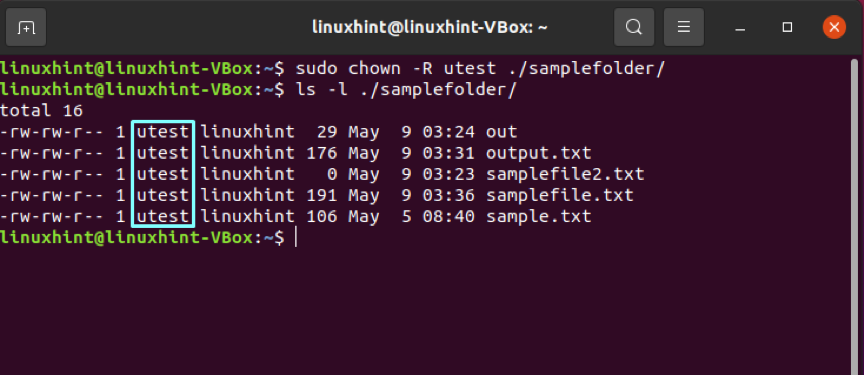
Changing the ownership of all sub-directories
Utilize the “-R” option of the chown command for changing the owners of all the files or folders present in a directory.
List out the directory content to view the results.
Changing the owner of a file
First of all, list out the file content to know about its ownership.
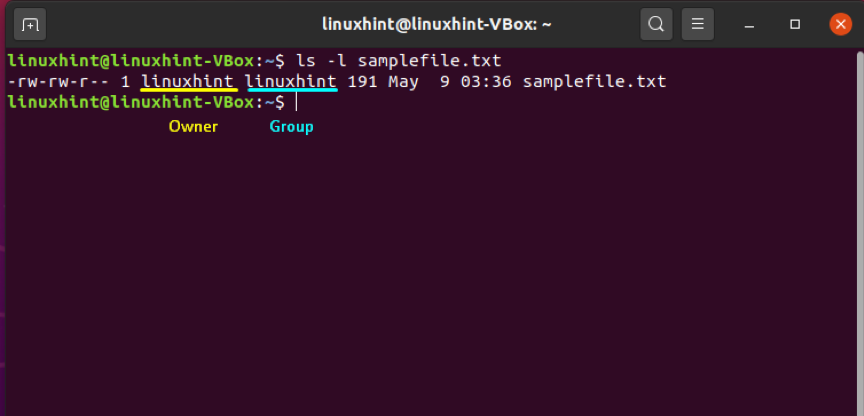
After that, specify the name of the user who you want to be the new owner of this file. In our case, we have chosen “utest” to avail the ownership of “samplefile.txt.”
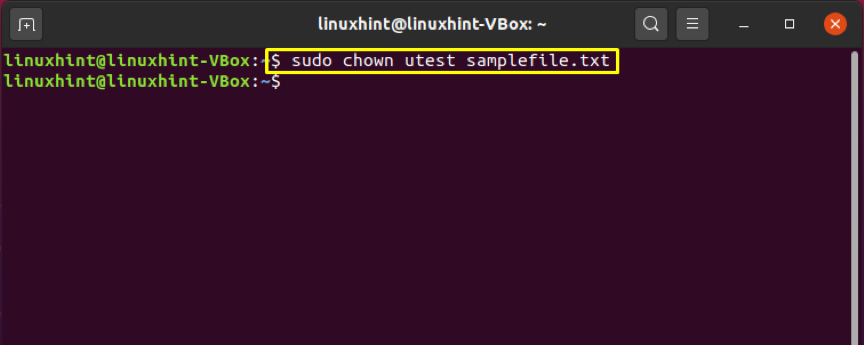
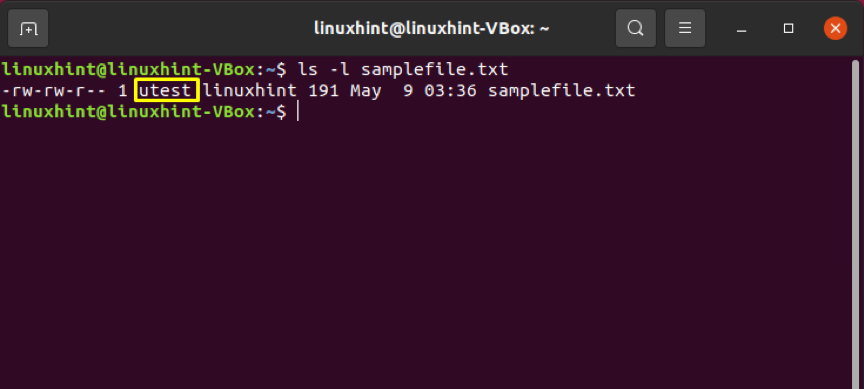
Again, verify the updated ownership changes.
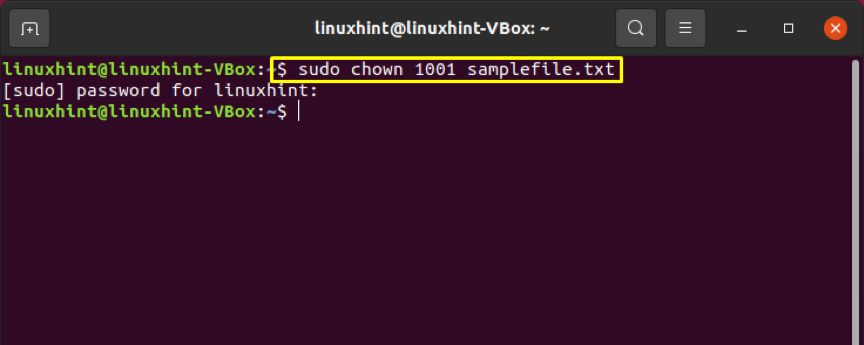
You can also use the “User ID” or “UID” of any user for this purpose. For that, retrieve the user ID of the new user by utilizing the “id” command with the “-u” option.
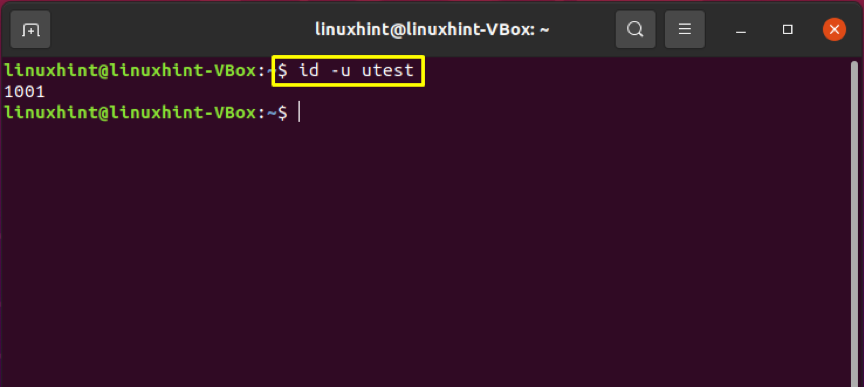
Add the User ID instead of the username to make the ownership changes.
Changing the owners of multiple files
Specify the file names at the end of the chown command to change the ownership of multiple files at once.
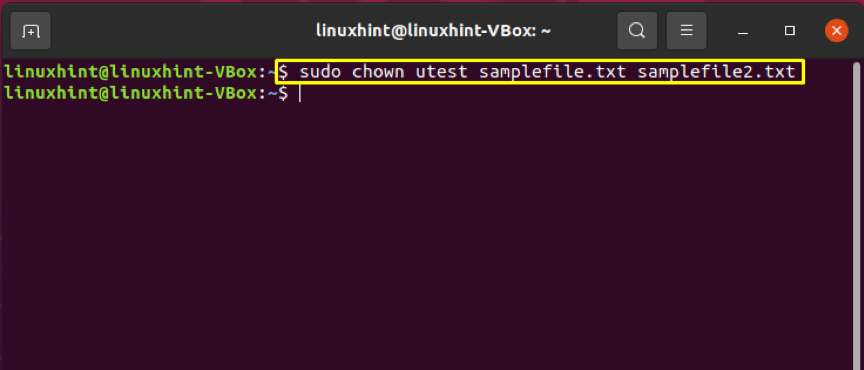
Write out the below-given command to confirm the changes.

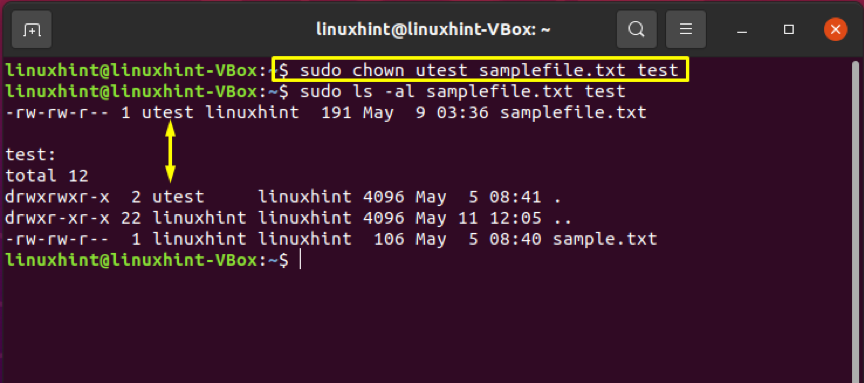
Changing the owner of directory and file at once
Follow the below-given method for changing the owners of the file and directory instantly.
This command will make “utest” the new owner of the “test directory” and the “samplefile.txt.”
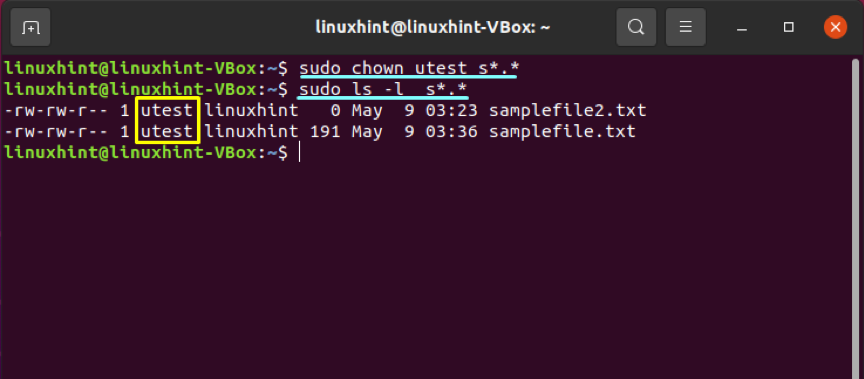
Changing the owner using wildcards
Wildcards are used to select a specific file group according to the given pattern. The chown command will then change the owner of the files after retrieving them from the wildcard execution.
Conclusion
For data security concerns, you may want to specify the ownership of files and directories. In Linux, we use the chown command-line utility for changing the ownership of directories or files. You can also utilize this command for changing directories and multiple file ownership at once. In this post, all of these statements are justified by providing practical examples.
About the author
Talha Saif Malik
Talha is a contributor at Linux Hint with a vision to bring value and do useful things for the world. He loves to read, write and speak about Linux, Data, Computers and Technology.
How to Change Ownership of Files and Folders Recursively
Learn how to use the chown command to recursively change the user and group ownership of files and directories in Linux command line.
chown owner_name file_or_folderThe problem arrives when you change the ownership of a directory, its content remains unchanged. The solution is not too complicated as well.
To change the ownership of all the contents of a directory, you can use the recursive option -R with chown command:
chown -R owner_name folder_nameIf you want to change both owner and group recursively, you can use it in the following manner:
chown -R owner_name:group_name folder_nameLet’s see it in detail and also see how you can change user and group recursively. Things are a lot easier to understand if you are familiar with the concept of file ownership and permission.
chown recursively
To recursively change the ownership of a directory, use it like this:
chown -R new_owner_name directory_nameIf you have to change the ownership of multiple directories with their contents, you can do it in the same line:
chown -R new_owner_name directory1 directory2 directory3Let me show that with a sample example. I have a directory named new_dir with some content in it. This directory and its content are owned by the root user.
[email protected]:~# ls -l /home/abhi/ total 4 drwxr-xr-x 3 root root 4096 May 30 07:30 new_dir [email protected]:~# ls -l /home/abhi/new_dir/ total 20 -rw-r--r-- 1 root root 12813 May 30 07:30 new.txt drwxr-xr-x 2 root root 4096 May 30 07:30 one_more_dirWhen I change the ownership of the new_dir, its ownership is changed:
[email protected]:~# chown abhi /home/abhi/new_dir [email protected]:~# ls -l /home/abhi/ total 4 drwxr-xr-x 3 abhi root 4096 May 30 07:30 new_dir But the files and folders inside it are still owned by root.
[email protected]:~# ls -l /home/abhi/new_dir/ total 20 -rw-r--r-- 1 root root 12813 May 30 07:30 new.txt drwxr-xr-x 2 root root 4096 May 30 07:30 one_more_dir Now, if I use the recursive option -R with chown command, it changes the ownership for everything inside the specified directory, not just the directory.
[email protected]:~# chown -R abhi /home/abhi/new_dir [email protected]:~# ls -l /home/abhi/new_dir/ total 20 -rw-r--r-- 1 abhi root 12813 May 30 07:30 new.txt drwxr-xr-x 2 abhi root 4096 May 30 07:30 one_more_dir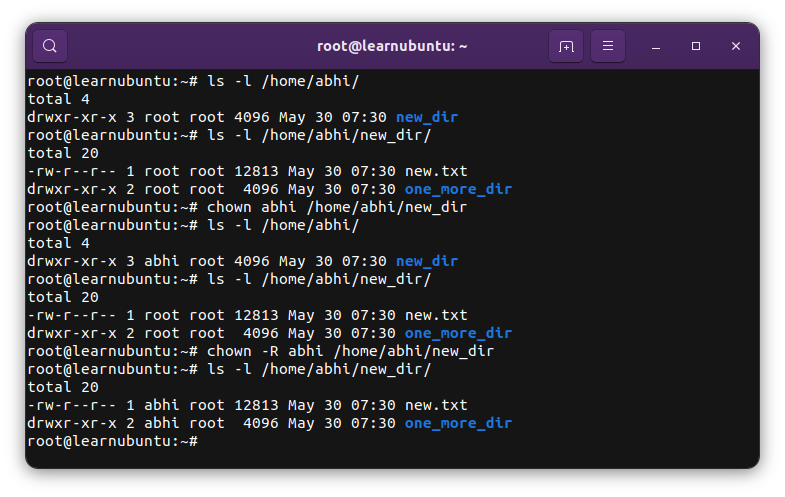
Change both owner and group recursively
The chown command allows you to change the owner as well as the group of files.
To recursively change the owner and group of a directory and all its content, use the chown command like this:
chown -R user_name:group_name directory_nameYou can use the same for changing the ownership of multiple folders:
chown -R user_name:group_name dir1 dir2Conclusion
Recently, I moved a self-hosted Ghost instance to a new server launched with DigitalOcean’s 1-click deployment. I had to upload the entire images folder from the backup (downloaded on the local system) to the new server. The system required changing the ownership of this image folder from root to ghost.
This method saved me the trouble. I hope this quick little tutorial helps you as well.
I highly recommend brushing up the basics of file permissions and ownership.
It’s one of the essential Linux concepts you must know.
Use chown to set the ownership of all a folder’s subfolders and files?
Will any of these answers work if the files inside a folder are owned by someone else and only have user read/write permission?
6 Answers 6
Usage: chown [OPTION]. [OWNER][:[GROUP]] FILE. or: chown [OPTION]. --reference=RFILE FILE. Change the owner and/or group of each FILE to OWNER and/or GROUP. [. ] -R, --recursive operate on files and directories recursively [. ] So you need to run (probably with sudo ):
chown -R USERNAME:GROUPNAME /PATH/TO/FILE Or, if the group shall be the specified user’s primary group (usually same name), you can also omit the GROUPNAME and just give the USERNAME: with a colon (no space before it!). It will be set implicitly:
chown -R USERNAME: /PATH/TO/FILE To only change the user and leave the group as it is, just specify USERNAME and no group name and no colon:
chown -R USERNAME /PATH/TO/FILE To only change the group and leave the owner user as it is, just specify :GROUPNAME with a leading colon:
chown -R :GROUPNAME /PATH/TO/FILE My username is timo and I did this to take ownership to all my files and folders on home directory (transferred from another account):
~$ sudo chown -R timo /home/timo/* This is how I normally do it, and I usually do this one folder at a time. Doesn’t take but a few moments to work through each folder.
This will also change ownership of symlinks instead of just the destination files that the symlinks point to.
man chown chown options user:group files/folders Not sure why other answers did not cover one dot. : And . are interchangeable, so you can use one dot for instance
chown -R user.group files/folders Either get to the terminal display mode as described elsewhere or do a ssh login from another computer. Usually the account is intact and it will be accessible via ssh.
You may also have an account on the same machine without the login loop problem. If you do, then login to that account (assuming it will let you sudo).
Once in, open a terminal and find the directory under which you can see the username directories. i.e. /home/username1 /home/username2
if any of the user directories is owned by root change it by running:
sudo chown -R username:username /home/username This example is based on an architecture where the user directories are under /home/
Run ls -l again to confirm the directory is owned by the user.
This was tested on Ubuntu 20.04