- Файл hosts в Linux
- Разрешение доменных имён в Linux
- Настройка файла hosts в Linux
- Выводы
- How to test /etc/hosts
- 3 Answers 3
- You must log in to answer this question.
- Related
- Hot Network Questions
- Subscribe to RSS
- Resolved “Temporary Failure in Name Resolution” Error in Linux
- 1. Check your internet connection
- 2. Verify DNS settings
- 3. Check the local hosts file
- 4. Restart the network service
- 5. Clear the DNS cache
- 6. Test the name resolution
- Conclusion
- How to Modify and Manage the Hosts File on Linux
- What’s the Linux Hosts File?
- The Linux Hosts File’s Location
Файл hosts в Linux
Система доменных имен DNS используется для определения, какой IP принадлежит к нужному домену в сети интернет. Когда какой-либо программе понадобится обратиться к сайту по его доменному имени, операционная система отправляет к DNS-серверу запрос, чтобы узнать, по какому IP ей дальше передавать пакеты. Но так происходит не всегда. Например, когда мы обращаемся к домену localhost, то всегда запрос отправляется нашему локальному компьютеру.
Всему причиной файл hosts. Если вы раньше пользовались Windows, то, наверное, уже слышали о таком файле. Там чаще всего он использовался для того, чтобы быстро заблокировать доступ к какому-либо ресурсу. Но применение его гораздо шире. В этой статье мы рассмотрим, как настроить файл hosts в Linux, а также какие возможности он нам предоставляет.
Разрешение доменных имён в Linux
Прежде чем мы перейдём к самому файлу hosts, нужно разобраться, как происходит поиск IP-адреса для доменного имени в Linux. Я говорил, что операционная система сразу же отправляет запрос DNS-серверу, но это не совсем так. Существует определённый порядок поиска, согласно которому он выполняется. Этот порядок установлен в конфигурационном файле /etc/nsswitch.conf
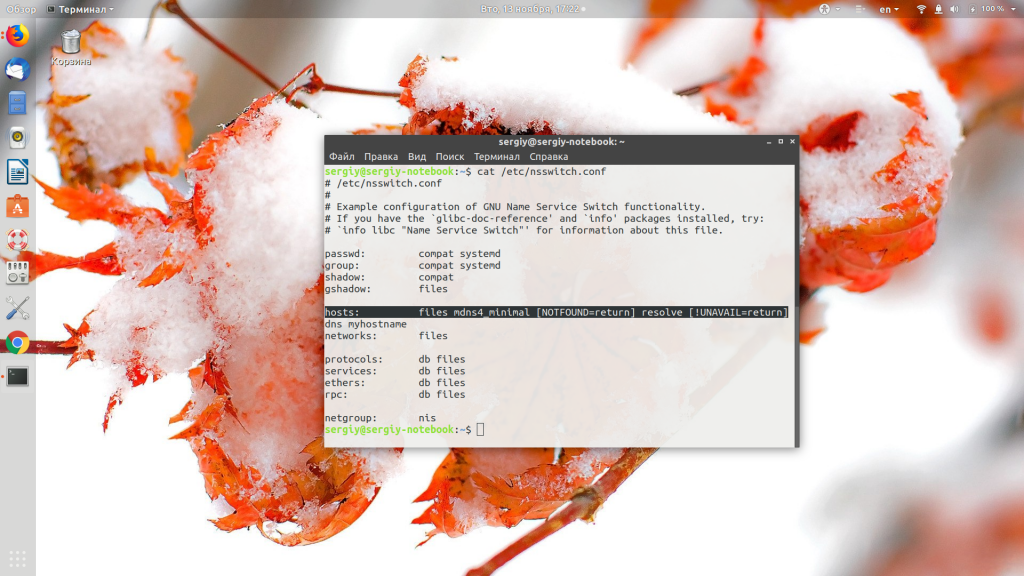
Здесь нас интересует строчка hosts. В ней в порядке очередности записаны службы, которые используются для поиска IP-адреса для доменного имени. Пункт files означает использование файла /etc/hosts, а dns — сервиса доменных имён интернета. Если files расположена перед hosts, это означает, что сначала система попытается найти домен в /etc/hosts, а уже потом по DNS. По умолчанию дело обстоит именно так.

Настройка файла hosts в Linux
Нужный нам файл находится в директории /etc/. Для его открытия можно использовать любой текстовый редактор как в командной строке, так и в графическом интерфейсе, только открывать его нужно с правами суперпользователя. Например, с помощью vim:
Синтаксис файла довольно простой. В нём находится несколько строчек с доменными именами и IP-адресами, которые нужно для них использовать. Каждая из них выглядит вот так:
ip_адрес домен алиас
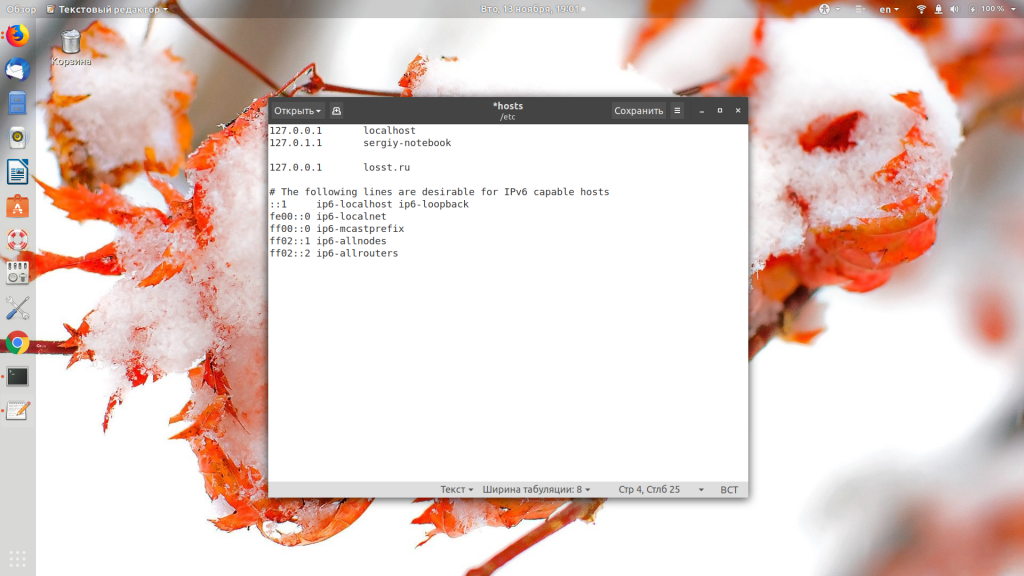
Обычно первая же строчка создаёт правило для перенаправления всех запросов к домену localhost на локальный IP-адрес — 127.0.0.1:
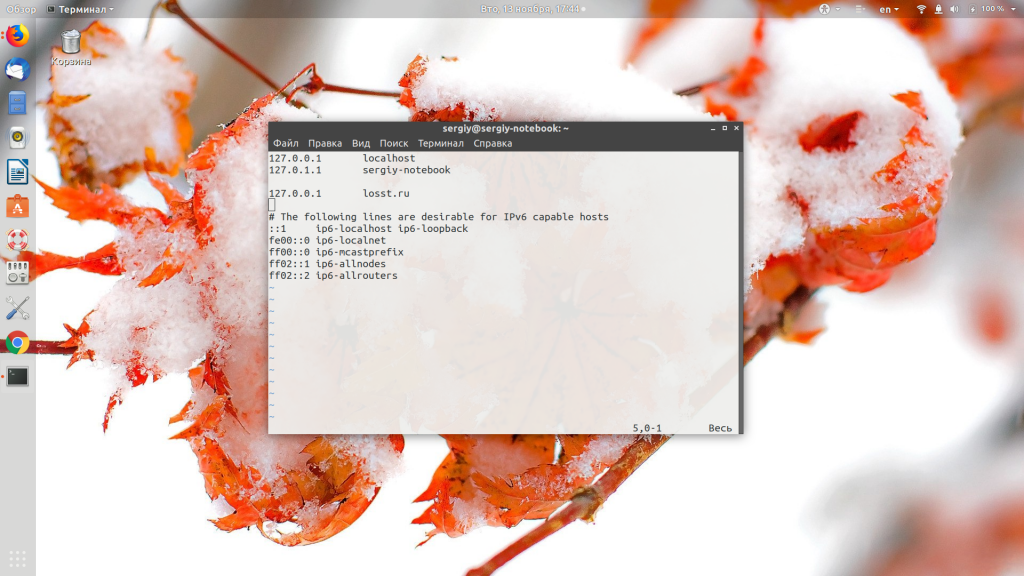
Также в этом файле по умолчанию размещаются перенаправления для имени вашего компьютера и для IPv6-адресов. Вы можете создать свои настройки для любого нужного домена. Для этого нужно добавить строчку в конец файла. Например, направим все запросы к домену losst.pro на ip 127.0.0.1:
Обратите внимание, что здесь указывается только домен, без протокола. Префикс http или https указывать не нужно, иначе ничего работать не будет. А вот для поддомена www нужно создавать отдельную запись или записывать его в виде алиаса. Например:
127.0.0.1 losst.pro www.losst.pro
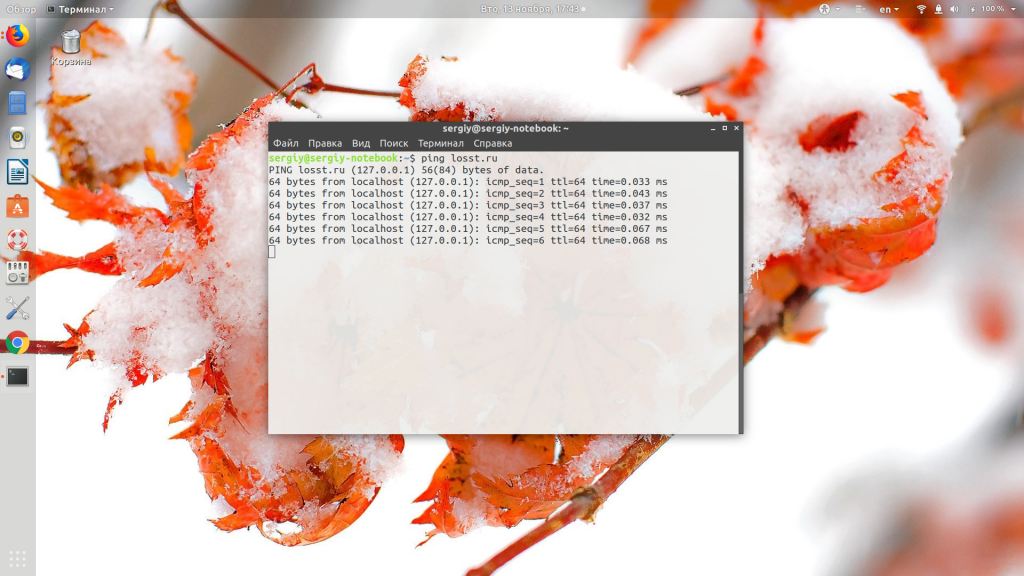
Теперь при запросе домена losst.pro будет открываться наш локальный IP. Чтобы вернуть доступ к оригинальному ресурсу, достаточно убрать добавленную строчку. Но вы можете использовать не только локальный адрес, но и любой другой. Это очень удобно, если вы только зарегистрировали домен и доменная зона ещё не успела обновиться, а вы уже хотите работать с новым сайтом. Просто добавьте данные в /etc/hosts и работайте как обычно.
Выводы
В этой небольшой статье мы разобрали, как выполняется настройка DNS через файл hosts Linux. Как видите, с его помощью вы можете блокировать доступ к нежелательным ресурсам, например, к которым программы не должны получить доступ, а также использовать его в работе веб-мастера.
Обнаружили ошибку в тексте? Сообщите мне об этом. Выделите текст с ошибкой и нажмите Ctrl+Enter.
How to test /etc/hosts
What’s the best way to confirm that your /etc/hosts file is mapping a hostname to the correct IP address? Using a tool like dig queries an external DNS directly, bypassing the hosts file.
@mdpc I edited it to reflect that. Basically the same question though, I was just looking for a way to verify the hosts file entry is working.
3 Answers 3
I tried this out and it seems to work as expected:
echo «1.2.3.4 facebook.com» >> /etc/hosts
$ getent ahosts facebook.com 1.2.3.4 STREAM facebook.com 1.2.3.4 DGRAM 1.2.3.4 RA looks good, thanks! I also found that ping works: ping facebook.com outputs: PING facebook.com (1.2.3.4) 56(84) bytes of data.
I found gethostip which accepts either hostname or IP and also has options suitable to print out exactly what you need.
$ gethostip -d facebook 1.2.3.4 You can use the ‘ping’ command to check the values added in /etc/hosts are working fine or not.
echo "1.1.1.1 abc.com" >> /etc/hosts ping abc.com You must log in to answer this question.
Related
Hot Network Questions
Subscribe to RSS
To subscribe to this RSS feed, copy and paste this URL into your RSS reader.
Site design / logo © 2023 Stack Exchange Inc; user contributions licensed under CC BY-SA . rev 2023.7.13.43531
Linux is a registered trademark of Linus Torvalds. UNIX is a registered trademark of The Open Group.
This site is not affiliated with Linus Torvalds or The Open Group in any way.
By clicking “Accept all cookies”, you agree Stack Exchange can store cookies on your device and disclose information in accordance with our Cookie Policy.
Resolved “Temporary Failure in Name Resolution” Error in Linux
A temporary failure in name resolution is a common issue that Linux users may encounter when their system cannot resolve a hostname to an IP address. This problem can occur due to various reasons, such as network connectivity issues, DNS configuration problems, or issues with the local hosts file. In this article, we will discuss several steps you can take to troubleshoot and resolve this issue on your Linux system.
1. Check your internet connection
Before diving into the technical aspects of resolving the issue, it is crucial to ensure that your system is connected to the internet and that the network is functioning properly. Verify your system’s network connection by attempting to access a website or using the ping command to check the connectivity to a known IP address or domain.
Try to ping an IP address eg: 8.8.8.8 and see the results:
If the ping is successful, that means internet is working properly on your system.
2. Verify DNS settings
The first step in troubleshooting temporary failure in name resolution is to verify your system’s DNS settings. The /etc/resolv.conf file contains the DNS server IP addresses, which are usually provided by your Internet Service Provider (ISP) or network administrator. This is the most common error we encouding for this error.
To view the contents of the /etc/resolv.conf file, run the following command:
If the file is empty or does not contain valid DNS server IP addresses, you can add them manually. To edit the file, run:
Add the following lines with the appropriate DNS server IP addresses, such as Google’s public DNS servers:
Save and exit the file using Ctrl+X, then Y, and finally Enter.
3. Check the local hosts file
The /etc/hosts file contains hostname and IP address mappings for your local system. Ensure that this file has the correct entries for your system’s hostname and IP address. You can view the file using:
If the file is incorrect or missing entries, edit it using:
Add or correct entries as needed, following this format:
4. Restart the network service
After making changes to the DNS or hosts files, you need to restart the networking service to apply the changes. Run one of the following commands, depending on your Linux distribution:
sudo systemctl restart networking sudo /etc/init.d/networking restart 5. Clear the DNS cache
If your system uses a DNS caching service like nscd or dnsmasq, you should clear the cache to ensure that the latest DNS information is used. Run the appropriate command to restart the service:
sudo systemctl restart nscd sudo systemctl restart dnsmasq 6. Test the name resolution
After completing the above steps, test the name resolution using the ping, host, or nslookup commands:
If the issue persists after following these steps, you may need to consult your network administrator or ISP for further assistance.
Conclusion
Resolving a temporary failure in name resolution on Linux systems involves checking network connectivity, verifying DNS settings, inspecting the local hosts file, restarting network services, and clearing the DNS cache. By following the steps outlined in this article, you should be able to troubleshoot and resolve most cases of temporary failure in name resolution. However, if the issue persists, it is essential to seek help from your network administrator or ISP, as there may be underlying problems with the network infrastructure or configuration that need to be addressed.
In some cases, the issue may also be related to firewall settings or security software on your system that is blocking DNS requests. Make sure to check your firewall rules and security software settings to ensure that they are not interfering with your system’s ability to resolve hostnames.
Furthermore, it is important to keep your system updated and ensure that all packages, including DNS-related tools and services, are up to date. Regularly updating your system can help prevent issues related to outdated or incompatible software components.
By following these steps and maintaining a healthy system, you can minimize the occurrence of temporary failures in name resolution and ensure smooth operation of your Linux system on the network.
How to Modify and Manage the Hosts File on Linux
Want to block certain websites and limit internet access on Linux? Here’s what you need to know about the hosts file.
Readers like you help support MUO. When you make a purchase using links on our site, we may earn an affiliate commission. Read More.
There’s a single file on your computer that serves as a small gateway between you and the web. It’s called the hosts file. If you need to block websites or create personalized web shortcuts on Linux, you can just add or tweak a few lines in the file.
In this post, we will discuss the hosts file in detail, along with comprehensive guides on how to edit and modify the hosts file securely.
What’s the Linux Hosts File?
The hosts file is a plain text file that all operating systems use to translate hostnames (also known as web addresses or URLs) into IP addresses. When you type in a hostname, such as wikipedia.org, your system will look into the hosts file to get the IP address needed to connect to the appropriate server.
If you open the hosts file, you’ll quickly notice that it doesn’t have the directory of the entire internet in there. Instead, there might be just a couple of lines and that’s it. What gives?
Turns out, your system will check the hosts file first before looking up a site on the DNS servers defined in your network settings (usually your ISP’s DNS servers).
This means that you can use the hosts file to add to what the DNS servers can’t provide (such as aliases for locations on your local network, which is otherwise only possible if you have a DNS server set up within your local network) or override the IP addresses that your DNS servers would normally provide.
For example, if you ask for wikipedia.org, the DNS servers will return Wikipedia’s IP address to your computer. But if you wanted to block Wikipedia on that computer, you can add an entry in the hosts file that tells your computer that wikipedia.org points to some other IP address that’s different from Wikipedia’s actual IP address.
Before DNS came online, this file held all the hostnames and IP addresses for the entire internet. System administrators would periodically download updated copies of this file from a central repository. Even by the early 1980s, it was almost impossible for admins to keep up as more and more hosts came online even when the network was still mostly limited to universities and research labs, so DNS was created.
This made the hosts file largely obsolete when dealing with the public internet or even more than a few machines, but it’s perfect for managing your local machine and a small local network like your Wi-Fi.
Nowadays, this file will typically have the hostname you chose for the Linux machine when you installed it and the localhost defined, which is the minimum required to use the network.
The Linux Hosts File’s Location
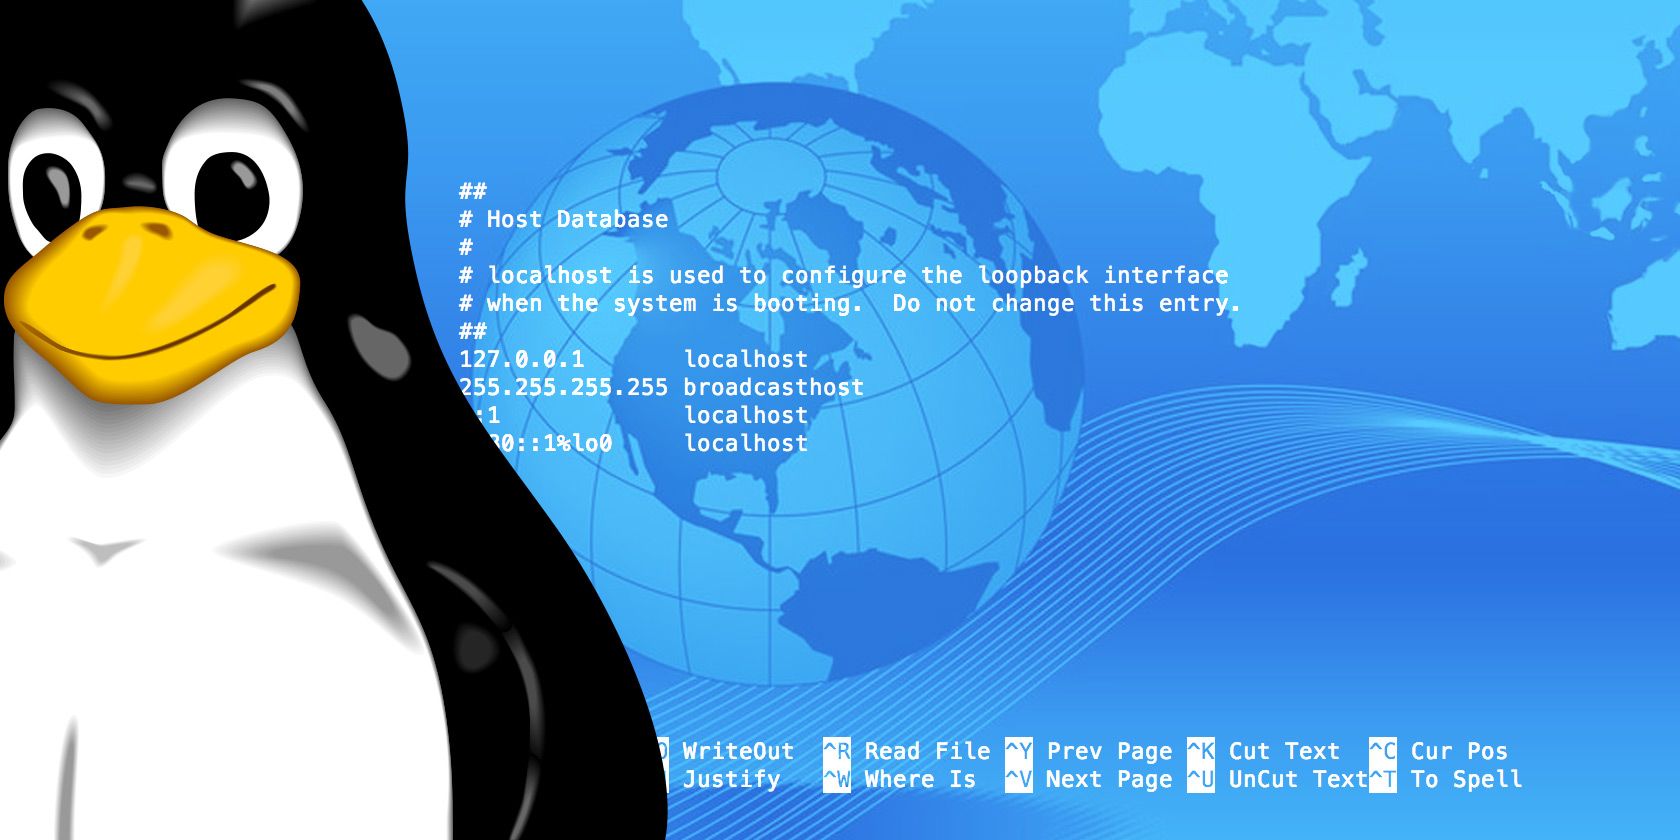
On Linux, you can find the hosts file under /etc/hosts. Since it’s a plain text file, you can open the hosts file using your preferred text editor.
Since the hosts file is a system file, you’ll need administrative rights to save changes. To edit the file using a Linux terminal-based text editor such as nano, you’ll need superuser access.