- Linux setup Check Point Mobile Access VPN
- Introduction
- Dependencies
- Java
- SSL
- 32 bit libs
- Downloading the Shell Scripts
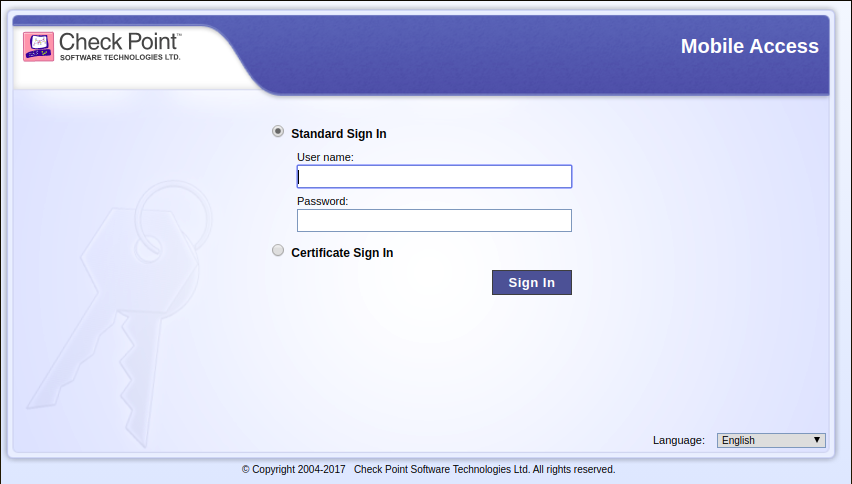
- 1. Login
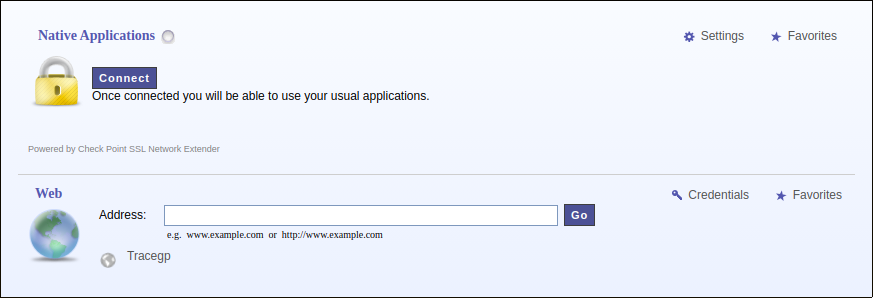
- 2. Click on “Settings” button
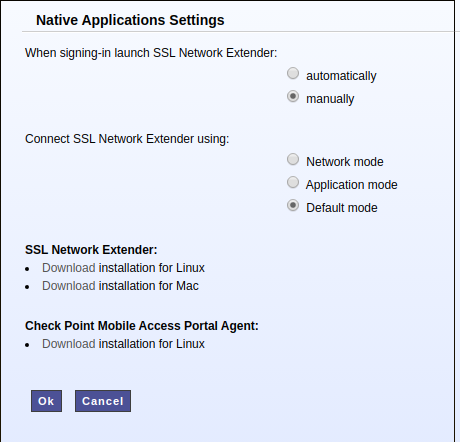
- 3. Click on “Download Installation for Linux” for both SSL Network Extender and Check Point Mobile Access Portal Agent
- Running the Shell Scripts
- Troubleshooting
- Post-install
- Checkpoint remote access for linux
Linux setup Check Point Mobile Access VPN
This is a step-by-step tutorial to setup your Linux machine with all the required dependencies to work with Check Point Mobile Access VPN. This tutorial also includes some troubleshooting.
Introduction
In the past year I had to setup my Ubuntu 18.04 laptop twice. Both times were very exhausting and took long hours until it was ready to use due to so many different errors hard to find the solution on Google. So no need to mention this tutorial (at the current state) is only useful if you’re working with a clean and recently installed Ubuntu LTS distro.
Dependencies
First make sure your operating system is up-to-date with:
$ sudo apt-get update && sudo apt-get upgrade Now you need some basic tooling for installing and building independent package vendors:
$ sudo apt-get install software-properties-common apt-transport-https wget curl $ sudo apt-get install build-essential Java
If your system has no Java version installed, make sure you install the version 8 (or higher). You can do that quickly with SDKMAN!, but first be sure you’re on your home directory with:
And then for installing SDKMAN!:
$ curl -s "https://get.sdkman.io" | bash $ source "$HOME/.sdkman/bin/sdkman-init.sh" List the available Java versions and try to find the OpenJDK version 8 or higher (in my case it was 8.0.232-open ) and then install it:
$ sdk list java $ sdk install java 8.0.232-open SSL
For the Check Point Mobile Access required packages, you’ll need to install xterm and some SSL packages with the following commands:
$ sudo apt-get install xterm $ sudo apt-get install libnss3-tools certutil 32 bit libs
If you’re running a 64 bit operating system, you’ll need to install some 32 bit compatible libraries:
$ sudo apt-get install libx11-6 $ sudo dpkg --add-architecture i386 $ sudo apt-get update $ sudo apt-get install multiarch-support $ sudo apt-get install libx11-6:i386 libc6:i386 libncurses5:i386 libstdc++6:i386 libstdc++5:i386 libpam0g:i386 Downloading the Shell Scripts
There are two shell script files you’ll need to download to setup Check Point Mobile Access VPN on your machine:
Both of them you can get on your company’s Mobile Access VPN page.
1. Login
2. Click on “Settings” button
3. Click on “Download Installation for Linux” for both SSL Network Extender and Check Point Mobile Access Portal Agent
Running the Shell Scripts
The scripts you’ve just downloaded are just regular files. So we need to change their permissions to make them executable with the following commands:
$ chmod +x snx_install.sh $ chmod +x cshell_install.sh The first script we’re going to run is the snx_install.sh , which should not give any errors when installing it.
$ ./snx_install.sh Installation successfull Here comes the tricky part: running the other shell script. The script will ask you for your password because it’s going to run some things as sudo . Everything should be going fine until it gets to the last step: when it tries to run /usr/bin/cshell/launcher . That’s where it gets stuck. This executable file does not work properly with sudo .
$ ./cshell_install.sh Start Check Point Mobile Access Portal Agent installation Extracting Mobile Access Portal Agent. Done Installing Mobile Access Portal Agent. Done Installing certificate. Done Starting Mobile Access Portal Agent. When you notice it is stuck at the message above, open Ubuntu’s system monitor and try to find a process called launcher with 0% CPU usage and Sleeping status. Once you find it, kill it.
Do not ever type CTRL+C on the terminal or try to end its process or launcher ’s. You must kill the launcher process. Otherwise, the script will do a clean-up and erase everything it has made that will allow you to make Check Point Mobile Access VPN work.
If you’ve done everything right, there should be an executable file called launcher at /usr/bin/cshell/ . If so, run it and it should have been displayed some logs as follows:
$ /usr/bin/cshell/launcher LAUNCHER> Starting CShell. LAUNCHER> CShell Started It means it has successfully been installed, and you should be fine trying to connect to the VPN now, but it doesn’t mean we don’t have more work to do.
Troubleshooting
If you end up with an error when you’re trying to run /usr/bin/cshell/launcher about a named pipe file called cshell.fifo inside the /tmp folder, just delete it with:
Post-install
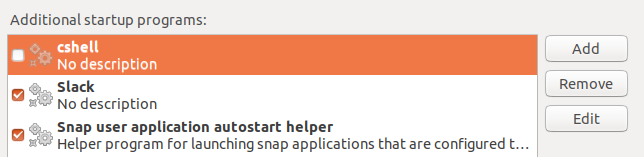
You need to disable one of your system’s startup applications. You should be able to see one of them called cshell with a marked checkbox. All it does is running the launcher executable file in /usr/bin/cshell/ . You must uncheck it because every time you let it run automatically it’s going to be run as sudo , which means it’s going to get stuck.
Now we’re going to do a little trick to make it start automatically without sudo : run it inside the .bashrc file, so every time you open up a terminal it’s going to run with your user normal permissions. Actually, we only want to run it once when you log in, right? So why don’t we simply run it inside .profile ? Because everything in .profile run as sudo , so the launcher is going to get stuck.
So here is the tricky part: let’s create a simple log file to check whether launcher should run every time you open up a terminal window. Add the following lines to the .profile file to remove the log file every time you log in.
if [ -f "/home/[MY-USER-NAME]/cshell_launcher.log" ]; then rm /home/[MY-USER-NAME]/cshell_launcher.log fi On the .bashrc file add the following lines to check whether it should run the launcher file every time you open up a terminal window:
if [ ! -f "/home/[MY-USER-NAME]/cshell_launcher.log" ]; then /usr/bin/cshell/launcher > /home/[MY-USER-NAME]/cshell_launcher.log fi Restart your computer, log into your user account and check if the log file we created is on your home directory by opening a terminal and typing:
$ ls | grep cshell cshell_launcher.log Then show its contents by using cat and it should be displayed as the following:
$ cat cshell_launcher.log LAUNCHER> Starting CShell. LAUNCHER> CShell Started Now you should be all set. Open your company’s Check Point Mobile Access page and you should be able to connect everytime you log into your computer. Just remember to open up a terminal window first 🙂
Checkpoint remote access for linux
Если у вас не работает один из способов авторизации, сконвертируйте свой аккаунт по ссылке
Авторизуясь в LiveJournal с помощью стороннего сервиса вы принимаете условия Пользовательского соглашения LiveJournal
После нескольких лет экспериментов мне таки удалось их соединить. Вообще-то Checkpoint использует IPSec, но, как водится, с некоторыми расширениями, делающими его несовместимыми с другими реализациями.
Родной клиент под линукс у Checkpoint’а когда-то был, но последняя версия была под RedHat 5 (не путать с RHEL5!). RH5 — это примерно 1997-98 год. С тех пор Checkpoint на линукс забил, а желающим рекомендует использовать SSL Network Extender, работающий через Java-плагин в браузере. Точнее, в моём случае не работающий, поскольку гейт по HTTPS вообще не отвечает.
Но добрые люди из компании Shrew Soft написали универсальный клиент, который умеет разговаривать на многих диалектах IPSec, включая CheckPoint’овский. Готового пакета под линукс у них самих нет, но из исходников собралось влёт. В некоторых дистрибутивах, типа убунты, говорят, есть уже готовое.
Остались сущие мелочи: настроить. В родной инструкции сказано, что клиенту нужен сертификат, который предлагается экспортировать из сервера. Но у меня нет доступа к серверу. Виндовый клиент этот сертификат скачивает при первом соединении с сервером и сохраняет у себя (способ небезопасный, но уж какой есть). Вот только сохраняет он его таким хитровывернутым способом…
Итак,
1) в Program Files\CheckPoint\SecuRemote\database\ находим файлик userc.C, в котором лежит конфигурация клиента. Файлик, к счастью, текстовый. Находим в нём параметр :cert, представляющий собой длинную строку из шестнадцатиричных цифр. И сохраняем эту строку в другой файлик, скажем, cert.hex
2) Конвертируем в бинарный вид: xxd -p -r cert.hex > cert.bin
3) Переставляем байты в обратном порядке… cat cert.bin | perl -0777e ‘print scalar reverse <>‘ > cert.der
4) Полученный файл представляет собой серверный сертификат в формате DER. Конвертируем в PEM: openssl x509 -inform DER -in cert.der -outform PEM -out cert.pem
Это Страшное Колдунство найдено тут.
Так, с сертификатом разобрались. Переходим к настройке параметров соединения..
Запускаем qikea, тыкаем в кнопочку Add. В полученном диалоге вбиваем следующие настройки:
General:
указываем IP-адрес гейта, порт 500.
Auto configuration: ike config pullю
Local Host Address method: Use a virtual adapter and assigned address и Obtain automatically.
MTU оставляем 1380.
Client:
NAT traversal: disable. Несмотря на это, оно успешно работает из-за NAT’а. Вероятно, эта настройка относится к собственно IPSec’овому NAT-T, а здесь он инкапсулируется в UDP, и NAT проходит на этом уровне. И в инструкции всё равно написано, что Shrew не поддерживает CheckPoint’овский NAT-T.
IKE fragmentation: enable, Max packet size: 540.
Остальные три галки (Enable Dead Peer Detection, Enable ISAKMP Failure Notifications, Enable Client Login Banner) оставляем как есть, то есть, включёнными.
Name resolution: оставляем по умолчанию:
Enable DNS, Obtain automatically. DNS suffix тоже Obtain automatically.
Учтите, что это приведёт к добавлению записей в /etc/resolv.conf при поднятии туннеля, если это нежелательно, можно выключить.
Authentication:
Authentication method: Hybrid RSA+XAuth.
Local Identity: User FQDN, UFQDN string оставляем пустой. В инструкции написано, что надо использовать FQDN, но у меня оно с такой настройкой не работает, только с UFQDN.
Remote Identity: Identification Type: any. В инструкции написано, что можно ещё IP address, я не пробовал.
Credentials: Server Certificate Authority File: вот тут надо указать файл с сертификатом, выковырянный на первом этапе. Сам файл больше уже не понадобится, он тут импортируется и целиком сохраняется в конфиге.
Phase1:
Exchange type: main. Agressive не работает.
DH Exchnage: group 2. Остальные варианты, включая auto, у меня не работают.
Cipher algorithm: AES, Key length: 256 bit. Auto не работает.
Hash algorithm: sha1. Auto не работает.
Key Life Time Limit: оставляем как есть: 86400 sec, data limit: 0 (в смысле, отключено).
Не забыть поставить галку Enable Check Point Compatible Vendor ID, без неё точно не заработает.
Phase2: всё про умолчанию:
Transfer algorithm: auto
HMAC Algorithm: auto
PFS Exchange: disabled
Compression algotithm: disabled
Key life time limit: 3600 sec, data limit: 0.
Policy:
Policy generation level: auto
Maintain persistent Security Associations: у меня выключено, в принципе, можно и включить, если кому надо.
Obtain Topology Automatically or Tunnel All: у меня выключено в связи с идиотской политикой, выдаваемой сервером. Он выдаёт маршрут в VPN для внешнего IP-адреса гейта. Причём в Windows этот идиотизм как-то работает, но в линуксе однозначно не будет. Поэтому все нужные маршруты далее вбить вручную. Тем более, что в инструкции написано, что автоматическое получение маршрутов из CheckPoint’а всё равно не работает.
Вот, собственно, и всё. Сохраняем, запускаем, вводим логин и пароль, и надеемся, что заработает..
Оригинал этой записи в личном блоге.
Любые материалы из этого блога запрещается использовать на сайте livejournal.ru в любой форме и любом объёме.