- Introduction
- Identifying your graphics card or APU
- Unsupported chips
- Supported, but hardware is too old for Unity
- Saved searches
- Use saved searches to filter your results more quickly
- Mange/rtl8192eu-linux-driver
- Name already in use
- Sign In Required
- Launching GitHub Desktop
- Launching GitHub Desktop
- Launching Xcode
- Launching Visual Studio Code
- Latest commit
- Git stats
- Files
- README.md
- About
- Установка драйвера Intel в Ubuntu
- Официальный установщик драйверов Intel
- Установка драйвера Intel в Ubuntu
- Выводы
Introduction
This guide shows you how to use the open source Radeon driver for some ATI/AMD graphics cards and APUs, which is part of the xserver-xorg-video-ati package.
This driver provides 2D and 3D acceleration in your video hardware. For the most recent releases of Ubuntu (and its flavours) this driver is usually as fast as the closed-source, proprietary fglrx driver (called AMD Catalyst) from AMD Inc. Furthermore the Radeon driver supports some older chipsets that fglrx does not.
The Radeon driver is already pre-installed in Ubuntu.
Identifying your graphics card or APU
First, check your graphic card name and chipset:
sudo update-pciids #optional command, requires internet
lspci -nn | grep -E 'VGA|Display'
It should report something like this for your graphics card and/or APU:
01:00.0 VGA compatible controller: Advanced Micro Devices, Inc. [AMD/ATI] RV710 [Radeon HD 4550]
If the report shows two different hardware devices, then you probably have a «hybrid graphics» system, with an iGP (integrated graphics processor inside the CPU) and a dedicated GPU.
Unsupported chips
- Ubuntu 16.04 LTS and newer: for some most recent graphics cards (R9 285, R9 380/380X, R9 M395X, R9 Nano/Fury/FuryX, RX 460/470/480, RX 550/560/570/580. ) and APUs (Carrizo, Stoney), the open-source AMDGPU driver is enabled by default. For Ubuntu 16.04 LTS AMDGPU-Pro hybrid driver is also available to download here (please read the release notes for known problems and limitations).
- Ubuntu 14.04 LTS: if you have Ubuntu 14.04 LTS with Linux kernel 4.4.0 (HWE stack Xenial), you can’t install the proprietary fglrx/Catalyst driver. However the open source AMDGPU driver is available to install through the xserver-xorg-video-amdgpu package.
Supported, but hardware is too old for Unity
These cards will not run Ubuntu’s Unity desktop with 3D acceleration. They will still run Unity, but the CPU will be used for basic drawing and performance may suffer. If you have one of these cards, a lighter desktop (such as XFCE or LXDE, found in Xubuntu and Lubuntu respectively) is recommended.
Saved searches
Use saved searches to filter your results more quickly
You signed in with another tab or window. Reload to refresh your session. You signed out in another tab or window. Reload to refresh your session. You switched accounts on another tab or window. Reload to refresh your session.
Drivers for the rtl8192eu chipset for wireless adapters (D-Link DWA-131 rev E1 included!)
Mange/rtl8192eu-linux-driver
This commit does not belong to any branch on this repository, and may belong to a fork outside of the repository.
Name already in use
A tag already exists with the provided branch name. Many Git commands accept both tag and branch names, so creating this branch may cause unexpected behavior. Are you sure you want to create this branch?
Sign In Required
Please sign in to use Codespaces.
Launching GitHub Desktop
If nothing happens, download GitHub Desktop and try again.
Launching GitHub Desktop
If nothing happens, download GitHub Desktop and try again.
Launching Xcode
If nothing happens, download Xcode and try again.
Launching Visual Studio Code
Your codespace will open once ready.
There was a problem preparing your codespace, please try again.
Latest commit
* fix netif_napi_add Linux 6.1/6.3 compile issue
Git stats
Files
Failed to load latest commit information.
README.md
NOTE: This branch is based on Realtek’s driver versioned 4.4.1. master is based on 4.3.1.1 originally.
The official drivers for D-Link DWA-131 Rev E, with patches to keep it working on newer kernels. Also works on Rosewill RNX-N180UBE v2 N300 Wireless Adapter and TP-Link TL-WN821N V6.
NOTE: This is just a «mirror». I have no knowledge about this code or how it works. Expect no support from me or any contributors here. I just think GitHub is a nicer way of keeping track of this than random forum posts and precompiled binaries being sent by email. I don’t want someone else to have to spend 5 days of googling and compiling with random patches until it works.
Source for the official drivers
Official drivers were downloaded from D-Link Australia. D-Link USA and the european countries I checked only lists revision A and B. Australia lists all three.
- Download page for DWA-131
- Direct download link for Linux drivers
- GitHub will not link to the ftp:// schema. Raw link contents: ftp://files.dlink.com.au/products/DWA-131/REV_E/Drivers/DWA-131_Linux_driver_v4.3.1.1.zip
In addition, you can find the contents of this version in the initial commit of this repo: 1387cf623d54bc2caec533e72ee18ef3b6a1db29
You can see the applied patches, their sources and/or motivation by looking at the commits. The master branch will mostly be kept clean with a single commit per patch, except for Pull Requests. You can review commit by commit and then record the SHA in order to get a safe reference to use. As long as the SHA stays the same you know that what you get has been reviewed by you.
Note that updates to this README will show up as separate commits. I will not mix changes to this file with changes to the code in case you want to mirror this without the README.
Building and installing using DKMS
This tree supports Dynamic Kernel Module Support (DKMS), a system for generating kernel modules from out-of-tree kernel sources. It can be used to install/uninstall kernel modules, and the module will be automatically rebuilt from source when the kernel is upgraded (for example using your package manager).
- Install DKMS and other required tools
- for normal Linux systems
sudo apt-get install git linux-headers-generic build-essential dkms
sudo apt-get install git raspberrypi-kernel-headers build-essential dkms
Make sure you’re installing same headers version as your current running kernel. If you just installed Raspbian it ships with an older kernel version than you’ll get headers for after installing raspberrypi-kernel-headers . You must either run sudo apt-get upgrade or install exact same raspberrypi-kernel-headers-XXX version as your kernel is before executing dkms install . If you have version mismatch you’ll get «Your kernel headers for kernel XXX cannot be found at YYY» error.
git clone https://github.com/Mange/rtl8192eu-linux-driver
. CONFIG_PLATFORM_I386_PC = n . CONFIG_PLATFORM_ARM_RPI = y
. CONFIG_PLATFORM_I386_PC = n . CONFIG_PLATFORM_ARM_AARCH64 = y
sudo dkms install rtl8192eu/1.0
echo "blacklist rtl8xxxu" | sudo tee /etc/modprobe.d/rtl8xxxu.conf
echo -e "8192eu\n\nloop" | sudo tee /etc/modules
echo "options 8192eu rtw_power_mgnt=0 rtw_enusbss=0" | sudo tee /etc/modprobe.d/8192eu.conf
sudo update-grub; sudo update-initramfs -uYou should see the line driver=8192eu
If you wish to uninstall the driver at a later point, use sudo dkms uninstall rtl8192eu/1.0. To completely remove the driver from DKMS use sudo dkms remove rtl8192eu/1.0 —all.
Reference: Intelbras IWA 3001 USB WiFi Adapter
Devices using the 8192eu chip can serve as decent access points, with speeds up to ~50Mbps.Using hostapd to manage your AP, set the proper ht-capab field for this device, which is:
Optionally enable wideband, if you don’t have neighbours:
Note that while this will result in a increase in network throughput it may cause clients further away to fail connecting.
It may also make the device work better with repeaters repeating its signal.HT_CAPAB=[HT40+][RX-STBC1][SHORT-GI-40][SHORT-GI-20][DSSS_CCK-40][MAX-AMSDU-7935] (for channels 1-7), or
HT_CAPAB=[HT40-][RX-STBC1][SHORT-GI-40][SHORT-GI-20][DSSS_CCK-40][MAX-AMSDU-7935] (for channels 5-13)Currently there is no way to change transmit power in the driver with iw or iwconfig tools, as you would with other wireless devices.
The values returned by these tools are purely fictional on this driver. However, you can still manually change the transmit power at compile time by editing the file hal/rl8192e/rtl8192e_phycfg.c and changing the lines below:/* Manual Transmit Power Control The following options take values from 0 to 63, where: 0 - disable 1 - lowest transmit power the device can do 63 - highest transmit power the device can do Note that these options may override your country's regulations about transmit power. Setting the device to work at higher transmit powers most of the time may cause premature failure or damage by overheating. Make sure the device has enough airflow before you increase this. It is currently unknown what these values translate to in dBm. */ // Transmit Power Boost // This value is added to the device's calculation of transmit power index. // Useful if you want to keep power usage low while still boosting/decreasing transmit power. // Can take a negative value as well to reduce power. // Zero disables it. Default: 2, for a tiny boost. int transmit_power_boost = 2; // (ADVANCED) To know what transmit powers this device decides to use dynamically, see: // https://github.com/lwfinger/rtl8192ee/blob/42ad92dcc71cb15a62f8c39e50debe3a28566b5f/hal/phydm/rtl8192e/halhwimg8192e_rf.c#L1310 // Transmit Power Override // This value completely overrides the driver's calculations and uses only one value for all transmissions. // Zero disables it. Default: 0 int transmit_power_override = 0; /* Manual Transmit Power Control */- Fork repo
- Do your patch in a topic branch
- Open a pull request on GH, or send it by email to Magnus Bergmark .
- I’ll squash your commits when everything checks out and add it to master .
The original code is copyrighted, but I don’t know by whom. The driver download does not contain license information; please open an issue if you are the copyright holder.
Most C files are licensed under GNU General Public License (GPL), version 2.
About
Drivers for the rtl8192eu chipset for wireless adapters (D-Link DWA-131 rev E1 included!)
Установка драйвера Intel в Ubuntu
В отличие от драйверов видеокарт от других производителей, таких как Nvidia и AMD, часть драйвера Intel для интегрированных видеокарт встроена в ядро, а другая часть в пакет mesa-utils. Таким образом если вы используете последнюю версию ядра и свежую версию mesa-utils то, скорее всего, вы используете самую свежую версию драйвера Intel.
В этой статье мы рассмотрим как выполняется установка драйвера Intel в Ubuntu если он не установлен по умолчанию, а также как получить самую последнюю версию.
Официальный установщик драйверов Intel
Раньше существовал установщик драйверов от Intel, позволяющий установить последнюю версию драйвера в Ubuntu или Fedora, но потом компания прекратила поддержку этой утилиты. Скачать её можно здесь. Но последняя версия пакета вышла в 2018 году, и с тех пор уже вышло много новых ядер и новых версий дистрибутива Ubuntu. Сейчас в репозиториях Ubuntu версия драйвера более новая чем там.
Установка драйвера Intel в Ubuntu
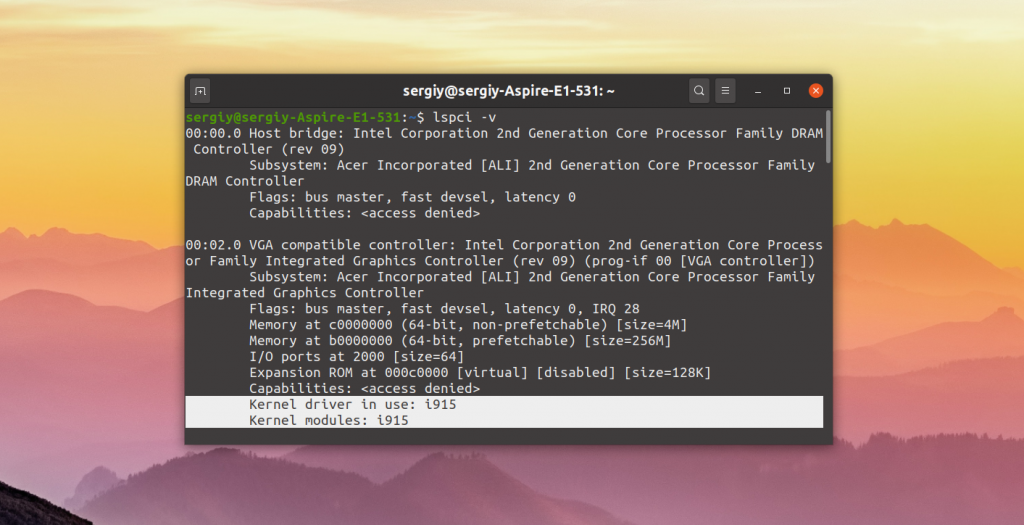
Вы можете посмотреть какой сейчас драйвер видеокарты используется с помощью команды lspci:

Как видите, в данном примере используется i915, это драйвер видеокарты от Intel. Он работает и ничего больше устанавливать не нужно. Если же в этой строчке находится что-то другое, можно попытаться установить драйвер.
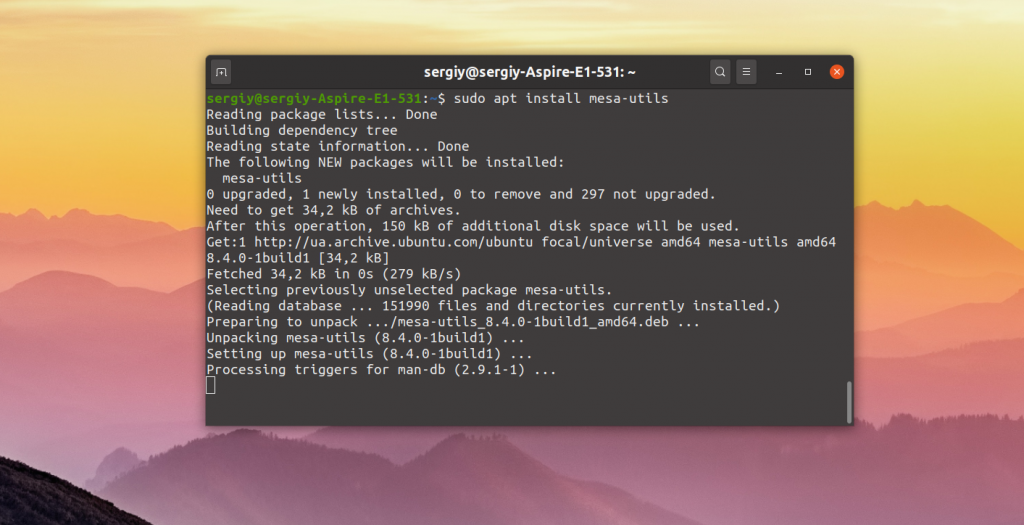
Для установки части драйвера для Xorg и Mesa достаточно установить в систему такие пакеты:
sudo apt install xserver-xorg-video-intel
sudo apt install mesa-utils
Если вы хотите получить самую последнюю версию драйвера можно воспользоваться специальным PPA. Для добавления репозитория в систему выполните:
sudo add-apt-repository ppa:oibaf/graphics-drivers
Затем просто обновите систему и перезагрузите компьютер:
Выводы
Вот и все. Теперь вы знаете как выполняется установка драйвера Intel Ubuntu. В отличие от драйверов для Nvidia, в большинстве случаев здесь всё уже установлено. И вам не надо думать как поддерживать актуальную версию этого драйвера в своей системе. Если у вас остались вопросы, спрашивайте в комментариях!
Обнаружили ошибку в тексте? Сообщите мне об этом. Выделите текст с ошибкой и нажмите Ctrl+Enter.