- Установка Cisco AnyConnect Client в Linux
- Комментарии 5
- Installing and Using AnyConnect on Ubuntu Desktop using the User Interface
- Objective
- Introduction
- AnyConnect Software Version
- Table of Contents
- Installing AnyConnect Secure Mobility Client v4.9.x
- Prerequisites
- Check these other articles out!
- Applicable Devices | Software Version
- Licensing Information
- Step 1
- Step 2
- Step 3
- Step 4
- Step 5
- Step 6
- Step 7
- Step 8
- Using AnyConnect Secure Mobility Client v4.9.x
- Step 1
- Step 2
- Step 3
- Step 4
- Step 5
- Step 6
- Conclusion
Установка Cisco AnyConnect Client в Linux
Внезапно потребовалось установить Cisco AnyConnect Secure Mobility Client. Провайдер выдает доступ к iLO сервера через этот кривой Cisco VPN. Казалось бы — рутинное, обычное дело — скачал и поставил, делов то… Но тупость в том, что Cisco по неведомым мне причинам не дает скачать этот клиент даже после регистрации!
На просторах сети нашел конечно же и магнит, и ссылку на клиент, выложенный добрыми людьми. Если кому то потребуется установить AnyConnect Secure Mobility Client от доблестной компании Cisco, то делаем так:
# С сайта http://ttcit.net/download/linux/ берем нужную версию: http://ttcit.net/download/linux/anyconnect-linux64-4.6.03049-predeploy-k9.tar.gz # распаковываем: tar xfz http://ttcit.net/download/linux/anyconnect-linux64-4.6.03049-predeploy-k9.tar.gz # устанавливаем VPN: cd anyconnect-linux64-4.6.03049-predeploy-k9/anyconnect-linux64-4.6.03049/vpn chmod +x vpn_install.sh bash ./vpn_install.sh # Соглашаемся с лицензией и клиент установлен.
Всем удачи и старайтесь не пользоваться неудобными и кривыми устройствами от Cisco. Выделенные серверы, в том числе серверы в России лучше купить здесь. И не используйте kvm для установки ОС. И газет советских до завтрака не читайте.
Комментарии 5
спасибо за инфу!) аффтор, , кончено понимаю, что эниконнект днина донная, но если все остальное не православное, то что же юзать то?))
Ещё можно заюзать `openconnect`. Достаточно команды: sudo openconnect -s /etc/vpnc/vpnc-script vpn-server —user=user-name Надо только подставить адрес сервера и имя пользователя. Нафига путь к `vpnc-script` я не имею понятия, но это дефолтный скрипт поставляемый вместе с openconnect. Никаких конфигов я не редактировал. Команда выше запросит пароль, потом при необходимости код от двухфакторной авторизации, и если всё хорошо, то создаст tunX сетевое устройство. После этого вся работа с сетью автомагически будет проходить через него. Тестировал на `openconnect` 8.05. Прямо сейчас набираю это сообщение через VPN открытый через него.
Installing and Using AnyConnect on Ubuntu Desktop using the User Interface
The documentation set for this product strives to use bias-free language. For the purposes of this documentation set, bias-free is defined as language that does not imply discrimination based on age, disability, gender, racial identity, ethnic identity, sexual orientation, socioeconomic status, and intersectionality. Exceptions may be present in the documentation due to language that is hardcoded in the user interfaces of the product software, language used based on RFP documentation, or language that is used by a referenced third-party product. Learn more about how Cisco is using Inclusive Language.
Objective
The objective of this article is to guide you through installing and using AnyConnect VPN Client v4.9.x on Ubuntu Desktop version 20.04 using the User Interface (UI).
Introduction
AnyConnect Secure Mobility Client is a modular endpoint software product. It not only provides Virtual Private Network (VPN) access through Secure Sockets Layer (SSL) and Internet Protocol Security (IPsec) Internet Key Exchange version2 (IKEv2) but also offers enhanced security through various built-in modules.
AnyConnect Software Version
Table of Contents
Installing AnyConnect Secure Mobility Client v4.9.x
This toggled section provides details and tips for beginners.
Prerequisites
- You need to purchase client license(s) from a partner like CDW or through your company’s device procurement. There are options for 1 user (L-AC-PLS-3Y-S5) or packets of licenses including one year for 25 users (AC-PLS-P-25-S). Other license options available as well, including perpetual licenses. For more details on licensing, check out the links in the Licensing Information section below.
- Download the latest version of firmware available for your router.(Click here for step-by-step instructions on this process.)
- Ubuntu 20.04 (LTS), 18.04 (LTS), and 16.04 (LTS) .
Check these other articles out!
Applicable Devices | Software Version
Licensing Information
AnyConnect client licenses allow the use of the AnyConnect desktop clients as well as any of the AnyConnect mobile clients that are available. You will need a client license to download and use the Cisco AnyConnect Secure Mobility Client. A client license enables the VPN functionality and are sold in packs of 25 from partners like CDW or through your company’s device procurement.
Want to know more about AnyConnect licensing? Here are some resources:
Step 1
Open a web browser and navigate to the Cisco Software Downloads webpage.
Step 2
In the search bar, start typing ‘Anyconnect’ and the options will appear. Select AnyConnect Secure Mobility Client v4.x.
Step 3
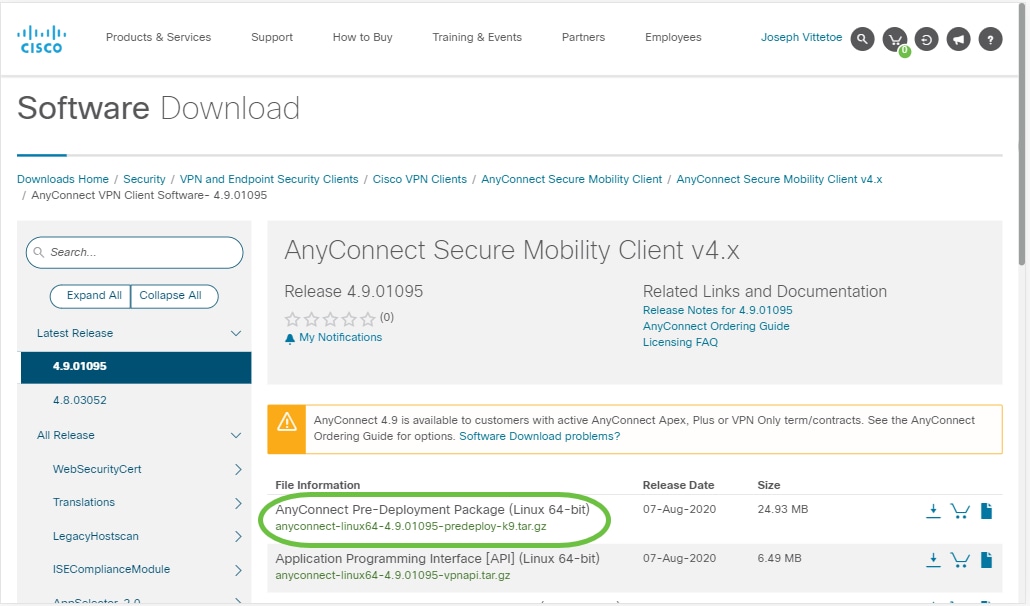
Download the Cisco AnyConnect VPN Client. Most users will select the AnyConnect Pre-Deployment Package (Linux 64-bit) option.
The images in this article are for AnyConnect v4.9.x, which was latest version at the time of writing this document.
If you purchased a license and you are unable to download AnyConnect, call +1 919-993-2724. Select option 2. You will need to know your Cisco ID (the one you use to log into Cisco.com) and the sales order number when you call. They will get that situation all straightened out.
Step 4
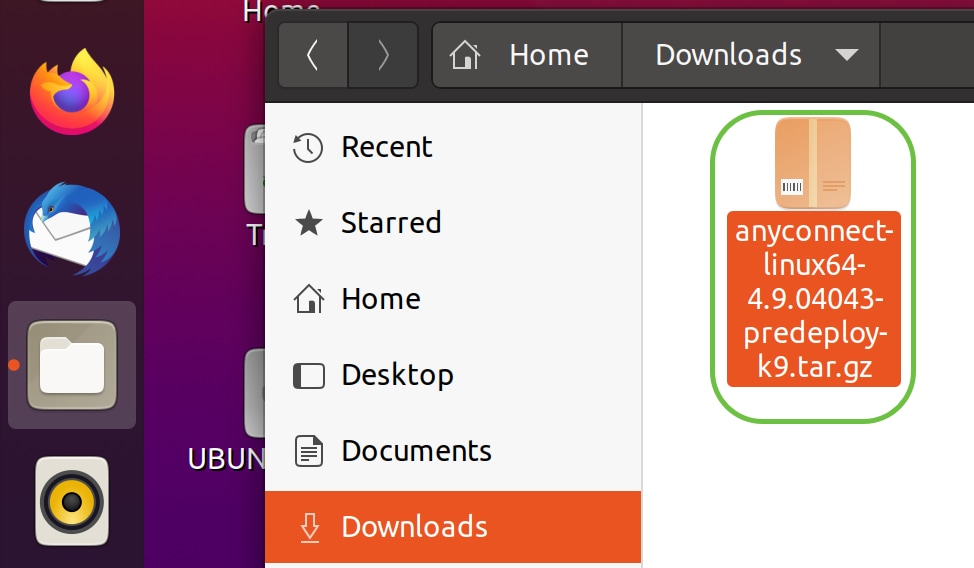
Navigate to the folder where you have downloaded the AnyConnect Client Package.
Step 5
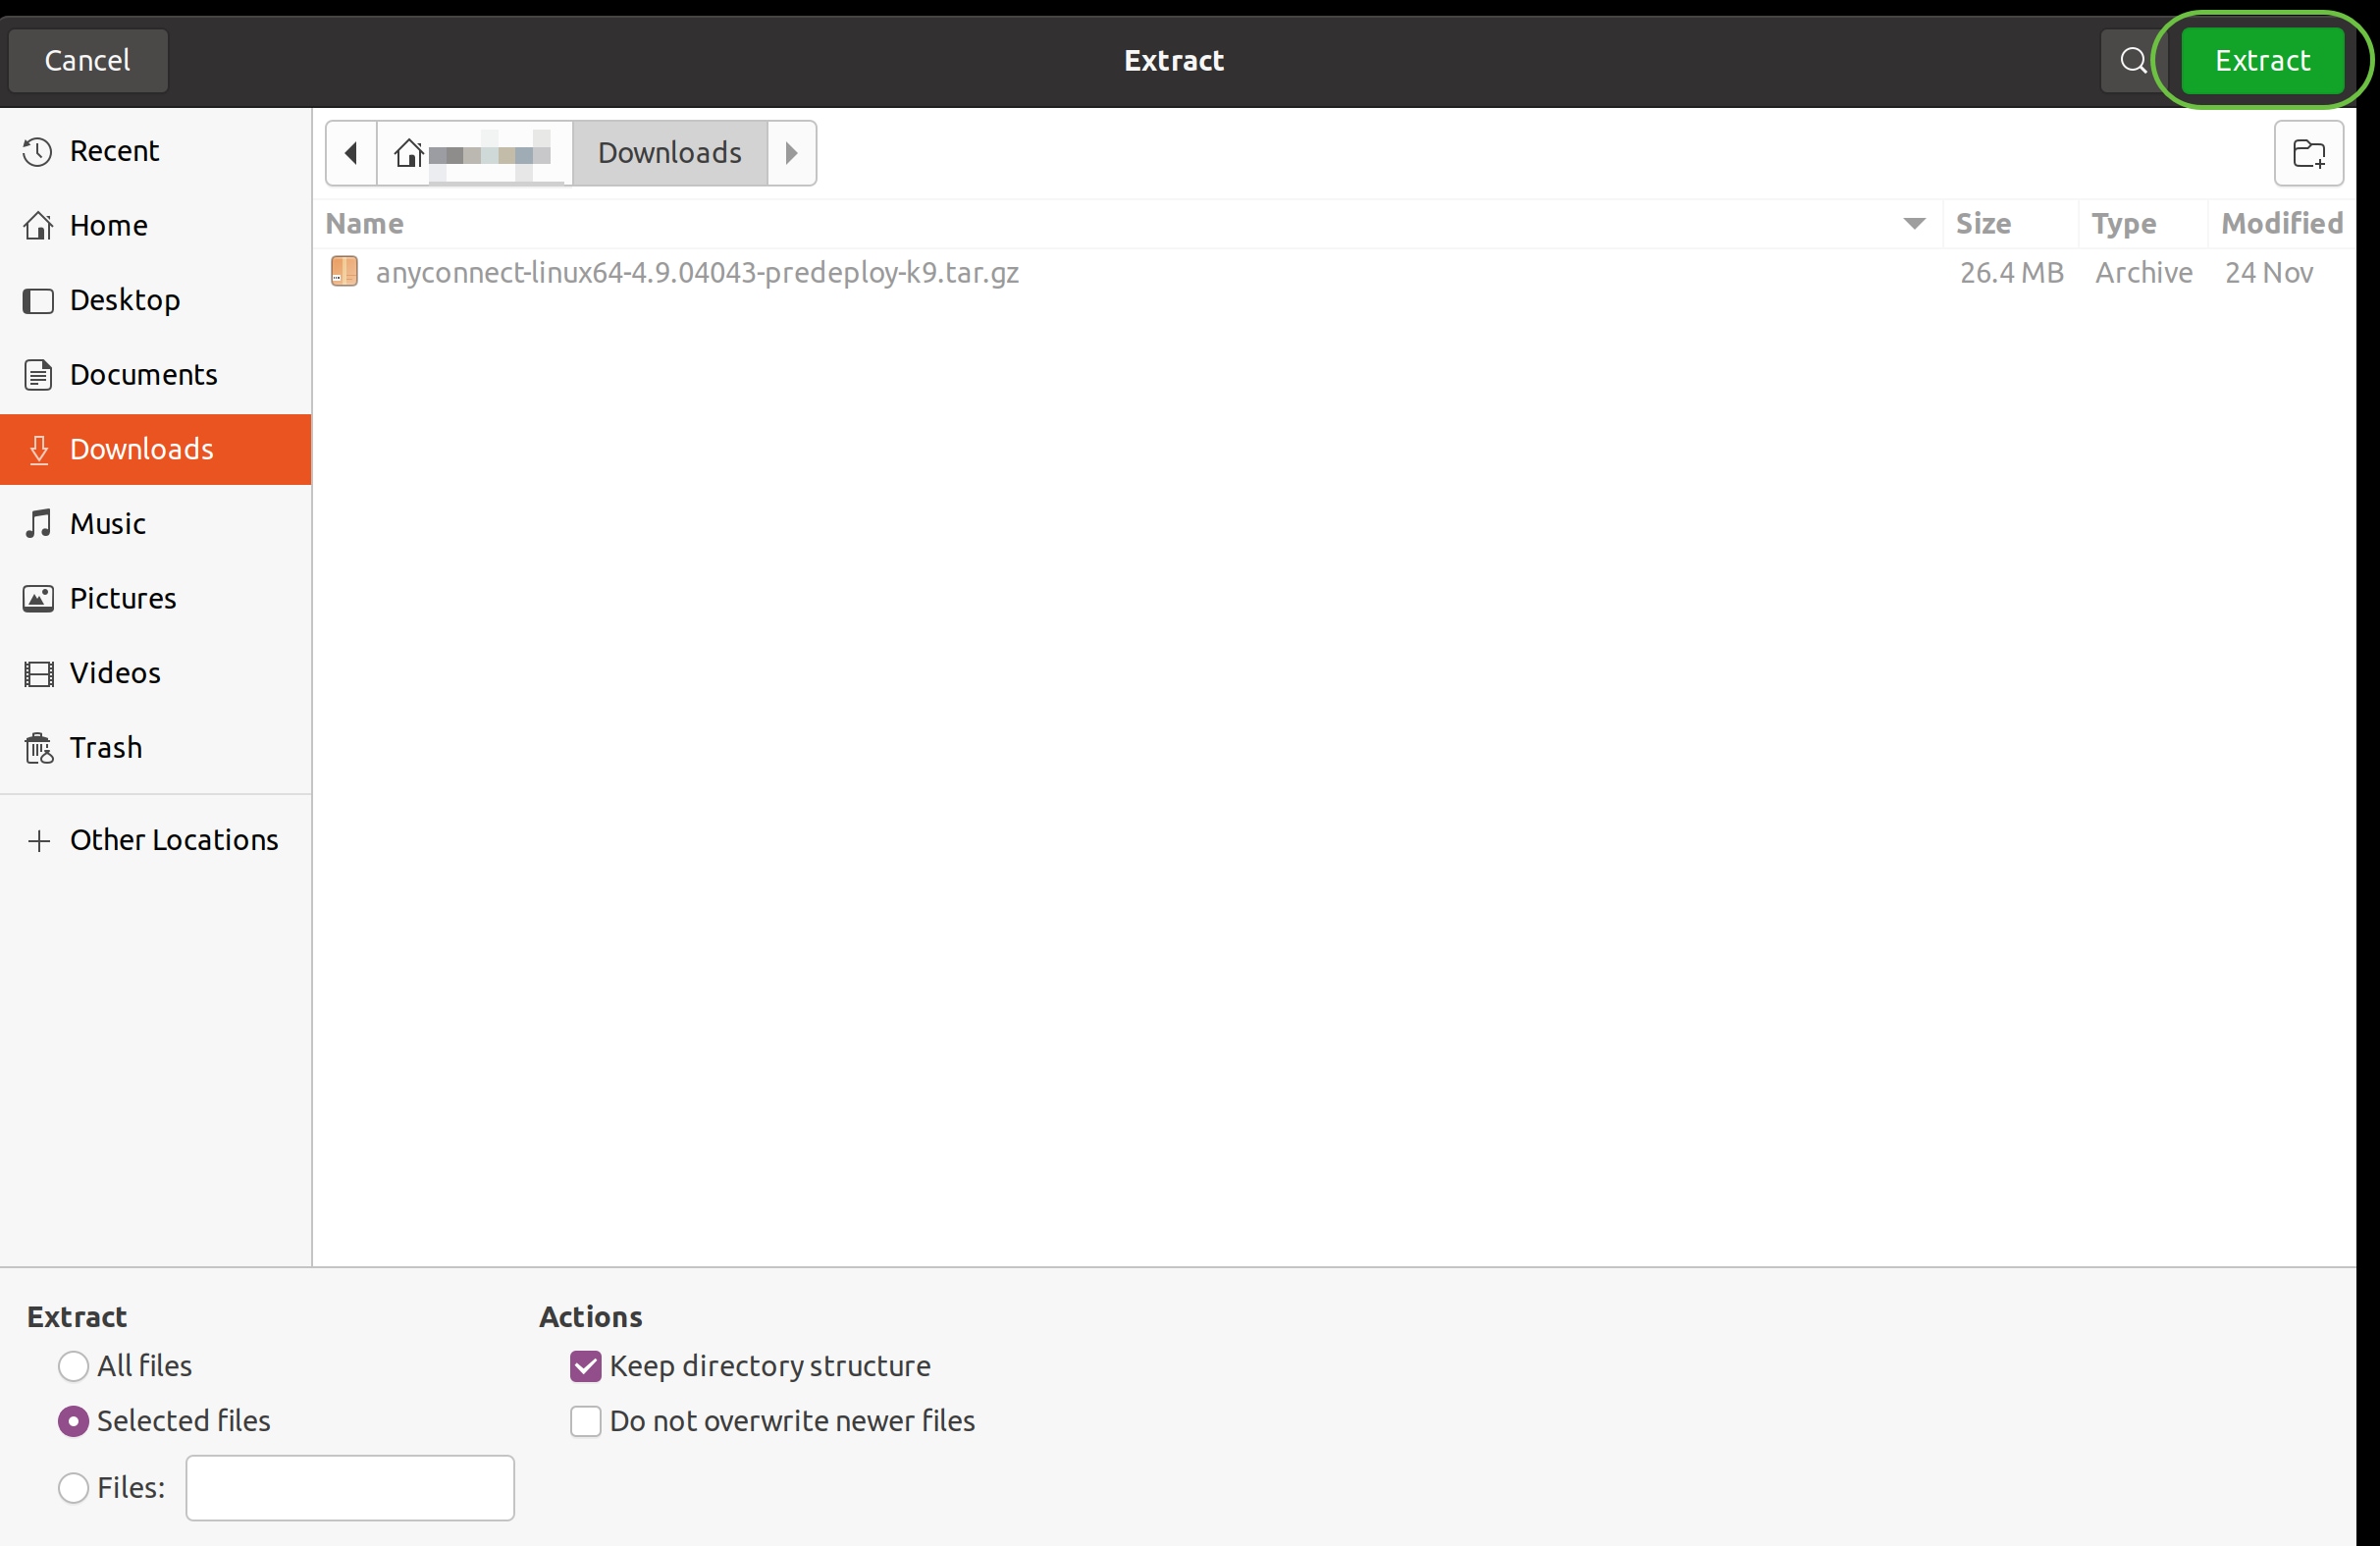
The initial download is a tarball archive (*.TAR, several files packed into one), which must be extracted. To extract the files, right- click on the AnyConnect archive and choose Open with Archive Manager. Click Extract.
Step 6
You will see a notification once the extraction is completed. Click Close.
Step 7
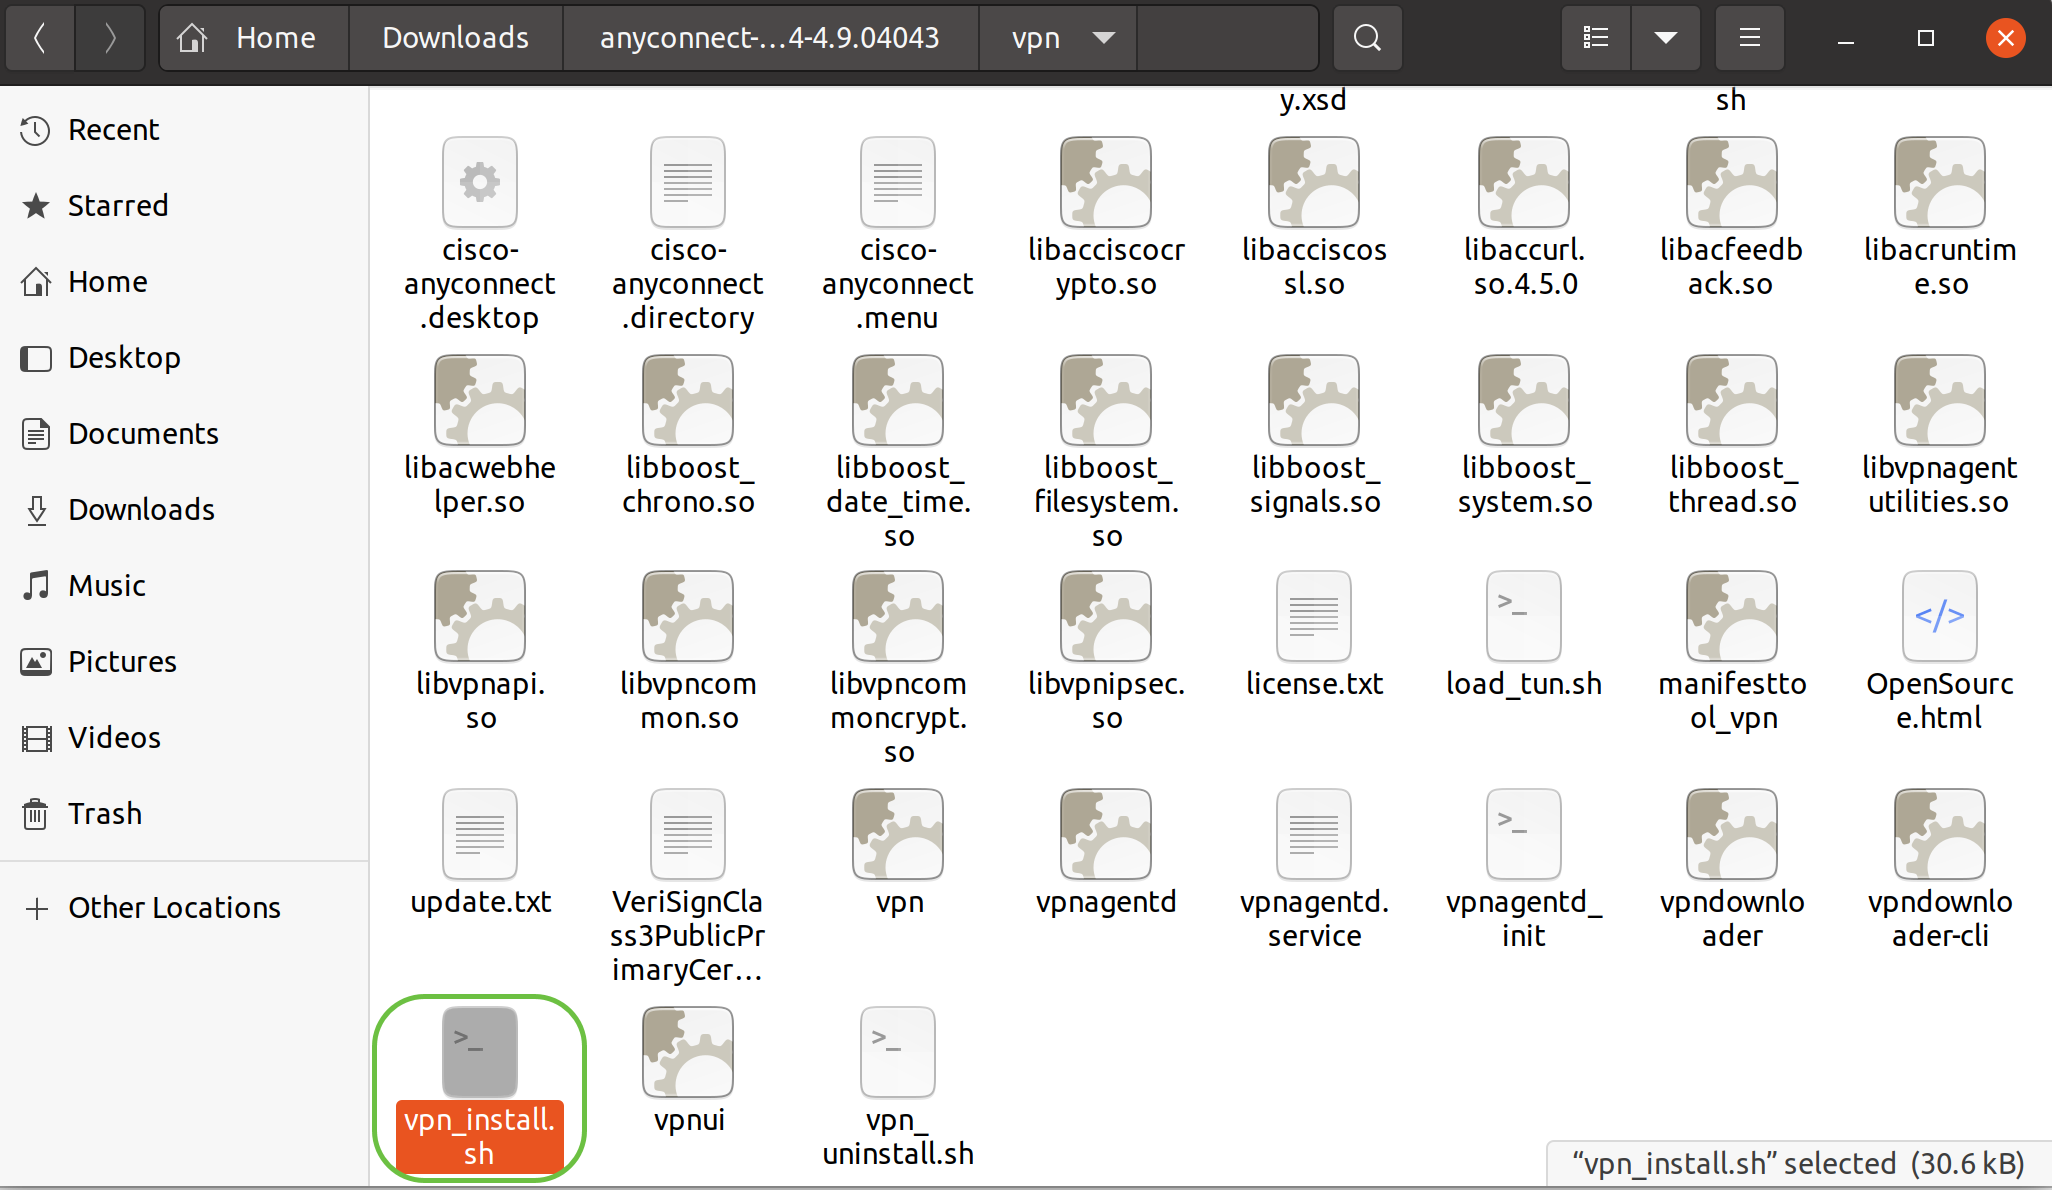
Locate the vpn_install.sh file in the extracted folder.
To run the AnyConnect install script, open a Linux Terminal by pressing Ctrl+Alt+T on your keyboard.
Type ‘sudo ./vpn_install.sh’. This will begin the installation process. For more details on the ‘sudo’ command, click here.
Step 8
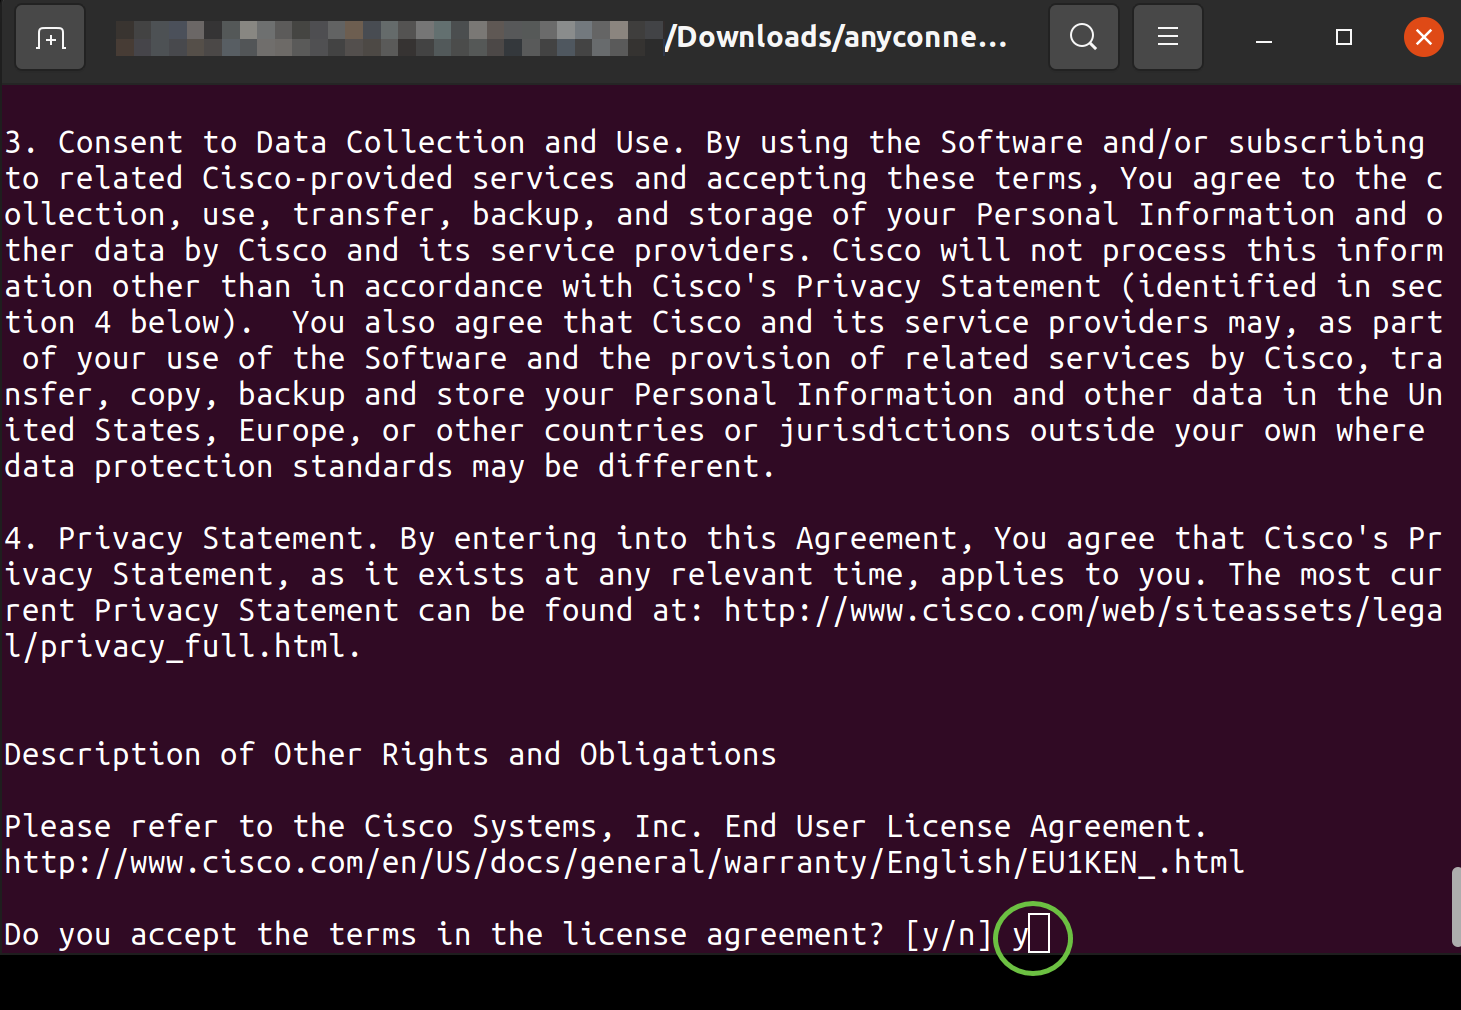
Accept the terms in the license agreement to complete the installation by typing ‘y’.
Using AnyConnect Secure Mobility Client v4.9.x
Step 1
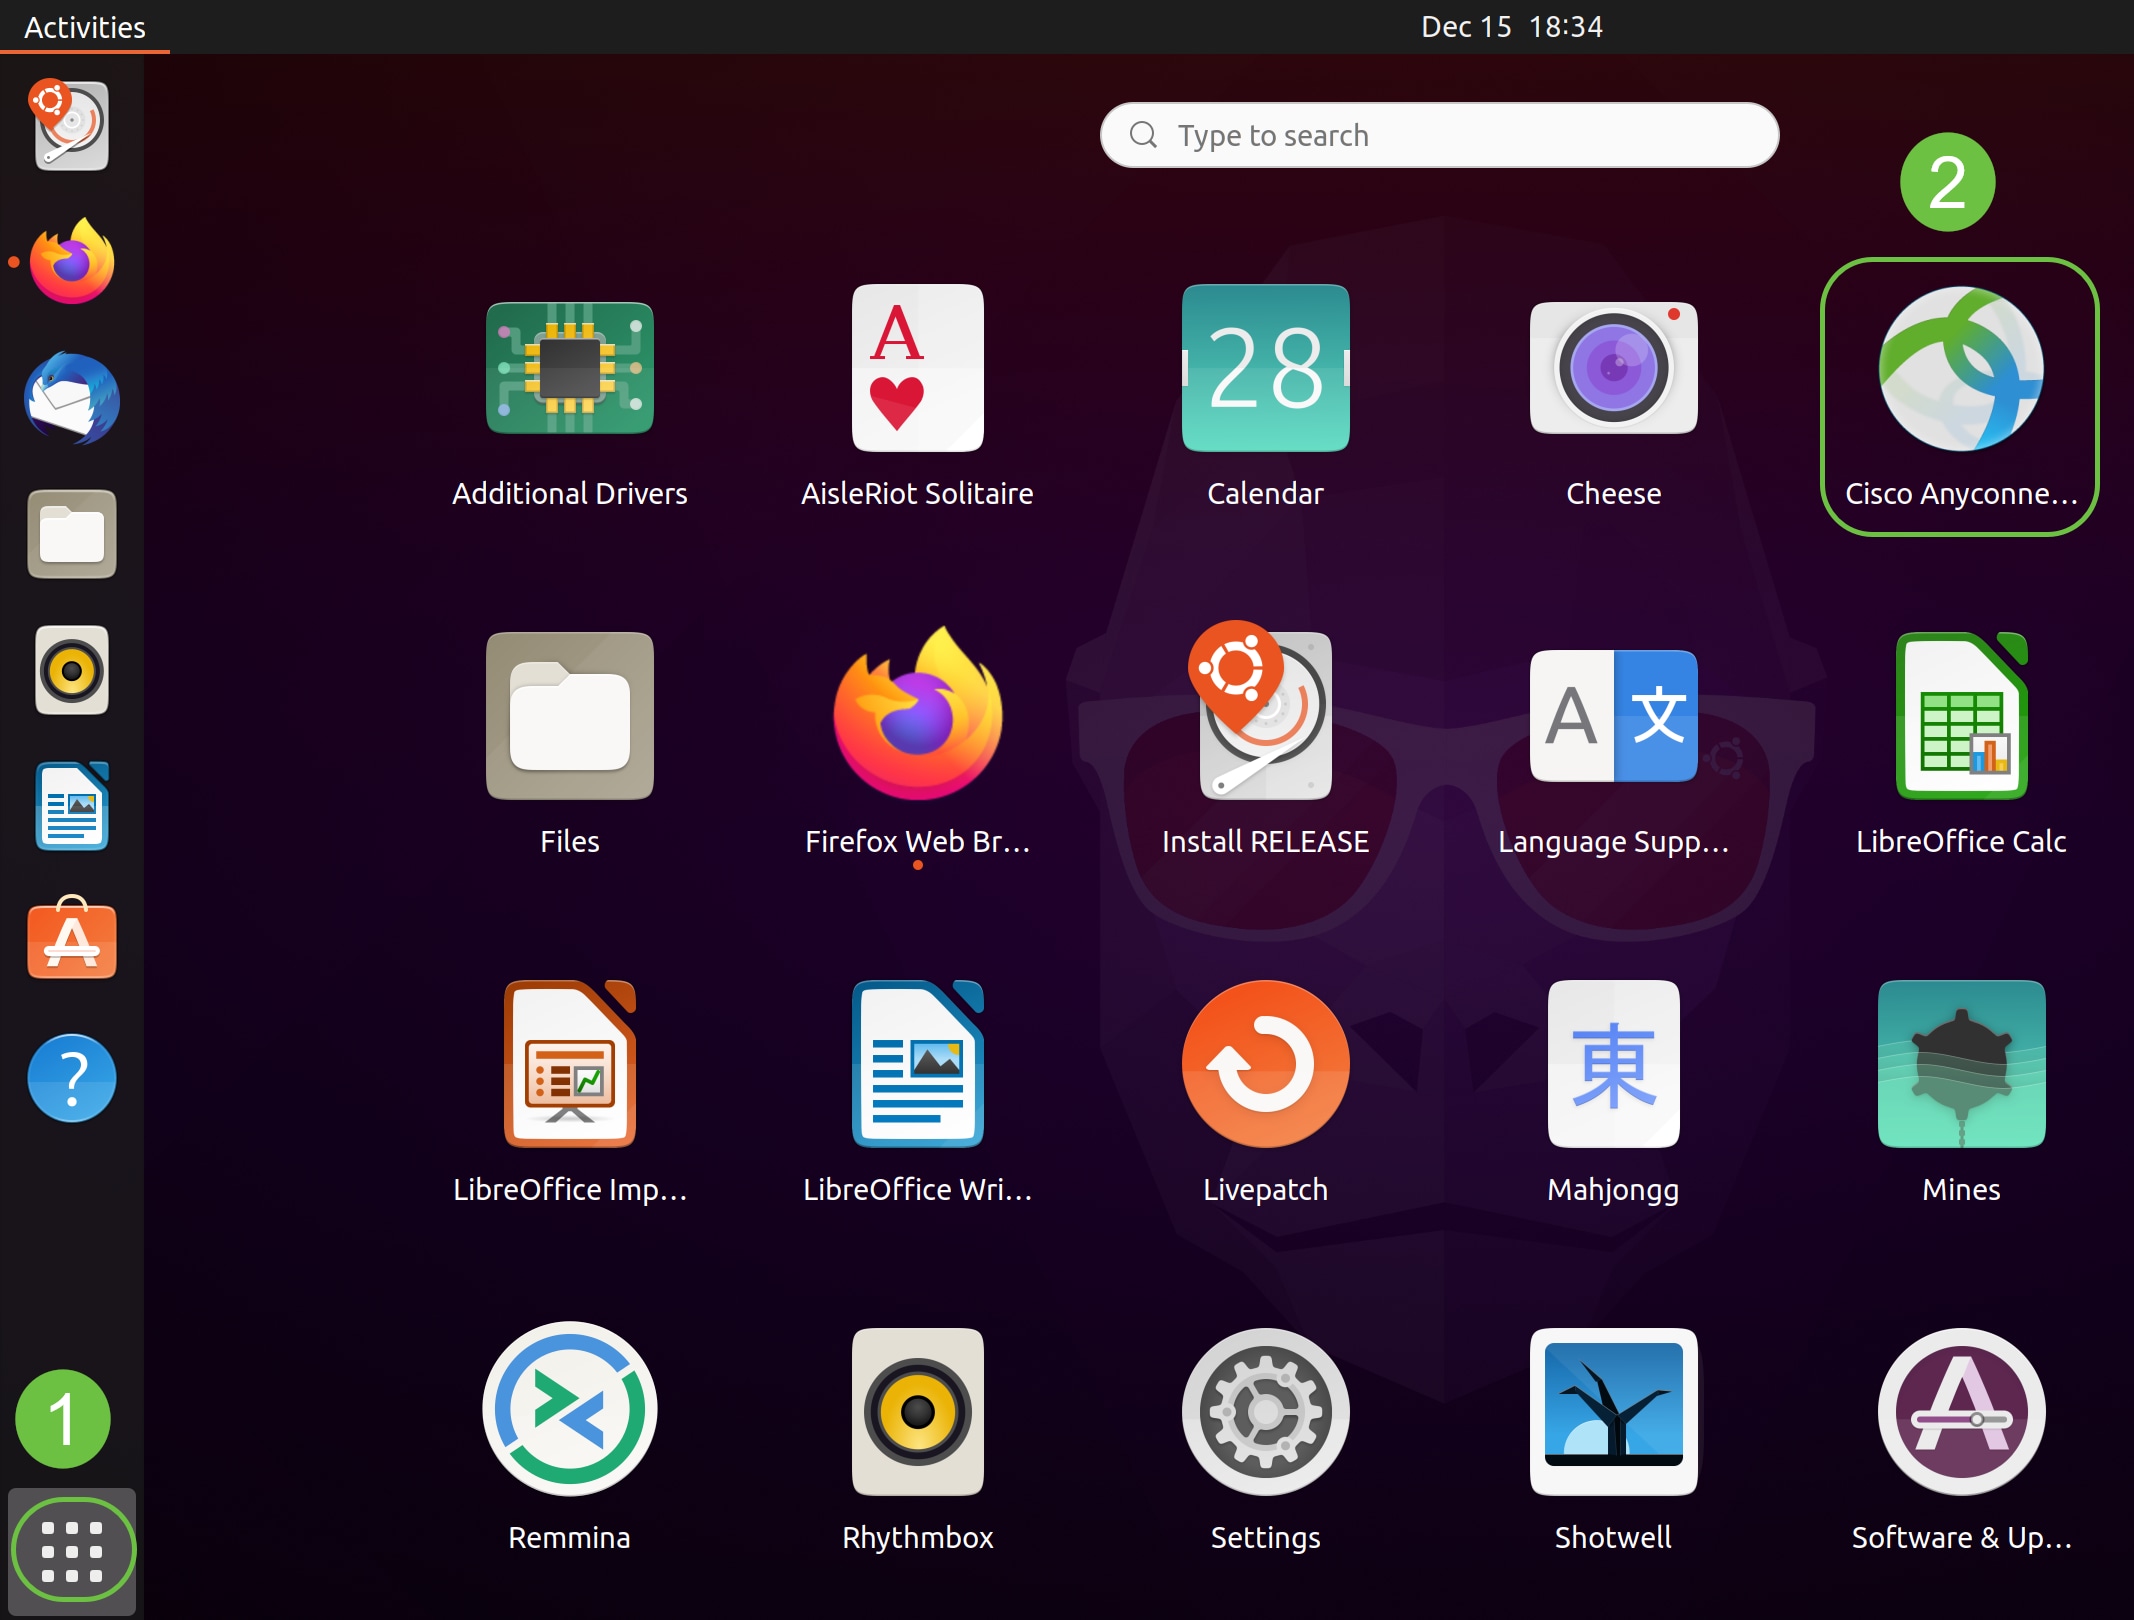
To access the AnyConnect app, click on the start icon (appears as nine dots on the lower left corner). Choose the Cisco Anyconnect app.
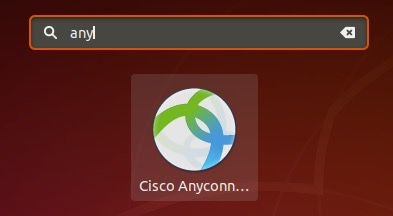
Alternatively, press Super+A (Super key is the windows icon key) on your keyboard to bring up the search bar. Start typing ‘Anyconnect’ and the app will appear.
Step 2
Click on the AnyConnect Secure Mobility Client icon.
Step 3
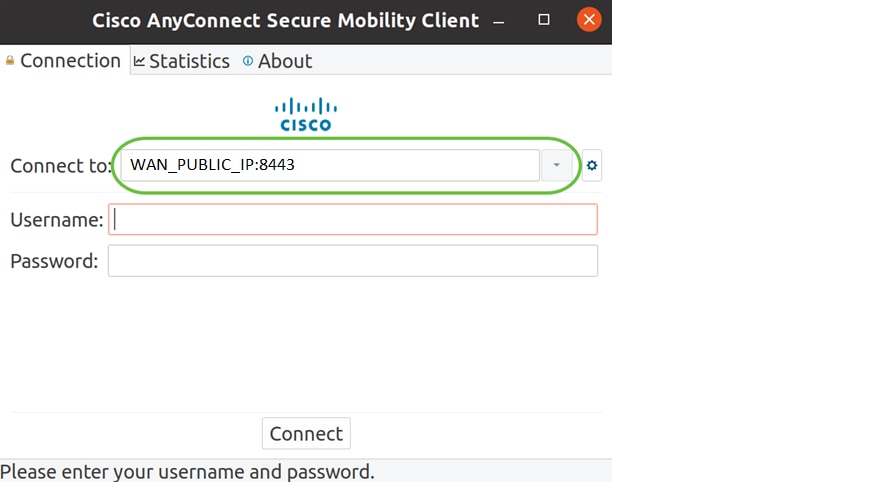
Enter the IP Address or Hostname of your desired server followed by the port number.
For RV340 family, the default port number is 8443.
Step 4
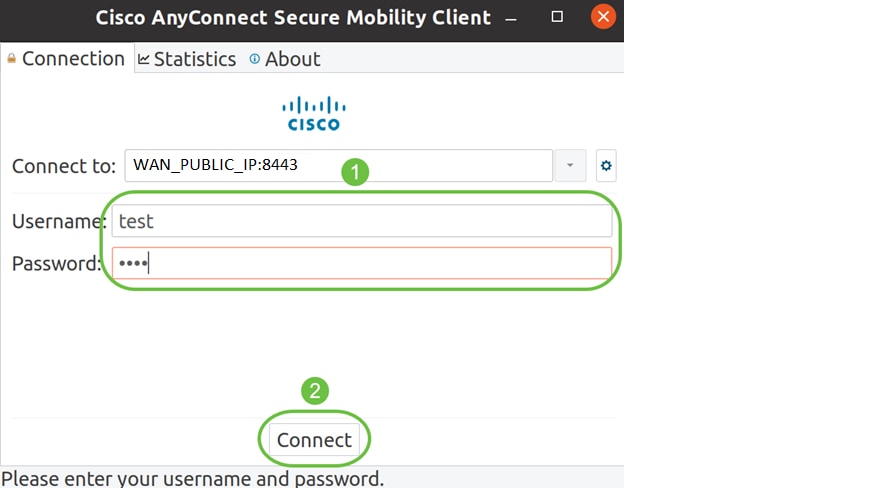
Enter your Username and Password in the fields provided. Click Connect.
Step 5
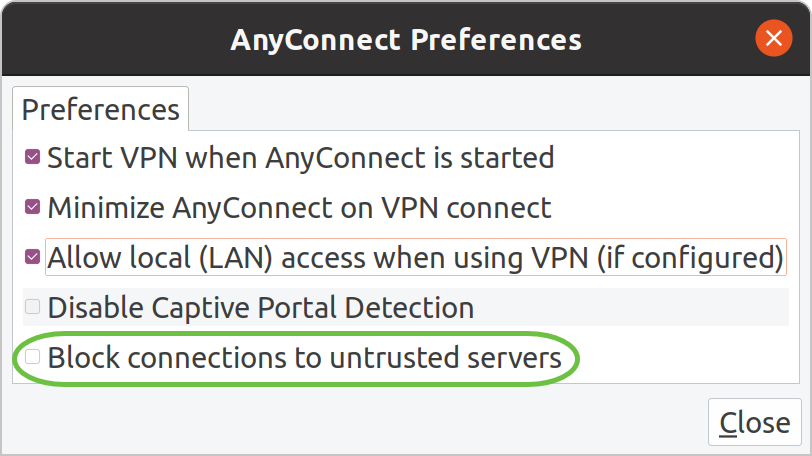
Some connections may not be secure using a trusted SSL certificate. By default, AnyConnect Client will block connection attempts to these servers.
Uncheck Block connections to untrusted servers under Preferences to connect to these servers.
Step 6
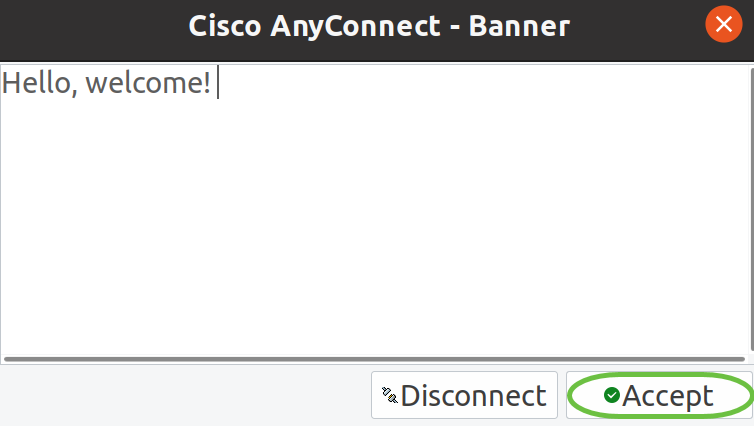
As soon as the connection is established, the login Banner will appear. Click Accept.
You will also see notification that the Cisco AnyConnect Secure Mobility Client is Connected.
Conclusion
There you have it! You have now successfully learned the steps to install and use the Cisco AnyConnect Secure Mobility Client v4.9.x on Ubuntu Desktop using the UI.

