- How to Install Cisco Packet Tracer 8.2 (8.2.0) on Ubuntu 22.04
- How to Install Packet Tracer 8.2.0 on Ubuntu 22.04.1 LTS
- How to Download and Install Packet Tracer
- How to Create a Desktop Shortcut
- How to Create a New Project
- How to Uninstall Packet Tracer
- Installing Old Versions
- Артём Санников
- Установка Cisco Packet Tracer в Ubuntu
- Как установить Cisco Packet Tracer
- Как запустить Cisco Packet Tracer
- Как удалить Cisco Packet Tracer
- Записи по теме
How to Install Cisco Packet Tracer 8.2 (8.2.0) on Ubuntu 22.04
Last Updated: September 5, 2022 | Cisco Packet Tracer | Tolga Bagci
In this article, we will examine how to set up and use the Cisco Packet Tracer 8.2 (8.2.0) simulator software on Ubuntu 22.04 (Jammy Jellyfish), one of the most popular and widely used Linux distributions.
How to Install Packet Tracer 8.2.0 on Ubuntu 22.04.1 LTS
The person or people preparing for Cisco exams prefer Packet Tracer (PT) as a start. They start to make network designs by installing Packet Tracer network software on Windows, Linux, and macOS systems. Although it is easy to install this software on a Windows operating system, this may not be the case on Linux systems.
In order to install and run Cisco network simulator software or any program on an Ubuntu distribution, you must have some command of basic terminal commands. Because when installing a program on Linux, you may need to install additional dependent packages.
The setup files of the older versions of Packet Tracer, such as 7.1, had the extension tar.gz. The extension of the setup file was changed to .run in version 7.2. In the current latest version (8.2), the setup file is now published as a .deb extension.
Packet Tracer 8 version has the ability to cable network devices with physical appearance experience and network controller features to monitor and manage network devices on the project from the host machine.
How to Download and Install Packet Tracer
Before installing the Cisco network simulator software, you must register on the Netacad website and then download the software to your computer for Linux systems and start the installation process.
Open your web browser on your Ubuntu computer and after viewing the Netacad site, enter your registered user information and log in. Then, click Download Packet Tracer from the Resources drop-down list on the Cisco Networking Academy homepage.
After scrolling down the webpage a little bit, click on the 64 Bit Download link under the Ubuntu Desktop Version 8.2.0 English title and save the CiscoPacketTracer_820_Ubuntu_64bit.deb file to your computer.
To install the Packet Tracer setup file with the deb extension that you downloaded to your computer, first open the terminal by pressing the CTRL + Alt + T keys together, and then go to the location where you downloaded the file.
Then, execute the command “sudo dpkg -i CiscoPacketTracer_810_Ubuntu_64bit.deb” in the terminal to start the installation and continue by typing your root password.
sudo dpkg -i CiscoPacketTracer_820_Ubuntu_64bit.debNOTE: You can also install the PacketTracer.deb package using the command below.
sudo apt install ./CiscoPacketTracer_820_Ubuntu_64bit.debIn the Configuring Packet Tracer window, press Enter to accept the software license agreement. If you want more information, you can visit Cisco’s official website as specified in the license agreement.
After confirming the software license agreement, press Enter on the Yes option to accept the EULA terms.
The files with Deb extension in Linux systems are extracted from the archive and installed with the dpkg command. However, when trying to install Packet Tracer or any other program, you may find that dependent packages need to be installed.
When you extract the installation file of Packet Tracer and see that the required dependent packages are not installed, first press Y to confirm the necessary packages such as “libgl1-mesa-glx or libxcb-xinerama0-dev” to be downloaded and installed from the Internet by executing the “sudo apt install -f” command in the terminal and then press Enter.
After the packages required for Packet Tracer 8.2 are downloaded from Linux servers and installed on your system, run the simulator software by executing the packettracer command in the terminal.
You can use the multi-user feature to connect the different networks that you have created in your Packet Tracer software with the software running on the same computer or on a different computer. So if you want to run the multi-user feature every time you start the application, click Yes.
In old versions of Packet Tracer, you had the right to register up to 3 projects without logging in to Cisco. However, in new versions, you now need to log in to your Netacad account.
In this step, when you try to log in to Netacad, the login screen where you enter your account information appears black or white and if you cannot log in, you can fix this problem by temporarily turning off your internet, or you should edit the cisco-pt.desktop file as a permanent solution.
To solve the login problem, open the terminal and execute the command “sudo nano /usr/share/applications/cisco-pt.desktop”. After viewing the contents of the cisco-pt.dektop file, change the Exec value as follows.
Change (Exec=/opt/pt/packettracer %f) To (Exec=/opt/pt/packettracer --no-sandbox %f)After clicking Cisco Networking Academy, type your registered email account and click Next.
Type your Netacad account password and click Log in.
To verify that you have installed the latest version of Packet Tracer, click Help / About to check the version number.
How to Create a Desktop Shortcut
After installing Cisco Packet Tracer on Ubuntu, a shortcut to the desktop location is not automatically created. So, you need to copy the shortcut to the desktop where the applications are located.
To copy the shortcut in the applications to the desktop, execute the command “cp /usr/share/applications/cisco-pt.desktop ~/Desktop/” in the terminal.
cp /usr/share/applications/cisco-pt.desktop ~/Desktop/After copying the shortcut, execute the command “chmod +x cisco-pt.desktop” to make the file executable.
chmod +x ~/Desktop/cisco-pt.desktopIf the Packet Tracer desktop shortcut is still not active, right-click on it and click Allow Launching. After this process, you will see that the desktop shortcut is active.
How to Create a New Project
After installing Packet Tracer, you can now start creating new projects to prepare for your Cisco exams and to better understand network protocols.
As an example, let’s connect a desktop computer and a laptop computer with Cisco Switch.
After clicking the end-user devices from the device categories, you can see devices such as PC, Laptop, Server, phone, or TV. Add a PC and Laptop to the workspace.
To establish a network connection between the PC and Laptop, click on the Switch group from the network devices category and add the 2960 Switch to the workspace.
To connect the computers you have added to the Switch, click Automatically choose the connection type from the cabling category.
After connecting the computers to the Switch, click PC0 and click IP Configuration on the Desktop tab.
Type the static IP address 192.168.1.100 in the FastEthernet0 interface of PC0 and type 255.255.255.0 in the Subnet Mask field.
Likewise, configure Laptop0’s IP configuration as 192.168.1.200 / 255.255.255.0.
Open Command Prompt to ping PC0 from Laptop0.
Ping from Laptop0 to PC0 using the command ping 192.168.1.100 and check the network connection.
Likewise, ping Laptop0 using the ping 192.168.1.200 command in PC0’s command prompt and check the connection.
How to Uninstall Packet Tracer
If you want to uninstall the Packet Tracer software from your Ubuntu computer, you can do this with a single line command using the terminal.
Open Terminal and execute the sudo apt remove packettracer command and type Y and press Enter to confirm the removal of dependent packets that were automatically installed but no longer needed.
sudo apt remove packettracerExecute the command below to delete the Cisco Packet Tracer desktop shortcut as well.
sudo rm -rf ~/Desktop/cisco-pt.desktopFinally, after uninstalling a program in Ubuntu, execute the command below to delete the useless files of the packages received and prevent your system’s cache from growing.
sudo apt autoclean && sudo apt autoremove
Installing Old Versions
Packet Tracer 7.2.2
- To install Packet Tracer.run, first open the terminal and change the permission of the file with the chmod command as follows. Then, start the installation process with the command ./PacketTracer-7.2.2-ubuntu-setup.run.
chmod +x PacketTracer-7.2.2-ubuntu-setup.run ./PacketTracer-7.2.2-ubuntu-setup.runwget https://ftp.us.debian.org/debian/pool/main/libp/libpng/libpng12-0_1.2.50-2+deb8u3_amd64.deb sudo dpkg -i libpng12-0_1.2.50-2+deb8u3_amd64.debwget https://archive.ubuntu.com/ubuntu/pool/main/g/glibc/multiarch-support_2.29-0ubuntu2_amd64.deb sudo dpkg -i multiarch-support_2.29-0ubuntu2_amd64.debmkdir cpt; dpkg -x libpng12-0_1.2.50-2+deb8u3_amd64.deb ./cpt cp ./cpt/lib/x86_64-linux-gnu/libpng12.so.0 /opt/pt/bin/cp /opt/pt/bin/Cisco-PacketTracer.desktop /home/user/Desktop/ chmod +x Cisco-PacketTracer.desktopPacket Tracer 7.2.1
- Open Terminal by pressing CTRL + Alt + T on the Ubuntu desktop and follow the commands below to extract the Packet Tracer.tar file to the folder.
mkdir CPT72 tar -xvzf Packet\ Tracer\ 7.2.1\ for\ Linux\ 64\ bit.tar.gz -C CPT72.wget http://ftp.us.debian.org/debian/pool/main/libp/libpng/libpng12-0_1.2.50-2+deb8u3_amd64.deb dpkg -i libpng12-0_1.2.50-2+deb8u3_amd64.debsudo mv Packet\ Tracer\ 7.2.1.desktop /usr/share/applicationsPacket Tracer 7.1.1
Installing the 7.1.x (7.1.1) versions of Packet Tracer on your Linux computer is almost the same as the above steps. However, as we said, you may need to install different dependent packages for the program. Download and install the dependent packages for version 7.1.1 using the commands below.
sudo apt-get install libqt5webkit5 libqt5multimediawidgets5 libqt5svg5 libqt5script5 libqt5scripttools5 libqt5sql5 wget https://mirrors.kernel.org/ubuntu/pool/main/i/icu/libicu52_52.1-3ubuntu0.8_amd64.deb sudo dpkg -i libicu52_52.1-3ubuntu0.8_amd64.deb wget https://ftp.debian.org/debian/pool/main/libp/libpng/libpng12-0_1.2.50-2+deb8u3_amd64.deb sudo dpkg -i libpng12-0_1.2.50-2+deb8u3_amd64.deb Артём Санников
Данная книга является руководством для начинающих специалистов в области анализа и обработки данных. В книге рассматривается язык SQL и его процедурное расширение PL/SQL от компании Oracle.
Установка Cisco Packet Tracer в Ubuntu
Cisco Packet Tracer — программное обеспечение, которое позиционирует себя как симулятор передачи данных и позволяет строить работоспособные модели сети на базе оборудования cisco. Данное программное обеспечение является кроссплатформенным и распространяется на такие операционные системы, как: Linux, Windows, MacOS, Android и IOS. Сейчас мы рассмотрим процесс установки Packet Tracer в операционной системе Ubuntu.
Как установить Cisco Packet Tracer
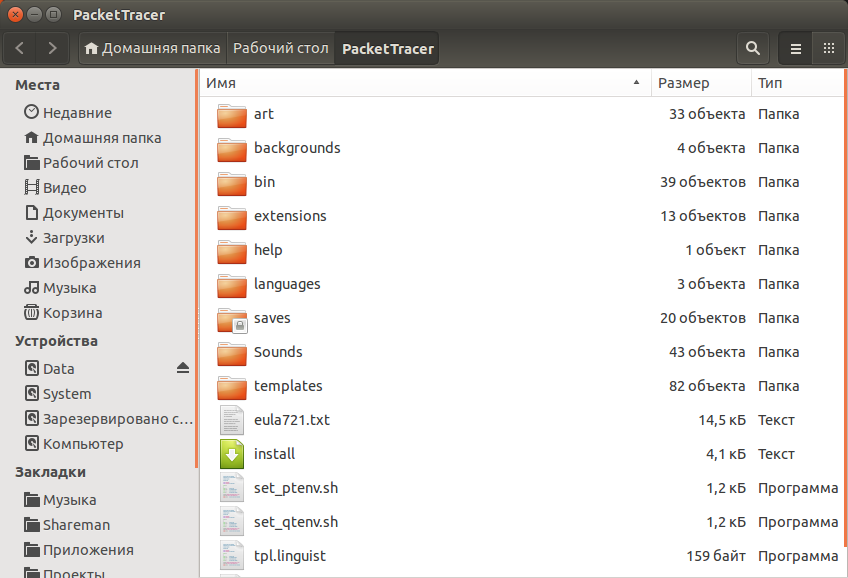
Переходим на официальный сайт компании Cisco и загружаем последний релиз Packet Tracer, затем распаковываем архив в любую директорию (из которой будет удобнее произвести установку). В моём случае я распаковал архив на рабочий стол.
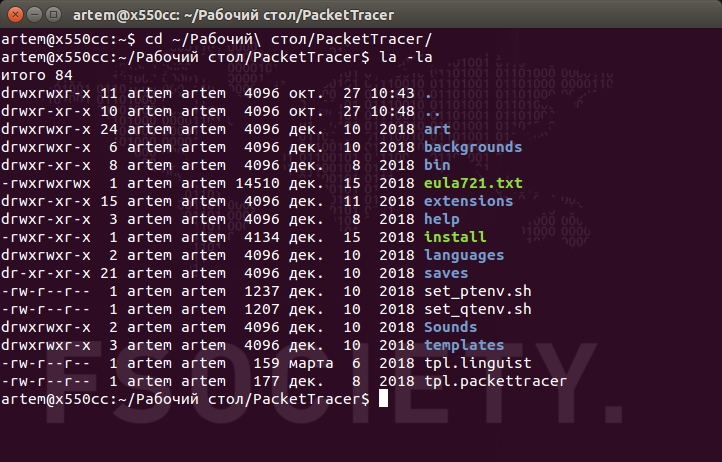
Открываем терминал сочетанием клавиш Ctrl + Alt + T и переходим в директорию с Packet Tracer (куда распаковали архив).
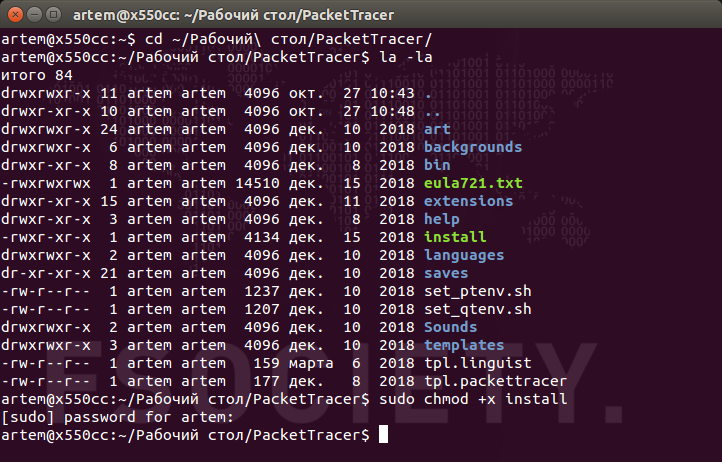
Делаем файл install исполняемым, то есть добавляем разрешение на исполнение к существующим разрешениям.
sudo chmod +x install
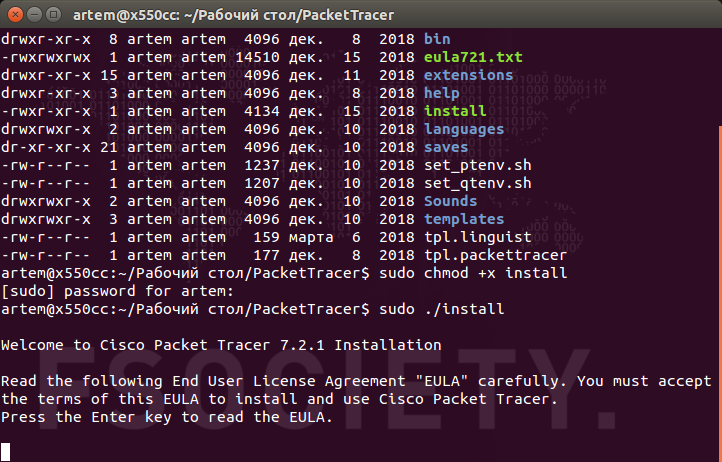
Нажимаем Enter для запуска установочного процесса.
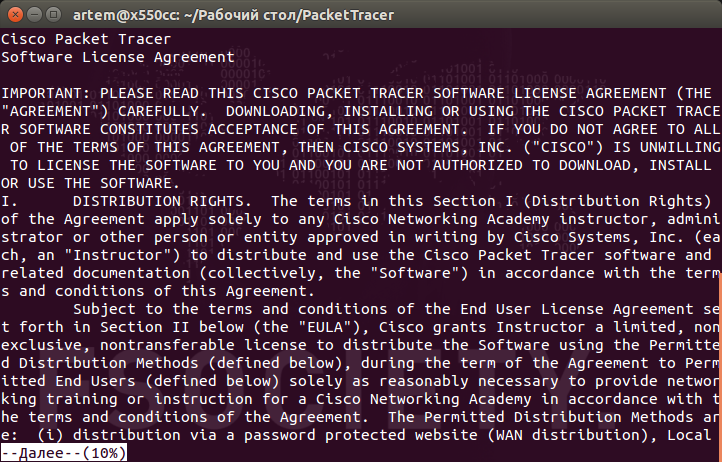
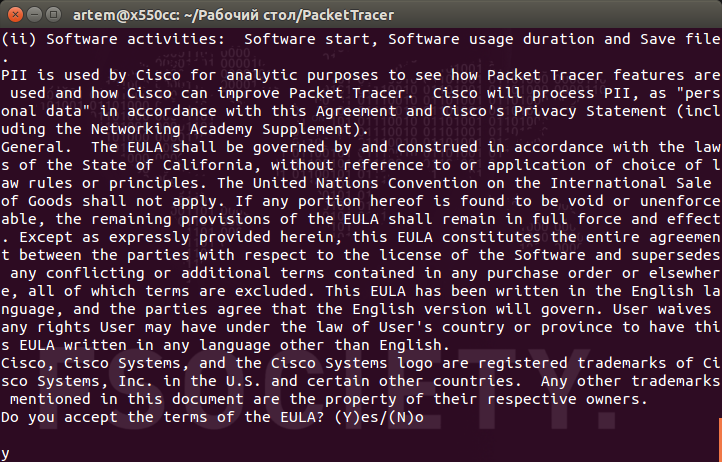
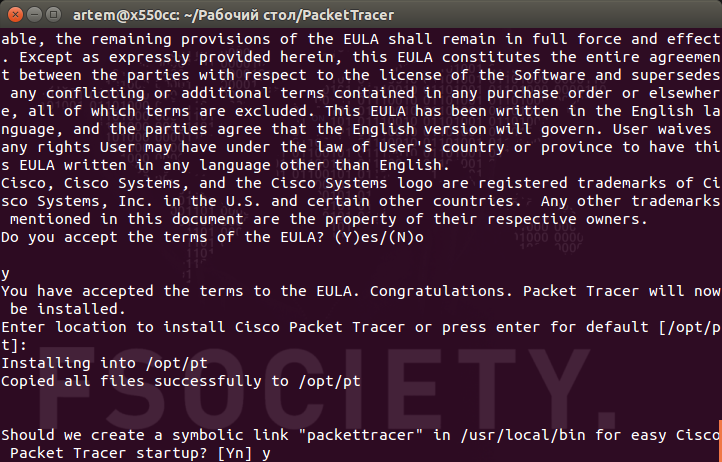
Читаем лицензионное соглашение и соглашаемся с политикой конфиденциальности.
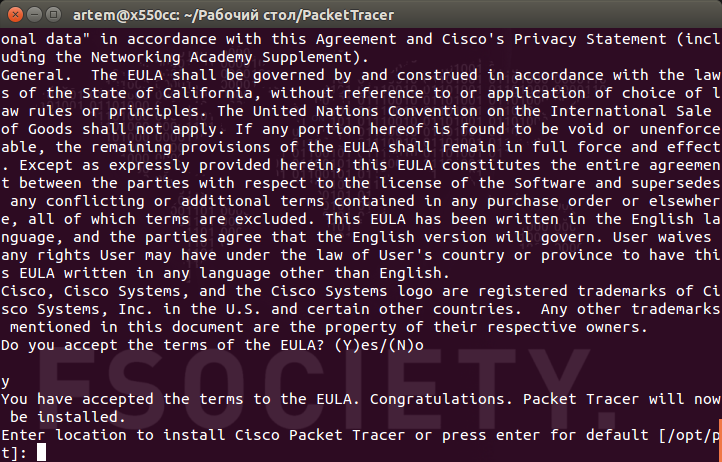
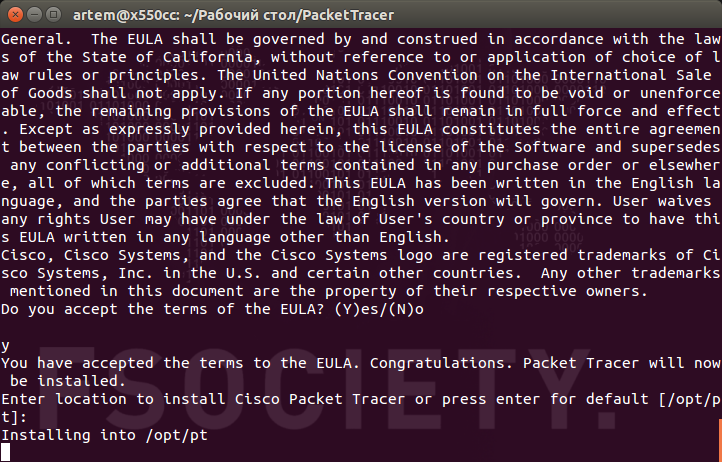
Система предлагает выбрать каталог для установки программного обеспечения. По-умолчанию это каталог /opt/pt/ , если устраивает, нажимаем Enter. А если нужно установить в другой каталог вводим соответствующий путь до директории.
Пошёл процесс копирования
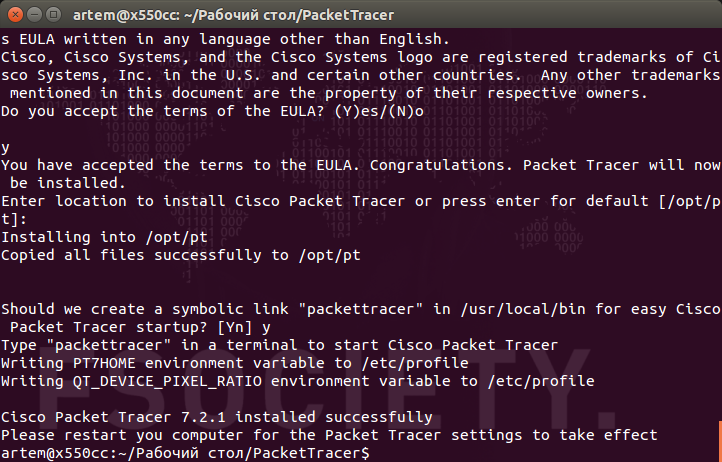
Далее нам предлагают создать символьную ссылку (это позволит запускать программу при помощи одной команды в терминале). Если символьная ссылка нужна, нажимаем Enter, если нет — вводим No.
Программное обеспечение Cisco Packet Tracer успешно установлено.
Как запустить Cisco Packet Tracer
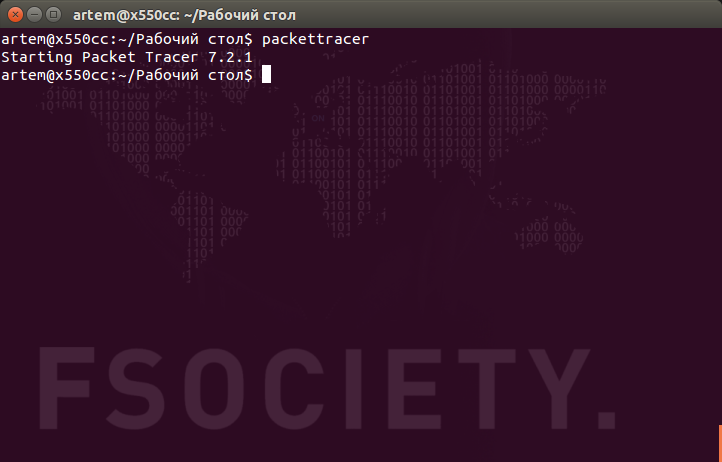
Откройте терминал сочетанием клавиш Ctrl + Alt + T , а затем выполните команду:
Как удалить Cisco Packet Tracer
Удалить Packet Tracer не сложно, главное понимать, что и в какой каталог вы установили. По-умолчанию программное обеспечение устанавливается в каталог /opt/pt/ , а символьная ссылка в /usr/local/bin/ .
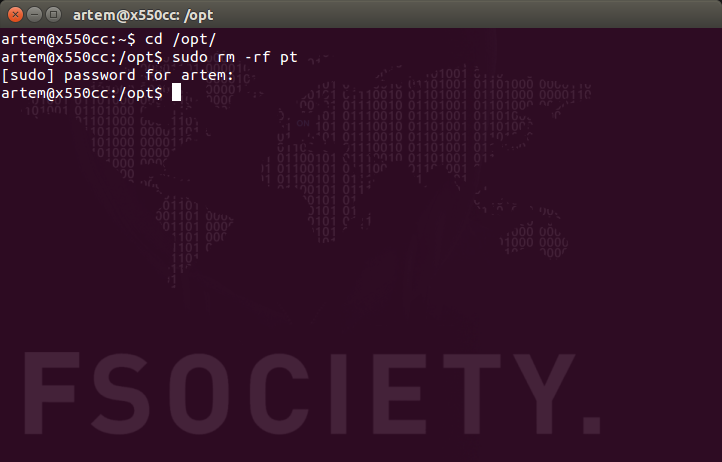
Первым делом перейдём в каталог /opt/ и удалим директорию /pt/ с программным обеспечением
cd /opt/
sudo rm -rf /pt
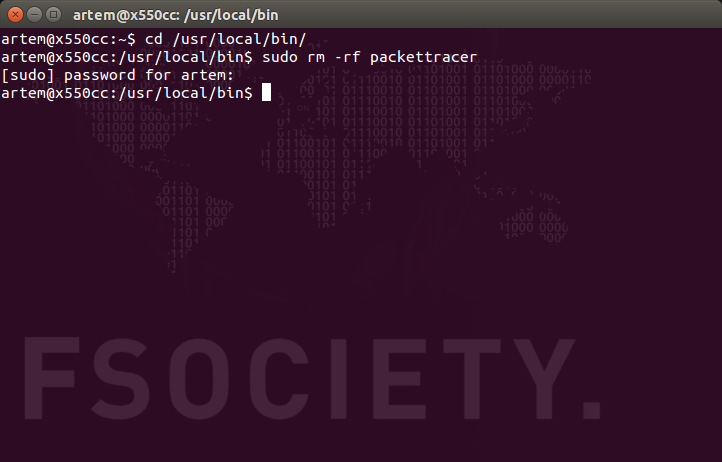
Далее переходим в каталог /usr/local/bin/ и удаляем символьную ссылку packettracer .
cd /usr/local/bin/
sudo rm -rf packettracer


