- Install Packet Tracer on Ubuntu 18.04 LTS
- Downloading Packet Tracer:
- Installing Packet Tracer on Ubuntu 18.04 LTS:
- Using Packet Tracer 7.2:
- About the author
- Shahriar Shovon
- Install Cisco packet tracer on Linux Desktop
- Extracting the archive and running the installation
- Installing the missing library package
- Running the Cisco Packet Tracer and creating a new shortcut
- Summary
Install Packet Tracer on Ubuntu 18.04 LTS
![]()
If you’re a newbie in networking trying to get certifications such as Cisco CCENT or CCNA, then Packet Tracer will be a great help to you.
Cisco Packet Tracer is a network simulation software for simulating Cisco networking devices. You can use Cisco Packet Tracer to design simple to pretty complex network topologies. You can also configure the virtual computers, routers, switches etc in Packet Tracer to test your network topology.
Cisco Packet Tracer can also be used to simulate wireless networks, IP telephony networks (VoIP) and many more.
If you’re aiming for Cisco certification such as CCENT, CCNA etc, then you can use Cisco Packet Tracer to learn to configure Cisco networking devices (such as Switches and Routers) using Cisco IOS commands.
In this article, I will show you how to install and use Cisco Packet Tracer on Ubuntu 18.04 LTS. Let’s get started.
Downloading Packet Tracer:
You can download and use Cisco Packet Tracer for free. You need a Cisco Network Academy account in order to download and use Cisco Packet Tracer. You can create a Cisco Network Academy account for free.
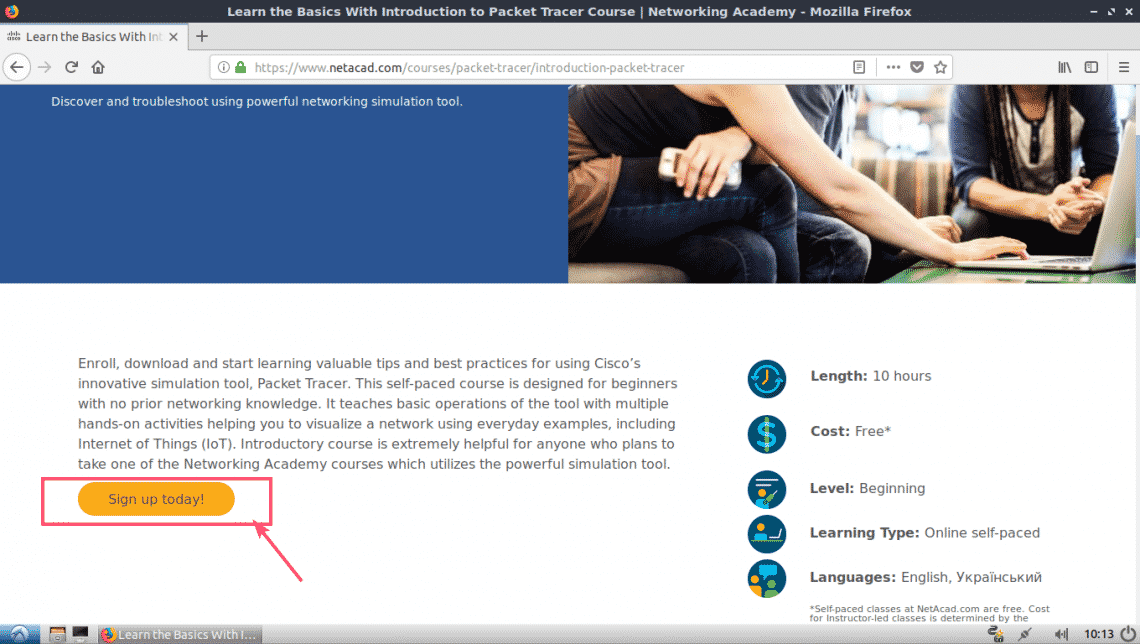
To create a Cisco Network Academy account, visit https://www.netacad.com/courses/packet-tracer from any web browser of your choice and you should see the following page. Now click on Enroll to download Packet Tracer as marked in the screenshot below.

You should see the following page. Now click on Sign up today! as marked in the screenshot below.
Now click on English.

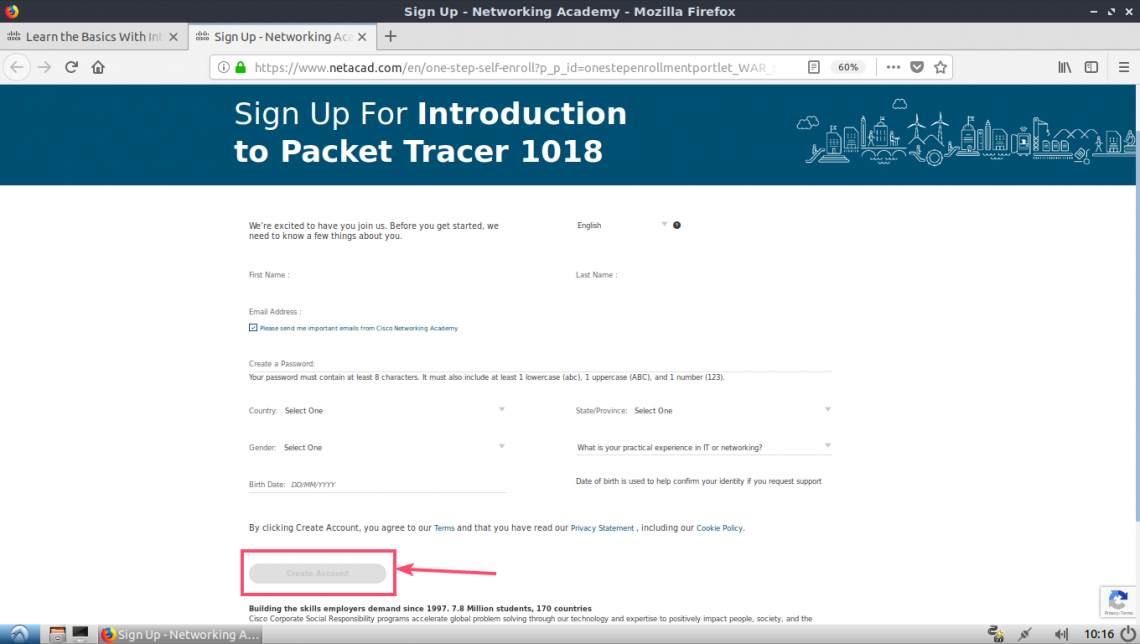
A sign up page should open. Fill in the details and click on Create Account as marked in the screenshot below.
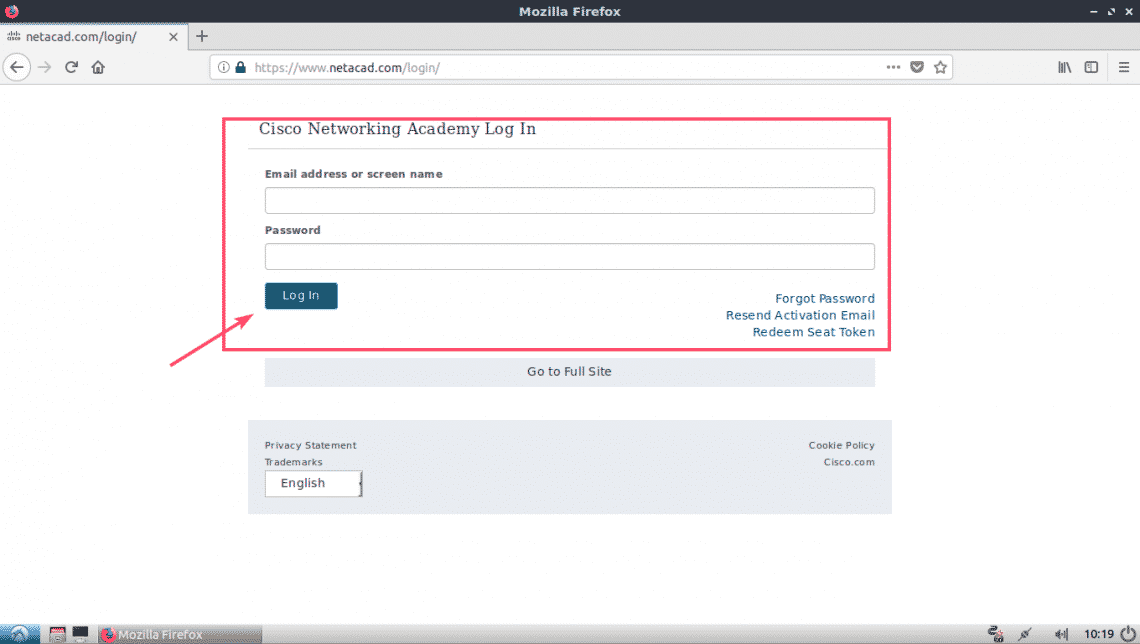
Once you’ve signed up and verified your account, go to https://www.netacad.com/ and you should see the following page. Click on Log In as marked in the screenshot below.

Now type in your email and password and click on Log In.
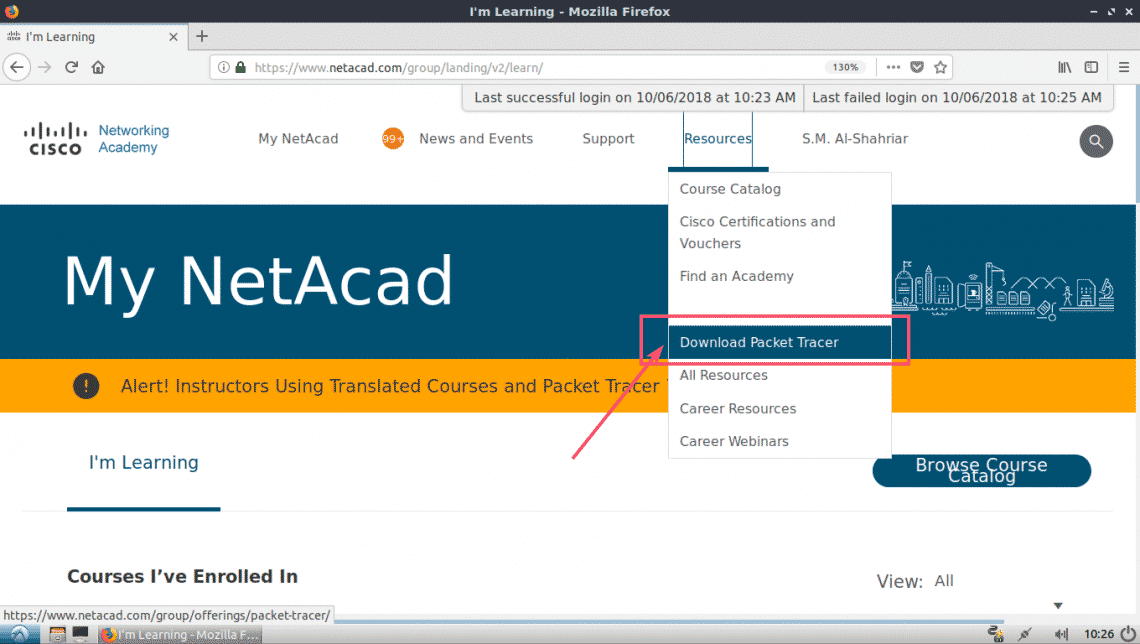
Once you’re logged in, click on Resource > Download Packet Tracer as marked in the screenshot below.
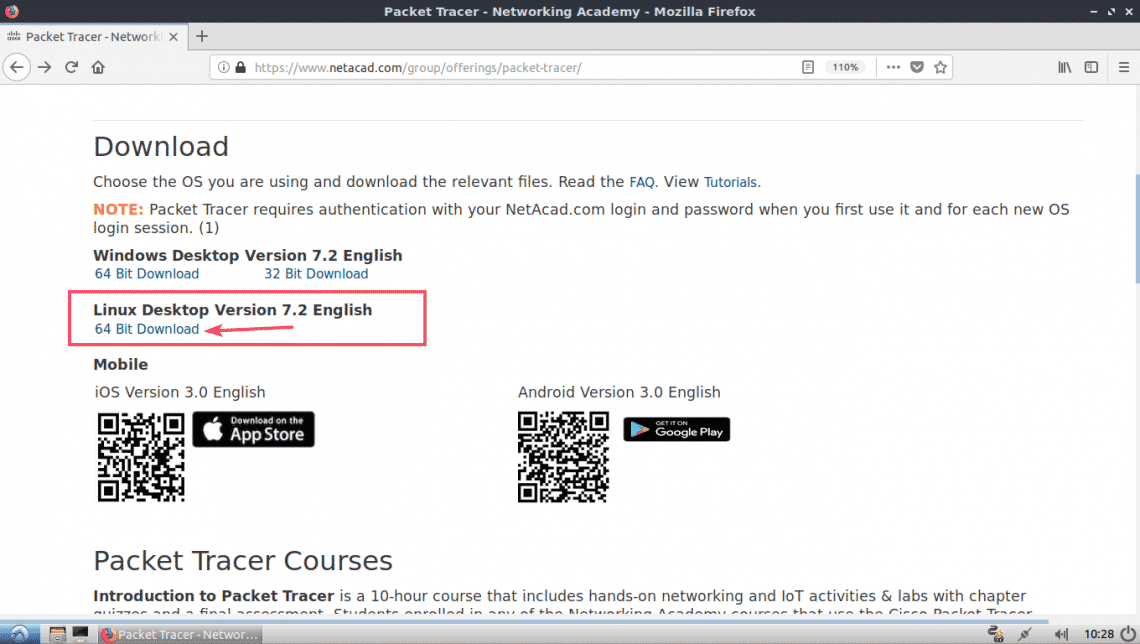
Now navigate to the Download section. At the time of this writing, Packet Tracer 7.2 is the latest version. From the Linux Desktop Version 7.2 English section, click on 64 Bit Download link as marked in the screenshot below.
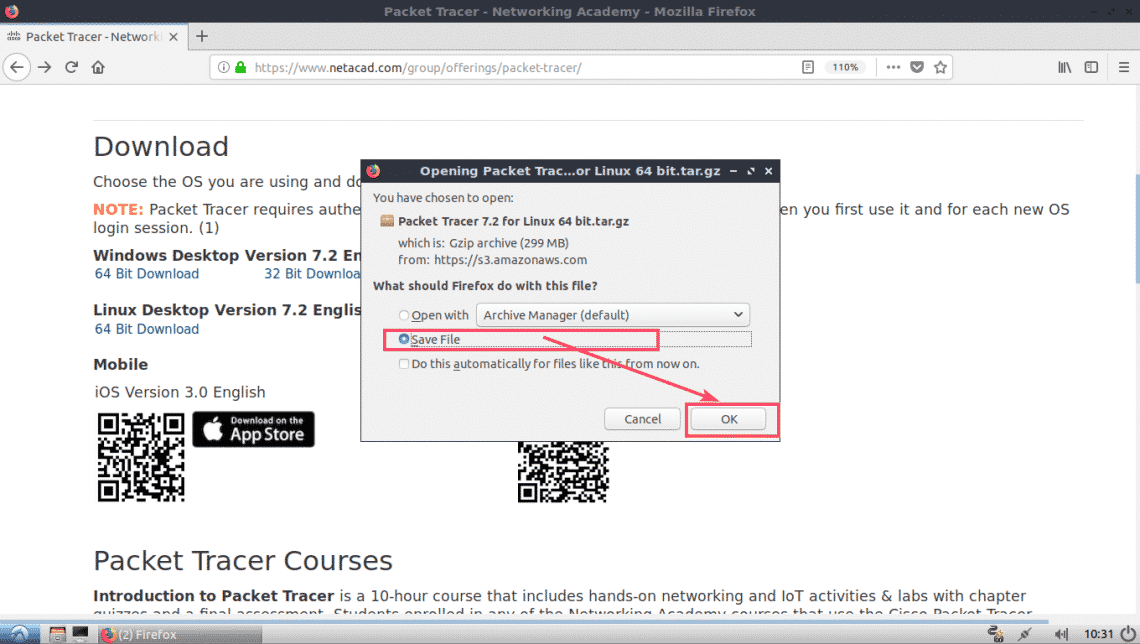
Your browser should prompt you to download Packet Tracer. Click on Save File and click on OK.
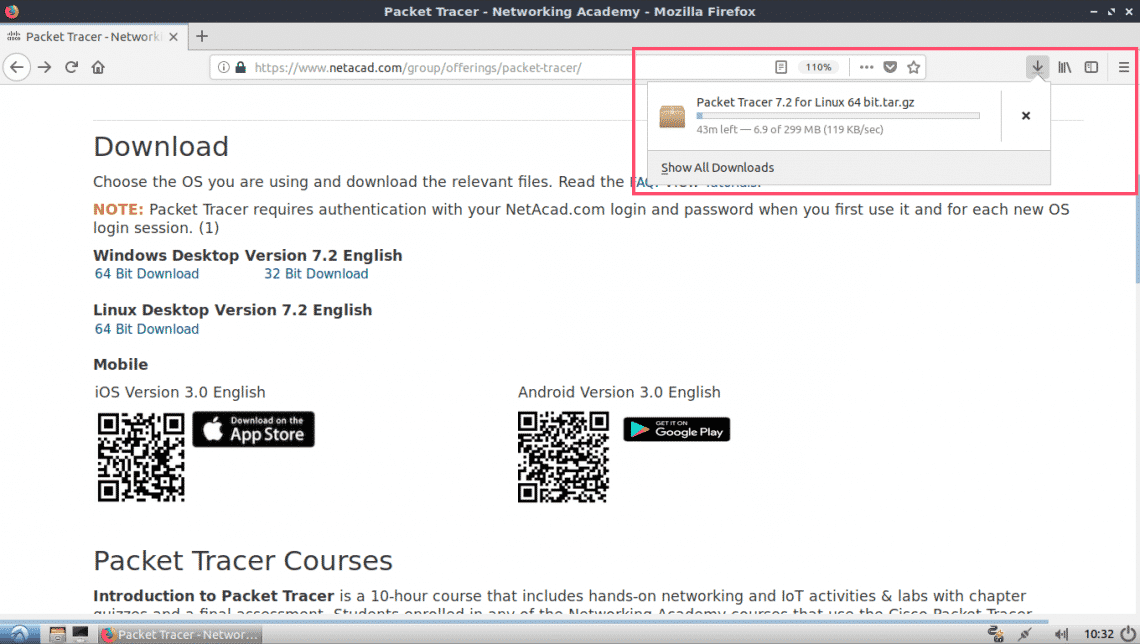
Your download should start.
Installing Packet Tracer on Ubuntu 18.04 LTS:
Now that Packet Tracer is downloaded. It’s time to install it.
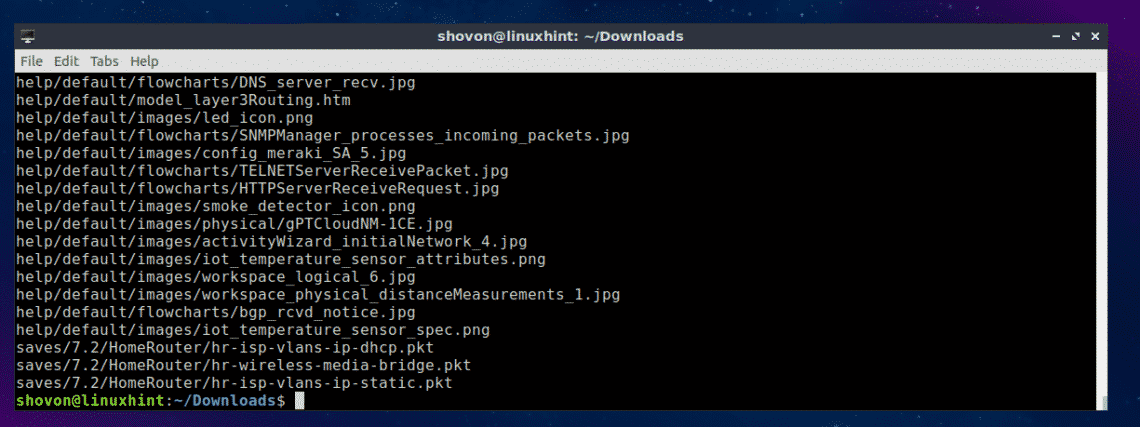
First, navigate to the ~/Downloads directory of your Ubuntu 18.04 LTS machine with the following command:

As you can see, Packet Tracer archive is available here.

Now make a new directory (Let’s call it PT72Installer) to extract the installer from the Packer Tracer archive you just downloaded.
Now extract the Packet Tracer archive with the following command:

All the files are extracted to PT72Installer directory.
Now navigate to the PT72Installer/ directory with the following command:

Now start the installer with the following command:

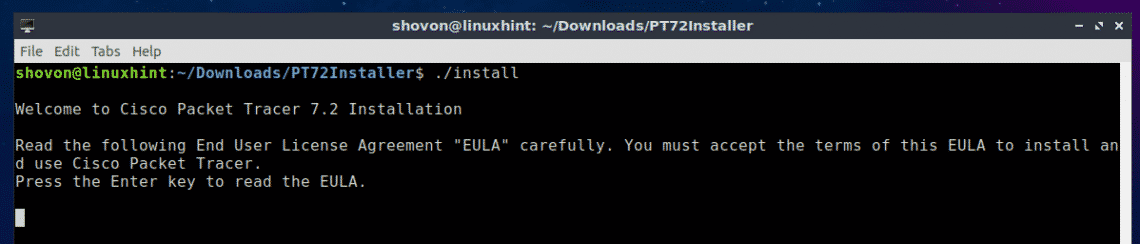
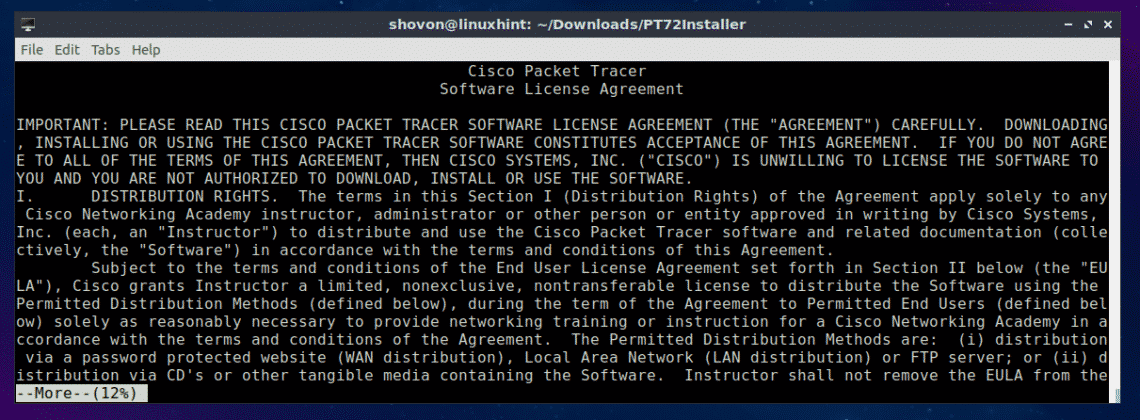
Press a few more times.
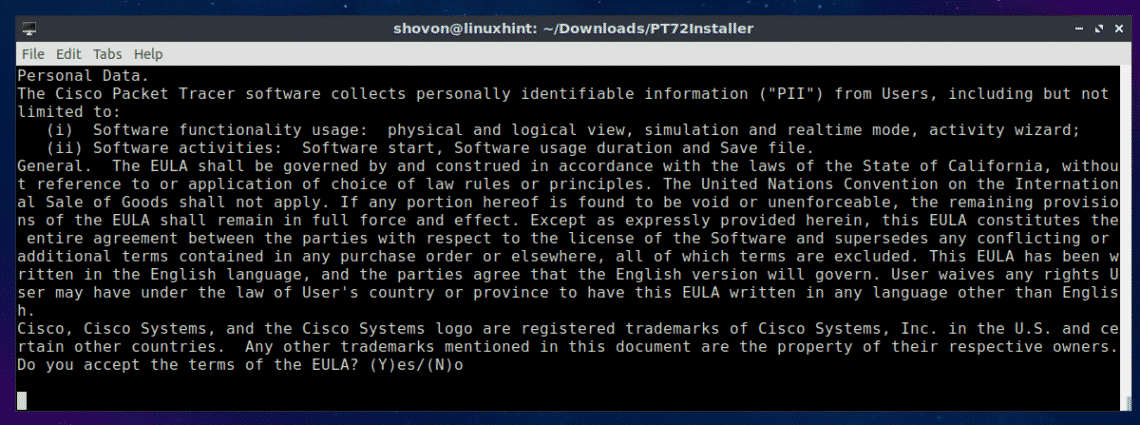
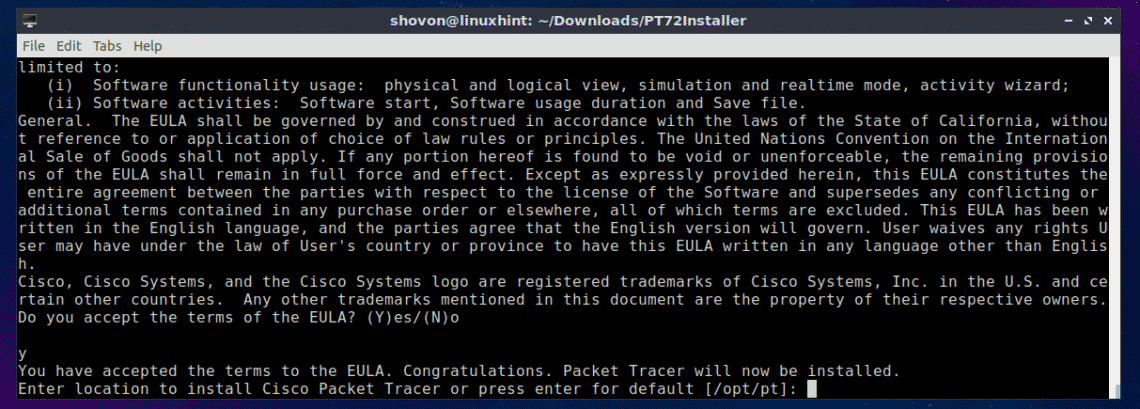
At the end of the License agreement, press y and then press .
Leave the default and press .
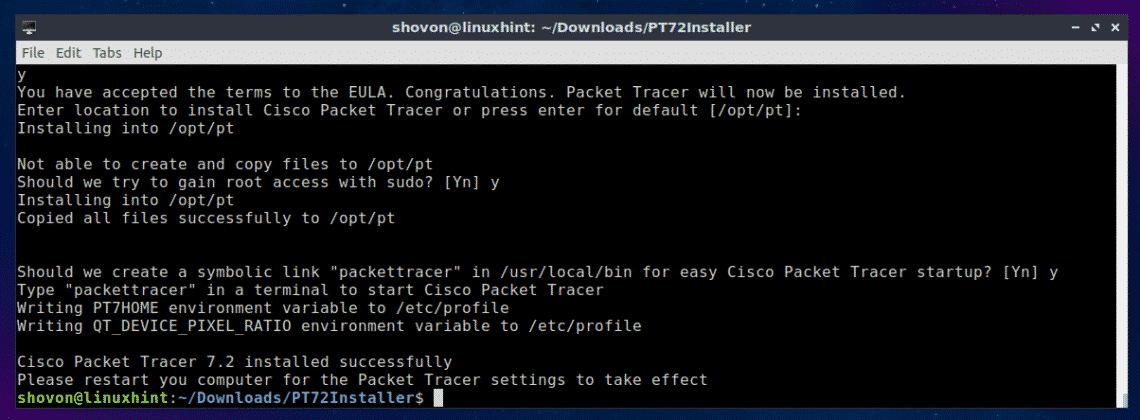
Press y and then press .
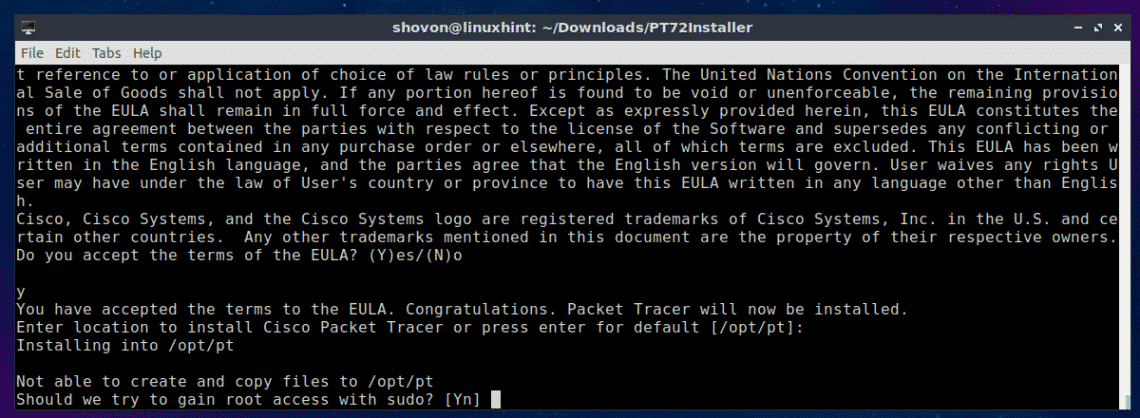
Press y and then press to continue.

Packet Tracer 7.2 should be installed.
Now restart your computer with the following command:
Once your computer starts, navigate to the Packet Tracker directory /opt/pt/bin with the following command:

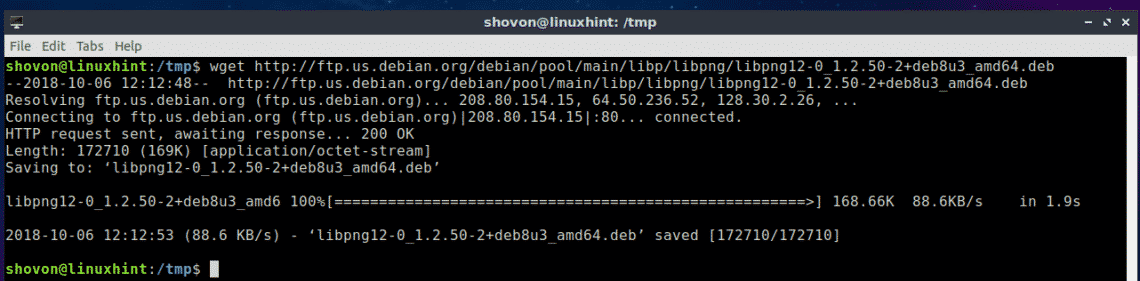
Now if you try to start Packet Tracer, you should see the following error. It means, libpng12.so.0 library file is not available in your computer. The library file is not available in the Ubuntu 18.04 LTS package repository as well. But you can download and install the library package from Debian Jessie package repository. It should solve our problem.

First, navigate to the /tmp directory with the following command:

To download the libpng12-0 library package from Debian Jessie package repository, run the following command:
$ wget http: // ftp.us.debian.org / debian / pool / main / libp / libpng / libpng12- 0 _1.2.50- 2 +
deb8u3_amd64.deb

libpng12-0 should be downloaded.
Now, install libpng12-0 with the following command:

libpng12-0 should be installed.

Now go back to the Packet Tracer directory (/opt/pt/bin) with the following command:
If you try to run Packet Tracer, you may still get some errors! The required Qt libraries are not installed.

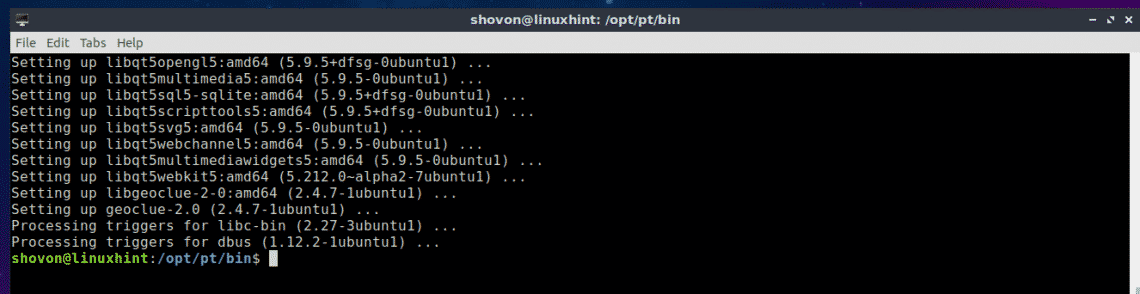
To install all the required Qt libraries, run the following command:
$ sudo apt update && sudo apt install libqt5webkit5 libqt5multimediawidgets5
libqt5svg5 libqt5script5 libqt5scripttools5 libqt5sql5

Now press y and then press .
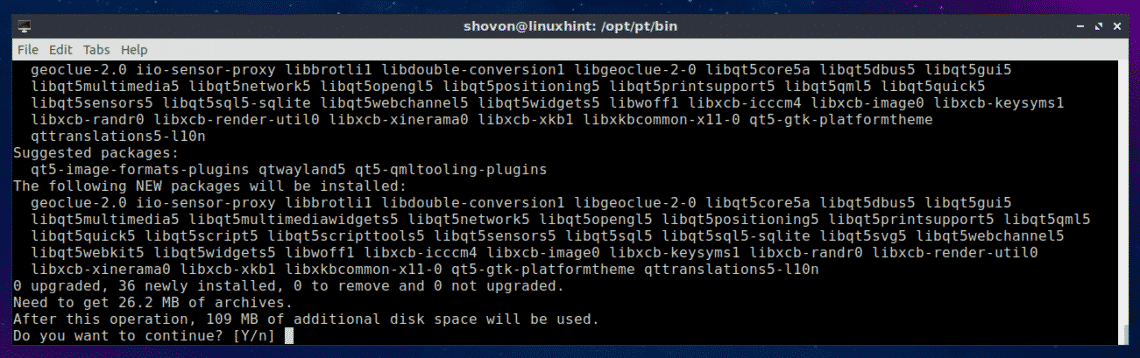
The Qt libraries should be installed.
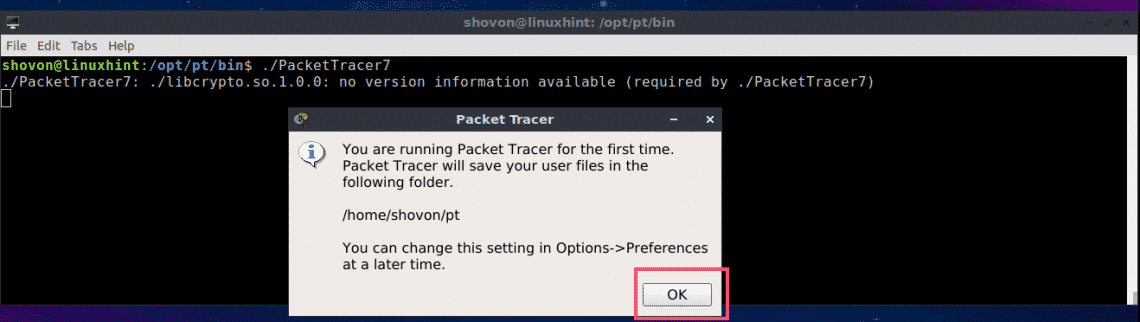
Now try to run Packet Tracer again.
We got a prompt! Click on OK.
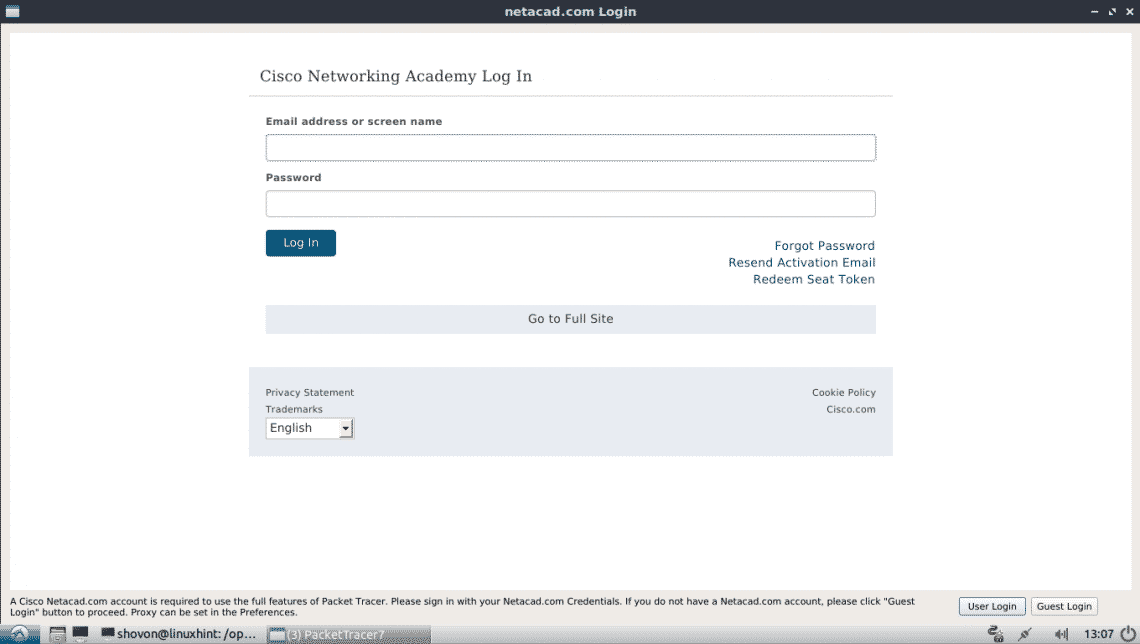
Now you should see the following window. Login to your Cisco Network Academy account.
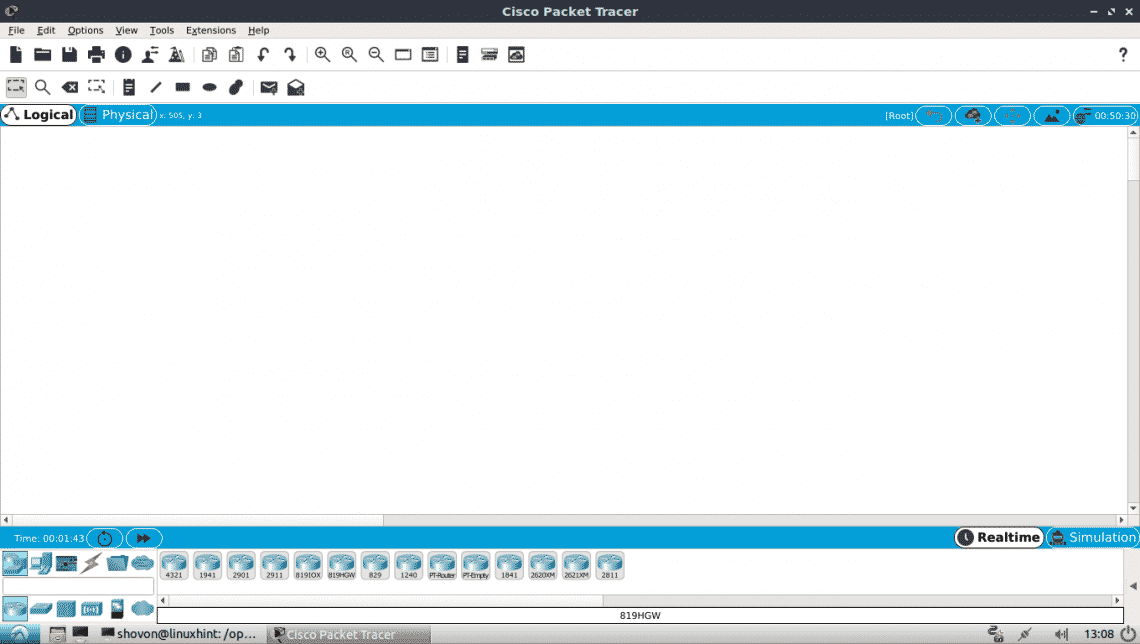
Packet Tracer 7.2 should start.
You can also start Packet Tracer 7.2 with the following command:
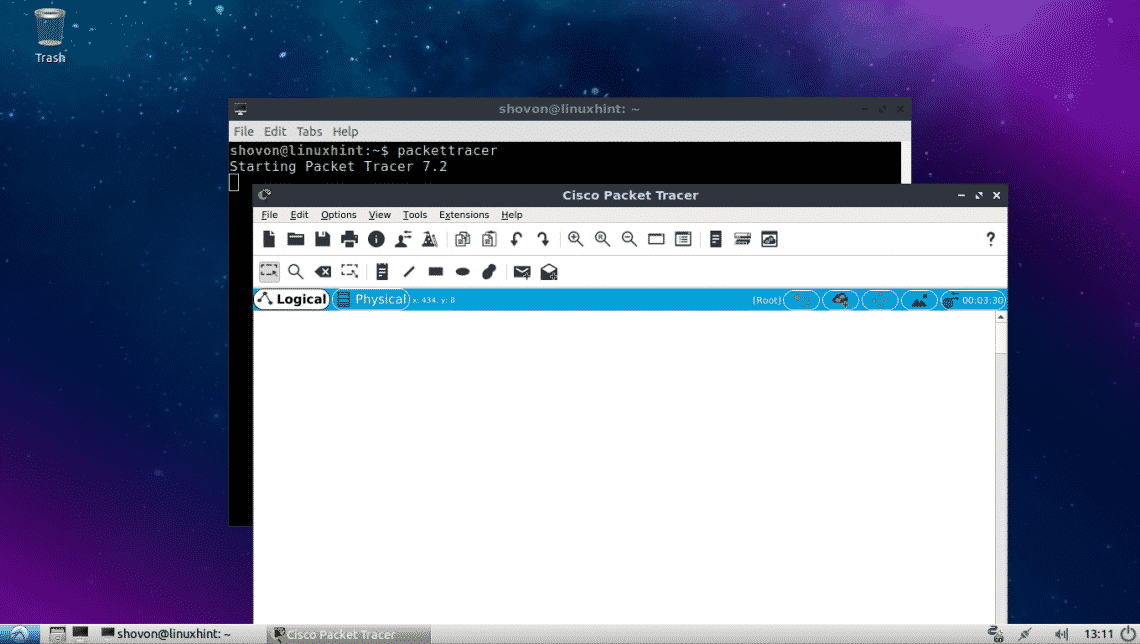
Using Packet Tracer 7.2:
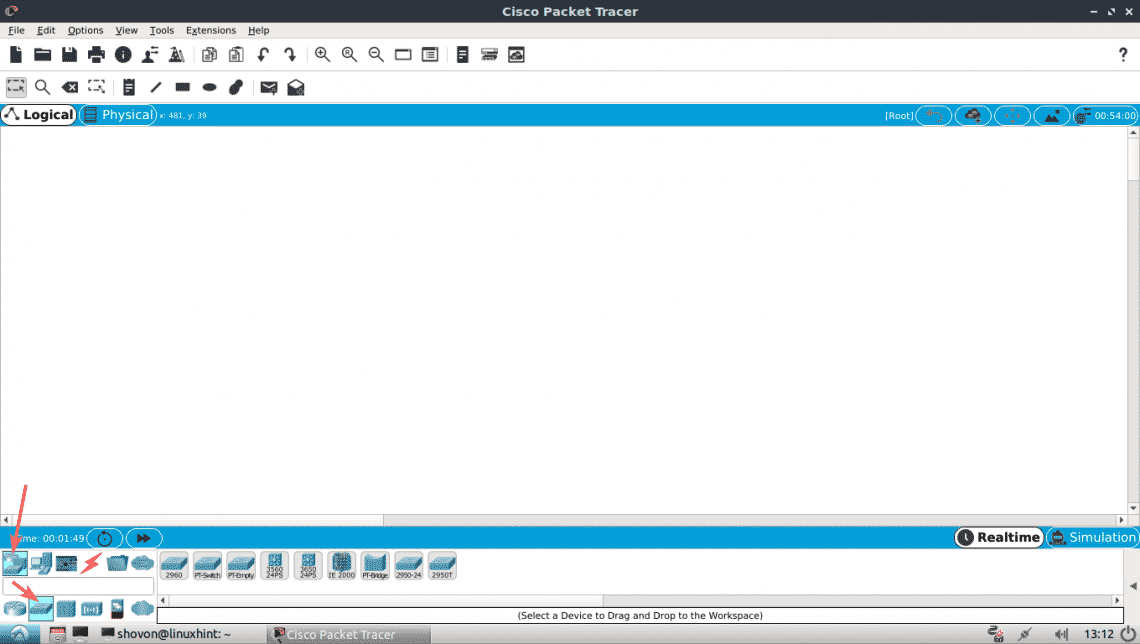
In this section, I will design a simple network topology and show you how Packet Tracer works.
First, start Packet Tracer 7.2. Now click on Network Devices icon and then click on Switches icon as marked in the screenshot below.
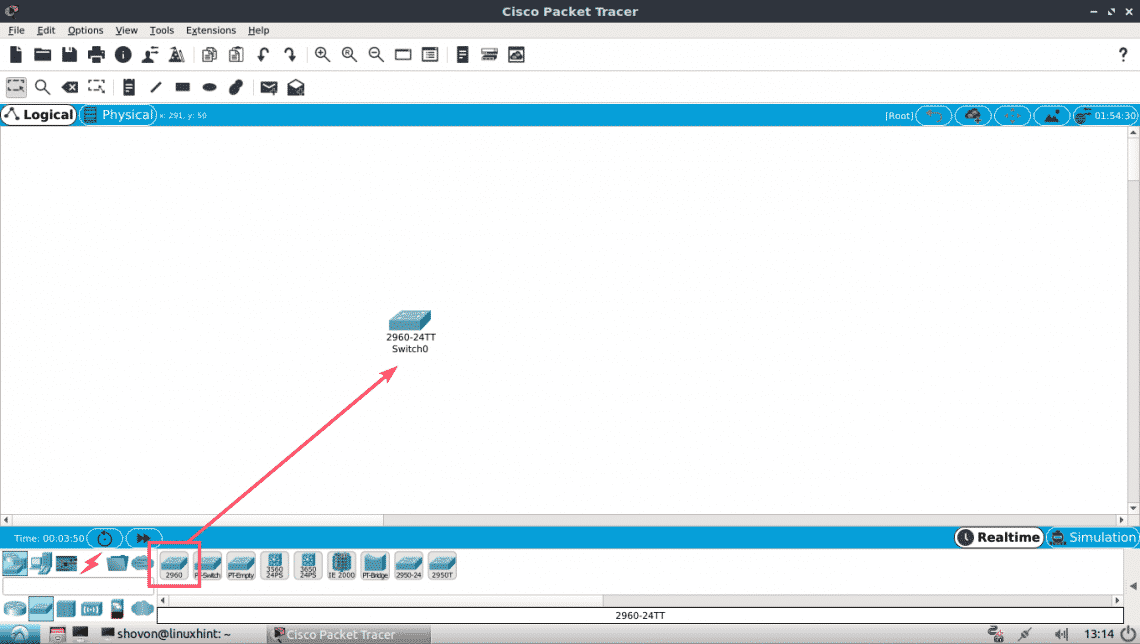
Now click and drag one of the switches to the project window.
Now click on the End Devices icon. As you can see, a lot of end devices such as PC, Laptop, Server etc are listed.
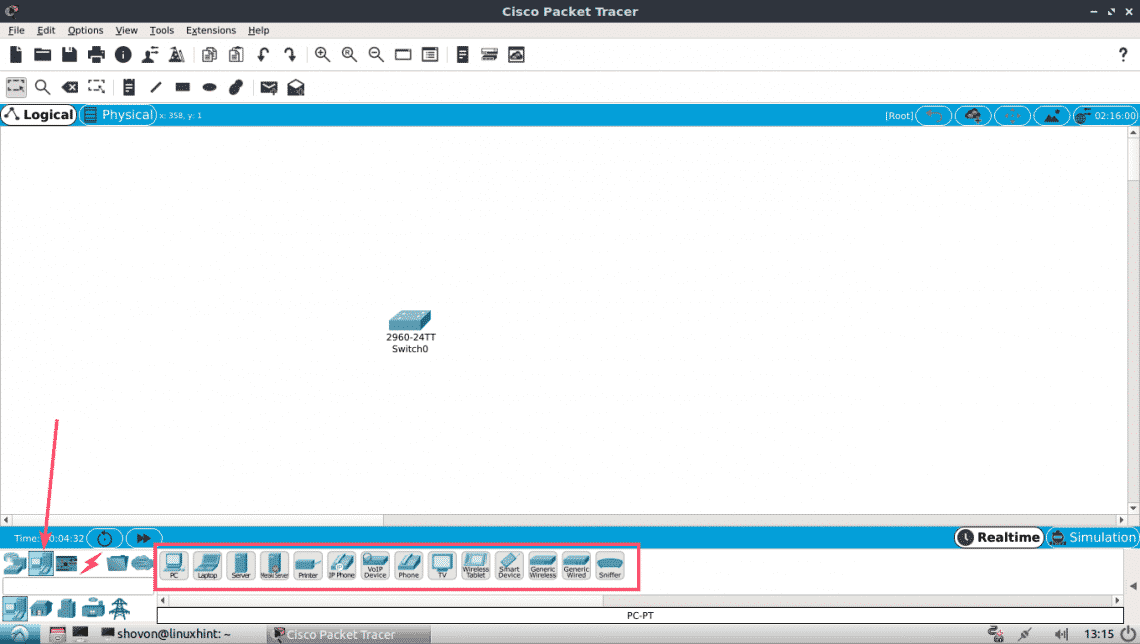
Now drag and drop 2 PCs to the project window.
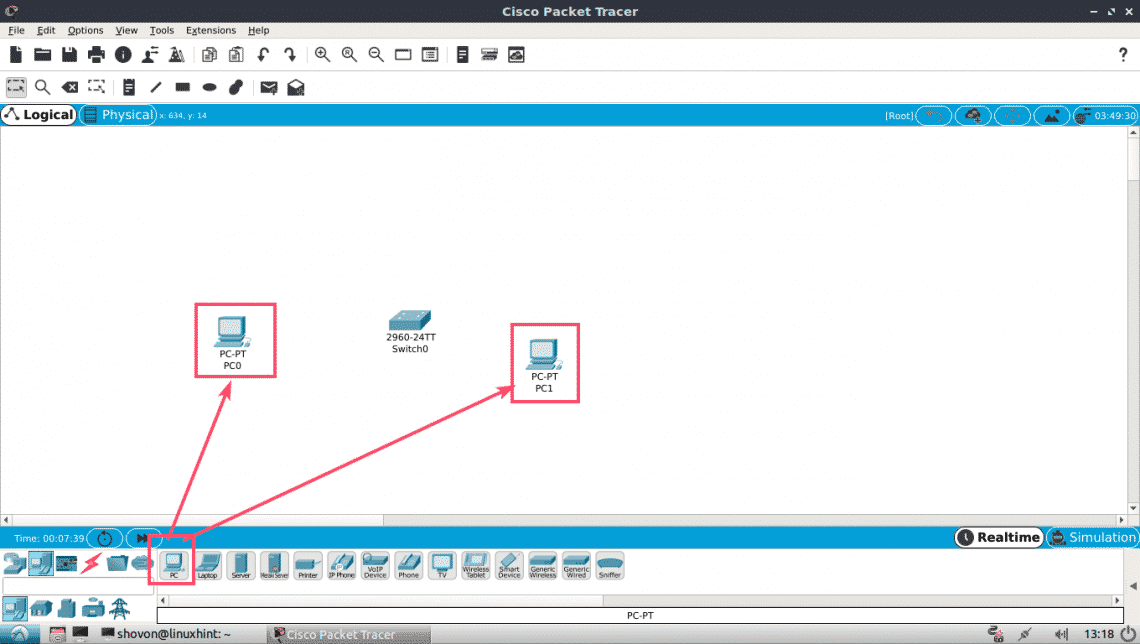
Now click on the Cable icon.
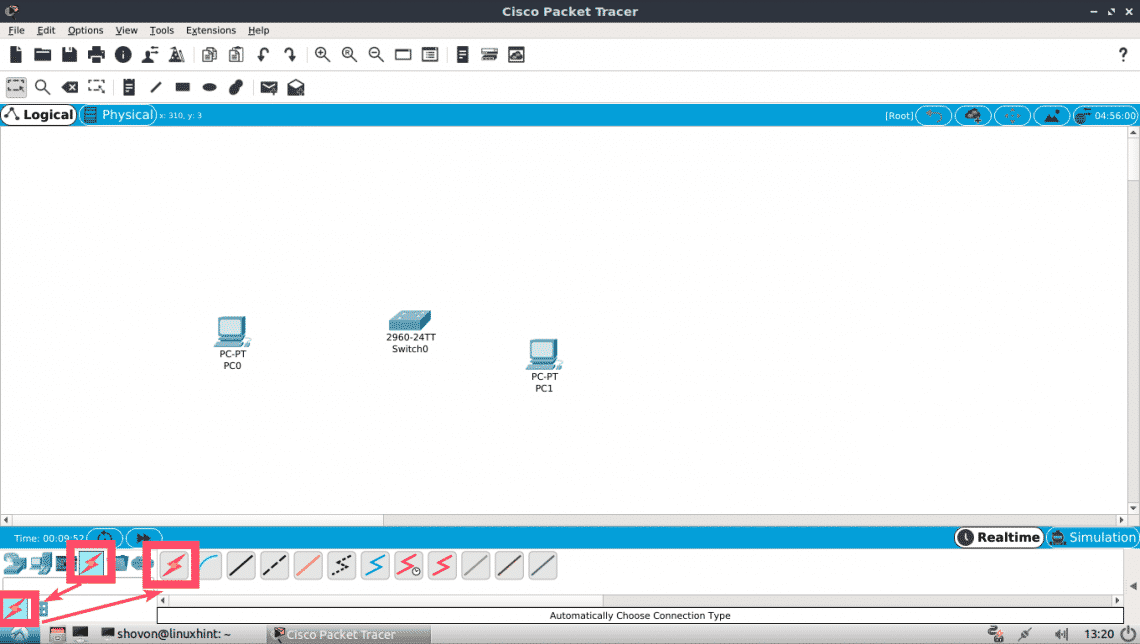
Then click on a PC and then on the Switch in your project window. They should be connected.
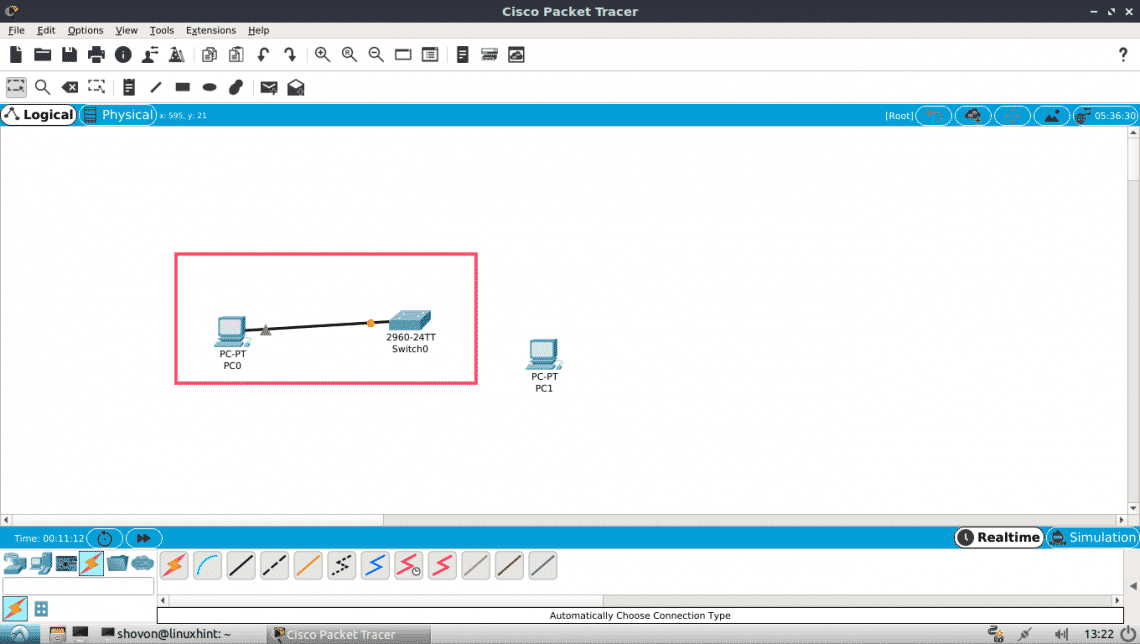
Connect the other PC to the switch the same way.

Now double click on any of the PC and you should see the following window. Go to the Desktop tab.
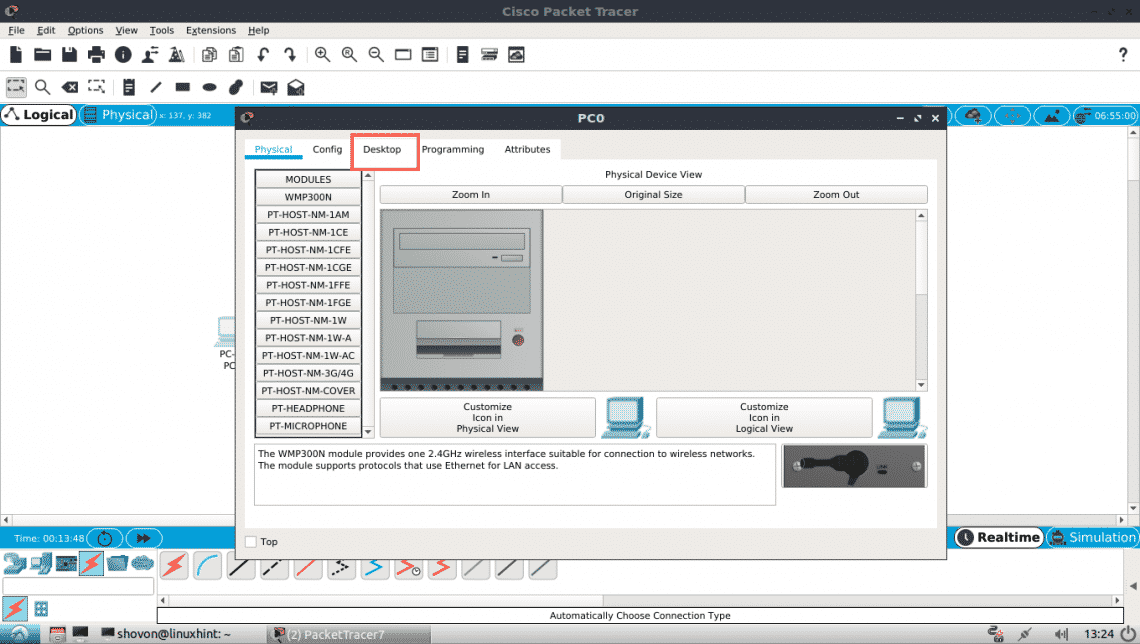
Now click on Configuration.

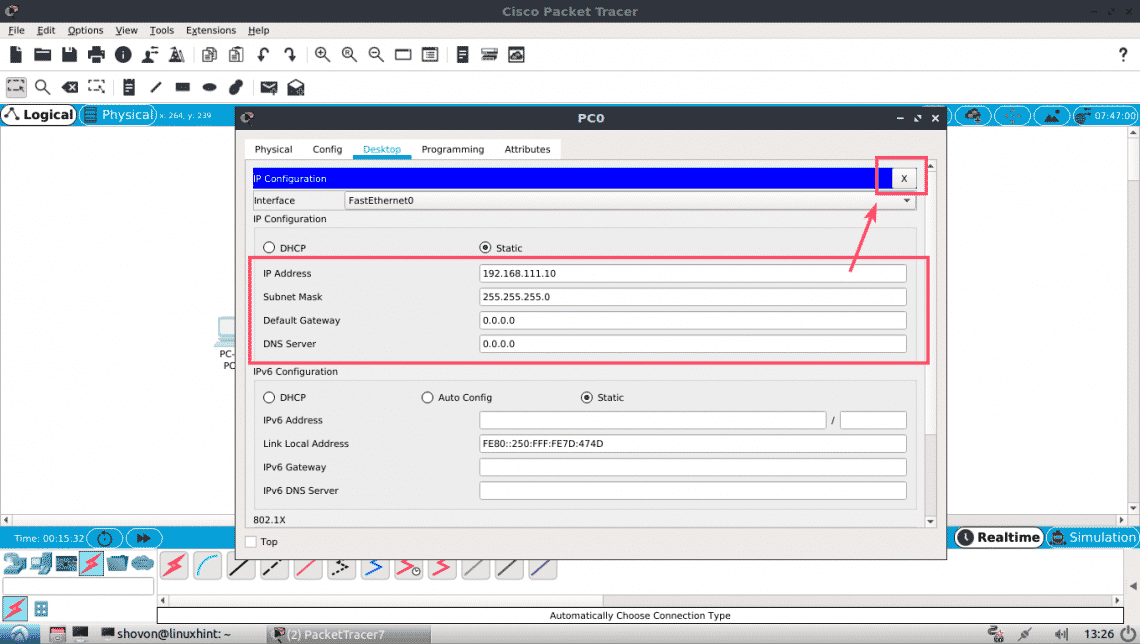
Now, fill in the IPv4 details as follows in one of the PCs and click on the X button once you’re done.
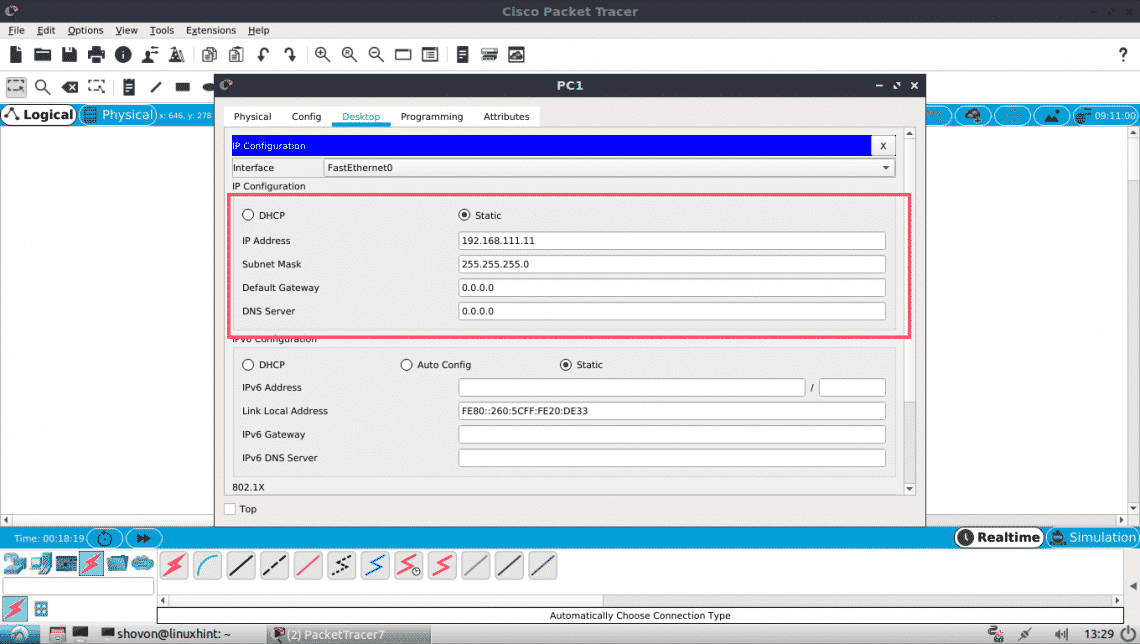
The same way, fill in the IPv4 details as follows in the other PC:
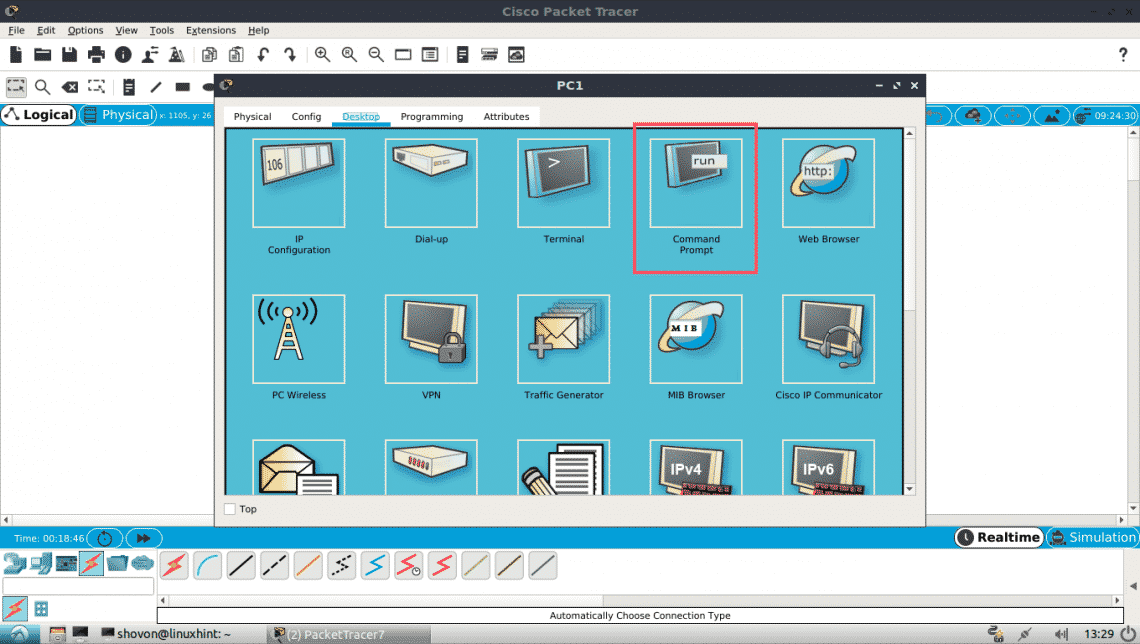
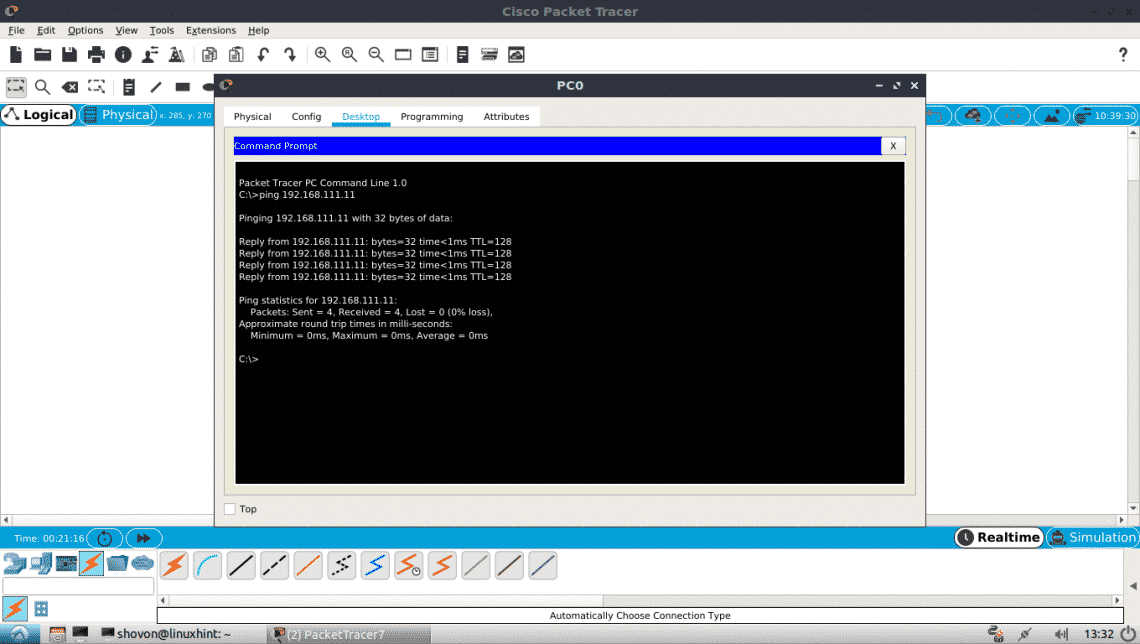
Now click on the Command Prompt icon on one of the PCs.
The command prompt should start. Now try to ping one PC from the other.
As you can see, the ping is working.
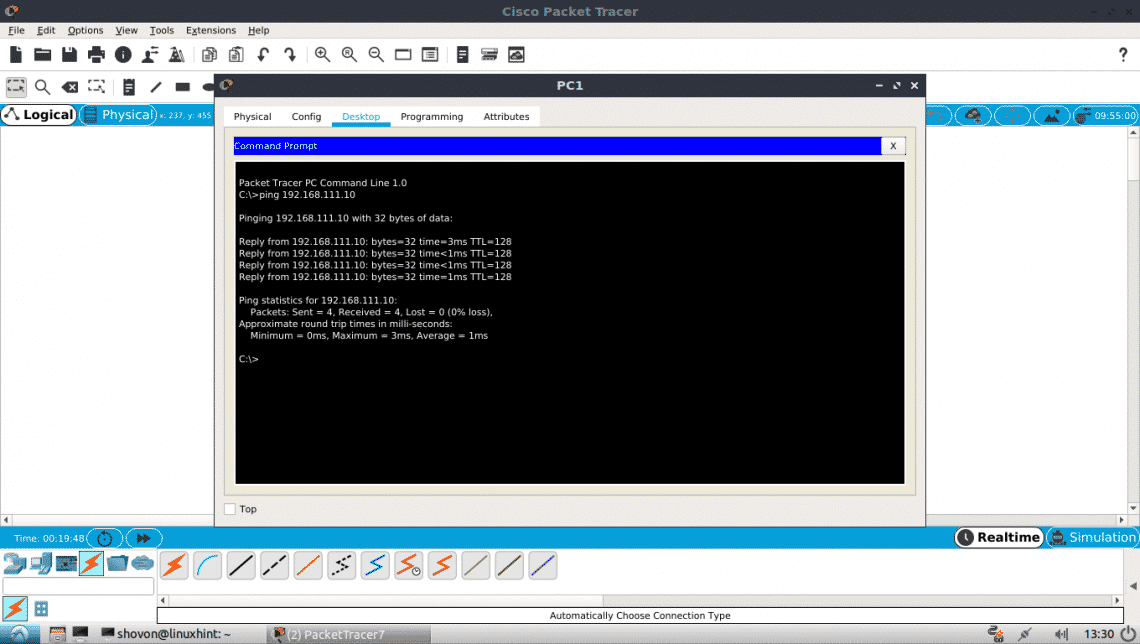
As you can see, the ping is working both ways. I can connect to one PC from the other.
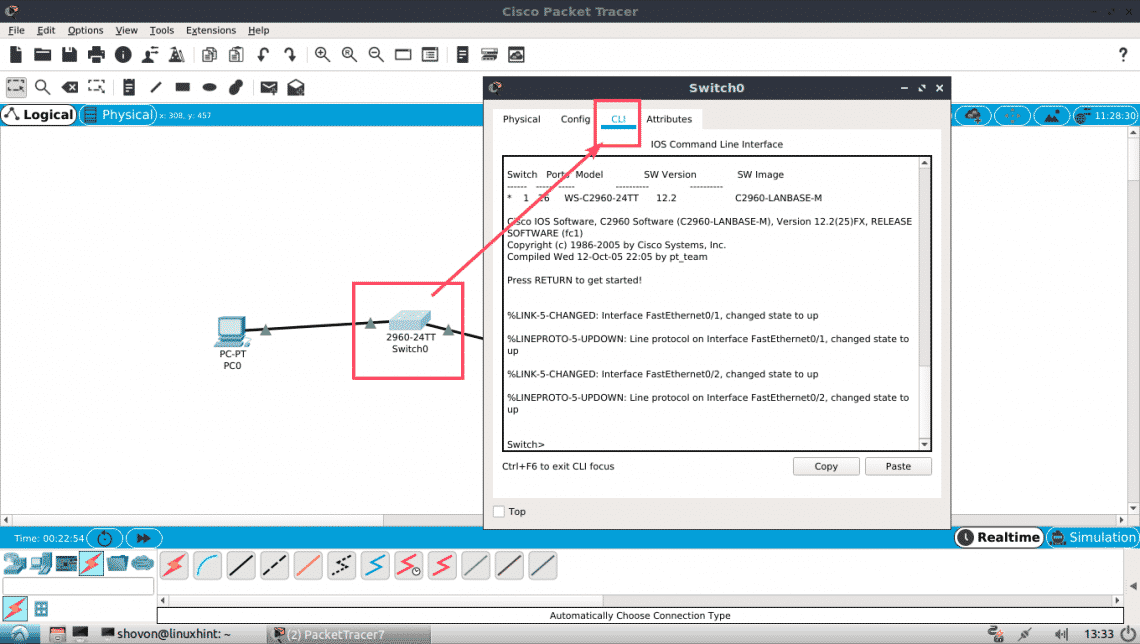
You can also login to the IOS console of your CISCO Switch. Just double click on the Switch in your project window and go to the CLI tab.
So that’s how you install and use Packet Tracer on Ubuntu 18.04 LTS. Thanks for reading this article.
About the author
Shahriar Shovon
Freelancer & Linux System Administrator. Also loves Web API development with Node.js and JavaScript. I was born in Bangladesh. I am currently studying Electronics and Communication Engineering at Khulna University of Engineering & Technology (KUET), one of the demanding public engineering universities of Bangladesh.
Install Cisco packet tracer on Linux Desktop

Here in this post we will cover the process on how to install Cisco Packet Tracer on Linux Desktop. First we will go through the setup process for the Debian based distros, meaning that this procedure will apply for the Debian, Linux Mint , Ubuntu and etc. With these steps you can install Cisco Packet Tracer on Debian, Linux Mint, Ubuntu and other Debian/Ubuntu based systems.
Another network simulation you can try out as well is GNS3(free as well. You can check the installation and how it looks on this post.
Bellow is a video tutorial as well:


Extracting the archive and running the installation
After you downloaded the installation, we now need to use the terminal. Run the terminal and navigate to the folder where the file is downloaded, in this case it is in Downloads folder:
Now we will extract the installation from the archive, for that we need to use the following command:
tar xvzf PacketTracer7.2.1forLinux64bit.tar.gz -C PacketTracer/

I created a new separate folder PacketTracer and in the command, I set the parameter to extract all the files in that folder. While still in the Downloads folder, we need to go the new folder we created, PacketTracer :
In this folder run the install file.

When you start the installation, hit space to pass the license agreement, accept the agreement in the end. After that, the installation will prompt you to use the default installation location or another which you can specify, but we will go with the default location. Then, installation will ask for your root password. Provide your root password.


Installing the missing library package
The installation will finish quickly, but we will not be able to run it yet and the shortcut which installation has created is not working, so we need to fix that as well.

We can run the software using the terminal. Software is located in the /opt/pt/bin folder. Command to navigate to the Cisco Packet Tracer executable file:
But, if we try to run the software, we will get an error saying that a library is missing . We need to acquire that library package and install it.


Link to the library package to download it: Download the library

We need to choose the package for the right PC architecture we have on our PC. In our case, it is amd64 which is a 64 bit version. When you download the package, just run it(double click on it) and the system will run the installation process.

A new prompt window will appear, it will display the package. On the bottom right corner you’ll have the option to install the package. Click on it and it will ask for the root password.

Running the Cisco Packet Tracer and creating a new shortcut
After we installed the library, we’ll be able now to run the Cisco Packet Tracer. We can run ti from the terminal. Since we installed the Cisco Packet Tracer version 7.2.1, the software will first prompt you to login with your netacad account in order to continue. But, if you don’t need to use the account anymore, you can use the Packet Tracer with the Guest login. Click on the Guest Login button on the bottom right corner. You’ll get a timer of 10 seconds. Wait for it and after that you’ll be able to use the software.


What is left is to fix the shortcut. Actually, instead, we will create a new shortcut. Go to the /opt/pt/bin folder and copy to the dekstop a file CIscoPacketTracer.desktop. We need to edit that file with a text editor. You can use nano, gedit or some other. In this example, we used the gedit. So, start the terminal again and navigate to the Desktop:

Then run the command the edit the file with a gedit text editor:
gedit CiscoPacketTracer.desktop

Now, edit the Exec= line and add the location of the Cisco Packet Tracer executable and that is /opt/pt/. Save the file, exit the text editor.

Next step is to convert that new shortcut into the executable. Use the command:
sudo chmod +x CiscoPacketTracer.desktop

And test the new shortcut.
Now, only thing left to do is to move the new shortcut we created to the applications folder in order for our new shortcut to show up in the start menu – this is optional. Use the command:
sudo mv CiscoPacketTracer.desktop /usr/share/applications

Test the shortcut again from the start menu. You can delete the old shortcut and enjoy your virtual network lab.
Summary
With these steps we performed the procedure how to install cisco packet tracer on linux desktop. The steps we executed on this post can be used to install cisco packet tracer on debian, mint and ubuntu.
Thank you very much for your time. I hope you found the post useful.