- Configure Port Forwarding/Port Triggering/NAT on RV34x Series Routers
- Objective
- Applicable Devices
- Software Version
- Comparing Port Forwarding and Port Triggering
- Port Forwarding
- Port Triggering
- Setting Up Port Forwarding and Port Triggering
- Port Forwarding
- Port Triggering
- Network Address Translation
- Other Resources
- View a video related to this article.
- Port Forwarding: теория и настройка Cisco
- Пример с ”домашним” роутером
- Настройка проброса порта
Configure Port Forwarding/Port Triggering/NAT on RV34x Series Routers
The documentation set for this product strives to use bias-free language. For the purposes of this documentation set, bias-free is defined as language that does not imply discrimination based on age, disability, gender, racial identity, ethnic identity, sexual orientation, socioeconomic status, and intersectionality. Exceptions may be present in the documentation due to language that is hardcoded in the user interfaces of the product software, language used based on RFP documentation, or language that is used by a referenced third-party product. Learn more about how Cisco is using Inclusive Language.
Objective
- Comparing Port Forwarding and Port Triggering
- Setting Up Port Forwarding and Port Triggering
- Setting up Network Address Translation (NAT)
Applicable Devices
Software Version
Comparing Port Forwarding and Port Triggering
These features allow some internet users to have access to specific resources on your network, while protecting the resources that you want to keep private. Some examples of when this is used: hosting web/email servers, alarm system and security cameras (to send the video back to an offsite computer). Port forwarding opens ports in response to inbound traffic for a specified service.
A list of these ports and their description are set up when you enter the information in the Service Management section of the set up wizard. When you set these up, you cannot use the same port number for both port forwarding and port triggering.
Port Forwarding
Port forwarding is a technology that allows public access to services on network devices on the Local Area Network (LAN) by opening a specific port for a service in response to inbound traffic. This ensures that the packets have a clear path to the intended destination, which allows for faster download speeds and lower latency. This is set for a single computer on your network. You need to add the specific computer’s IP address and it cannot change.
This is a static operation that opens a specific range of ports that you select and doesn’t change. This may increase security risk as the configured ports are always open.
Imagine that a door is always open on that port to that device that it was assigned.
Port Triggering
Port triggering is similar to port forwarding but a little more secure. The difference is that the trigger port is not always open for that specific traffic. After a resource on your LAN sends outbound traffic through a trigger port, the router listens for inbound traffic through a specified port or port range. Triggered ports are closed when there is no activity, which adds to the security. Another benefit is that more than one computer on your network can access this port at different times. Therefore, you do not need to know the IP address of the computer that will trigger it in advance, it does this automatically.
Think of you giving someone a pass but there is a doorman there that checks your pass each time you enter and then closes the door until the next person with a pass arrives.
Setting Up Port Forwarding and Port Triggering
Port Forwarding
To configure port forwarding, follow these steps:
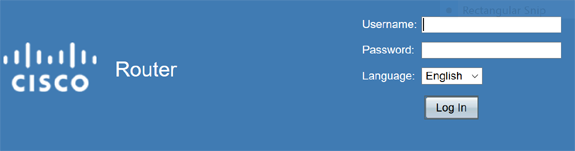
Step 1. Log in to the web configuration utility. Enter the IP address for the router in the search/address bar. The browser might issue a warning that the website is untrusted. Continue to the website. For more guidance with this step, click here.
Enter the username and password for the router and click Log In. The default username and password is cisco.
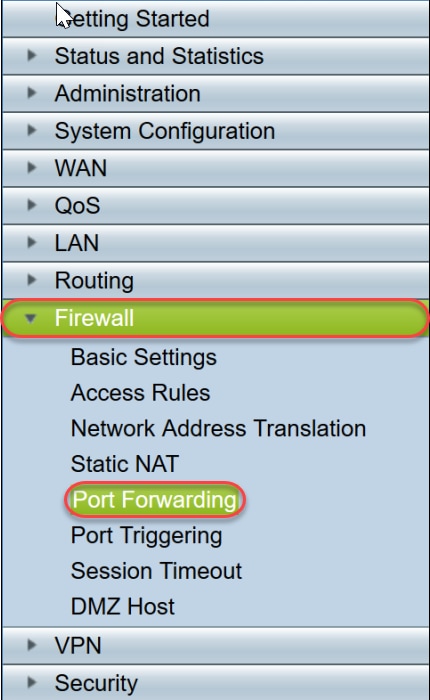
Step 2.From the main menu on the left side,Click Firewall > Port Forwarding
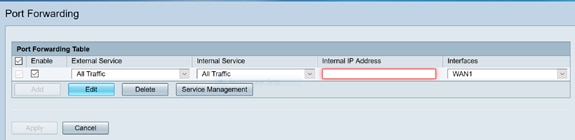
In the Port Forwarding Table, click Add or select the row and click Edit to configure the following:
Select an external service from the drop-down list. (If a service is not listed, you can add or modify the list by following the instructions in the Service Management section.)
Select an internal service from the drop-down list. (If a service is not listed, you can add or modify the list by following the instructions in the Service Management section.)
Enter the internal IP addresses of the server.
Select the interface from the drop-down list, to apply port forwarding on.
Enable or disable the port forwarding rule.
For example, a company hosts a web server (with an internal IP address of 192.0.2.1) on their LAN. A port forwarding rule for HTTP traffic could be enabled. This would allow requests from the internet into that network. The company sets the port number 80 (HTTP) to be forwarded to IP address 192.0.2.1, then all HTTP requests from outside users will be forwarded to 192.0.2.1. It is set up for that specific device in the network.
Step 3 .Click Service Management
In the Service Table, click Add or select a row and click Edit and configure the following:
- Application Name – Name of the service or application
- Protocol – Required protocol. Refer to the documentation for the service that you are hosting
- Port Start/ICMP Type/IP Protocol – Range of port numbers reserved for this service
- Port End – Last number of the port, reserved for this service

Port Triggering
To configure port triggering, follow these steps:
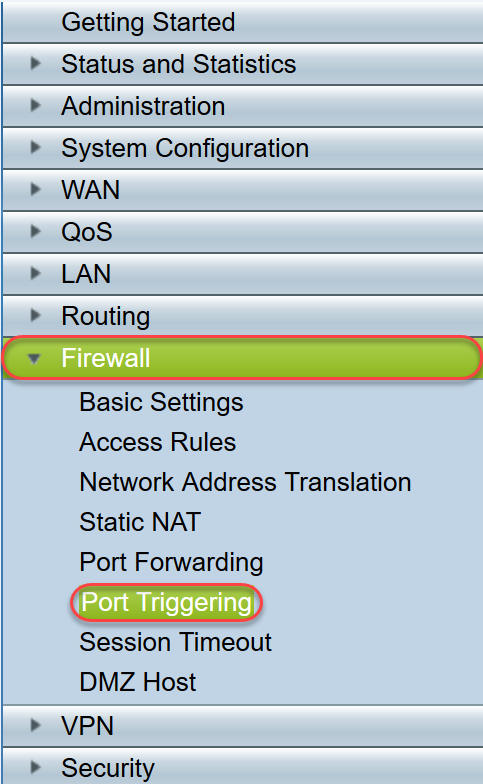
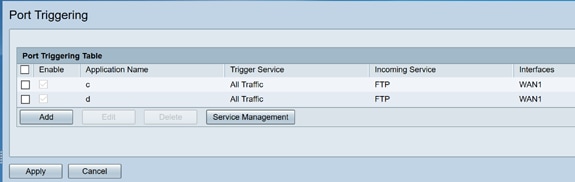
Step 1.Log in to the web configuration utility. From the main menu on the left side,click Firewall > Port Triggering
Step 2.To add or edit a service to the port triggering table, configure the following:
Enter the name of the application.
Select a service from the drop-down list. (If a service is not listed, you can add or modify the list by following the instructions in the Service Management section.)
Select a service from the drop-down list. (If a service is not listed, you can add or modify the list by following the instructions in the Service Management section.)
Select the interface from the drop-down list.
Enable or disable the port triggering rule.
Click Add (or select the row and click Edit) and enter the following information:
Step 3 . Click Service Management, to add or edit an entry on the Service list.
In the Service Table, click Add or Edit and configure the following:
- Application Name – Name of the service or application
- Protocol – Required protocol. Refer to the documentation for the service that you are hosting
- Port Start/ICMP Type/IP Protocol – Range of port numbers reserved for this service
- Port End – Last number of the port, reserved for this service
Network Address Translation
Network address translation (NAT) enables private IP networks with unregistered IP addresses to connect to the public network. This is a commonly configured protocol in most networks. NAT translates the private IP addresses of the internal network to public IP addresses before packets are forwarded to the public network. This allows a large number of hosts on an internal network to access the internet through a limited number of public IP addresses. This also helps to protect the private IP addresses from any malicious attack or discovery as the private IP addresses are kept hidden.
To configure NAT, follow these steps
Step 1.Click Firewall> Network Address Translation

Step 2. In the NAT Table, check Enable NAT for each applicable Interface on the list to enable
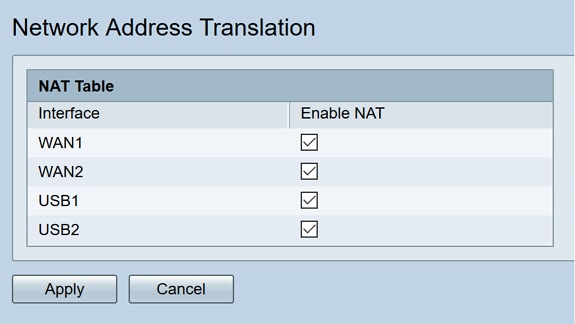
You have now successfully configured Port forwarding, Port Triggering, and NAT.
Other Resources
- For configuration of Static NAT, click here
- For answers to many questions about routers, including the RV3xx series, click here
- For FAQs on RV34x series, click here
- For more information on RV345 and RV345P, click here
- For more information on configuring Service Management on the RV34x series, click here
View a video related to this article.

Port Forwarding: теория и настройка Cisco
![]()
Port Forwarding – или проброс портов, который также иногда называемый перенаправлением портов или туннелированием – это процесс пересылки трафика, адресованного конкретному сетевому порту с одного сетевого узла на другой. Этот метод позволяет внешнему пользователю достичь порта на частном IPv4-адресе (внутри локальной сети) извне, через маршрутизатор с поддержкой NAT.
Обычно peer-to-peer (p2p) программы и операции обмена файлами, такие как веб-сервер и FTP, требуют, чтобы порты маршрутизаторов были перенаправлены или открыты, чтобы позволить этим приложениям работать.
Поскольку NAT скрывает внутренние адреса, p2p работает только в ситуации где соединение идет изнутри наружу, где NAT может сопоставлять исходящие запросы с входящими ответами.
Проблема в том, что NAT не разрешает запросы, инициированные извне, но эту ситуацию можно решить с помощью перенаправления портов. Проброс портов может быть настроен для определенных портов, которые могут быть перенаправлены внутренним хостам.
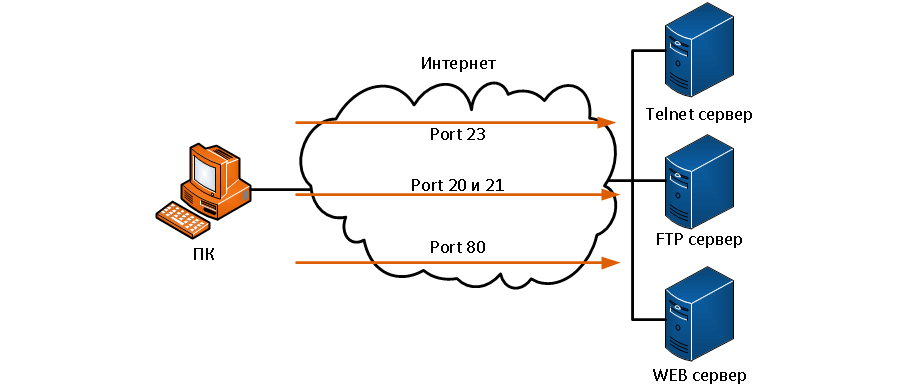
Напомним, что программные приложения в интернете взаимодействуют с пользовательскими портами, которые должны быть открыты или доступны для этих приложений. В различных приложениях используются разные порты. Например, HTTP работает через well-known порт 80. Когда кто-то набирает адрес wiki.merionet.ru то браузер отображает главную страницу нашей базы знаний. Обратите внимание, что им не нужно указывать номер порта HTTP для запроса страницы, потому что приложение принимает порт 80. Если требуется другой номер порта, его можно добавить к URL-адресу, разделенному двоеточием (:). Например, если веб-сервер слушает порт 8080, пользователь вводит http://www.example.com:8080.
Проброс портов позволяет пользователям в интернете получать доступ к внутренним серверам с помощью адреса порта WAN маршрутизатора и соответствующего номера внешнего порта. Внутренние серверы обычно конфигурируются с частными адресами IPv4 и когда запрос отправляется на адрес порта WAN через Интернет, маршрутизатор перенаправляет запрос на соответствующий сервер в локальной сети. По соображениям безопасности широкополосные маршрутизаторы по умолчанию не разрешают перенаправление любого внешнего сетевого запроса на внутренний хост.
Пример с ”домашним” роутером
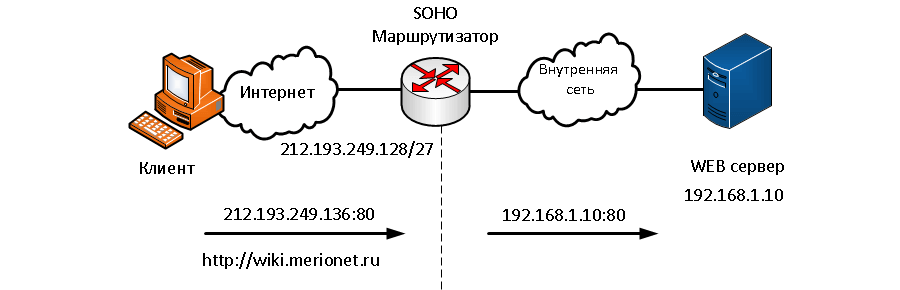
На схеме показан пример, когда проброс портов выполнятся при помощи домашнего SOHO (small office/home office) роутера. Переадресация портов может быть включена для приложений при помощи указания внутреннего локального адреса. Пользователь в интернете вводит адрес //wiki.merionet.ru, который соответствует внешнему адресу 212.193.249.136 и пакет попадает на маршрутизатор, который перенаправляет HTTP-запрос на внутренний веб-сервер по адресу IPv4 192.168.1.10, используя номер порта по умолчанию 80.
Можно указать порт, отличный от порта 80 по умолчанию. Тем не менее, внешний пользователь должен знать конкретный номер порта для использования. Подход, используемый для настройки перенаправления портов, зависит от марки и модели маршрутизатора.
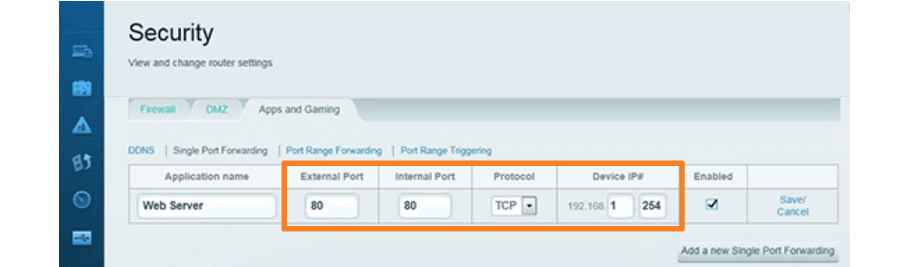
Настройка проброса порта
Реализация перенаправления (проброса) портов с помощью команд IOS аналогична командам, используемым для настройки статического NAT. Переадресация портов — это, по существу, статическая трансляция NAT с указанным номером TCP или UDP-порта.
В общем виде основная команда выглядит так:
ip nat inside source [extendable]

- tcp или udp – указывает это tcp или udp порт;
- local-ip – это ip адрес присвоенный хосту внутри сети;
- local-port – устанавливает локальный tcp/udp порт в диапазоне от 1 до 65535. Это номер порта, который слушает сервер;
- global-ip – это уникальный глобальный IP адрес внутреннего хоста, по которому клиенты в интернете будут связываться с ним;
- global-port – устанавливает глобальный tcp/udp порт в диапазоне от 1 до 65535. Это номер порта снаружи, по которому будут связываться клиенты;
- extendable – эта опция применяется автоматически. Она разрешает пользователю настраивать двойственные статические трансляции, если они идут на один и тот же адрес;
Router(config)#Ip nat inside source static tcp 192.168.1.10 80 212.193.249.136:8080 Router(config)# interface serial0/0/0 Router(config-if)# ip nat outside Router(config)# interface serial0/0/1 Router(config-if)# ip nat inside
Показана настройка для данной схемы, где 192.168.1.10 — внутренний локальный адрес IPv4 веб-сервера, прослушивающий порт 80. Пользователи получат доступ к этому внутреннему веб-серверу, используя глобальный IP-адрес 212.193.249.136:, глобальный уникальный публичный IPv4-адрес. В этом случае это адрес интерфейса Serial 0/0/1. Глобальный порт настроен как 8080. Это будет порт назначения, вместе с глобальным адресом 212.193.249.136 для доступа к внутреннему веб-серверу. Как и другие типы NAT, перенаправление портов требует конфигурации как внутренних, так и внешних NAT-интерфейсов.
Подобно статическому NAT, команда show ip nat translations может использоваться для проверки переадресации портов.
Router# show ip nat translations Pro Inside Global Inside Local Outside local Outside global tcp 212.193.249.136:8080 192.168.1.10:80 212.193.249.17:46088 212.193.249.17:46088 tcp 212.193.249.136:8080 192.168.1.10:80 --- ---