- WLC 3504 Release 8.5 Deployment Guide
- Introduction
- Advantages of the vWLC
- Hardware Requirement
- Download Cisco Virtual Wireless LAN Controller
- Prerequisite
- HYPER-V Requirement
- Product Overview
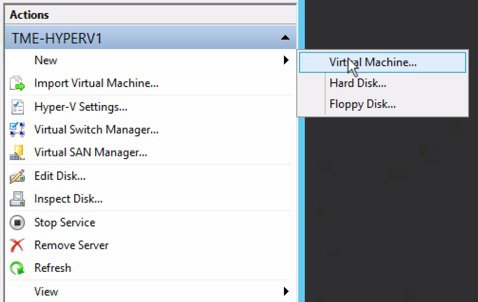
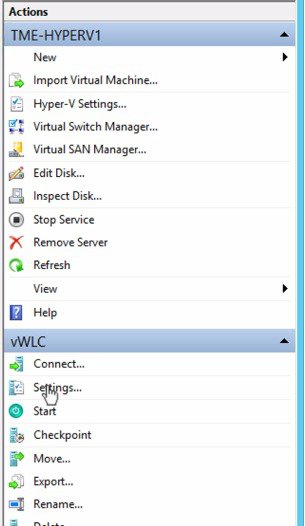
- Deploying vWLC on Hyper-V
- Using Windows PowerShell
- Configure Tagged Ports
- Deploying vWLC on Hyper-V via Script
- Виртуальный Cisco Wireless LAN Controller (WLC)
- Установка образа AIR_CTVM-K9_8_5_105_0.ova на виртуальную машину VMWare
- Разворачиваем образ
- Выбираем образ
- Настройка сети
- Настройка контролера WLC после установки
- Прерываем автоматическую установку
- Первоначальная конфигурация — 1
- Первоначальная конфигурация — 2
- Настройка контроллера WLC через WEB интерфейс
WLC 3504 Release 8.5 Deployment Guide
The documentation set for this product strives to use bias-free language. For the purposes of this documentation set, bias-free is defined as language that does not imply discrimination based on age, disability, gender, racial identity, ethnic identity, sexual orientation, socioeconomic status, and intersectionality. Exceptions may be present in the documentation due to language that is hardcoded in the user interfaces of the product software, language used based on RFP documentation, or language that is used by a referenced third-party product. Learn more about how Cisco is using Inclusive Language.
- Introduction
- Advantages of the vWLC
- Hardware Requirement
- Download Cisco Virtual Wireless LAN Controller
- Prerequisite
- HYPER-V Requirement
- Product Overview
- Deploying vWLC on Hyper-V
- Using Windows PowerShell
- Configure Tagged Ports
- Deploying vWLC on Hyper-V via Script
Introduction
With release 8.4 and above, we are introducing vWLC support for Microsoft Hyper-V. The focus of this deployment guide is to provide guidance on deploying vWLC on Hyper-V.
Prior to release 7.4, Wireless LAN (WLAN) controller software ran on dedicated hardware you were expected to purchase. The Virtual Wireless LAN Controller (vWLC) runs on general hardware under an industry standard virtualization infrastructure. The vWLC is ideal for small and mid-size deployments with a virtual infrastructure and require an on-premises controller. Distributed branch environments can also benefit with a centralized virtual controller with branches requiring up to 3000 access points..
vWLCs are not a replacement of shipping hardware controllers. The function and features of the vWLC offer deployment advantages and benefits of controller services where data centers with virtualization infrastructure exist or are considered.
Advantages of the vWLC
Flexibility in hardware selection based on your requirements.
Reduced cost, space requirements, and other overheads since multiple boxes can be replaced with single hardware running multiple instances of virtual appliances.
Hardware Requirement
Virtual Wireless LAN Controller Version 8.2 and above
| Settings | Small | Large |
|---|---|---|
| Minimum Number of vCPUs | 1 | 2 |
| Minimum Memory | 2 GB | 8 GB |
| Required Storage | 8 GB | 8 GB |
| Minimum Number of VMNICs | 2 | 2 |
| Maximum Access Points | 200 | 3000 |
| Maximum Clients Support | 6000 | 32000 |
| Upgrade to Small* | Yes | No |
| Upgrade to Large* | No | Yes |
* Upgrades are only supported on the same platform.
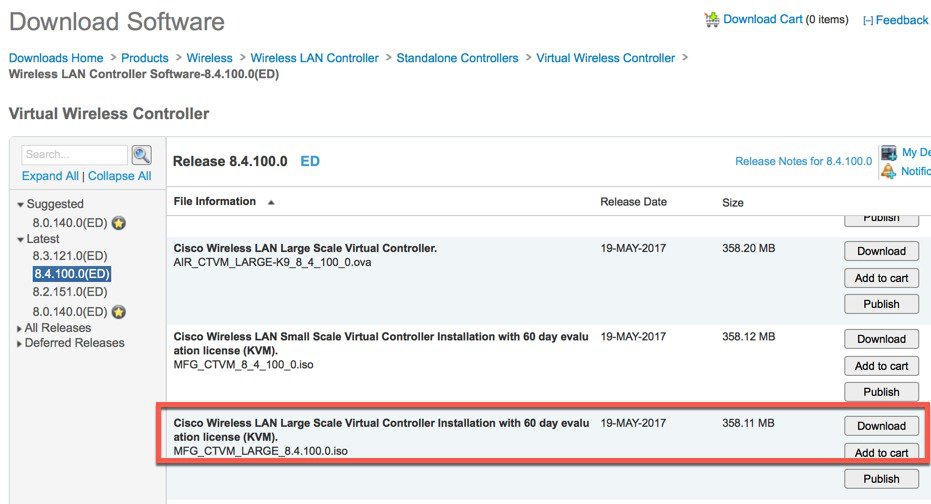
Download Cisco Virtual Wireless LAN Controller
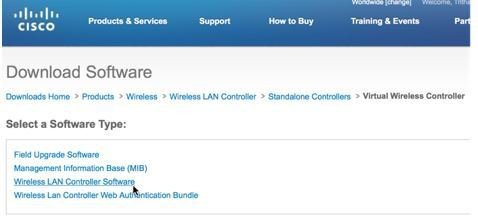
For software release 8.x, virtual wireless controllers will be offered in 2 types of deployment, SMALL or LARGE, in *aes (software upgrade) or *.ova (VMware) or *.iso (KVM/Hyper-V) format. Refer to the HW requirement needed to support the target deployment.
Software upgrade is *.aes format.


For installing NEW virtual wireless controllers on Hyper-V and KVM, use *.iso.

Prerequisite
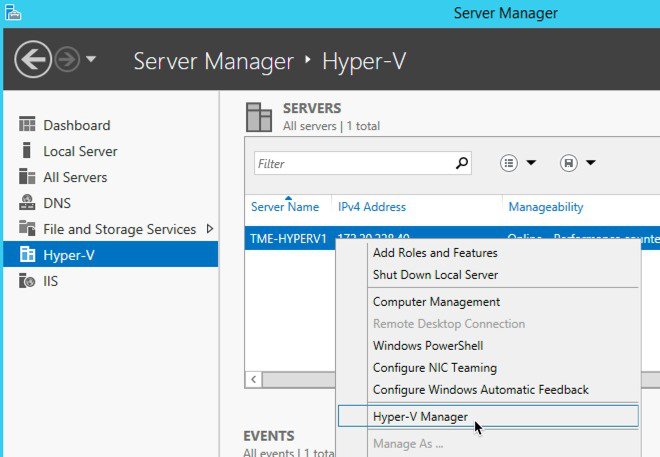
- You must have Hyper-V running on Microsoft 2012 Servers or higher, with a virtual switch already created.
- An SSH client (for example, Putty on Windows or Terminal on Macintosh) is required to access the Cisco vWLC console.
- Browsers such as Chrome, Firefox are recommended to access the Cisco vWLC web UI.
- Determine the type that you want to deploy for the Cisco vWLC. See the next section for more information.
HYPER-V Requirement
Hyper-V requirement is based on vWLC scale.
| Requirement Type | Minimum Requirements |
|---|---|
| CPU | Clock speed: 2.0 GHz or faster Number of cores: Small—1 vCPU Large—2 vCPU |
| Memory | Host—Minimum 8GB or higher Small—2 GB Large—8 GB |
| Hard Disks | Host—100GB or higher vWLC Small or Large—8 GB |
| NIC | 2 GB NIC interfaces required |
| Hypervisor | Hyper-V (Microsoft Servers 2012 and above) |
Product Overview
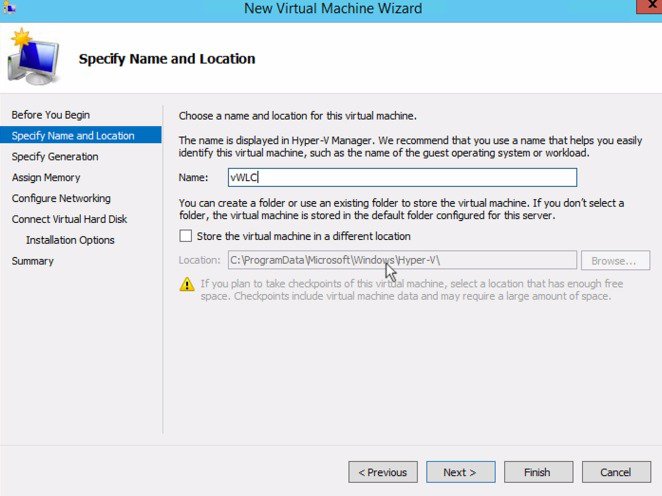
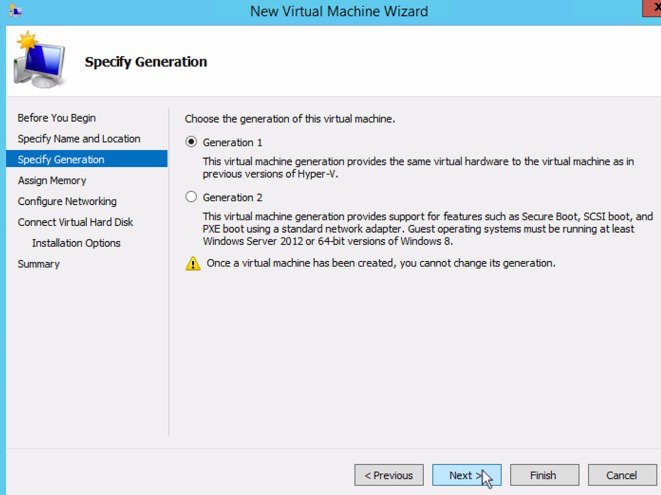
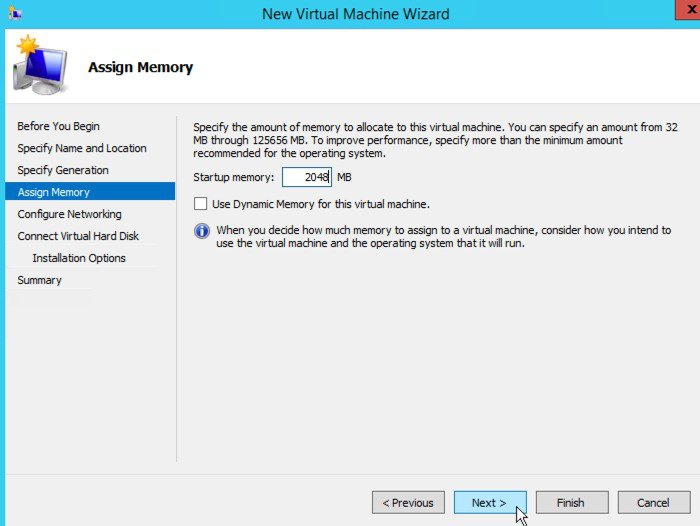
Deploying vWLC on Hyper-V
To deploy vWLC on Hyper-V, follow the procedure below:
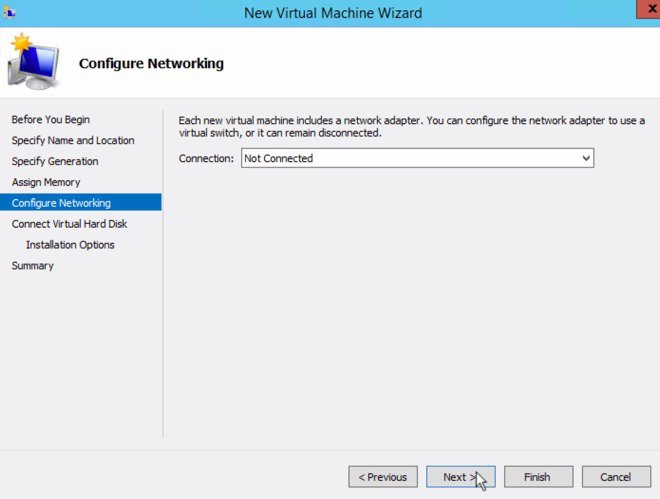
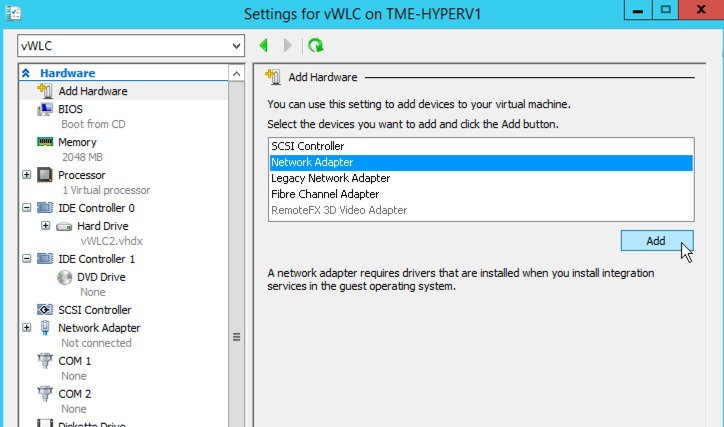

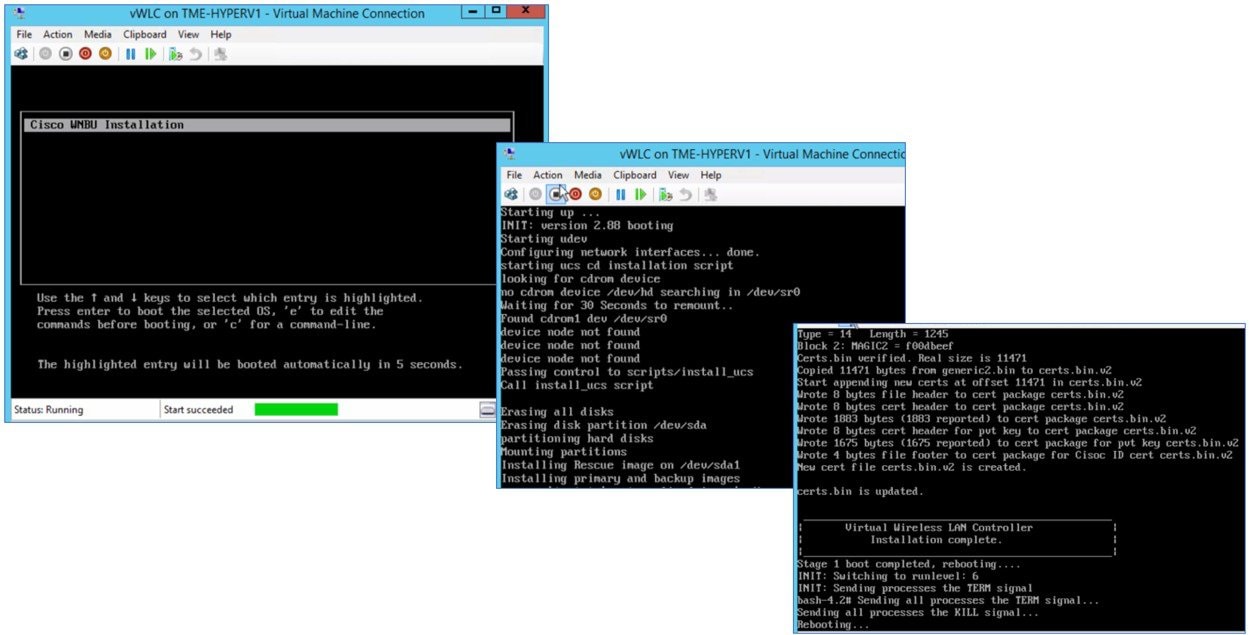
Using Windows PowerShell
- Configuring tagged ports for vWLC
- Deploying vWLC on Hyper-V using a file/script with ISO image
Configure Tagged Ports
C:\Users\Administrator>powershell
Windows PowerShell
Copyright (C) 2014 Microsoft Corporation. All rights reserved.
Show list of adapters and assignment:
Get-VMNetworkAdapter -VMName
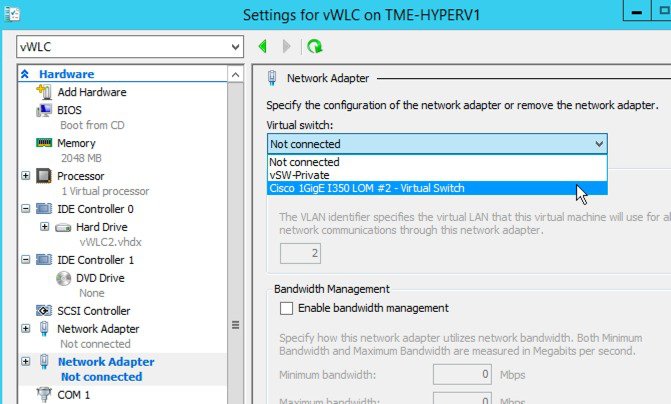
Configure Ethernet1 (vWLC data port/management) as Trunk, with Native VLAN id 0
Set-VMNetworkAdapterVlan -VMName “vWLC” -VMNetworkAdapterName Eth1 -Trunk -AllowedVlanIdList “1-4000” -NativeVlanId 0
Configure Ethernet0 (vWLC serial port) as access/untagged
Set-VMNetworkAdapterVlan -VMName “vWLC” -VMNetworkAdapterName Eth0 -Untagged
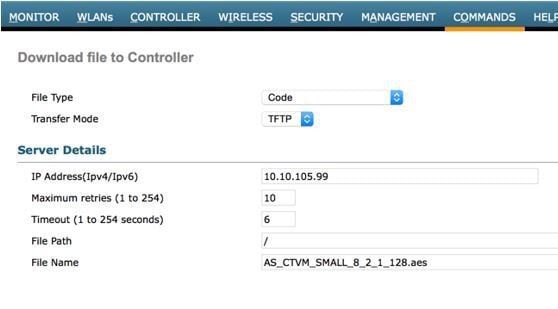
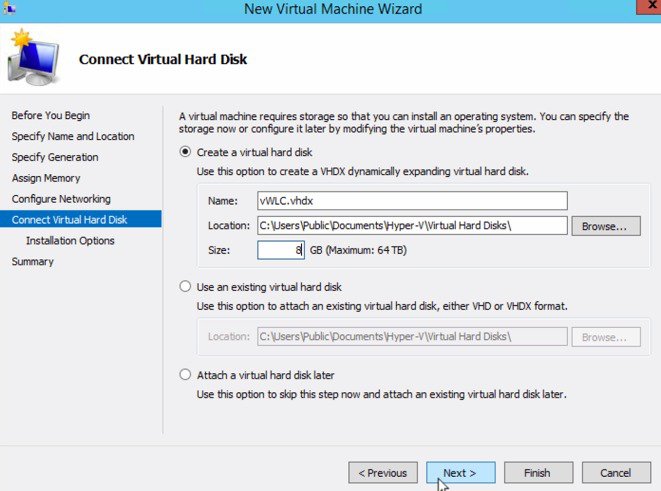
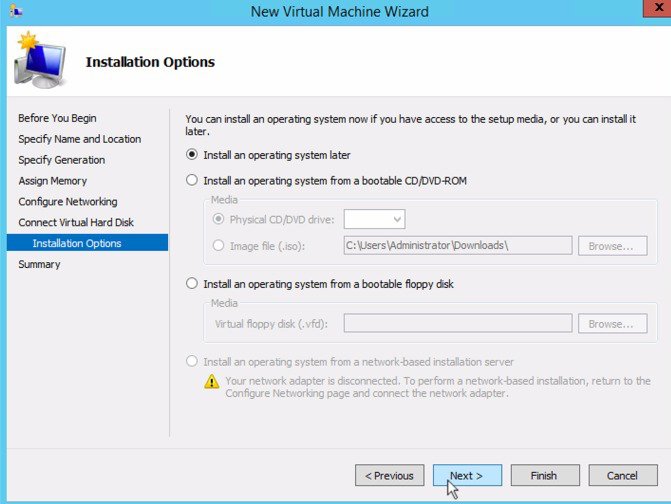
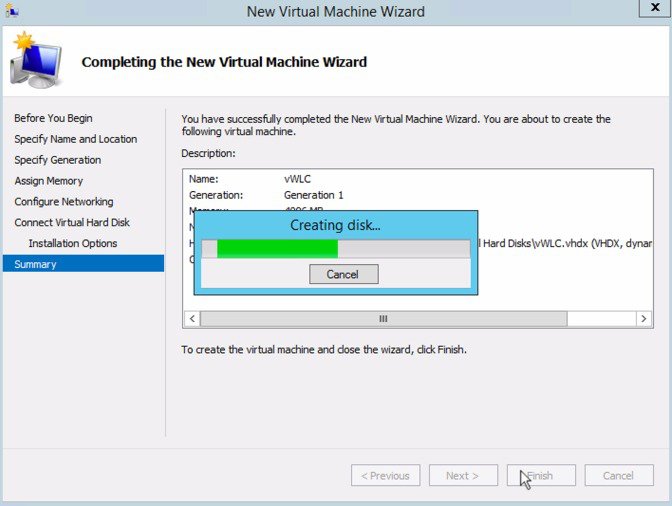
Deploying vWLC on Hyper-V via Script
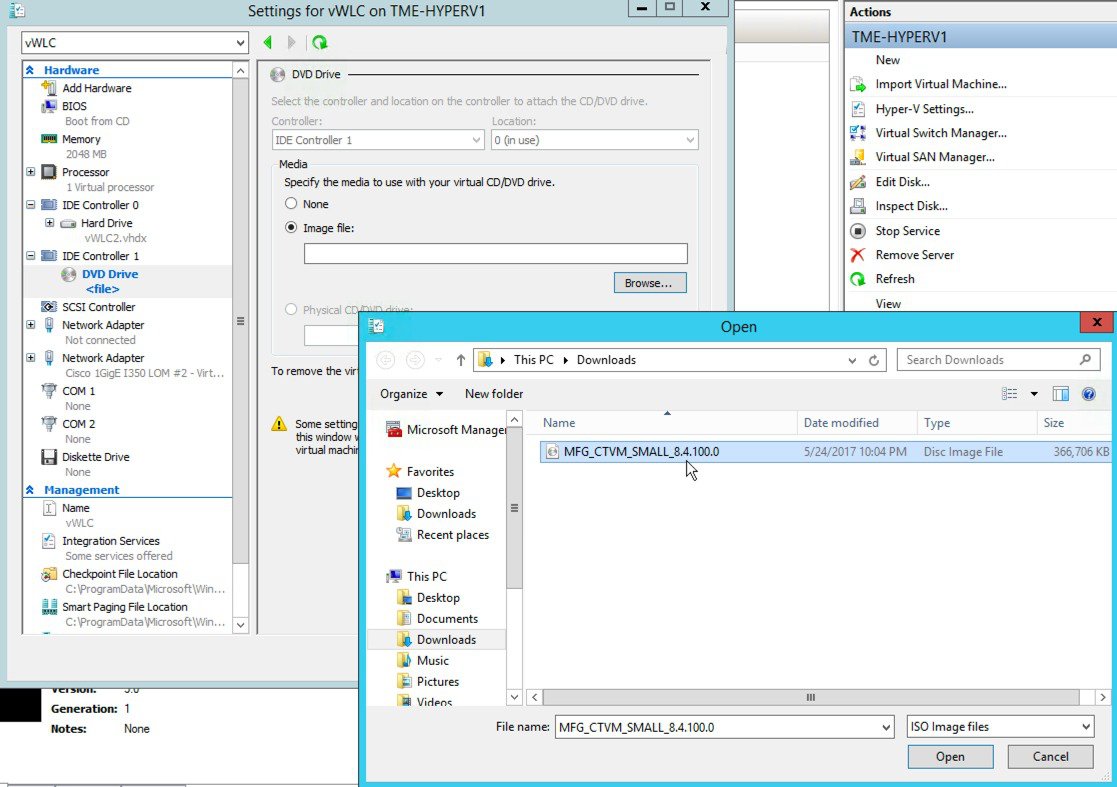
Create a PowerShell script (*.ps1) using a text editor (e.g. Notepad) and save to a file folder.
| Note | A *.ps1 extension is needed to be recognized as a PowerShell script. |
param($MPSW="vsw9x",$SPSW="vsw10x",$Name="vWLC",$RAM=2GB,$ISO="NULL") $VHD=8GB $VMLocation="C:\HyperV" "" "" "Input parameters are:" "" "Management Port Virtual Switch is : $MPSW" "Service Port virtual Switch is : $SPSW" "Name of the VM is : $Name" "Memory requestd is : $RAM" "Sotware input ISO is : $ISO" "Default media Storage is : $VHD" #Create Storage space for VHD files MD $VMLocation -ErrorAction SilentlyContinune #Create VM switches if not present $TestSwitch = Get-VMSwitch -Name $MPSW -ErrorAction SilentlyContinue if ($TestSwitch.Count -EQ 0) $TestSwitch = Get-VMSwitch -Name $SPSW -ErrorAction SilentlyContinue if ($TestSwitch.Count -EQ 0) #remove existing file if any for the current VM Remove-Item $VMLocation\$Name* -recurse $NewVM=New-VM -Name $Name -Path $VMLocation -MemoryStartupBytes 8GB -NewVHDPath $VMLocation\$Name.vhdx -NewVHDSizeBytes $ -SwitchName $SPSW Rename-VMNetworkAdapter -VMName $Name -Name "Network Adapter" -NewName Eth0 Add-VMNetworkAdapter -VMName $Name -SwitchName $MPSW -Name Eth1 #Set Management port to Trunk Set-VMNetworkAdapterVlan -VMName $Name -VMNetworkAdapterName Eth1 -Trunk -AllowedVlanIdList "1-4000" -NativeVlanId 0 #Set ISO path Set-VMDvdDrive -VMName $Name -Path $ISO #Set boot order Set-VMBios -VMName $Name -StartupOrder @("IDE","CD","LegacyNetworkAdapter","Floppy") #Boot the VM "Your VM is Starting.. Please enter any key within 15secs on VM console to boot” Start-Sleep 5 Start-VM $Name "VM Started" #connect the user to console vmconnect localhost $Name PowerShell cmdlet to invoke script within file location of the script created above.
powershell -f -ISO
Copyright © 2017, Cisco Systems, Inc. All rights reserved.
Виртуальный Cisco Wireless LAN Controller (WLC)
Процесс установки и настройки Cisco Wireless LAN Controller (WLC) на виртуальной машине VMWare. Сразу отмечу, что при использовании виртуальной машины (образ ОС в этом случае будет иметь именование AIR-CTVM), точки доступа будут работать в режиме FlexConnect, что в свою очередь вызывает проблемы с роумингом клиентов. Как написано на форуме Cisco — данная ситуация совершенно нормальная, что MAC адреса флапают, так как в режиме Flex, трафик идет напрямую через порт коммутатора, к которому подключена точка, в отличии от режима Local, когда весь трафик проходит через контроллер. Такое поведение при переключении клиентов с точки на точку меня не устраивает, так как используются голосовые терминалы, а вот для работы терминалов сбора данных (ТСД), вполне подходит.
Установка образа AIR_CTVM-K9_8_5_105_0.ova на виртуальную машину VMWare
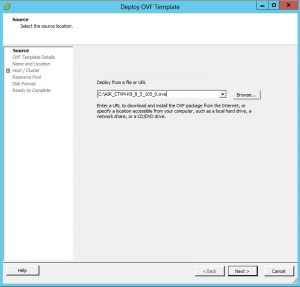
Разворачиваем образ
Выбираем образ
Настройка сети
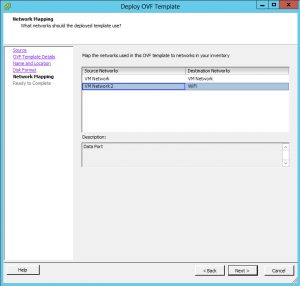
Важно указать правильную последовательность, так как первый порт — сервисный, второй отвечает за управление контроллером и точками доступа.
Настройка контролера WLC после установки
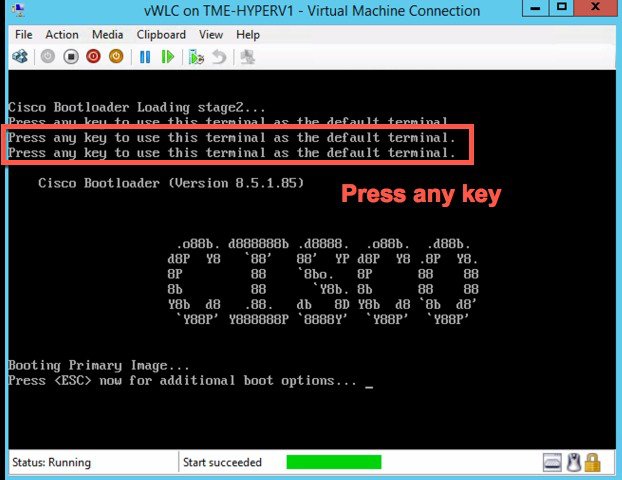
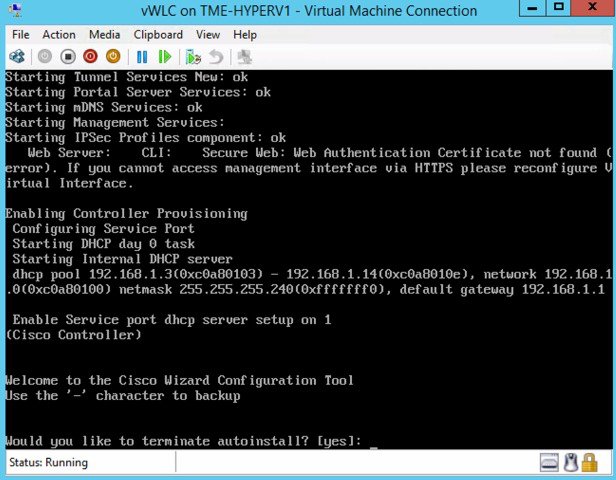
Прерываем автоматическую установку
На этапе запуска виртуальной машины нажимает любую кнопку, что бы попасть в командную строку и приступить к настроек
Первоначальная конфигурация — 1
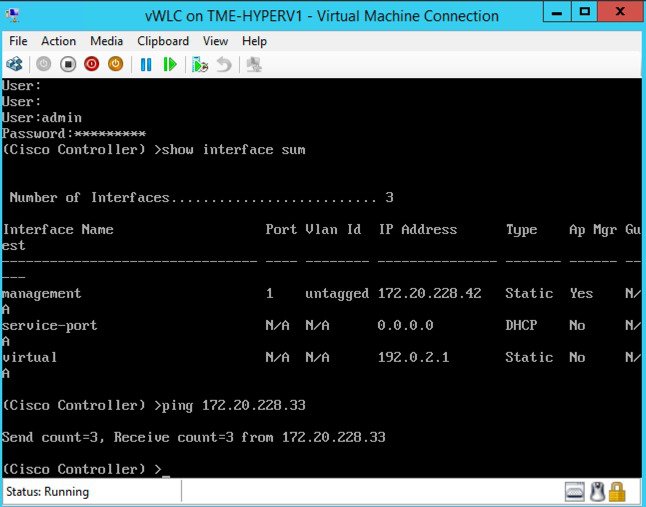
Задаем имя контроллера, имя администратора контроллера и пароль, настраиваем сервисный порт на работу по DHCP (он нам не нужен), настроим IP адрес для администрирования контроллера. Порт лучше всего настраивать транковый, но в данном примере я сделаю через naitive vlan. Укажем IP адрес DHCP сервера, который будет отвечать за раздачу IP адресов на точки доступа. Настроим виртуальный интерфейс — 1.1.1.1
Первоначальная конфигурация — 2
Укажем мобильную группу, зададим первый SSID — в нашем примере MySSID. Настройку бриджа DHCP оставим по умолчанию, разрешим использование статических IP адресов, настройку RADIUS сервера пропустим, код страны укажем RU и разрешим использование 802.11b 802.11a и 802.11g сетей. Настроим сервер времени. Отключим Ipv6. На этом начальная настройка закончена, можно сохранить конфигурацию и перезапустить контроллер
Настройка контроллера WLC через WEB интерфейс
В процессе настройки мы указали IP адрес управления 192.168.15.15 Так как мы задали нетегированный порт, то настройка порта коммутатора будет выгладить следующим образом