- How do I install Citrix ICA Client (Receiver) 13 on Debian 64-bit Linux?
- 3 Answers 3
- Как установить Citrix клиент на Ubuntu 14.04.1 Desktop
- Citrix ICA Client How-To for Linux
- Obtaining the Citrix ICA Client
- Unpacking Citrix ICA Client
- Configuring Your Browser
- Connecting to Citrix and Using the Citrix ICA Client
How do I install Citrix ICA Client (Receiver) 13 on Debian 64-bit Linux?
The Citrix ICA Client (Receiver) 13 has many i386 dependencies, so I cannot install on my amd64 (64-bit) Debian Linux. How can I make this work?
3 Answers 3
This was very difficult to fix, so I am answering my own question. Much debt is owed to the others who have blogged about the various components of this fix!
This answer assumes you are running Debian amd64 architecture. It also assumes your Debian installation is already multiarch-aware. (That is beyond this question.)
- Get the Citrix ICA Client (Receive) 13 installer: http://www.citrix.com/downloads/citrix-receiver/linux/
- Be sure to select the 64-bit .deb installer
- Example filename: icaclient_13.0.0.256735_amd64.deb
- dpkg —add-architecture i386
- apt-get install ia32-libs ia32-libs-i386 libglib2.0-0:i386 libgtk2.0-0:i386
- This will install almost two hundred dependent packages. Be very patient.
- dpkg —force-all —install icaclient_13.0.0.256735_amd64.deb
- Ignore the warnings about missing dependencies: lib32asound2 and nspluginwrapper . The installation will work without these libraries.
- Check there are no missing dependencies: ldd /opt/Citrix/ICAClient/wfica
- If you see not found in the output:
- Uninstall the Citrix ICA Client: apt-get remove icaclient
- Install the missing packages. (This can be a bit tricky as Debian does not always have a 1:1 relationship between names in the ldd output and package names.)
- Reinstall the Citrix ICA Client: dpkg —force-all —install icaclient_13.0.0.256735_amd64.deb
- cp —verbose /usr/share/ca-certificates/mozilla/* /opt/Citrix/ICAClient/keystore/cacerts/
- Add a new application: /opt/Citrix/ICAClient/wfica.sh
Each time you need to add unrelated Debian packages in the future, you will be forced to:
- Uninstall package icaclient : apt-get remove icaclient
- Install other packages
- Reinstall package icaclient (using the .deb file from Citrix)
- dpkg —force-all —install icaclient_13.0.0.256735_amd64.deb
- Recopy the CACerts from Mozilla.
- cp —verbose /usr/share/ca-certificates/mozilla/* /opt/Citrix/ICAClient/keystore/cacerts/
Finally, you can make permanent changes to your .deb package. Read more here: How do I fix a bad commercial deb package?
Как установить Citrix клиент на Ubuntu 14.04.1 Desktop
Понадобилось мне уметь использовать в своей работе опубликованные приложения на системе нового образца, а именно релиза Ubuntu 14.04.1 Desktop amd64 , поэтому данная заметка будет своего рода напоминалка шагов, которые нужно сделать, чтобы использовать опубликованные приложения от Citrix. В работу данных шагов включена практическая часть , как установить клиент Citrix Receiver 13 для последующего использования приложений Windows. В роли таких приложений у меня на работе выступает возможность подключения клиентом 1С , как версии 7 так и 8 к определенным базам. Также в ходе практической демонстрации как происходит подключение, я покажу пути решения проблем, с которыми я столкнулся.
Итак, сперва запрещу системе обновлять на более новые релизы :
ekzorchik@srv-serv:~$ sudo nano /etc/update-manager/release-upgrades
Обновляю систему до актуального состояния:
ekzorchik@srv-serv:~$ sudo apt-get update && sudo apt-get upgrade -y
Создам каталог, где буду располагаться скачанные deb файлы клиента Citrix:
ekzorchik@srv-serv:~$ mkdir ica
Далее посредством браузера по ссылке (http://www.citrix.ru/downloads/citrix-receiver/linux/receiver-for-linux-131.html) скачиваю deb пакеты применительно к своей архитектуре amd64 в созданный каталог ica.
Далее перехожу к установке клиента:
ekzorchik@srv-serv:~$ sudo dpkg -i ica/icaclient_13.1.0.285639_amd64.deb
В процессе установки обнаружатся недостающие компоненты, для их установки следует запустить нижеследующую команду:
ekzorchik@srv-serv:~$ sudo apt-get –f install –y
Повторяю установку клиентской части Citrix и она завершается успешно, ошибок не было выявлено в процессе:
ekzorchik@srv-serv:~$ sudo dpkg -i ica/icaclient_13.1.0.285639_amd64.deb
Устанавливаю поддержку USB:
ekzorchik@srv-serv:~$ sudo dpkg -i ica/ctxusb_2.4.285639_amd64.deb
Selecting previously unselected package ctxusb.
(Reading database … 167659 files and directories currently installed.)
Preparing to unpack …/ctxusb_2.4.285639_amd64.deb …
Unpacking ctxusb (2.4.285639) …
Setting up ctxusb (2.4.285639) …
* Starting Citrix USB daemon [fail] – А почему статус ошибочный
Processing triggers for ureadahead (0.100.0-16) …
Начинаю смотреть логи, почему так происходит натыкаюсь на то что в системе не найден некоторый модул ь :
ekzorchik@srv-serv:~$ sudo tail -f /var/log/syslog | grep ctxusbd
Dec 11 15:16:41 srv-serv ctxusbd[8380]: libcap: libcap.so.1: cannot open shared object file: No such file or directory
Dec 11 15:20:39 srv-serv ctxusbd[8501]: libcap: libcap.so.1: cannot open shared object file: No such file or directory
Пока поправить, эту ошибку не знаю. Двигаюсь дальше, запускаю собственно сам клиент, действия как его вызвать смотрите ниже:
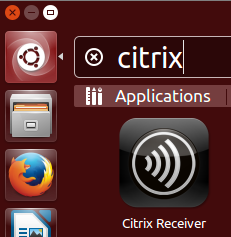
Т.к. дефолтный графический интерфейс Ubuntu 14.04.1 Desktop – это Unity, то чтобы вызвать приложение , нужно посредством системного меню, где имеют место установленные приложения вызвать Dash, которое находится в самом верхнем значке панели Unity и после в строке поиска набрать – «Citrix». По мере ввода будут отображаться приложения, имеющие полное соответствие с набранным.

Приложение у меня не запустилось и в логах, нет ни каких сообщений об этом. Даже по окончании этой заметки данное приложение у меня с использованием GUI интерфейса не запустилось, только консольное подключение работало и проблем не знало. Видимо это из-за стола с графическим интерфейсом Unity.
Заходим на Web— интерфейс сервера, где развернут Citrix:
Если не получиться вдруг зайти, то можно как вариант прописать соответствие имени хоста и IP адреса в файл /etc/hosts:
ekzorchik@srv-serv:~$ sudo nano /etc/hosts
Сохраняем внесенные изменения.
Далее открываем браузер и вводим в строку адреса следующий URL:
http://ekt-ts10.dsplit.local/Citrix/AccessPlatform — авторизуюсьИ нажимаю Log In

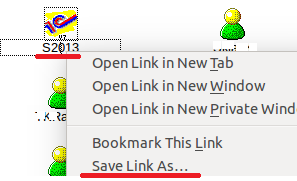
Меня перекинет на страницу, где будут отображены все опубликованные и доступные данному пользователю приложения и скачиваем уже существующее приложение “S2013”

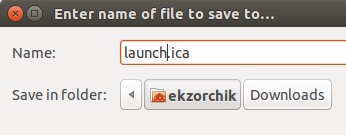
, выделив его и сохранив (Save Target As) куда-либо удобнее, по умолчанию скачиваемое приложение именуется , как launch.ica

, а после сохранившийся файл переименовываем, как 1c.ica, хотя можно было здесь это и сразу в процессе скачивания.
ekzorchik@srv-serv:~$ mv launch.ica 1c.ica
Запускаю клиент Citrix из консоли с указанием на скачанное приложение :
ekzorchik@srv-serv:~$ /opt/Citrix/ICAClient/wfica 1c.ica
(wfica:2575): Gtk-WARNING **: Unable to locate theme engine in module_path: «murrine»,
ekzorchik@srv-serv:~$ sudo apt-get install gtk2-engines-murrine:i386 –y)
Пробую запустить скачанное приложение еще раз.
ekzorchik@srv-serv:~$ /opt/Citrix/ICAClient/wfica 1c.ica
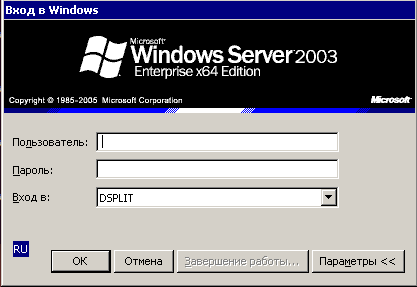
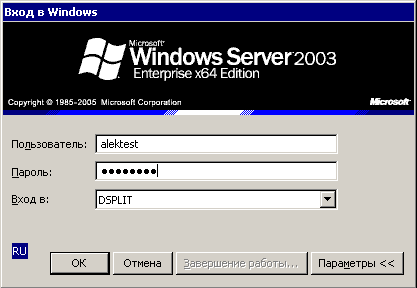
И окно аутентификации на сервере

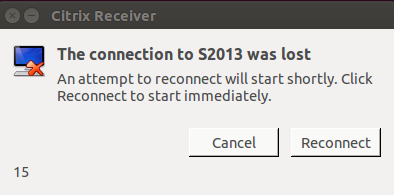
, но обнаружил – не работает клавиатура, а через некоторое время вообще приложение зависло, мышкой не могу нажать на ОК, ОТМЕНА, Параметры.
И после соединение было сброшено

Заметил еще одно но, после запуска, файл 1c.ica удаляется, поэтому запрещю его удаление:
ekzorchik@srv-serv:~$ sudo chown ekzorchik:ekzorchik 1c.ica
ekzorchik@srv-serv:~$ sudo chattr +i 1c.ica
ekzorchik@srv-serv:~$ sudo apt-get install gtk2-engines
Запускаю снова и опубликованное приложение запускается:
ekzorchik@srv-serv:~$ /opt/Citrix/ICAClient/wfica 1c.ica
ввожу аутентификационные данные на подключение

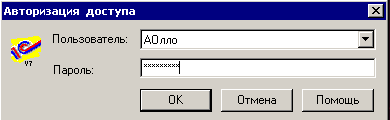
Нажимаю ОК и попадаю в следующее окно уже авторизации в программе 1С базы опубликованного приложения:

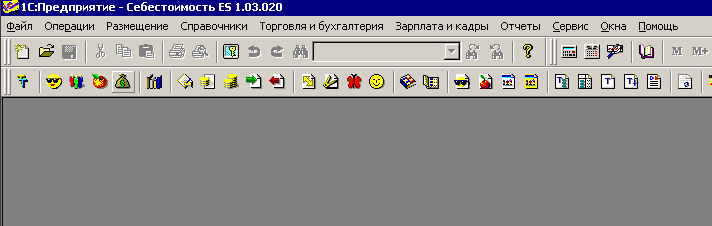
И нажимаю «ОК» и передо мной разворачивается приложение 1С подключенное к определенной базе

Завершаю работу с программой
Файл – Выход — Да
и возвращаюсь в консоль, проверяю не удалился ли файл 1c.ica, нет не удалился.
Подправляю конфиг 1c.ica чтобы миновать окно аутентификации на сервере:
ekzorchik@srv-serv:~$ chattr -i 1c.ica
chattr: Operation not permitted while setting flags on 1c.ica
ekzorchik@srv-serv:~$ sudo chattr -i 1c.ica
Ниже пример моего конфигурционного файла на прозрачное подключение к опубликованному приложению . Пояснять в этой заметке значение каждого параметра не имеет смысла, есть документация.
ekzorchik@srv-serv:~$ nano 1c.ica
Citrix ICA Client How-To for Linux
Note: I changed jobs a couple of years ago, and I no longer have access to a Citrix Server, therefore these instructions are to the best of what I had at the time, and may have changed or require tweaking since the last time I executed them.
Fortunately for us Linux users, Citrix provides binaries for connecting to Citrix servers from Linux boxen. Unfortunately, they have made the attempt to oversimplify the installation of their binaries by providing an installation script. The installation script is flawed in that it assumes you want to use Netscape as your browser. And even then it doesnt seem to install ready-to-use. So for those of us that want to use it with a different browser (and/or Netscape for that matter), we are relegated to hunting google and/or searching for hidden documentation on how to manually install the client. So to Citrix, I say «A for effort» and «F» for not realizing that us linux techies also like to have detailed instructions on how to manually install when the automated install doesnt suit our needs. And that brings us to the purpose of this page.
Obtaining the Citrix ICA Client
You need to obtain the Citrix ICA Client package. Citrix offers an RPM, but for the purposes of this page, Im recommending the tarball. Thus, these instructions will be based off of the tarball download.
First, obtain the Citrix ICA Client tarball by going to http://www.citrix.com/ and selecting «Downloads». Or if you specifically want the current Linux x86 tarball, go to http://download2.citrix.com/files/de/products/client/ica/current/linuxx86.tar.gz. From this point on in the documentation, the tarball will be assumed to be the x86 version, so substitute accordingly if you have to.
Unpacking Citrix ICA Client
Once you’ve obtained the tarball, you need to unpack it. Pick a temporary location to unpack this tarball. For this page, well use /tmp/citrix/. So create the temporary directory, move the tarball to that directory and change into that directory:
mv linuxx86.tar.gz /tmp/citrix/
gzip decompress linuxx86.tar.gz
Now to run the installation command you must be logged in as the super user (root). So change to root (using su, or however).
Execute the installation script, and follow the instructions as prompted:
Using the default installation directory is highly recommended. If you choose not to, youll have to read the install.txt to figure out what environment variables need to be set to get the Citrix ICA Client to work. The rest of this page will assume that the Citrix ICA Client was installed to its default directory. If the default was chosen, the binaries are now installed in /usr/lib/ICAClient/.
Note: I reccomend answering «No» to the installer when it asks if you’d like to integrate Citrix automatically since this How-To handles all of the setup needed.
Configuring Your Browser
These directions should work for Firefox, Mozilla, Netscape, and any other Linux Mozilla-based browser. The first step is to find the plugins directory for the browser you wish to configure. The plugins directory is typically found as a subdirectory of the installation directory for your browser. If you are unsure of the location of your plugins directory, you can try the following command to attempt to locate the plugins directory:
find / -name plugins | grep -i «netscape\|firefox\|mozilla»
Well assume that we are configuring Firefox, and that Firefox was installed to /opt/firefox. Again the following will have to be done as the superuser (root). Change into the plugins directory of your browser:
Next, create a symlink (aka softlink) to the Citrix ICA Client library:
ln s /usr/lib/ICAClient/npica.so npica.so
If the Citrix install script was able to find Netscape, it probably already did this step for you.
Connecting to Citrix and Using the Citrix ICA Client
Close all running instances of the browser you configured (just to be safe). Open a new instance of the browser. Type the URL of and connect to your Citrix Server (as though installation were complete). Login to the Citrix server with your user id and password. Once logged in, you should get the mini-desktop with all of your applications. The first time you click on an application, your browser is likely going to popup a dialog box giving you the choice to open the file or save the file. Choose the option to open the file. Where it asks for the application to use on this type of file, type in the path to the wfica application:
If given the choice, tell the browser to use this application for all future downloads of this file type.
- If you see not found in the output: