- How to Install ClamAV on Linux Mint 21
- Installing ClamAV CLI on Linux Mint 21
- Scanning Files and Directories Using ClamAV CLI
- Installing ClamAV GUI on Linux Mint 21
- Conclusion
- About the author
- Aaliyan Javaid
- Установка ClamAV на Debian/Ubuntu/ Linux Mint
- 2 thoughts on “ Установка ClamAV на Debian/Ubuntu/ Linux Mint ”
- Добавить комментарий Отменить ответ
- Рубрики
- соц сети
- Архив новостей
- Свежие записи
- Свежие комментарии
How to Install ClamAV on Linux Mint 21
![]()
Clamav is a command-line tool that scans files and directories for viruses, Trojan horses, and other malicious software. ClamAV is also capable of scanning emails and other types of files, making it a versatile and powerful tool for protecting your system from malware. Since this anti-virus application is command line but there is a GUI application for it as well so read this guide to know how to get it on Linux Mint 21.
Installing ClamAV CLI on Linux Mint 21
ClamAV is based on a multi-threaded scanning engine that can quickly scan large files and directories so to get it on Linux Mint just use:

Once the antivirus is installed check its version to see if it is installed correctly and for that purpose execute:

Scanning Files and Directories Using ClamAV CLI
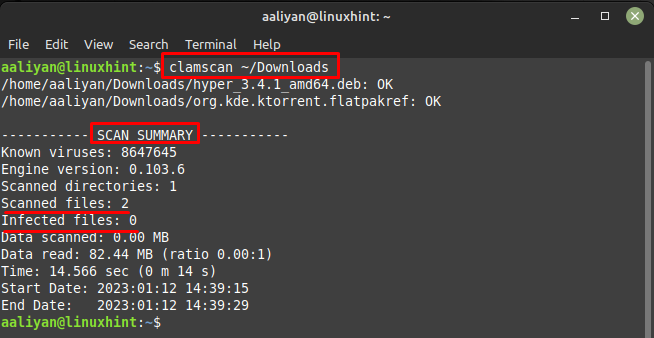
ClamAV uses a combination of signature-based detection and heuristic analysis to identify and remove malware and therefore it is preferred by many Linux users so to scan any directory using ClamAV CLI below is the syntax that should be followed:
For further illustration I have scanned my Downloads directory of Linux Mint by using the above-mentioned syntax:
If you want to just see the infected files only then just use the –infected command by using the above-mentioned syntax:

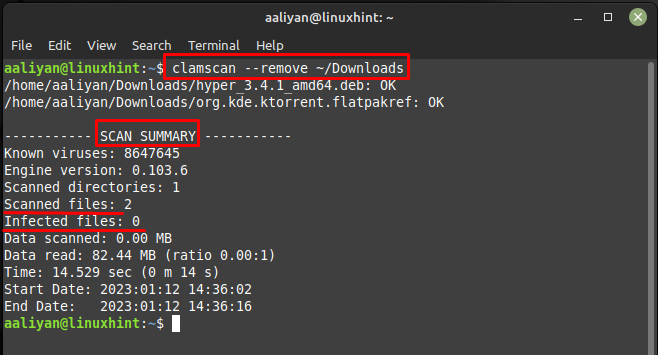
If you want to remove the infected files automatically then just use the –remove command by using the above-mentioned syntax, but remember that if the antivirus feels any suspicious file, it will also remove it so be careful before using this command:
Further if you want to scan any file for viruses then just follow the given below syntax:
For further illustration I have scanned a zip in the Downloads directory of Linux Mint by using the above-mentioned syntax:

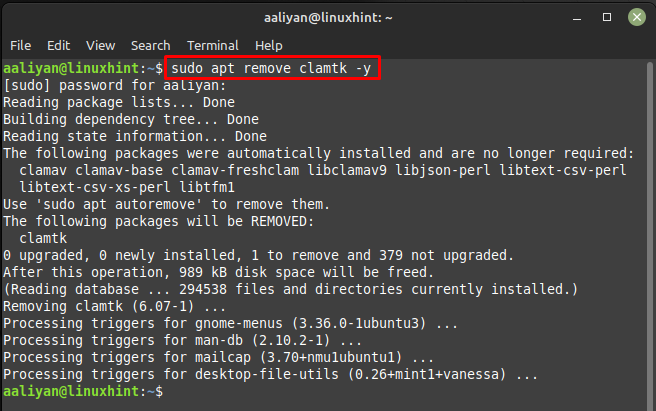
Now to remove this application from Linux Mint 21 then execute the below-mentioned command in case you installed it through apt:

Installing ClamAV GUI on Linux Mint 21
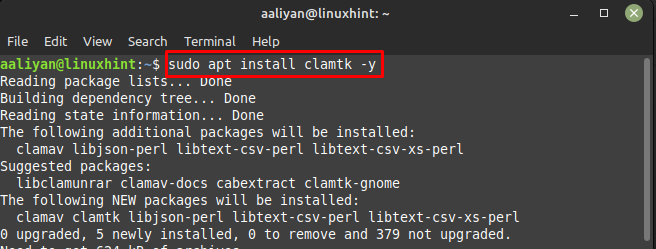
One of the key advantages of ClamAV is its open-source nature, which allows users to inspect the source code and make modifications as needed so if you are more comfortable in using the GUI of Linux Mint then install its GUI version by executing:
Next the run the application through Linux Mint terminal:

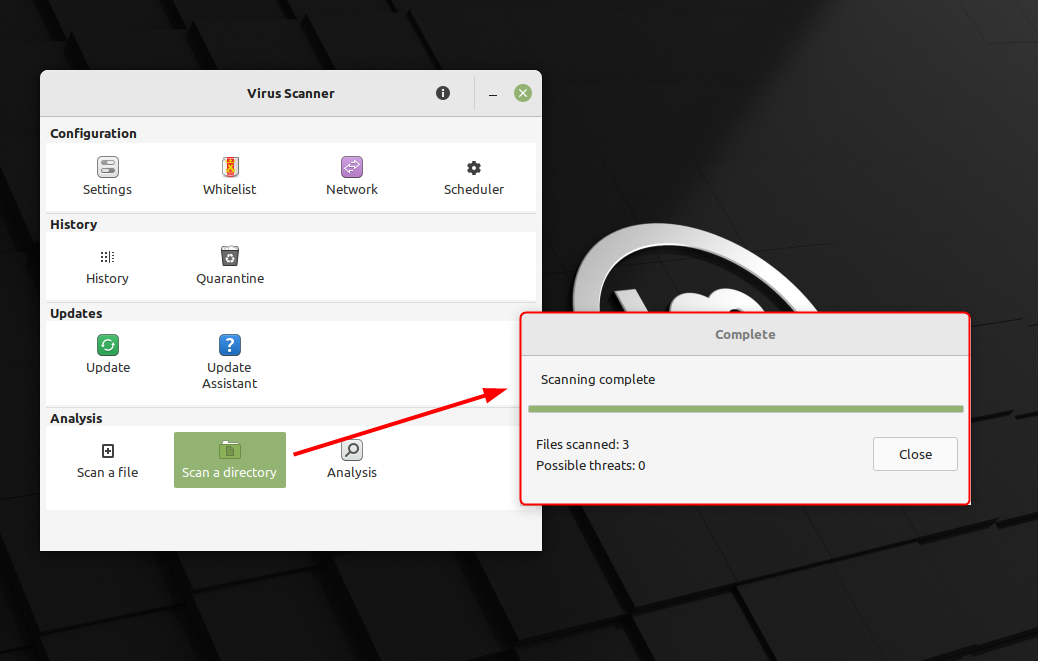
To scan any file or directory just click on Scan a directory and from the pop-up select the respective directory or file and afterwards click on OK:
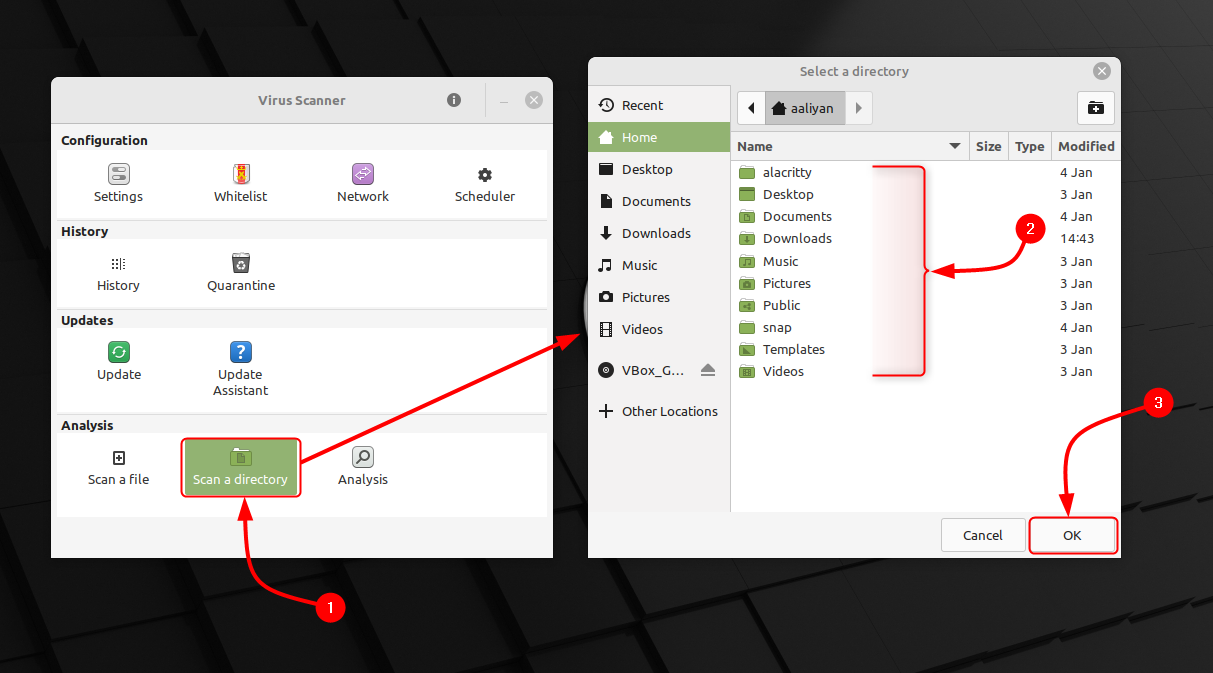
Once the file or directory is scanned the complete statistics like number of files scanned and number of possible threats will be displayed; next click on the close button once the scan is completed:
Now to remove this application from Linux Mint if you are no longer to use it then execute the below command in case you installed it through apt:
Conclusion
ClamAV is a powerful and flexible antivirus software that is well-suited for use on mail and web servers, as well as for individual computers. This guide gives the complete guide on how to install both the CLI and GUI version of ClamAV on Linux Mint and how to scan files or directories through it.
About the author
Aaliyan Javaid
I am an electrical engineer and a technical blogger. My keen interest in embedded systems has led me to write and share my knowledge about them.
Установка ClamAV на Debian/Ubuntu/ Linux Mint

ClamAV- это утилита которая может помочь Вам в поиске не желательного ПО на вашей системе, очень легкая и простая. Установка ClamAV на Debian/Ubuntu/ Linux Mint не нуждается в сильных знаниях линукс.
Сейчас расскажу как можно это все сделать на готовом примере, я использую ОС — Ubuntu.
Для установки ClamAV на Debian/Ubuntu/ Linux Mint выполните:
# sudo apt-get install clamav
После установки нужно обновить ему антивирусную базу, можно сделать следующей командой:
Чтобы выполнить сканирование компьютера нужно:
Еще можно выполнить и так:
# sudo clamscan --infected --remove --recursive
Если нуждаетесь в помощи, то читаем мануал по использованию:
Установка ClamAV на Debian/Ubuntu/ Linux Mint завершена. Спасибо что читаете и используете мой сайт http://linux-notes.org
2 thoughts on “ Установка ClamAV на Debian/Ubuntu/ Linux Mint ”
lena@AirTouch-72EO ~ $ sudo apt-get install clamav
Чтение списков пакетов… Готово
Построение дерева зависимостей
Чтение информации о состоянии… Готово
E: Не удалось найти пакет clamav
Что -то не получается ничего. Помогите разобраться, пожалуйста.
Попробуйте выполнить:
# apt-get update -y && apt-get upgrade -y И после чего:
# apt-get install clamav
Добавить комментарий Отменить ответ
Этот сайт использует Akismet для борьбы со спамом. Узнайте, как обрабатываются ваши данные комментариев.
Рубрики
- Arch Linux (167)
- Commands (36)
- Debian’s (635)
- Administration tools Ubuntu (37)
- Backups Debian’s (7)
- Database в Ubuntu (58)
- Games (игры) (1)
- Monitoring в Debian и Ubuntu (49)
- Virtualization в Ubuntu / Debian/ Linux Mint (41)
- Docker (22)
- Kubernetes (6)
- KVM (4)
- OpenVZ (3)
- Vagrant (5)
- VirtualBox (6)
- ArgoCD (1)
- Concourse (1)
- Gitlab (1)
- Jenkinks (4)
- Spinnaker (1)
- Apache (32)
- Cherokee (1)
- FTP-services (5)
- Lighttpd (1)
- Nginx (26)
- PHP (27)
- Proxy для Debian’s (2)
- Tomcat (4)
- Панели управления в Ubuntu/Debian/Mint (24)
- Установка и настройка почты на Ubuntu/Debian (12)
- Хранилища (clouds) (2)
- Administration tools freeBSD (19)
- Database во FreeBSD (52)
- Monitoring во freeBSD (37)
- Virtualization во FreeBSD (22)
- VoIP (1)
- Установка Web сервисов (91)
- Установка и настройка почты (6)
- Установка из ports (пакетов) (19)
- Установка из sorce code (исходников) (23)
- Непрерывная интеграция (CI) (27)
- Database в MacOS (36)
- Monitoring в Mac OS (31)
- Security (безопасность) (12)
- Virtualization в Mac OS (30)
- Docker (19)
- Kubernetes (6)
- Vagrant (5)
- VirtualBox (5)
- ArgoCD (1)
- CircleCI (1)
- Concourse (1)
- Gitlab (1)
- Jenkinks (4)
- Spinnaker (1)
- Administration tools CentOS (49)
- Backups RPM’s (4)
- Database в CentOS (68)
- Monitoring в CentOS (67)
- Virtualization в CentOS/ Red Hat/ Fedora (42)
- Docker (23)
- Kubernetes (6)
- KVM (5)
- OpenVZ (2)
- Vagrant (5)
- VirtualBox (6)
- VMWare (3)
- ArgoCD (1)
- Concourse (1)
- Gitlab (1)
- Jenkinks (4)
- Spinnaker (1)
- Apache (35)
- Cherokee (1)
- DNS (3)
- FTP (10)
- Nginx (33)
- PHP (34)
- Proxy для RedHat’s (2)
- Tomcat (2)
- Voice (2)
- Панели управления в CentOS/Red Hat/Fedora (27)
- Прокси сервер на CentOS/RHEL/Fedora (4)
- Установка и настройка почты на CentOS/RHEL/Fedora (14)
- Хранилища (clouds) (1)
соц сети

Архив новостей
Свежие записи
Свежие комментарии
- Глеб к записи Установка Adobe Flash Player в Debian/Ubuntu/Mint
- Максим к записи Заблокировать User Agents используя Nginx
- Денис к записи Как включить EPEL репозиторий на CentOS
- Гость к записи Закомментировать/Раскомментировать строки vi/vim в Unix/Linux
- Sergey к записи Установка и настройка OpenVPN сервера на Debian/Ubuntu/Linux Mint