- Installing CMake
- Windows
- macOS
- Linux, UNIX
- Download Verification
- Getting Started With CMake and CPack on Linux
- How to Install CMake
- Using CMake to Configure, Build, and Debug a C++ Project on Linux
- Configuration
- CMake With CPack
- Using CPack With CMake
- Conclusion
- About the author
- Denis Kariuki
- How to cross compile for linux x86 with linux amd64, cmake and g++?
- Here is the information I found:
- missing pieces:
- Is it possible at all?
Installing CMake
There are several ways to install CMake, depending on your platform.
Windows
There are pre-compiled binaries available on the Download page for Windows as MSI packages and ZIP files. The Windows installer has an option to modify the system PATH environment variable. If that is not selected during installation, one may manually add the install directory (e.g. C:\Program Files\CMake\bin) to the PATH in a command prompt.
One may alternatively download and build CMake from source. The Download page also provides source releases. In order to build CMake from a source tree on Windows, you must first install the latest binary version of CMake because it is used for building the source tree. Once the binary is installed, run it on CMake as you would any other project. Typically this means selecting CMake as the Source directory and then selecting a binary directory for the resulting executables.
macOS
There are pre-compiled binaries available on the Download page for macOS as disk images and tarballs. After copying CMake.app into /Applications (or a custom location), run it and follow the “How to Install For Command Line Use” menu item for instructions to make the command-line tools (e.g. cmake) available in the PATH. Or, one may manually add the install directory (e.g. /Applications/CMake.app/Contents/bin) to the PATH.
One may alternatively download and build CMake from source as in the following section.
Linux, UNIX
There are pre-compiled binaries available on the Download page for some UNIX platforms. One may alternatively download and build CMake from source. The Download page provides source releases. There are two possible approaches for building CMake from a source tree. If there is no existing CMake installation, a bootstrap script is provided:
./bootstrap make make install
(Note: the make install step is optional, cmake will run from the build directory.)
By default bootstrap will build CMake without any debug or optimization flags. To enable optimizations you will need to specify the CMAKE_BUILD_TYPE option to bootstrap like this: ./bootstrap — -DCMAKE_BUILD_TYPE:STRING=Release
For more options with bootstrap, run ./bootstrap —help .
Or, an existing CMake installation can be used to build a new version:
(Note: the make install step is optional, cmake will run from the build directory.) If you are not using the GNU C++ compiler, you need to tell the bootstrap script (or cmake) which compiler you want to use. This is done by setting the environment variables CC and CXX before running it. For example:
env CC=cc CXX=CC ./bootstrap make make install
Download Verification
Each release on the Download page comes with a file named cmake-$version-SHA-256.txt, where $version is the release version number.
One may use this file to verify other downloads, such as the source tarball. For example:
$ curl -OL https://github.com/Kitware/CMake/releases/download/v3.20.1/cmake-3.20.1-SHA-256.txt $ curl -OL https://github.com/Kitware/CMake/releases/download/v3.20.1/cmake-3.20.1.tar.gz $ sha256sum -c --ignore-missing cmake-3.20.1-SHA-256.txt cmake-3.20.1.tar.gz: OK
The SHA-256 file itself can be verified by GPG signature:
$ curl -OL https://github.com/Kitware/CMake/releases/download/v3.20.1/cmake-3.20.1-SHA-256.txt.asc $ gpg --keyserver hkps://keyserver.ubuntu.com --recv-keys C6C265324BBEBDC350B513D02D2CEF1034921684 $ gpg --verify cmake-3.20.1-SHA-256.txt.asc cmake-3.20.1-SHA-256.txt
The GPG key C6C265324BBEBDC350B513D02D2CEF1034921684 is a signing subkey whose expiry is updated yearly.
Getting Started With CMake and CPack on Linux
![]()
“CMake is a popular and helpful cross-platform, open-source set of tools that utilize compiler and platform-independent configuration files to build, test, and package projects. CMake was developed as the solution for a cross-platform build space for open-source projects.
CPack is a packaging tool that is cross-platform and distributed by CMake. However, it can be used independently of CMake, but it uses generator concepts from the CMake suite tool.
This guide covers the installation and usage of CMake and CPack.”
How to Install CMake
You can install CMake via the command line or the Ubuntu Software Centre. In this case, we will install it via the command line, but you can check the complete CMake installation methods for more details.
First, update your repository.
Next, enter the command below to install CMake.
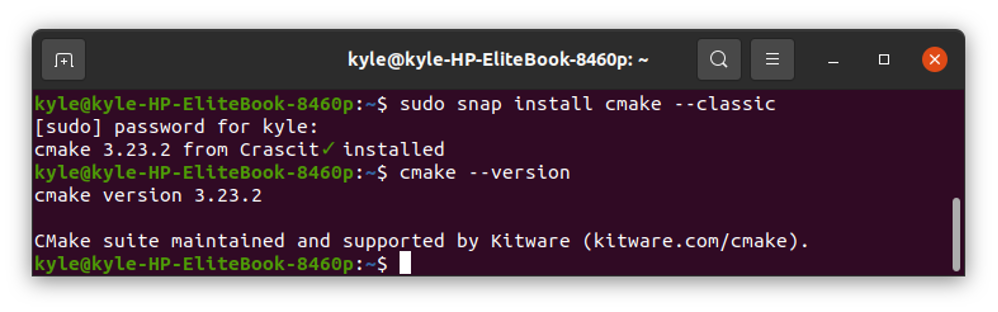
You can confirm the installation by checking its version.
Using CMake to Configure, Build, and Debug a C++ Project on Linux
CMake is popular for managing code builds for C++ projects, and it does so with the help of the CMakeLists.txt files for each directory. They define the tasks the build system should undertake.
In our case, we will write a simple C++ program using Visual Studio Code and build it using CMake.
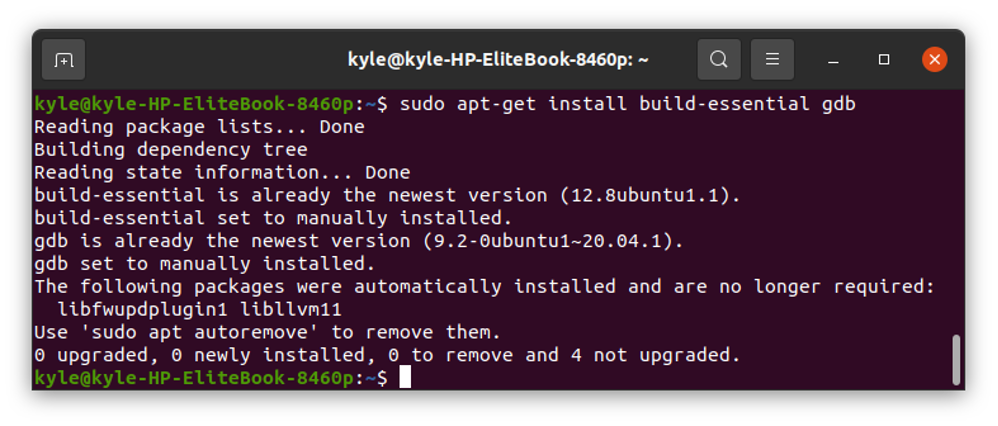
Ensure you have the C++ Visual Studio extension installed, a debugger, preferably gcc, and CMake.
You can install gcc using the command:
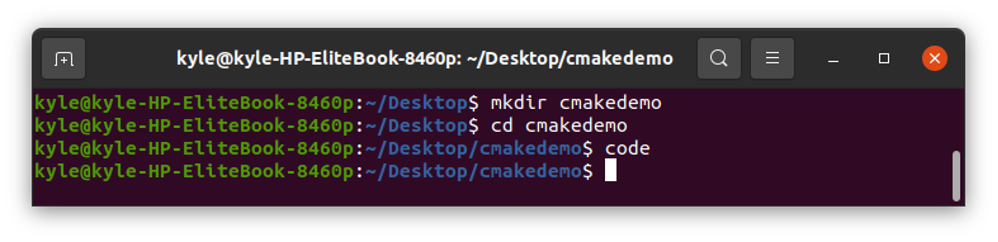
To start, create a working folder and open it in Visual Studio Code.
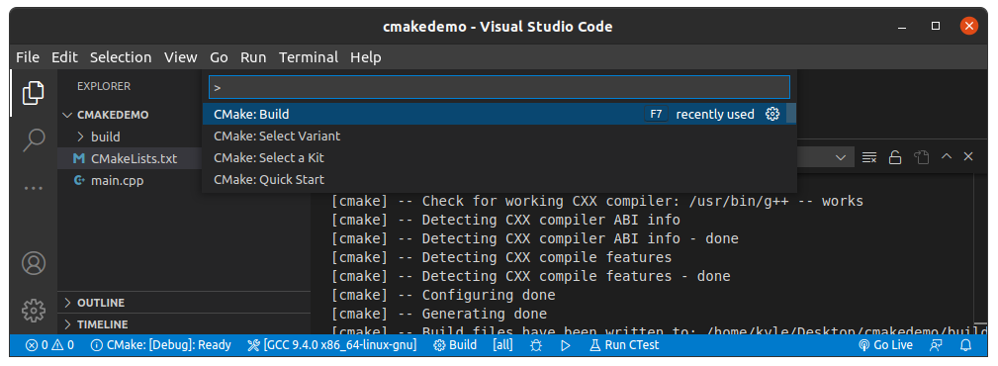
Once Visual Studio Code opens, open the Palette by typing ctrl + shift + p
To quickly create the needed CMake files, type CMake: Quick Start and choose the option like in the image below.
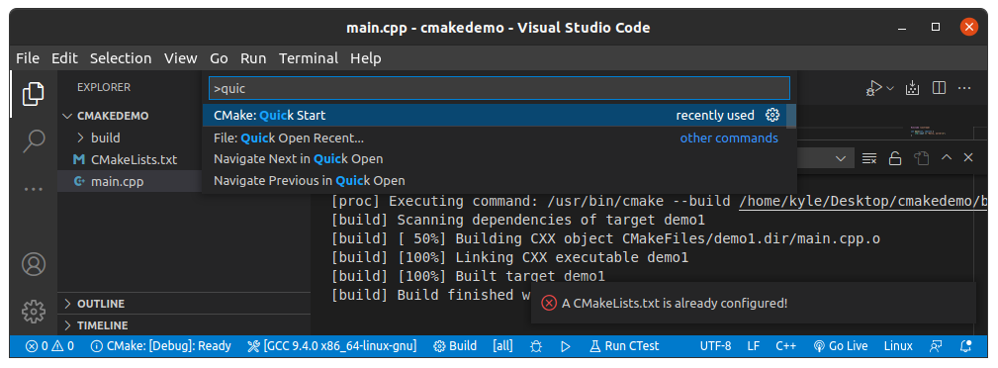
If prompted to choose between Library and Executable, choose Executable. You will notice two files, the main function and the CMakeLists.txt will be created.
You also need to select a Kit to inform CMake which compiler to use.
First, check your gcc version on the terminal. On the Palette, search for Kit and choose the one that matches your version.
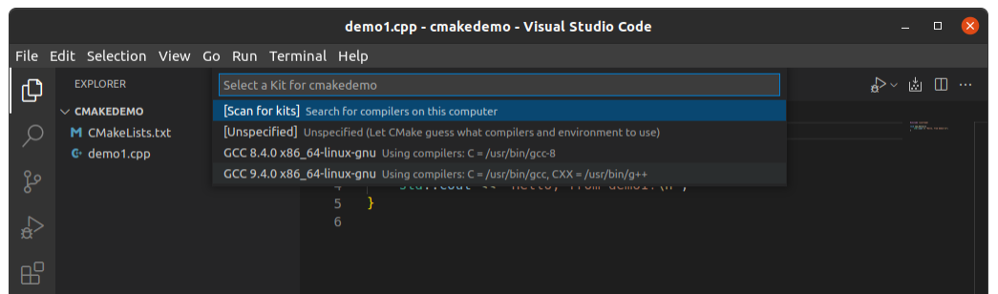
At the bottom of the window, you will see the selected kit. In our case, it’s GCC 9.4.0 x86_64-linux-gnu.
CMake also uses a variant that contains instructions on building the project. Still on the Palette, type CMake: Select Variant. There are four variants to choose from.
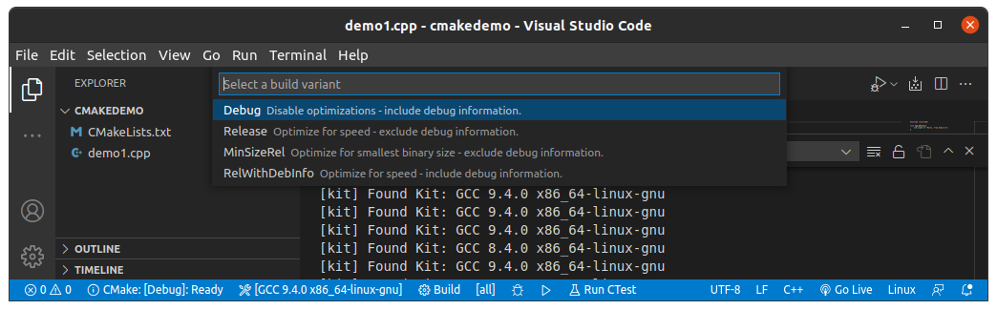
- Debug: it includes the debug details, but it disables optimizations.
- Release: no debug details, but optimization gets included.
- RelWithDebInfo: it includes debug info and optimizes for size.
- MinSizeRel: it doesn’t include the debug details, but it optimizes for size.
In our case, we need optimization and debugging information. So, we will choose Debug.
Configuration
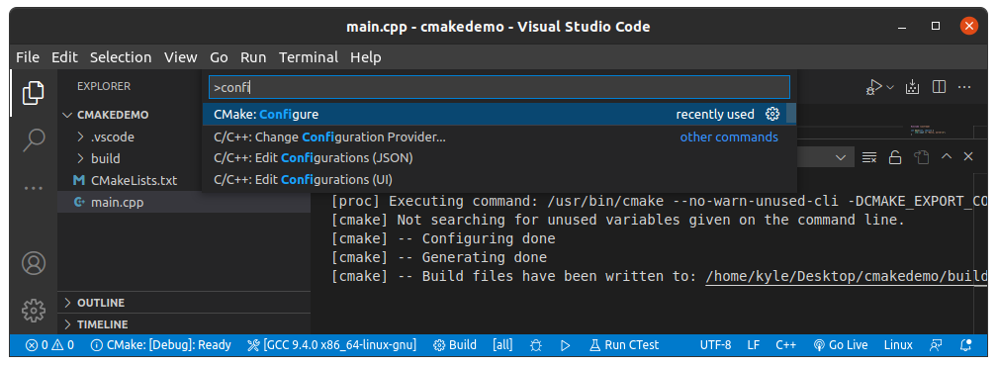
Everything is set. Open the Palette and type CMake: Configure, click the enter button, and CMake will generate the build files and configure the project.
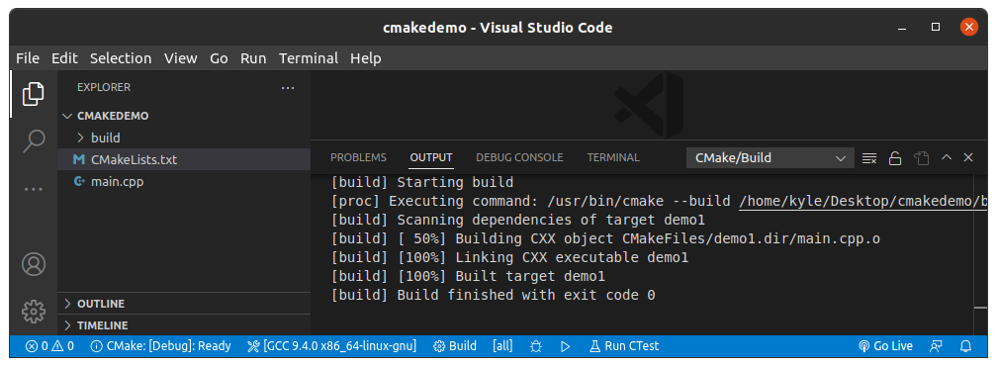
The final step is to build the project. You can do so by clicking the Build at the bottom of the screen or running CMake: Build.
That’s it! You’ve successfully used the CMake tool to configure and build the project.
In case of any error with the project, simply run the CMake: Debug, and it will show where the error is on the code.
CMake With CPack
Once you have a project configured and built as we did with CMake, you need a way to build the software to make it installable. What you need is a way or tool that lets you build the project on your development machine and create a form that can be transferred and installed on another device. That’s what CPack does.
CPack will create an installer and a package for the project. It can create binary and source packages. The good thing is that CPack supports the creation of installers for OS X, RPMs, zip files, .tar.gz, Debian packages, Windows, and .sh.
CPack works to create a duplicate of the source tree for the project and tar or zip file, and you can transfer the file to another machine and store them in the correct directory and have your project up and running. CPack does most of the work, including creating a temporary directory for the project and copying the install tree in a suitable format for the packaging tool.
Using CPack With CMake
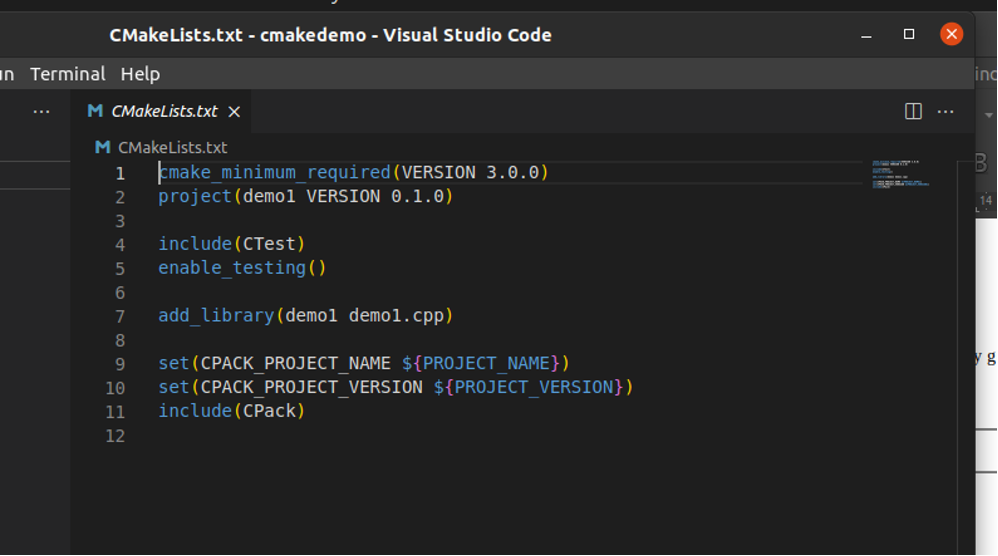
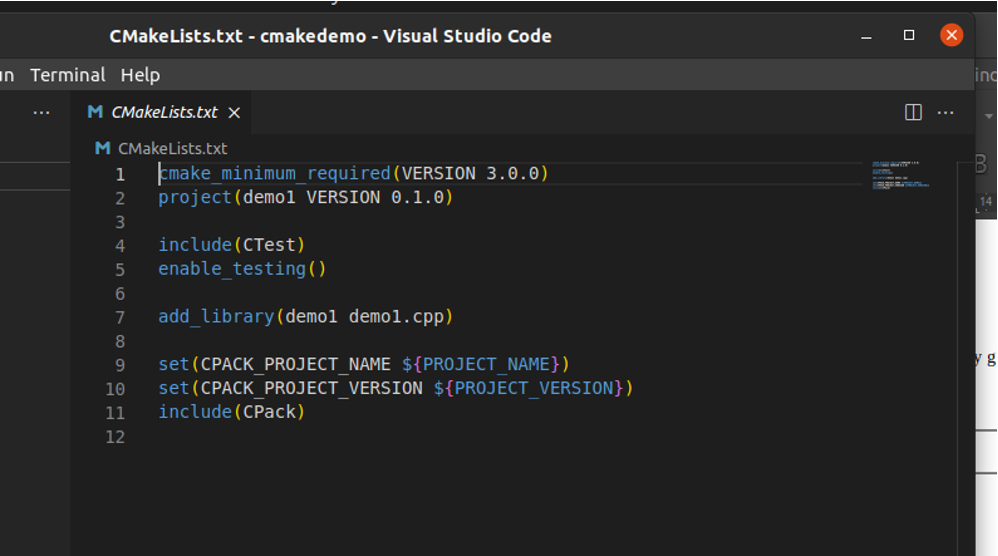
Since CPack is part of CMake, combining the two is pretty easy. In our C++ project using CMake, we had a CMakeLists.txt file created. Inside the file, there is support for CPack that comes auto-generated, as shown.
Therefore, the remaining part is to generate the installers and packages.
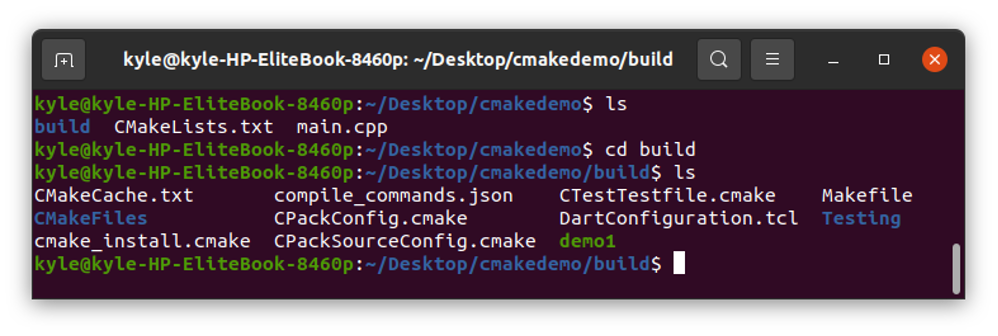
To do so, first, navigate to the build directory inside the project directory. In our example, it will be:
You can list the different files in the directory.
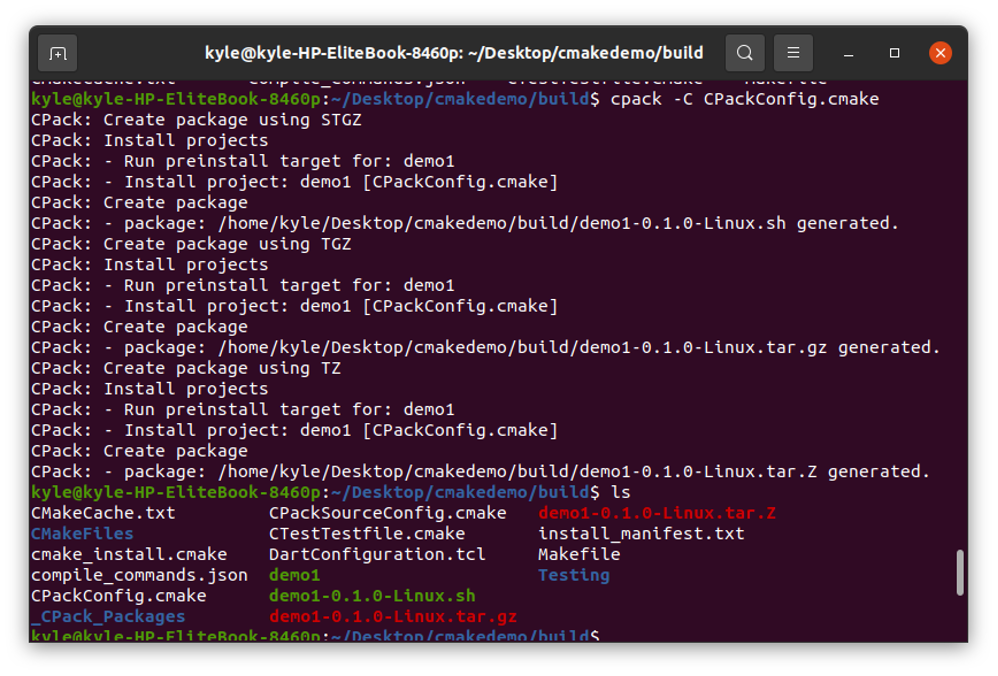
To generate the installers, run the command:
You can note the different generators from the output below, including .tar.gz, .sh, and .tar.z.
Alternatively, you can run the command:
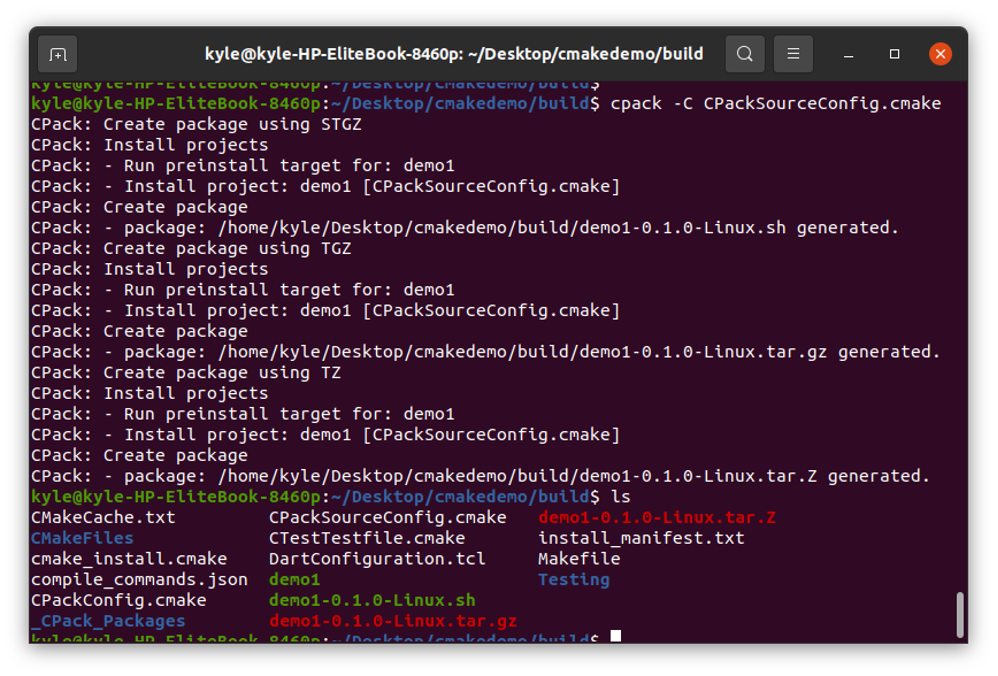
You now have the needed packages for your project.
Conclusion
CMake and CPack are helpful tools for generating configuration files, building, testing, and packaging projects. There are tons of options that you can use with the commands to achieve different things. This guide covered what CPack and CMake are, then went ahead to show an example usage that configures and builds a C++ project with CMake and packages it with CPack.
About the author
Denis Kariuki
Denis is a Computer Scientist with a passion for Networking and Cyber Security. I love the terminal, and using Linux is a hobby. I am passionate about sharing tips and ideas about Linux and computing.
How to cross compile for linux x86 with linux amd64, cmake and g++?
+1 for each piece of information that helps to complete the whole picture. You don’t need to know the whole answer. I’ll appreciate individual pieces of the puzzle just as much. Thanks. I am about to attempt my first cross-compilation. I have searched both SO and the web and found many pieces of information, but I don’t always know how to put those pieces together because there are still some missing pieces. My host: linux Kubuntu amd64.
Target: linux kubuntu x86 (32bit) (should be easy, no?)
Tools: g++ and cmake.
Here is the information I found:
How to compile a 32-bit binary on a 64-bit linux machine with gcc/cmake
mentions export CFLAGS=-m32. That’s one piece. Cross-platform: selecting data types to use 32/64 bit
mentions data types. I may have to pay attention to that within my code. #ifdef for 32-bit platform
#ifdef for 32-bit platform
links to the following, although I am not too sure yet how to use it:
http://predef.sourceforge.net/prearch.html http://ww.ubuntuforums.org/showthread.php?t=1377396
I did: sudo apt-get install g++-multilib
missing pieces:
Ideally, when I do ‘make’ (with cmake), it should spit out both a amd64 binary and a x86 one. Part of my CMakeLists.txt looks like this:
add_definitions(-Wall -pthread) add_executable (../run.amd64 user.cpp time.cpp init.cpp utils.cpp main.cpp) target_link_libraries(../run.amd64 cppcms dbixx config++ ctemplate) How do I introduce the flag -m32 to create a second executable? Should I want to make only one executable (e.g. for testing and debugging), how do I tell cmake to make either one or both binaries? Also, you can see that I use some third party libraries, some of which I had to compile myself. Does this mean that I need to compile each of those binaries for the target host as well? Some use cmake and some use: ./configure; make;
How would I do about compiling those libraries for the target host (flags to use, etc.)? Note: the dynamically linked libraries are already compiled and installed on the target computer, so maybe I don’t need to worry about this step. I am not sure: this is one of my missing pieces. What I need is a kind of tutorial, or at least some of the missing pieces. I’ll update this post with more details on what I achieved and how. Thanks. P.S.