- Install All Media Codecs in Ubuntu With a Single Command
- How to Install All Media Codecs in Ubuntu?
- Conclusion
- Install All Essential Media Codecs in Ubuntu With This Single Command [Beginner’s Tip]
- What is Ubuntu Restricted Extras?
- How to install Ubuntu Restricted Extras?
- Installing restricted extra package on Kubuntu, Lubuntu, Xubuntu
- How to install Multimedia Codecs on Linux Mint
- How to Install Multimedia Codecs on Linux Mint using the terminal
- How to Install Multimedia Codecs on Linux Mint using Graphical Interface
- Conclusion
- Install Multimedia Codecs on Ubuntu 22.04
- How to install multimedia codecs on Ubuntu 22.04
- How to remove Multimedia codecs Ubuntu 22.04
- Conclusion
Install All Media Codecs in Ubuntu With a Single Command
When you install the Ubuntu operating system, some of the media files (audio/video) don’t work on your system. The reason for not working the media files are missing “ubuntu-restricted-extras”, which usually occurs when you opt for the minimal installation option feature. This package contains several required packages like unrar, encrypted DVD playback, and mp4.
This guide lists all the possible steps to install all media codecs on Ubuntu. Let’s start!
How to Install All Media Codecs in Ubuntu?
All media codecs use the “ubuntu-restricted-extras”, which is present in the “Multiverse” repository, which is not free & open-source. Due to licensing and legal issues, Ubuntu can not include it in the default “apt” repository.
The following three steps will allow you to add a multiverse repository followed by all media codecs. To install the “All Media Codecs” in your system, follow the below three simple steps.
Step 1: Install Multiverse Package
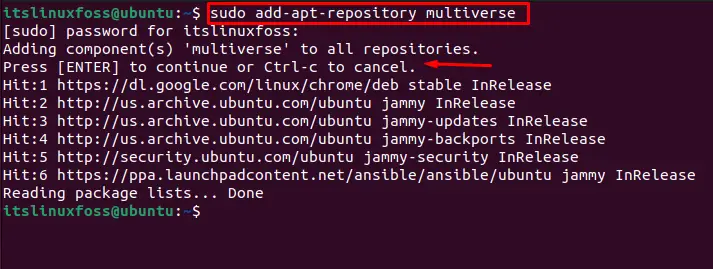
To install the “ubuntu-restricted-extras” package, we must enable the “Multiverse” via the below-mentioned command:
$ sudo add-apt-repository multiverse
Step 2: Update the Core Repositories
It’s recommended to update the system core repositories after installing the package for the newer version of the packages via the command:

Step 3: Install Ubuntu Restricted Extras
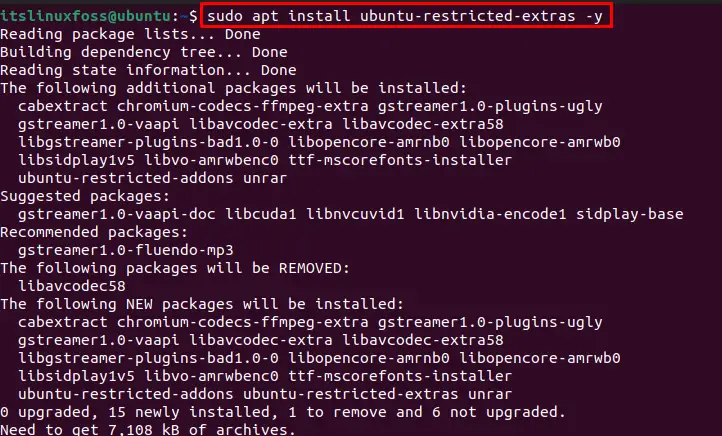
The “ubuntu-restricted-extras” package can be installed on Ubuntu using the following command:
$ sudo apt install ubuntu-restricted-extras -y
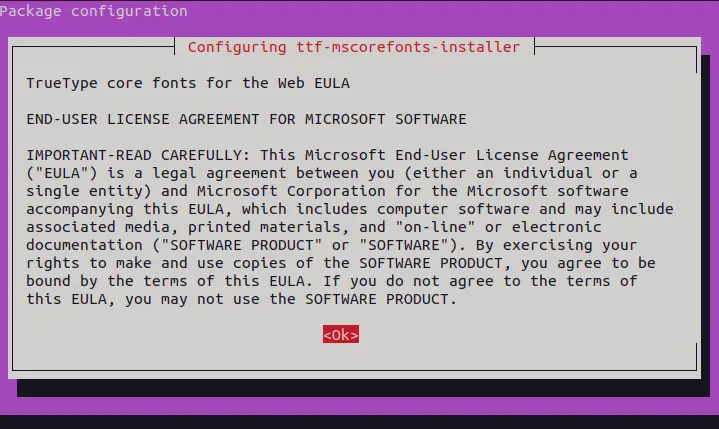
It will show a “Package Configuration” screen with a description of the “End-User License Agreement” EULA to use the Microsoft Software & related media applications. Press the “Tab” key to navigate to “ ” and click the “Enter” button to continue to the next screen.
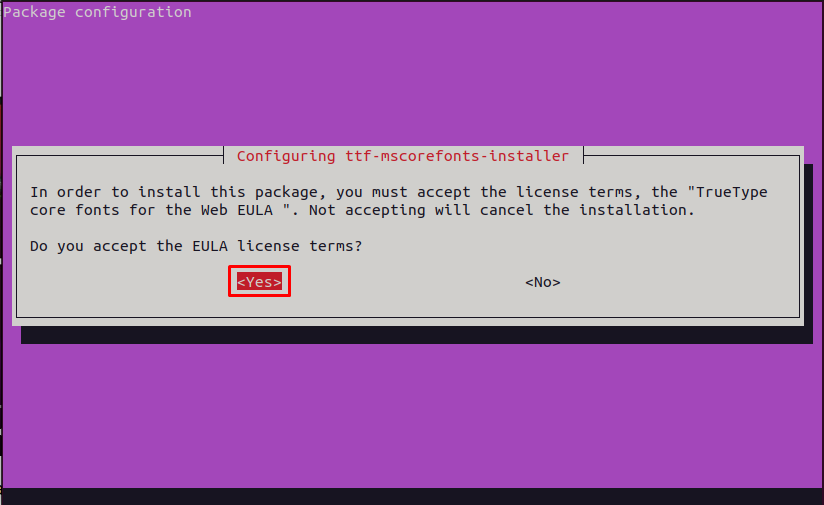
A new screen with the permission to “Accept” the terms and continue to install the “ubuntu-restricted-extras”. By default, the “ ” option is selected. Press the “Tab” key to switch the selection to “Yes>” as shown below. Press the “Enter” key to continue:
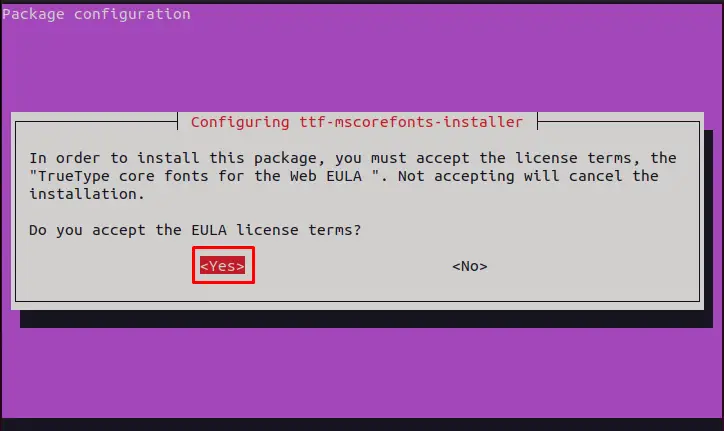
After accepting the “license terms”, the remaining packages of the “ubuntu-restricted-extras” will start installing.
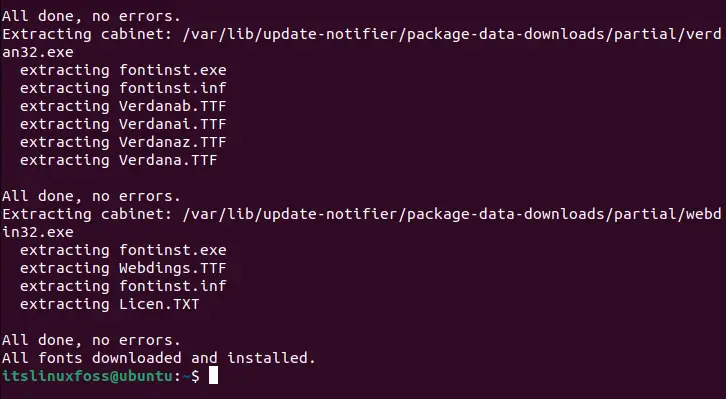
It is observed that the installation is successful without any errors.
Conclusion
To install All media Codecs in Ubuntu, enable the “Multiverse” repository and execute the “sudo apt install ubuntu-restricted-extras -y” command in the terminal. The Ubuntu codecs may be missing due to the minimal installation of the latest releases. This post provided the simplest method to install multimedia codecs on Ubuntu.
Install All Essential Media Codecs in Ubuntu With This Single Command [Beginner’s Tip]
Ubuntu Restricted Extras is a single package that allows you to install all the essential media codecs to run files like MP3, h264 on Ubuntu-based distributions.
If you have just installed Ubuntu or some other Ubuntu flavors like Kubuntu, Lubuntu etc, you’ll notice that your system doesn’t play some audio or video file. For video files, you can install VLC on Ubuntu. VLC one of the best video players for Linux and can play almost any video file format. But you’ll still have troubles with audio media files and flash player. The good thing is that Ubuntu provides a single package to install all the essential media codecs: ubuntu-restricted-extras.
What is Ubuntu Restricted Extras?
The ubuntu-restricted-extras is a software package that consists various essential software like flash plugin, unrar, gstreamer, mp4, codecs for Chromium browser in Ubuntu etc. Since these software are not open source and some of them involve software patents, Ubuntu doesn’t install them by default. You’ll have to use multiverse repository, the software repository specifically created by Ubuntu to provide non-open source software to its users. Please read this article to learn more about various Ubuntu repositories.
How to install Ubuntu Restricted Extras?
I find it surprising that the software center doesn’t list Ubuntu Restricted Extras. In any case, you can install the package using command line and it’s very simple. Open a terminal in Ubuntu by searching for it in the menu or using the terminal keyboard shortcut Ctrl+Alt+T. Since ubuntu-restrcited-extras package is available in the multiverse repository, you should verify that the multiverse repository is enabled on your system:
sudo add-apt-repository multiverseYou may want to update the package cache if you are not running Ubuntu (Ubuntu does it automatically):
sudo apt install ubuntu-restricted-extrasWhen you enter the command, you’ll be asked to enter your password. When you type the password, nothing is displayed on the screen. That’s normal. Type your password and press enter. It will show a huge list of packages to be installed. Press enter to confirm your selection when it asks. You’ll also encounter an EULA (End User License Agreement) screen like this: 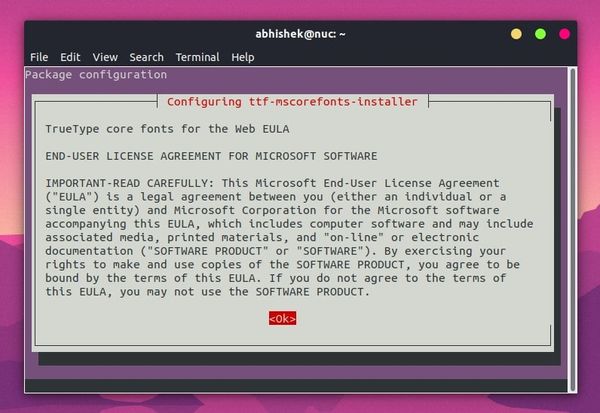 It could be overwhelming to navigate this screen but don’t worry. Just press tab and it will highlight the options. When the correct options are highlighted, press enter to confirm your selection.
 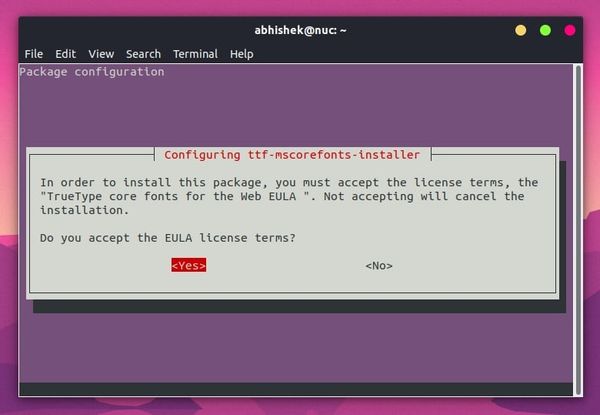 Once the process finishes, you should be able to play MP3 and other media formats thanks to newly installed media codecs.
Installing restricted extra package on Kubuntu, Lubuntu, Xubuntu
Do keep in mind that Kubuntu, Lubuntu and Xubuntu has this package available with their own respective names. They should have just used the same name but they don’t unfortunately. On Kubuntu, use this command:
sudo apt install kubuntu-restricted-extrassudo apt install lubuntu-restricted-extrassudo apt install xubuntu-restricted-extrasI always recommend getting ubuntu-restricted-extras as one of the essential things to do after installing Ubuntu. It’s good to have a single command to install multiple codecs in Ubuntu. I hope you like this quick tip in the Ubuntu beginner series. I’ll share more such tips in the future.
How to install Multimedia Codecs on Linux Mint
![]()
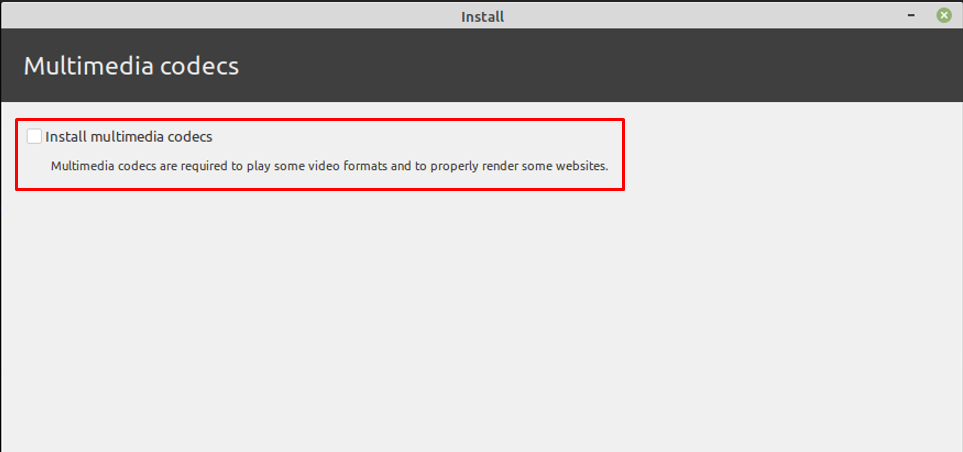
Multimedia codecs include the essential libraries and dependencies that are necessary to run several types of media files. Many distributions of Linux (like Manjaro) come with a set of default codecs. For instance, during the installation of Linux Mint, you may have noticed the following interface that asks you for the installation of Multimedia codecs. Most of the users uncheck the box as they do not know the importance of this step.
However, if you have not checked the box, there is no need to worry, we have compiled this guide to provide the installation of Multimedia Codecs on Linux Mint.
There are two ways to get multimedia codecs on Linux Mint.
How to Install Multimedia Codecs on Linux Mint using the terminal
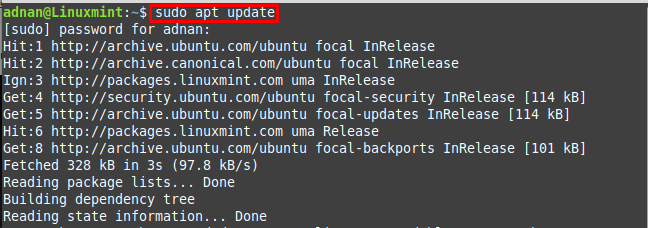
Firstly, you need to fire up the Linux Mint’s terminal (Ctrl+Alt+T). Update the packages repository with the help of the following command.
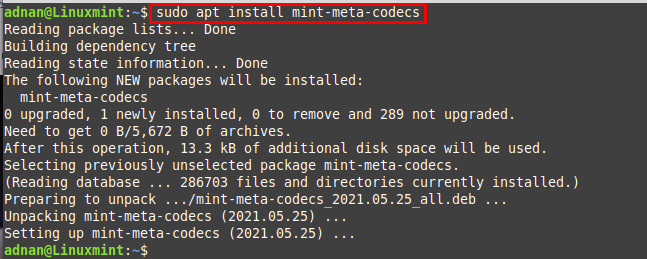
Once the system is adapted, now execute the below-mentioned command to install all the essentials (the missing audio/video and DVD libraries) that are required to run multimedia files on Linux Mint. Note : The mint-meta-codecs contain all the packages that are necessary to get complete support of Multimedia on Linux Mint.
How to Install Multimedia Codecs on Linux Mint using Graphical Interface
The graphical interface of all the distributions of Linux is quite user-friendly, as is the Linux Mint also. The following steps guide you to get the latest multimedia codecs to pack available.
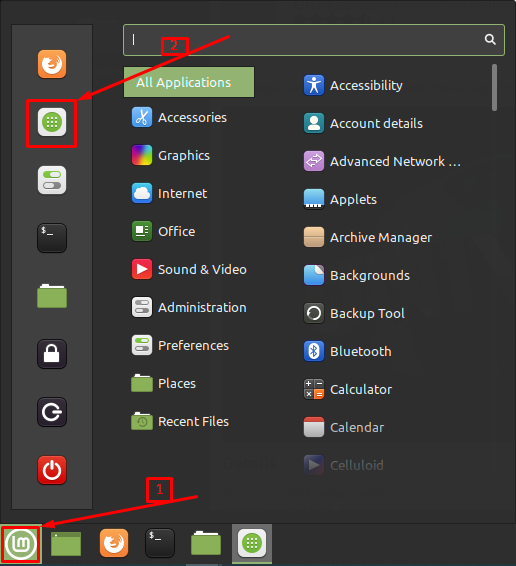
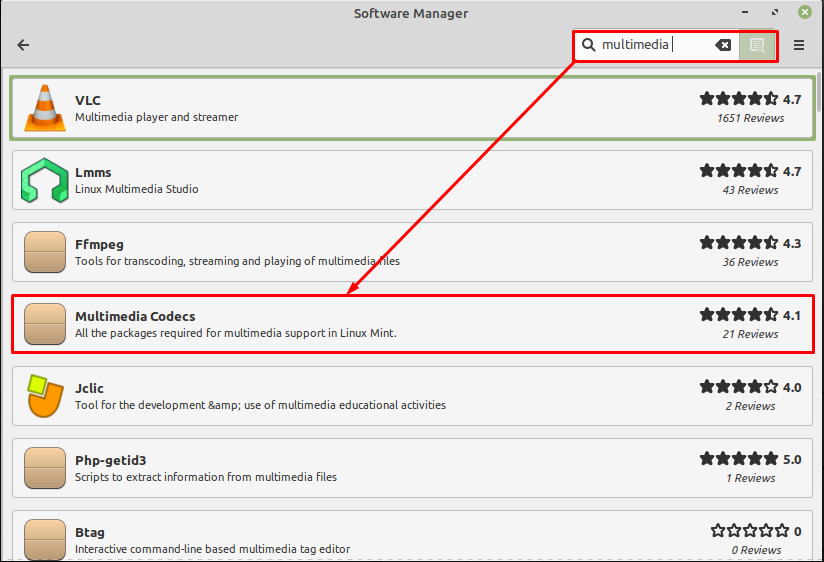
Step 1 : Navigate to the Menu of Linux Mint and click on the Software Manager icon.
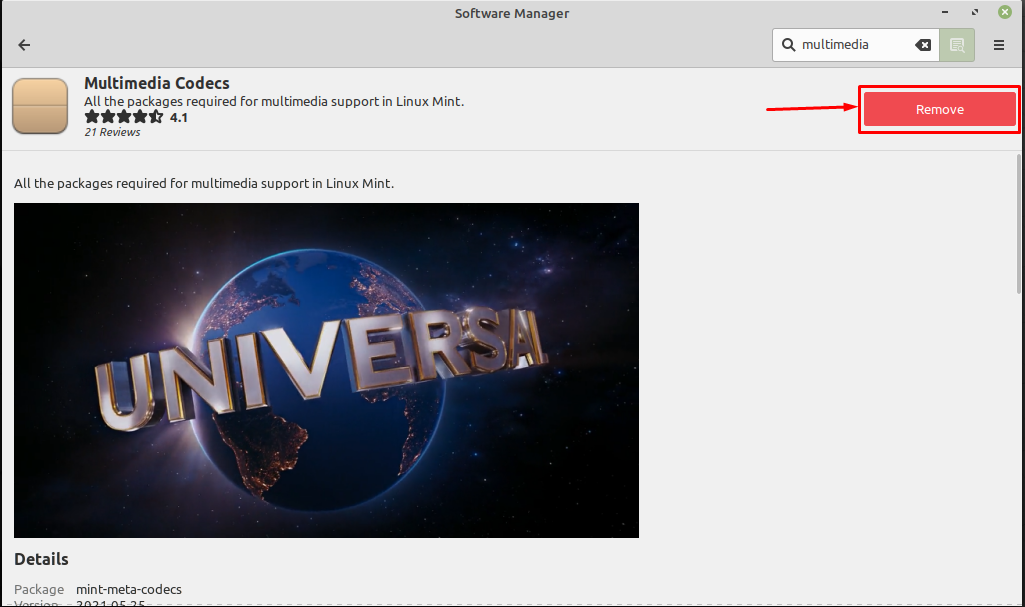
Step 2 : Once the Software Manager is opened; type “multimedia” on the search bar and you will get the “Multimedia Codecs” package as shown below.
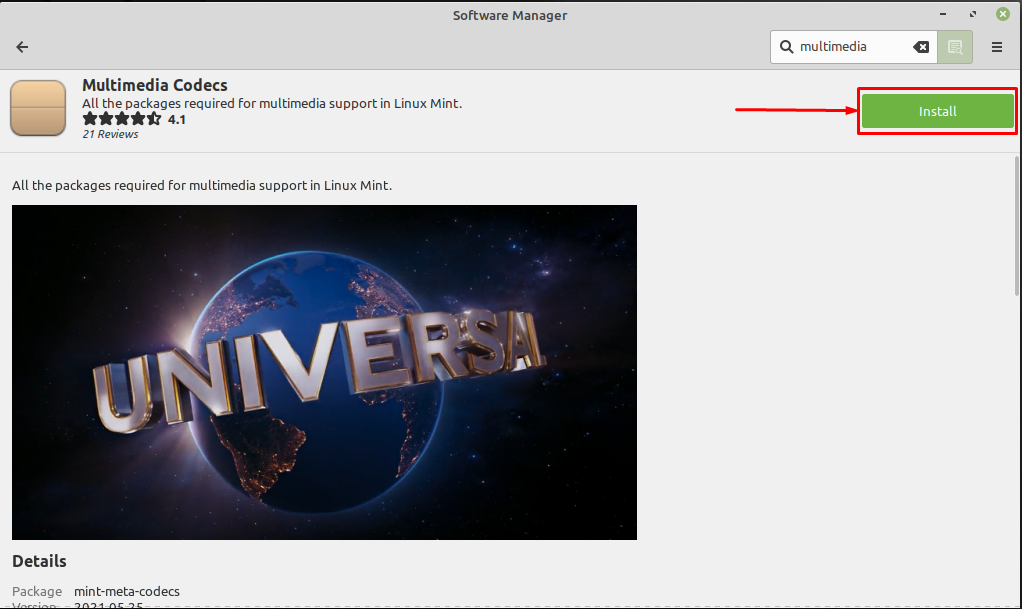
Upon clicking on the “Multimedia Codecs“, an Install button will appear. Click on it to start the installation.
After doing so, you will get a prompt to get the missing libraries and it is recommended to perform the action as provided.
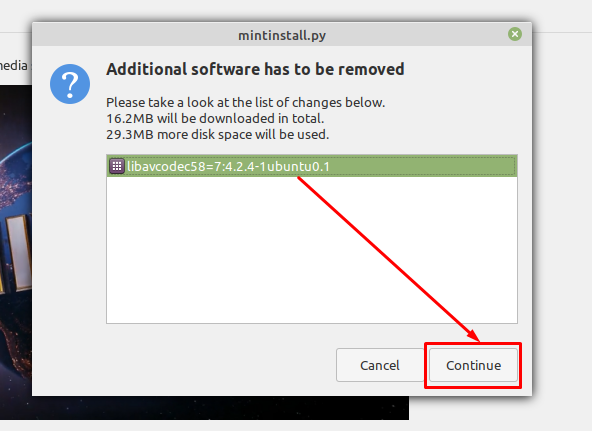
After clicking on the Continue, an authentication prompt will appear; enter your password and navigate to Authenticate to proceed further.

Soon after that, the installation will begin:
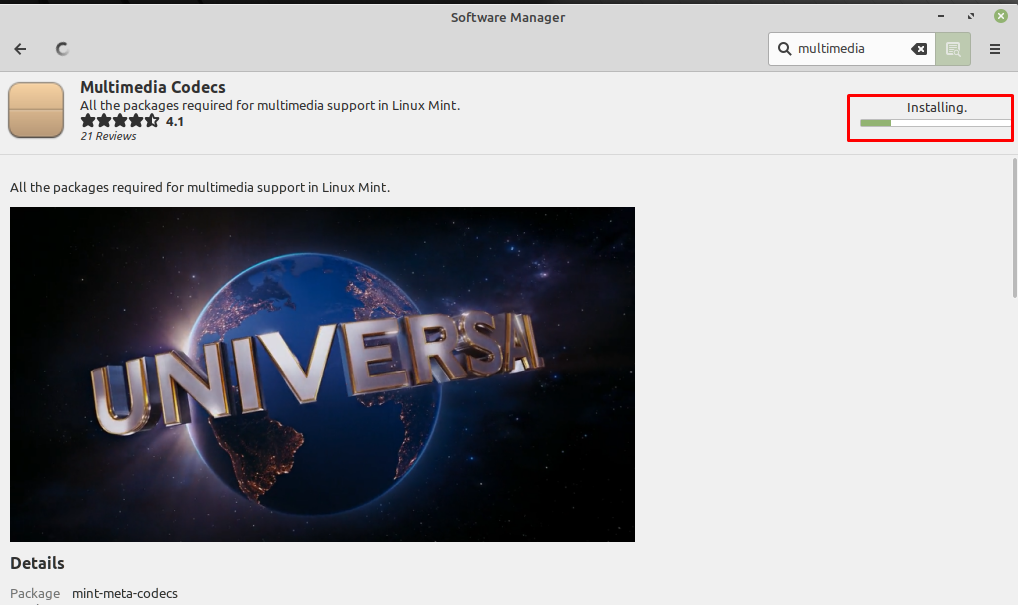
Once the installation is completed; a Remove button will be there that means the installation is completed.
Get some good media player
It is recommended to install a good media player that can play both audio and video content. In the category of media players, VLC is a widely used and resourceful media player for Linux-based distributions. Install VLC by issuing the command provided below.

Once all the steps are performed successfully, you are now ready to play every type of Multimedia content on Linux Mint.
Conclusion
Multimedia codecs are the essentials to play the audio-video files of different formats. There may exist a few libraries of multimedia that allow you to play some content. But it is recommended to get the complete Multimedia package after installation of Linux Mint. In this guide, we have provided the installation of multimedia codecs on Linux Mint. The two possible ways(graphical and terminal) are explained here to get the essentials of Multimedia related content. The graphical interface seems easy to follow but the terminal lover will surely adopt the command line method to get Multimedia codecs on Linux Mint.
Install Multimedia Codecs on Ubuntu 22.04
![]()
Multimedia codecs comprise a set of libraries/dependencies to play audio/video files of various formats. Ubuntu 22.04 comes up with default support for a few codecs. However, it is recommended to install multimedia codecs to get the uninterrupted stream of video and audio files.
Ubuntu 22.04 comes up with updated security features, improved usability, interactive interface and much more. Ubuntu 22.04 is the latest release of the LTS version of Ubuntu. This article provides a step-by-step installation guide of multimedia codecs on Ubuntu 22.04.
How to install multimedia codecs on Ubuntu 22.04
Multimedia codecs not only allow you to play audio video files, but they can also be used to compress/decompress media files for a smooth transmission. Let’s head over to the following steps that leads to installing the multimedia codecs on Ubuntu 22.04:
Step 1: It is recommended to update the system’s package before getting any program/application. Perform the update operation via the following command.

Step 2: Once the packages are updated successfully. You can install the multimedia codecs on your system by issuing the following command. The command will install the package ubuntu-restricted-extras which is equipped with essential media codecs.
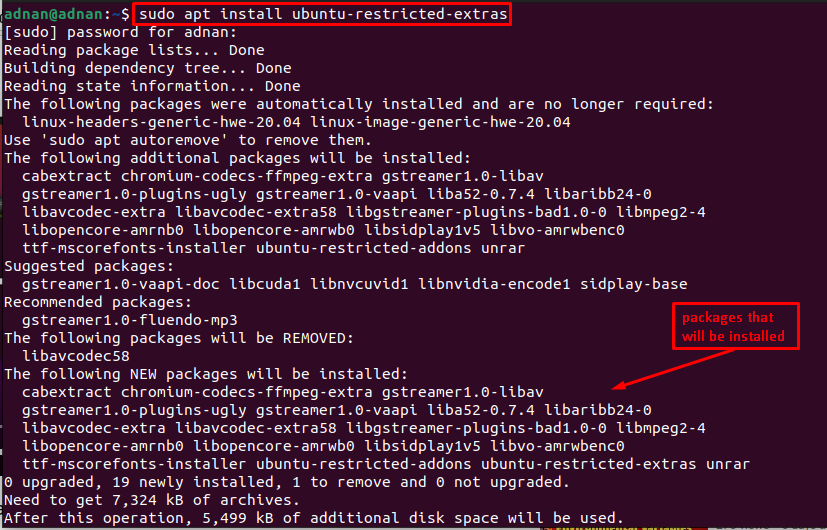
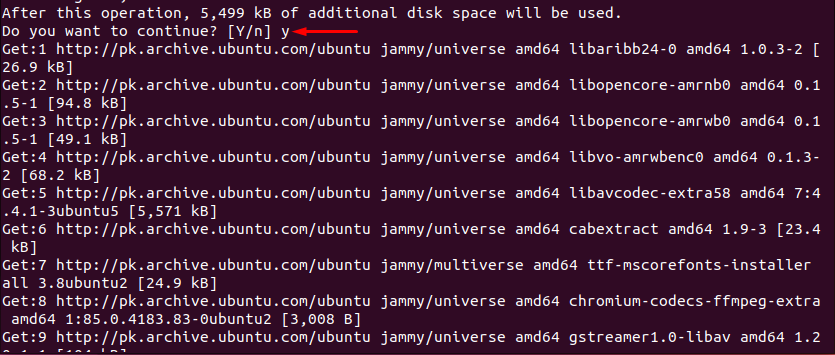
Before installation, Ubuntu will ask you to confirm by pressing “y“. Moreover, you would also observe that a few codecs are installed but not required. Whereas there are tens of codecs that will be installed with this command.
As the installation is started, the following interface will appear which states that license agreement is required for Microsoft-core-fonts (a package being installed with the multimedia codecs).
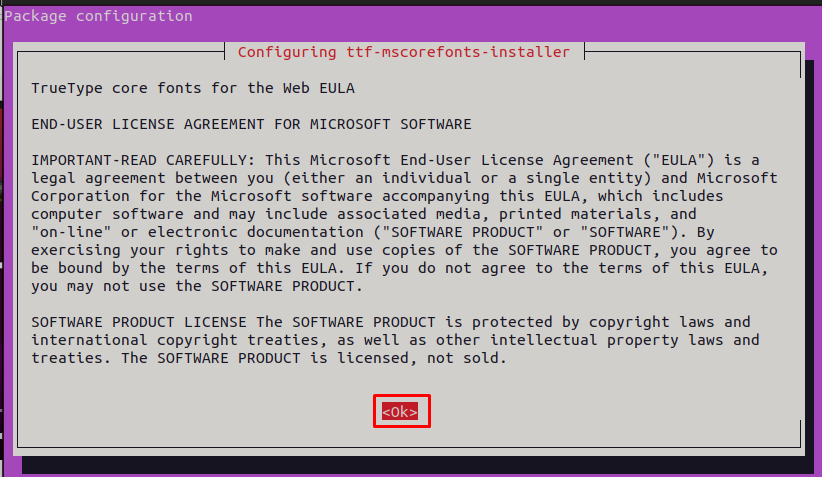
Now, you have to accept the license agreement of Microsoft-core-fonts. To do so, press the “tab” key to navigate to “OK” and hit enter:
The installation may take a while. Once the installation is finished; you can now play all kinds of audio/video files on your Ubuntu 22.04.
How to remove Multimedia codecs Ubuntu 22.04
Although the Multimedia codecs are recommended to be there on your Ubuntu 22.04. However, if you do not want to keep them on your Ubuntu 22.04. You can remove them via the following command.

Moreover, if you want to remove the configuration files as well. You can use the “–purge” option as written below:
Here you go with multimedia codecs!
Conclusion
Ubuntu 22.04 is the latest LTS release of Ubuntu. It is equipped with the updated security features, improved usability, and interface. Multimedia codecs are the essential packages that are recommended to play various audio/video files on Ubuntu. Although Ubuntu 22.04 is equipped with most of them, it is recommended to install multimedia codecs for an uninterrupted stream of media on Ubuntu 22.04.