- Команда tar в Linux
- Синтаксис команды tar
- Как пользоваться tar
- 1. Создание архива tar
- 2. Просмотр содержимого архива
- 3. Распаковка архива tar Linux
- 3. Работа со сжатыми архивами
- Выводы
- Linux tar Command – How to Compress Files in Linux
- What is the tar command?
- How to create an archive
- How to remove files after compression
- How to view the contents of an archive
- How to extract an archive
- How to search in compressed log files
- Wrapping Up
Команда tar в Linux
В качестве инструмента для архивации данных в Linux используются разные программы. Например архиватор Zip Linux, приобретший большую популярность из-за совместимости с ОС Windows. Но это не стандартная для системы программа. Поэтому хотелось бы осветить команду tar Linux — встроенный архиватор.
Изначально tar использовалась для архивации данных на ленточных устройствах. Но также она позволяет записывать вывод в файл, и этот способ стал широко применяться в Linux по своему назначению. Здесь будут рассмотрены самые распространенные варианты работы с этой утилитой.
Синтаксис команды tar
Синтаксис команд для создания и распаковки архива практически не отличается (в том числе с утилитами сжатия bzip2 или gzip). Так, чтобы создать новый архив, в терминале используется следующая конструкция:
tar опции архив.tar файлы_для_архивации
tar опции архив.tar
Функции, которые может выполнять команда:
| Функция | Длинный формат | Описание |
|---|---|---|
| -A | —concatenate | Присоединить существующий архив к другому |
| -c | —create | Создать новый архив |
| -d | —diff —delete | Проверить различие между архивами Удалить из существующего архива файл |
| -r | —append | Присоединить файлы к концу архива |
| -t | —list | Сформировать список содержимого архива |
| -u | —update | Обновить архив более новыми файлами с тем же именем |
| -x | —extract | Извлечь файлы из архива |
При определении каждой функции используются параметры, которые регламентируют выполнение конкретных операций с tar-архивом:
| Параметр | Длиннный формат | Описание |
|---|---|---|
| -C dir | —directory=DIR | Сменить директорию перед выполнением операции на dir |
| -f file | —file | Вывести результат в файл (или на устройство) file |
| -j | —bzip2 | Перенаправить вывод в команду bzip2 |
| -p | —same-permissions | Сохранить все права доступа к файлу |
| -v | —verbose | Выводить подробную информацию процесса |
| —totals | Выводить итоговую информацию завершенного процесса | |
| -z | —gzip | Перенаправить вывод в команду gzip |
А дальше рассмотрим примеры того, как может применяться команда tar Linux.
Как пользоваться tar
1. Создание архива tar
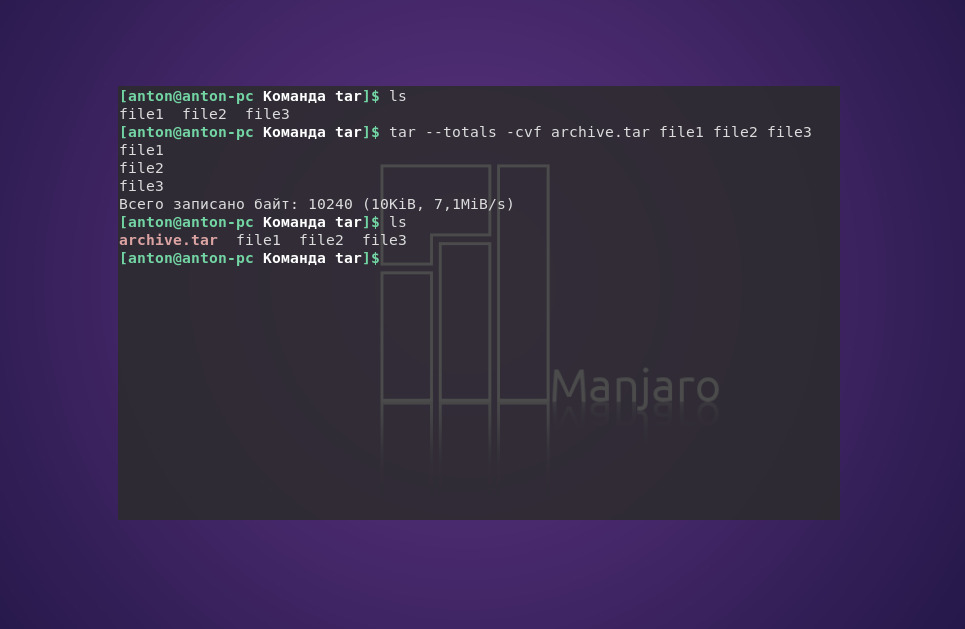
С помощью следующей команды создается архив archive.tar с подробным выводом информации, включающий файлы file1, file2 и file3:
tar —totals —create —verbose —file archive.tar file1 file2 file3
Но длинные опции и параметры можно заменить (при возможности) однобуквенными значениями:
tar —totals -cvf archive.tar file1 file2 file3
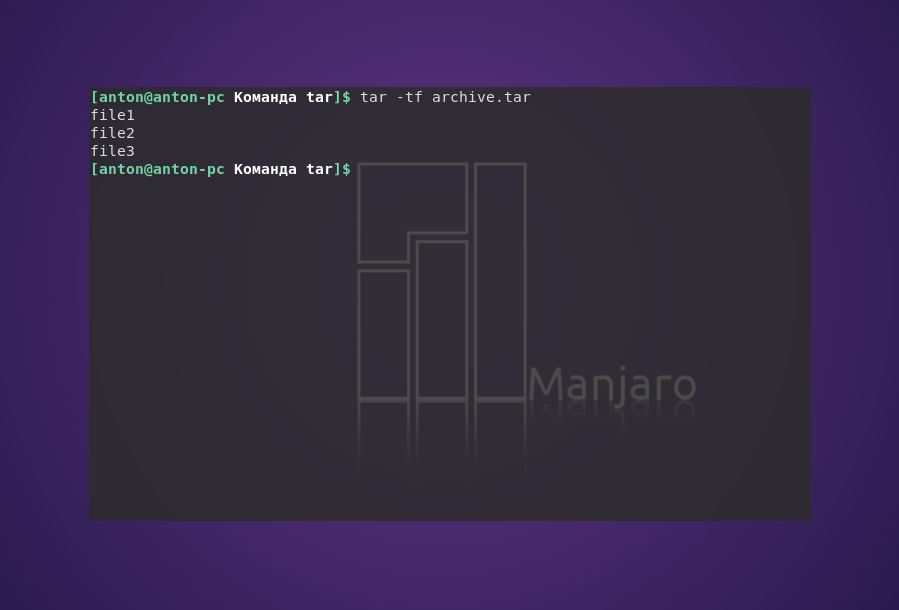
2. Просмотр содержимого архива
Следующая команда выводит содержимое архива, не распаковывая его:
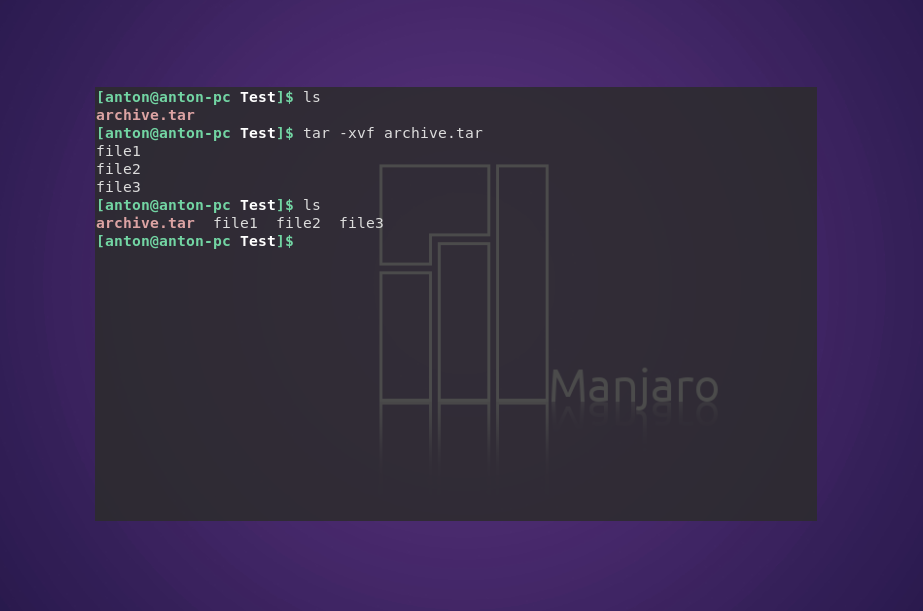
3. Распаковка архива tar Linux
Распаковывает архив test.tar с выводом файлов на экран:
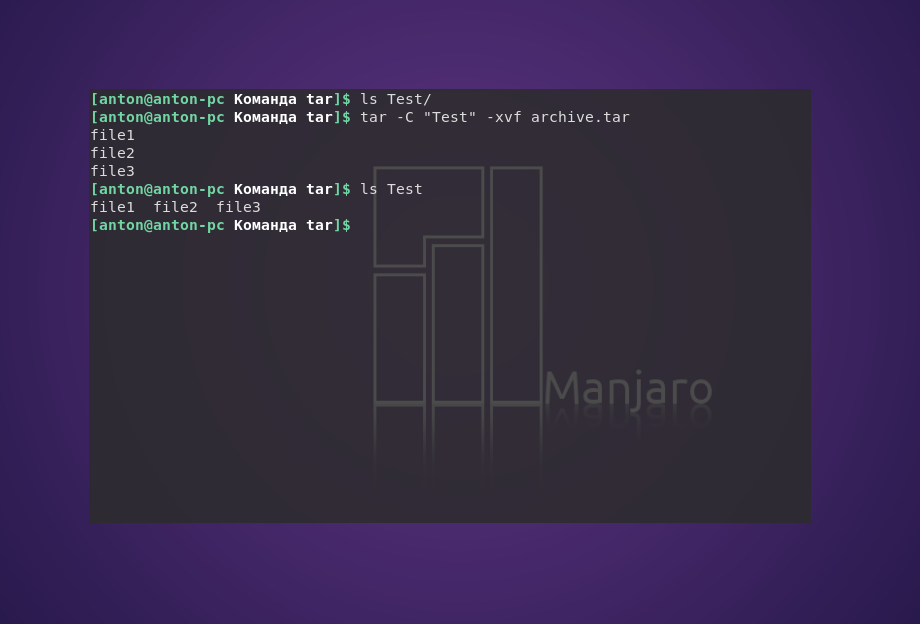
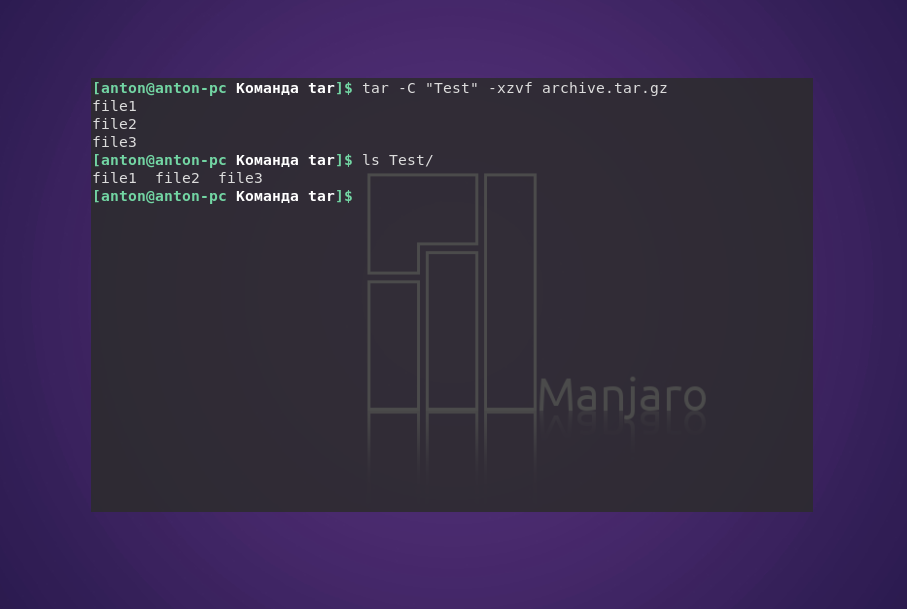
Чтобы сделать это в другой каталог, можно воспользоваться параметром -C:
tar -C «Test» -xvf archive.tar
3. Работа со сжатыми архивами
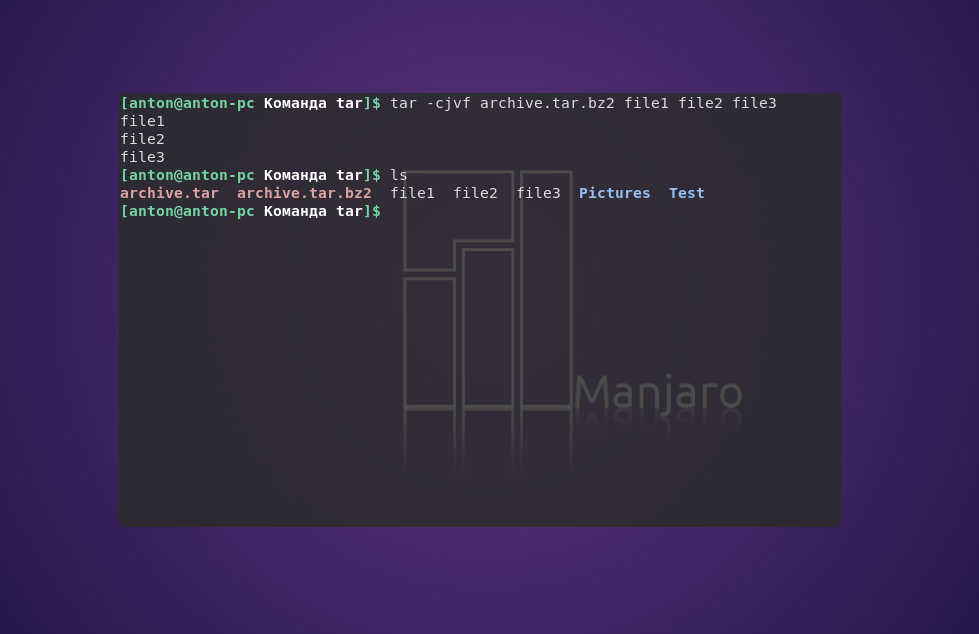
Следует помнить, что tar только создаёт архив, но не сжимает. Для этого используются упомянутые компрессорные утилиты bzip2 и gzip. Файлы, сжатые с их помощью, имеют соответствующие расширения .tar.bz2 и .tar.gz. Чтобы создать сжатый архив с помощью bzip2, введите:
tar -cjvf archive.tar.bz2 file1 file2 file3
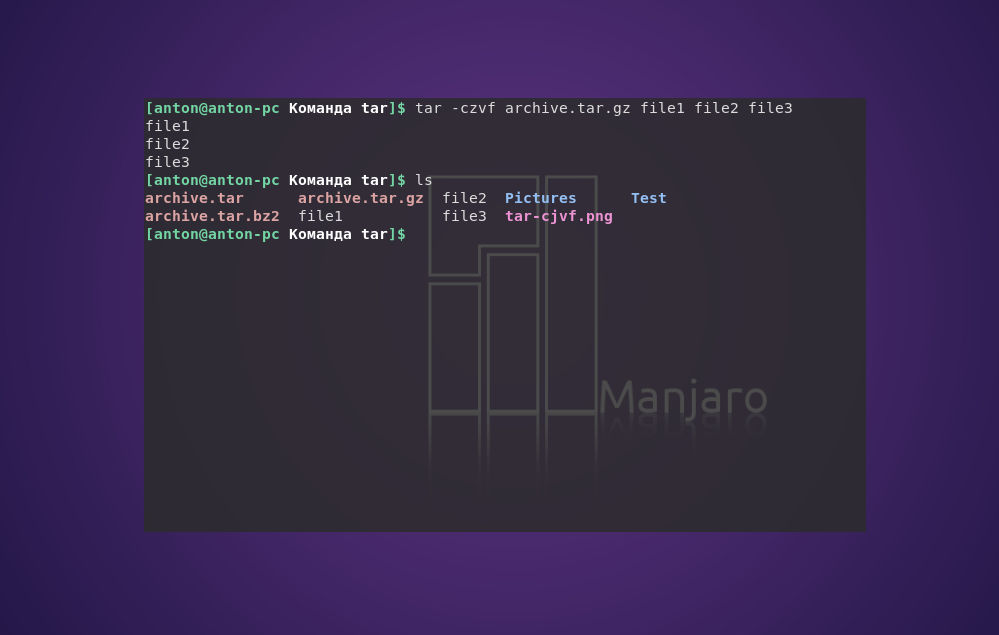
Синтаксис для gzip отличается одной буквой в параметрах, и меняется окончание расширения архива:
tar -czvf archive.tar.gz file1 file2 file3
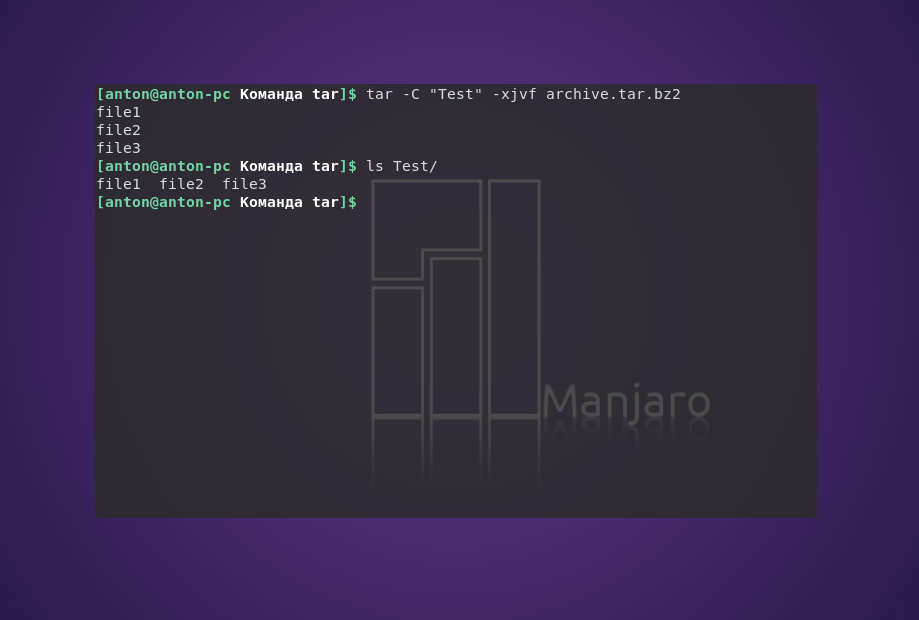
При распаковке tar-архивов с таким расширением следует указывать соответствующую опцию:
tar -C «Test» -xjvf arhive.tar.bz2
На заметку: архиватор tar — одна из немногих утилит в GNU/Linux, в которой перед использованием однобуквенных параметров, стоящих вместе, можно не ставить знак дефиса.
Выводы
В этой статье была рассмотрена команда tar Linux, которая используется для архивации файлов и поставляется по умолчанию во всех дистрибутивах. В её возможности входит создание и распаковка архива файлов без их сжатия. Для сжатия утилита применяется в связке с популярными компрессорами bzip2 и gzip.
Обнаружили ошибку в тексте? Сообщите мне об этом. Выделите текст с ошибкой и нажмите Ctrl+Enter.
Linux tar Command – How to Compress Files in Linux

Zaira Hira

File compression is an essential utility across all platforms. It helps you reduce file size and share files efficiently. And compressed files are also easier to copy to remote servers.
You can also compress older and rarely used files and save them for future use which helps you conserve disk space.
In this post, we’ll look at how to compress files with the tar command in Linux, along with some examples of tar in action.
What is the tar command?
We use the tar command to compress and expand files from the command line. The syntax is shown below:
tar [flags] destinationFileName sourceFileNameThe tar command uses the following flags to customize the command input:
| Flag | Explanation | Usage |
|---|---|---|
| -c | Create a new archive. | We use this flag whenever we need to create a new archive. |
| -z | Use gzip compression. | When we specify this flag, it means that archive will be created using gzip compression. |
| -v | Provide verbose output. | Providing the -v flag shows details of the files compressed. |
| -f | Archive file name. | Archive file names are mapped using the -f flag. |
| -x | Extract from a compressed file. | We use this flag when files need to be extracted from an archive. |
How to create an archive
We have a list of the following files which we’ll compress with tar .
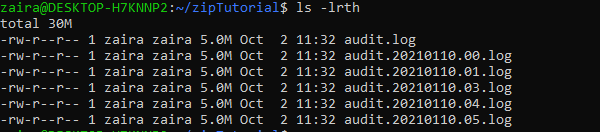
To compress them, we’ll use tar like this:
tar -czvf logs_archive.tar.gz *Let’s break down this command and look into each flag.
-c is creating and archive.
-z is using gzip compression.
-v is providing details of the files that have been archived.
-f is creating an archive with the name ‘logs_archive.tar.gz’ as supplied in the command above.
In the results below, we can see that the archive has been created successfully.

How to remove files after compression
Let’s say we don’t want to keep the original files after creating an archive. For that, we can use the —remove-files flag.
tar -czvf logs_archive.tar.gz * --remove-files
Here, the -czvf flags are working as demonstrated before, but the original files are also removed. Once we list the files, we only see the archive.
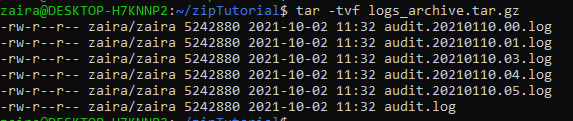
How to view the contents of an archive
You might need to view the contents of an archive without actually extracting it. You can do this with the -t flag.
tar -tvf logs_archive.tar.gzIn this command, -t flag specifies that we need to only view the contents of the archive. -f specifies the filename and -v displays the detailed contents.
How to extract an archive
To extract files from an archive, you use the -x flag like this:
tar -xzvf logs_archive.tar.gzLet’s break down this command and look into each flag.
-x is extracting and archive.
-z specifies that the archive is gzip.
-v is providing details of the files that have been archived.
-f is extracting from the archive named ‘logs_archive.tar.gz’.

Here’s a useful tip: commands that take a long time to execute can continue in the background with & .
Adding files to an archive and extracting an archive can take a while. To keep the commands running in the background while you keep working, pair the command with & like this:
tar -xzvf logs_archive.tar.gz &How to search in compressed log files
You might still need to access certain files once they’re archived. Luckily, there is a method you can use to search and view compressed log files without decompressing them and compromising disk space.
The command you can use to search in compressed files is zgrep :

We can search for a string in an archive using the below command:
zgrep -Hna 'string-to-search' compressedFile.tar.gz Let’s briefly look at the flags.
-H lists the file name that contains the match.
-n displays the line number that contains the matched string.
-a treats all files as text files.

Wrapping Up
File compression helps us save time and resources when sharing files. Servers are almost always rotating and archiving huge log files.
You can also schedule file compression via cron jobs to automate disk cleaning. I highly recommend that you take advantage of this utility.
Thanks for reading until the end. I would love to connect with you. You can find me here on Twitter. Do share your thoughts.