- Introduction to the command-line interface
- What is the command line?
- Open the command-line interface
- Prompt
- Your first command (YAY!)
- Basics
- Current directory
- Learn more about a command
- List files and directories
- Change current directory
- Create directory
- Exercise!
- Solution:
- Clean up
- Exit
- Summary
- Ready?
- 8 Useful X-window (Gui Based) Linux Commands – Part I
- 1. xeyes Command
- 2. xfd Command
- 3. xload Command
- 4. xman Command
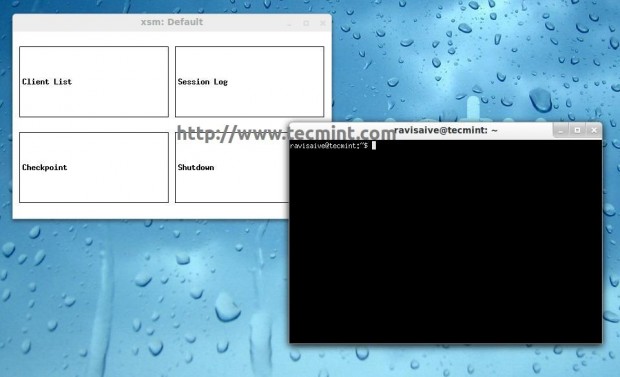
- 5. xsm Command
- 6. xvidtune Command
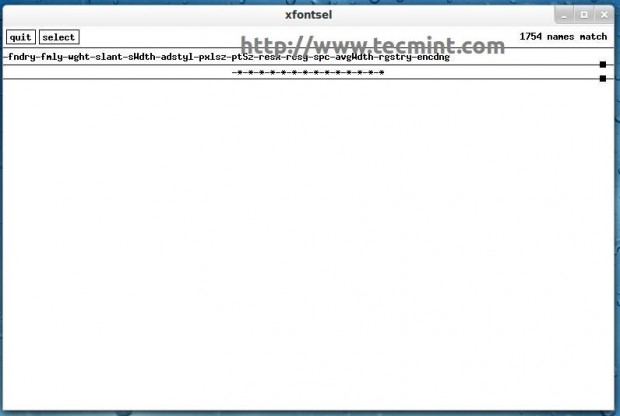
- 7. xfontsel Command
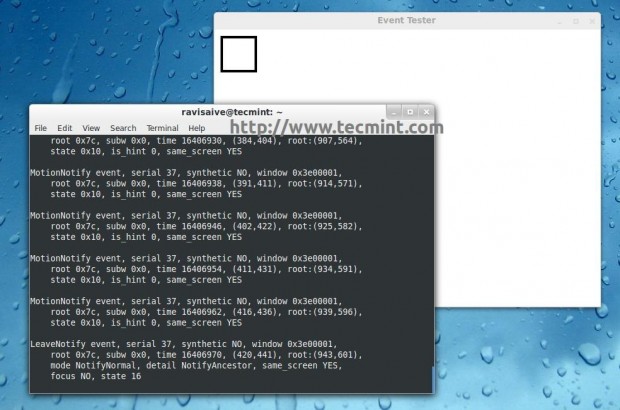
- 8. xev Command
Introduction to the command-line interface
For readers at home: this chapter is covered in the Your new friend: Command Line video.
It’s exciting, right?! You’ll write your first line of code in just a few minutes! 🙂
Let us introduce you to your first new friend: the command line!
The following steps will show you how to use the black window all hackers use. It might look a bit scary at first but really it’s just a prompt waiting for commands from you.
Note Please note that throughout this book we use the terms ‘directory’ and ‘folder’ interchangeably but they are one and the same thing.
What is the command line?
The window, which is usually called the command line or command-line interface, is a text-based application for viewing, handling, and manipulating files on your computer. It’s much like Windows Explorer or Finder on the Mac, but without the graphical interface. Other names for the command line are: cmd, CLI, prompt, console or terminal.
Open the command-line interface
To start some experiments we need to open our command-line interface first.
Depending on your version of Windows and your keyboard, one of the following should open a command window (you may have to experiment a bit, but you don’t have to try all of these suggestions):
- Go to the Start menu or screen, and enter «Command Prompt» in the search field.
- Go to Start menu → Windows System → Command Prompt.
- Go to Start menu → All Programs → Accessories → Command Prompt.
- Go to the Start screen, hover your mouse in the lower-left corner of the screen, and click the down arrow that appears (on a touch screen, instead flick up from the bottom of the screen). The Apps page should open. Click on Command Prompt in the Windows System section.
- Hold the special Windows key on your keyboard and press the «X» key. Choose «Command Prompt» from the pop-up menu.
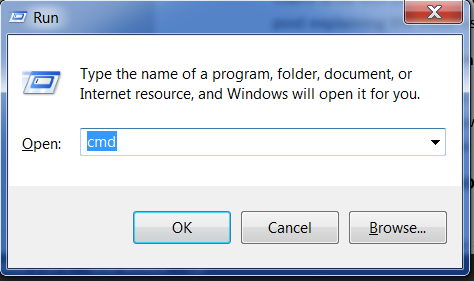
- Hold the Windows key and press the «R» key to get a «Run» window. Type «cmd» in the box, and click the OK key.
Later in this tutorial, you will need to have two command windows open at the same time. However, on some versions of Windows, if you already have one command window open and you try to open a second one using the same method, it will instead point you to the command window you already have open. Try it now on your computer and see what happens! If you only get one command window, try one of the other methods in the list above. At least one of them should result in a new command window being opened.
Go to Applications → Utilities → Terminal.
It’s probably under Applications → Accessories → Terminal, or Applications → System → Terminal, but that may depend on your system. If it’s not there, you can try to Google it. 🙂
NOTE If you followed RunCode setup instructions follow these steps to open command line.
To open the Ubuntu terminal on RunCode, go to Workspaces → New Workspace → Blank. This will open a new Visual Studio Code workspace which has an Ubuntu terminal in the bottom pane.
Altenatively, you can go to Workspaces → New Workspace → Jupyter Lab. This will open a Python prompt which is depicted by >>> , you can type exit() to get back to the Ubuntu terminal.
Ubuntu is a version of Linux so from now on you can follow Linux instructions.
Prompt
You now should see a white or black window that is waiting for your commands.
If you’re on Mac or Linux, you probably see a $ , like this:
On Windows, you probably see a > , like this:
Take a look at the Linux section just above now — you’ll see something more like that when you get to PythonAnywhere later in the tutorial.
Each command will be prepended by a $ or > and one space, but you should not type it. Your computer will do it for you. 🙂
Just a small note: in your case there may be something like C:\Users\ola> or Olas-MacBook-Air:~ ola$ before the prompt sign, and this is 100% OK.
The part up to and including the $ or the > is called the command line prompt, or prompt for short. It prompts you to input something there.
In the tutorial, when we want you to type in a command, we will include the $ or > , and occasionally more to the left. Ignore the left part and only type in the command, which starts after the prompt.
Your first command (YAY!)
Let’s start by typing this command:
And then hit enter . This is our result:
As you can see, the computer has just printed your username. Neat, huh? 🙂
Try to type each command; do not copy-paste. You’ll remember more this way!
Basics
Each operating system has a slightly different set of commands for the command line, so make sure to follow instructions for your operating system. Let’s try this, shall we?
Current directory
It’d be nice to know where are we now, right? Let’s see. Type this command and hit enter :
Note: ‘pwd’ stands for ‘print working directory’.
Note: ‘cd’ stands for ‘change directory’. With PowerShell you can use pwd just like on Linux or Mac OS X.
You’ll probably see something similar on your machine. Once you open the command line you usually start at your user’s home directory.
Learn more about a command
Many commands you can type at the command prompt have built-in help that you can display and read! For example, to learn more about the current directory command:
OS X and Linux have a man command, which gives you help on commands. Try man pwd and see what it says, or put man before other commands to see their help. The output of man is normally paged. Use the space bar to move to the next page, and q to quit looking at the help.
Adding a /? suffix to most commands will print the help page. You may need to scroll your command window up to see it all. Try cd /? .
List files and directories
So what’s in it? It’d be cool to find out. Let’s see:
$ ls Applications Desktop Downloads Music . > dir Directory of C:\Users\olasitarska 05/08/2020 07:28 PM Applications 05/08/2020 07:28 PM Desktop 05/08/2020 07:28 PM Downloads 05/08/2020 07:28 PM Music . Note: In PowerShell you can also use ‘ls’ like on Linux and Mac OS X.
Change current directory
Now, let’s go to our Desktop directory:
Note that the directory name «Desktop» might be translated to the language of your Linux account. If that’s the case, you’ll need to replace Desktop with the translated name; for example, Schreibtisch for German.
Check if it’s really changed:
$ pwd /Users/olasitarska/Desktop > cd C:\Users\olasitarska\Desktop PRO tip: if you type cd D and then hit tab on your keyboard, the command line will automatically fill in the rest of the name so you can navigate faster. If there is more than one folder starting with «D», hit the tab key twice to get a list of options.
Create directory
How about creating a practice directory on your desktop? You can do it this way:
This little command will create a folder with the name practice on your desktop. You can check if it’s there by looking on your Desktop or by running a ls or dir command! Try it. 🙂
PRO tip: If you don’t want to type the same commands over and over, try pressing the up arrow and down arrow on your keyboard to cycle through recently used commands.
Exercise!
A small challenge for you: in your newly created practice directory, create a directory called test . (Use the cd and mkdir commands.)
Solution:
$ cd practice $ mkdir test $ ls test > cd practice > mkdir test > dir 05/08/2020 07:28 PM test Clean up
We don’t want to leave a mess, so let’s remove everything we did until that point.
First, we need to get back to Desktop:
Using .. with the cd command will change your current directory to the parent directory (that is, the directory that contains your current directory).
$ pwd /Users/olasitarska/Desktop > cd C:\Users\olasitarska\Desktop Now time to delete the practice directory:
Attention: Deleting files using del , rmdir or rm is irrecoverable, meaning the deleted files will be gone forever! So be very careful with this command.
> rmdir /S practice practice, Are you sure ? Y Done! To be sure it’s actually deleted, let’s check it:
Exit
That’s it for now! You can safely close the command line now. Let’s do it the hacker way, alright? 🙂
Summary
Here is a summary of some useful commands:
| Command (Windows) | Command (Mac OS / Linux) | Description | Example |
|---|---|---|---|
| exit | exit | close the window | exit |
| cd | cd | change directory | cd test |
| cd | pwd | show the current directory | cd (Windows) or pwd (Mac OS / Linux) |
| dir | ls | list directories/files | dir |
| copy | cp | copy file | copy c:\test\test.txt c:\windows\test.txt |
| move | mv | move file | move c:\test\test.txt c:\windows\test.txt |
| mkdir | mkdir | create a new directory | mkdir testdirectory |
| rmdir (or del) | rm | delete a file | del c:\test\test.txt |
| rmdir /S | rm -r | delete a directory | rm -r testdirectory |
| [CMD] /? | man [CMD] | get help for a command | cd /? (Windows) or man cd (Mac OS / Linux) |
These are just a very few of the commands you can run in your command line, but you’re not going to use anything more than that today.
If you’re curious, ss64.com contains a complete reference of commands for all operating systems.
Ready?
8 Useful X-window (Gui Based) Linux Commands – Part I
We, the Tecmint Team is consistent in producing high quality articles of all kinds in Linux and Open-source domain. We have been working hard from the first day of our establishment, in order to bring knowledgeable and relevant content to our beloved readers. We have produced a lot of shell based programs ranging from funny commands to the serious commands. A few of which are:

- 20 Funny Linux Commands
- 51 Lesser Known Useful Linux Commands
- 60 Linux Commands – A Guide from Newbies to Administrator
Here in this article we will be providing a few of X-based commands, which is generally available in most of the standard distributions of today, and if in case you find the below X-based commands, not installed in your box, you can always apt or yum the required packages. Here all the below listed commands are tested on Debian.
1. xeyes Command
A Graphical eyes, which follows the mouse movement. It seems much of a funny command, than of any useful use. Being funny is as much useful, is another aspect. Run the ‘xeyes‘ in the terminal and see the moving mouse pointer motion.

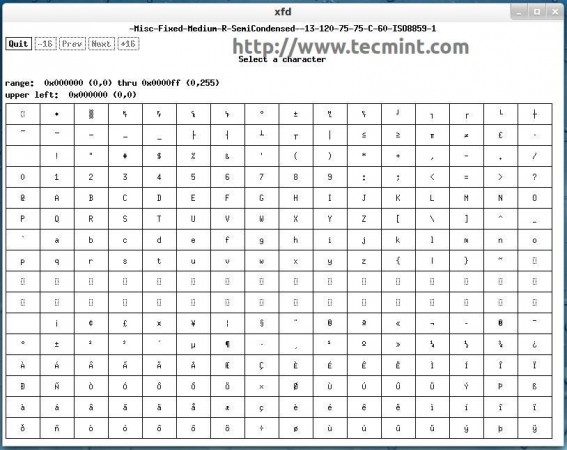
2. xfd Command
The ‘xfd‘ display all the characters in an X font. xfd utility creates a window containing the name of the font being displayed.
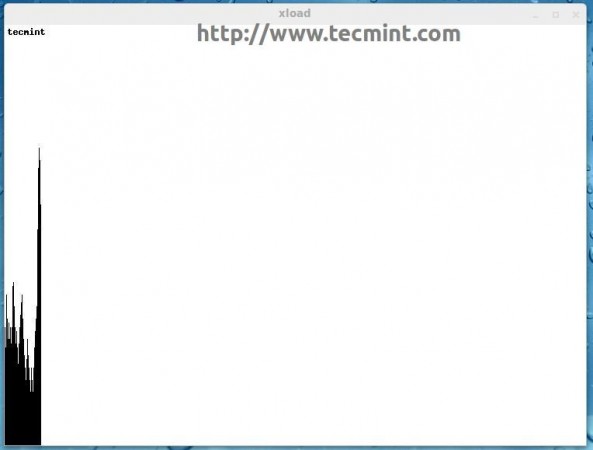
3. xload Command
The ‘xload‘ outputs system load average display for the X server. It is a fantastic tool to check real time average system load.
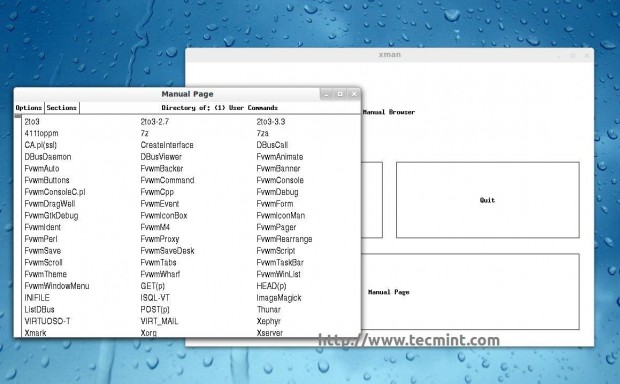
4. xman Command
Most of us are aware of man aka manual pages and use them frequently whenever we want the reference of a command or application, its usages, etc. But Very few people know that man page has a ‘X‘ version called xman.
5. xsm Command
The ‘xsm‘ stands for ‘X Session Manager‘ it’s a session manager. A session is a group of applications each of which refers to a particular state.
6. xvidtune Command
The ‘xvidtune‘ is video mode tuner for xorg. xvidtune is a client interface to the X server video mode extension.
Note: The Incorrect use of this program can do permanent damage to your monitor and/or Video card. If you don’t know what you are doing, don’t change anything and exit immediately.

7. xfontsel Command
The ‘xfontsel‘ application provides a simple way to display the fonts known to your X server.
8. xev Command
The ‘xev‘ stands for X events. Xev prints content of x events.
That’s all for now. We have planned to post at-least one more article in the above series and we are working for that. Till then stay tuned and connected to Tecmint. Don’t forget to provide us with your valuable feedback in our comment section.