- Installing the GNU C compiler and GNU C++ compiler
- Installing the GNU Java compiler
- Installing the GNU Fortran compilers
- Installing the GNU autotools
- 32-bit Builds on AMD64
- Installing the Intel Compiler Suite Professional Edition 10.x
- Get the License Number and Extract to a path without spaces
- On 64-bit systems you may also need to issue these commands
- Run the Installation Script
- Edit /etc/bash.bashrc to add the installation path to the PATH environment variable
- Installing the X11 development compilers
- How to install GCC on Ubuntu 20.04
- Prerequisites
- Installation Procedure
- Installation Steps
- System Packages Updating
- Installation of Development Package
- Downloading of Manual Pages
- Verification of GCC.
- Conclusion
- About the author
- Younis Said
Installing the GNU C compiler and GNU C++ compiler
To install the gcc and g++ compilers, you will need the build-essential package. This will also install GNU make.
build-essential contains a list of packages which are essential for building Ubuntu packages including gcc compiler, make and other required tools.
$ sudo apt-get update $ sudo apt-get upgrade $ sudo apt-get install build-essential $ gcc -v $ make -v
Now, you should able to compile software using C / C++ compilers.
To install the manpages for c and c++ development, install the manpages-dev package.
Installing the GNU Java compiler
Note that GNU’s Java compiler is not the same as the one developed and distributed by Sun Microsystems, and will not provide Java to the firefox browser. For that, please see Java. To install gcj, the GNU Java compiler, install the following package: gcj.
To install the GNU Java bytecode interpreter, you need the gij package.
To have gcj compile to executables, install libgcj6-dev (otherwise an error during compilation occurs: libgcj.spec: No such file or directory). Use synaptic to install libgcj6-dev.
Installing the GNU Fortran compilers
To install the GNU Fortran 77 compiler — g77, you need the g77 package.
To install the GNU Fortran 95 compiler — gfortran, the package is: gfortran.
Installing the GNU autotools
To install autoconf and automake, you need the autoconf and automake packages.
Apt-get will tell you to explicitly choose a version of automake. If, for example, you decide to use automake1.9, you need to specify the version, such as the automake1.9 package.
32-bit Builds on AMD64
The GNU compilers have options that allow them to create 32-bit object and executable files on 64-bit operating systems, and vica versa. The critical options are -m32 (to build 32-bit) and -m64 (to build 64-bit).
These options will be present when you install the compiler of your choice. However, they won’t actually work unless you install several additional packages.
The first thing you will need is the multilib package for the compiler you are using. For example, to add multilib support to the default version of g++ (4.1 in gutsy), you would install
The multilib packages are compiler runtime packages. Now, you need 32-bit (or 64-bit) versions of whatever libraries you need to link your application program. 64-bit packages have names that start with lib64. Install these on 32-bit systems to support 64-bit builds. 32-bit packages have names that start with lib32. Install these on 64-bit systems to support 32-bit builds. Whatever else you are doing, you will probably need . If you are using g++, you will need
Installing the Intel Compiler Suite Professional Edition 10.x
- gcc, build-essential, libc6-dev (see above)
- ia32-libs, g++-multilib, and libc6-dev-i386 (for 64-bit systems)
- 32-bit packages starting with lib32 (for 64-bit systems)
- alien and rpm for installing the RPM packages that Intel distributes.
- libstdc++5 and libstdc++5-3.3-dev for good measure because Intel’s builds depend on these runtimes.
before you attempt installing the Intel Compiler Suite.
Get the License Number and Extract to a path without spaces
Ensure that you have obtained the license number for your installation and extracted the downloaded installation archive into a path that does not contain any spaces. This last statement is utterly important. The installer script that comes with the package has a bug that does not allow you to install the compiler suite if you have any spaces in the installer script path.
On 64-bit systems you may also need to issue these commands
# cd /usr/lib32 # ln -s libpthread.so libpthread.so.0 # ln -s libm.so libm.so.6 # ln -s libc.so libc.so.6 # ln -s libdl.so libdl.so.2
because the chklic_32_64 license checking utility from Intel dynamically links to these libraries.
Once you’re done preparing to install the compiler suite, it’s time to go to the installer directory and install the compiler (be sure to also read through accompanying documentation; e.g., README, INSTALL.txt):
Run the Installation Script
$ cd /home/user/intel_compiler_suite $ sudo ./install.sh . Follow the wizard as it guides you through the installation process.
After installing the compiler, you need to tell your shell the location of these executables by adding their parent paths to the PATH environment variable.
Edit /etc/bash.bashrc to add the installation path to the PATH environment variable
export PATH=/opt/intel/cc/10.1.012/bin:/opt/intel/idb/10.1.012/bin:$
Where 10.1.012 is the version of the compiler suite installed.
Installing the X11 development compilers
Install script for X11 development libs
$ sudo apt-get -y install libx11-dev
InstallingCompilers (последним исправлял пользователь cable-31-58 2012-08-10 10:18:50)
The material on this wiki is available under a free license, see Copyright / License for details
You can contribute to this wiki, see Wiki Guide for details
How to install GCC on Ubuntu 20.04
![]()
GCC is regarded as an indispensable component in the all-inclusive compiler of GNU. It is an aggregation of depository pertinent to the language of programming. The languages inclusive in the GCC are C, Fortran, Go, C++, Objective C- and various other essential languages. The GCC is reckoned as a build-essential because it manifests various other operating tools for open sources. You can consider it as a chief process for the well-versed operating systems, including Linux. It is a compiler because it inhibits the libraries for the programing language, that ease the accessibility of those languages in commands. GCC compiler is also a credential for the Linux kernel along with some primary instruments of GNU. This guide follows a very elementary procedure in terms of programming to successfully install the GCC compiler on ubuntu 20.04. once you are done installing, you can palpably induce the system for the compilation of the programming languages.
Prerequisites
Equivalent to the installation of other packages on ubuntu, GCC also postulates some prerequisites before installing it on ubuntu 20.04. Those requirements encompass the availability of enough space for some latest binary files. Also, it is an inherent requirement for any form of installation to log-in the system via root user or through the user entailing the sudo privileges.
Installation Procedure
It has become excessively quick to download the GCC compiler on ubuntu. The reason is justified by the fact that the Linux system’s depository also contains the packages for build-essentials. Through these packages, you can conveniently download the GCC compiler. Primarily you can find these packages in the repository through the meta-package. If you want to access the GCC compiler after a convenient installation, then you should opt for the development package. That will assist you in downloading all the build-essentials of GCC in your system in a single go.
Installation Steps
You can achieve the successful installation of GCC in your ubuntu by three major steps. These steps are so easy that even if you are a beginner, you can handily use the commands for an effective installation. The steps for the installation of the GCC compiler on your Ubuntu 20.04 are as follows:
- System Package updating.
- Installation of the development package.
- Downloading of manual pages (optional).
- Verification of GCC.
System Packages Updating
In this step, use the simple and fundamental sudo commands to update and upgrade your existing packages. By inputting these commands, you can update your system packages. the sudo commands for this purpose are:
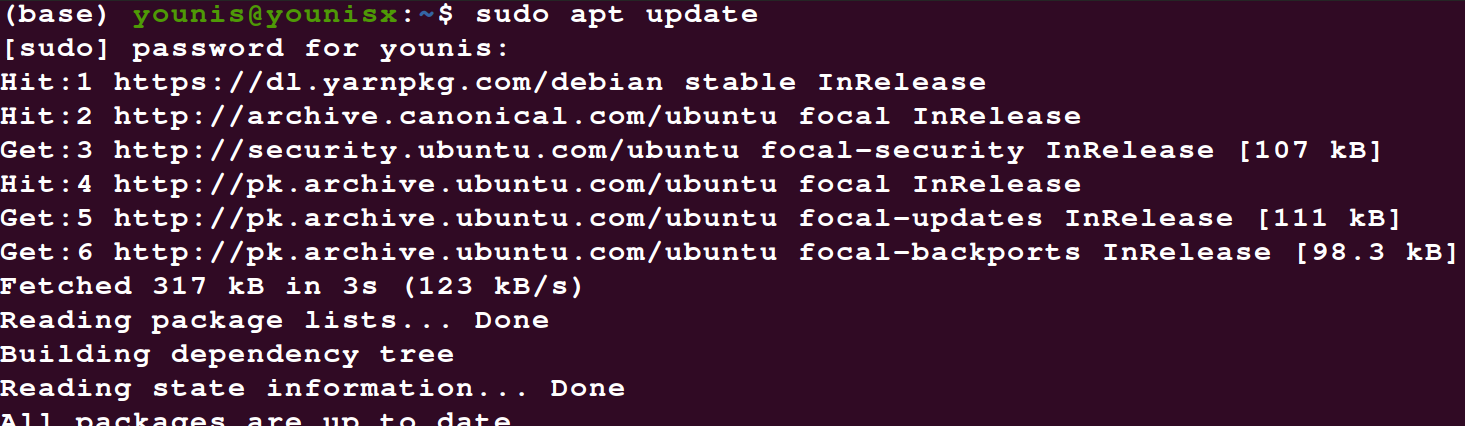
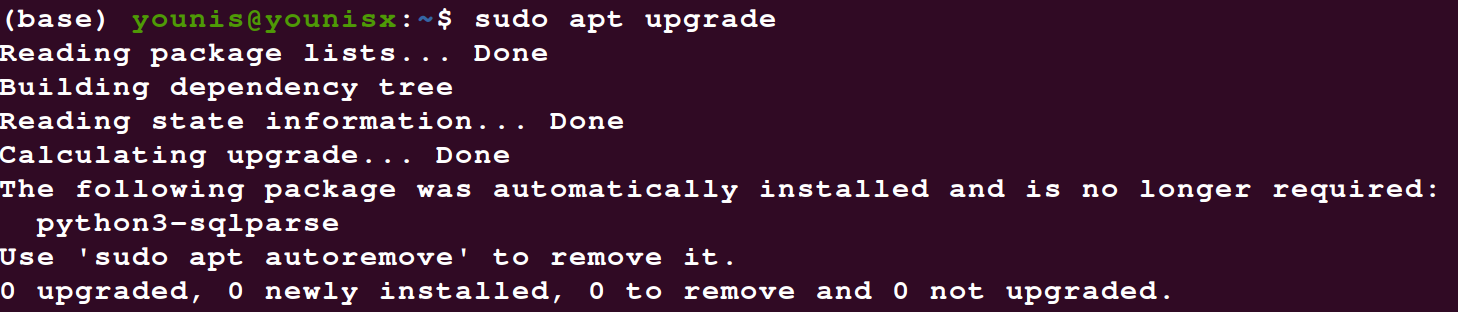
Although the upgrade command of sudo is not mandatory, make sure to run the command for updating your system packages. It is a crucial step because, without updating, you can precisely access the level of your system packages.
Installation of Development Package
This is the second step for the installation. Some people just leave the process after this step, and it is quite alright. The steps after this one are just to ensure the installation, so professional programmers usually install the GCC package using the first two steps only. But for beginners, it is recommended to perform all the steps just to be sure that you have successfully installed the compilation of GCC.
Dwell upon the fact that this command of sudo assist in the installation of the development package that itself is a build-essential of GCC compiler. Apply the following command of sudo to install the development package.
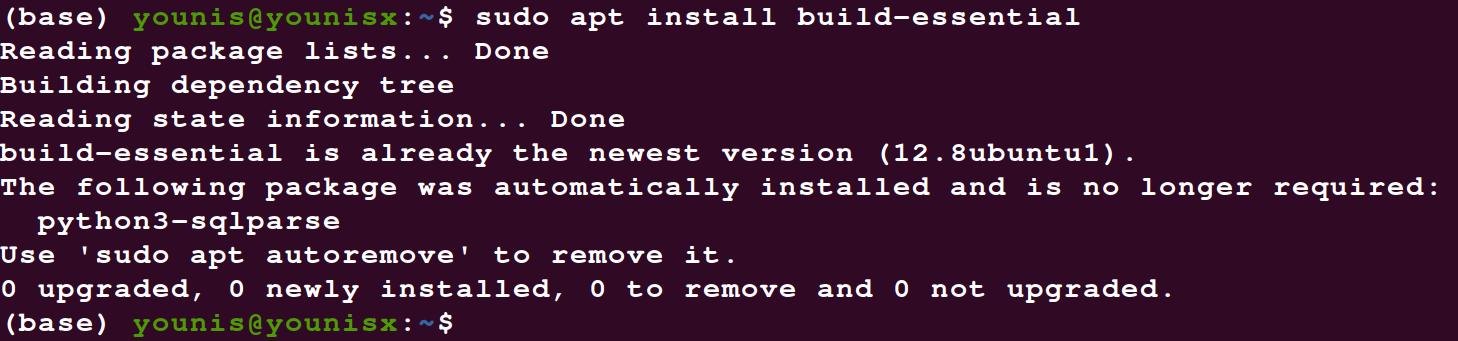
After this command, you will see an output window that will tell you about the successful installation. The output will also reveal all the additional packages that you have downloaded along with your development package. You will also witness the packages suggested by the system for downloading along with the recommendation of a manual page to understand the GCC development on your Ubuntu 20.04 fully. The output window will also ask you to type Y (Yes) for the continuation of the installation. Just press Y and then press Enter, and you will successfully install the GCC.
Downloading of Manual Pages
This step is optional because it doesn’t play any functional role in the overall installation of GCC. But it can assist you in understanding the usance of GNU for effective development. Type the following command if you want to download the manual pages.
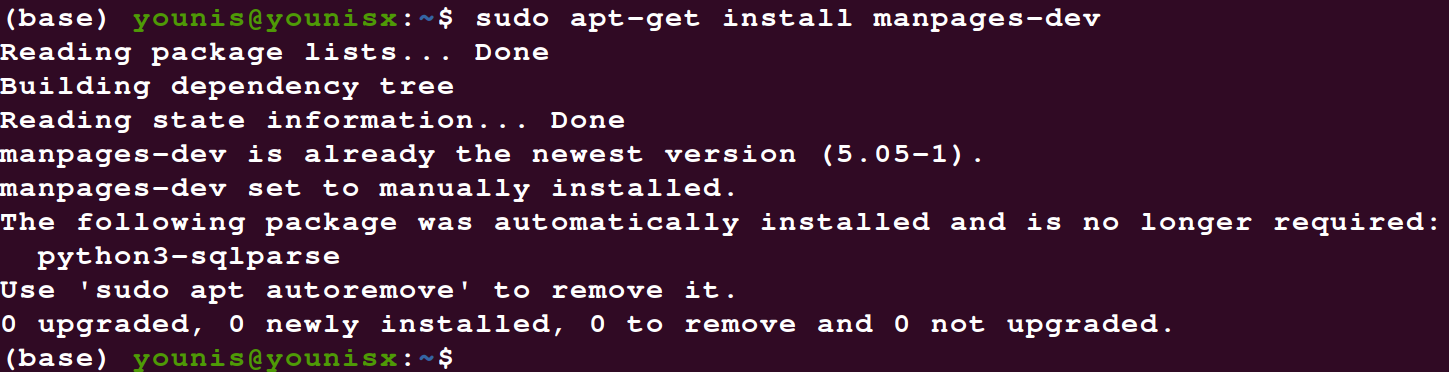
With this, you will get a hold of the manual pages constituting the instructions for development.
Verification of GCC.
Now, this is the last step. You can skip it if you are a professional or if you are sure that the compiler has been installed. To verify your recently installed GCC compiler on ubuntu input this command in your system terminal:

It is important to know that you can also use this command at the beginning of the process if you have existing GCC on your system. It will tell you the existing version of the GCC compiler then.
Conclusion
This guide is well-detailed so that even if you are a beginner in the field of programming, you can still install GCC with efficiency. If you notice the output window after every command keenly, then you’ll know what is going on, what are the supplements downloads, and what you need to do further for assurance of your installation package. Also, if you are a beginner, then ensure the implementation of the last two steps to be on the safe side.
About the author
Younis Said
I am a freelancing software project developer, a software engineering graduate and a content writer. I love working with Linux and open-source software.